

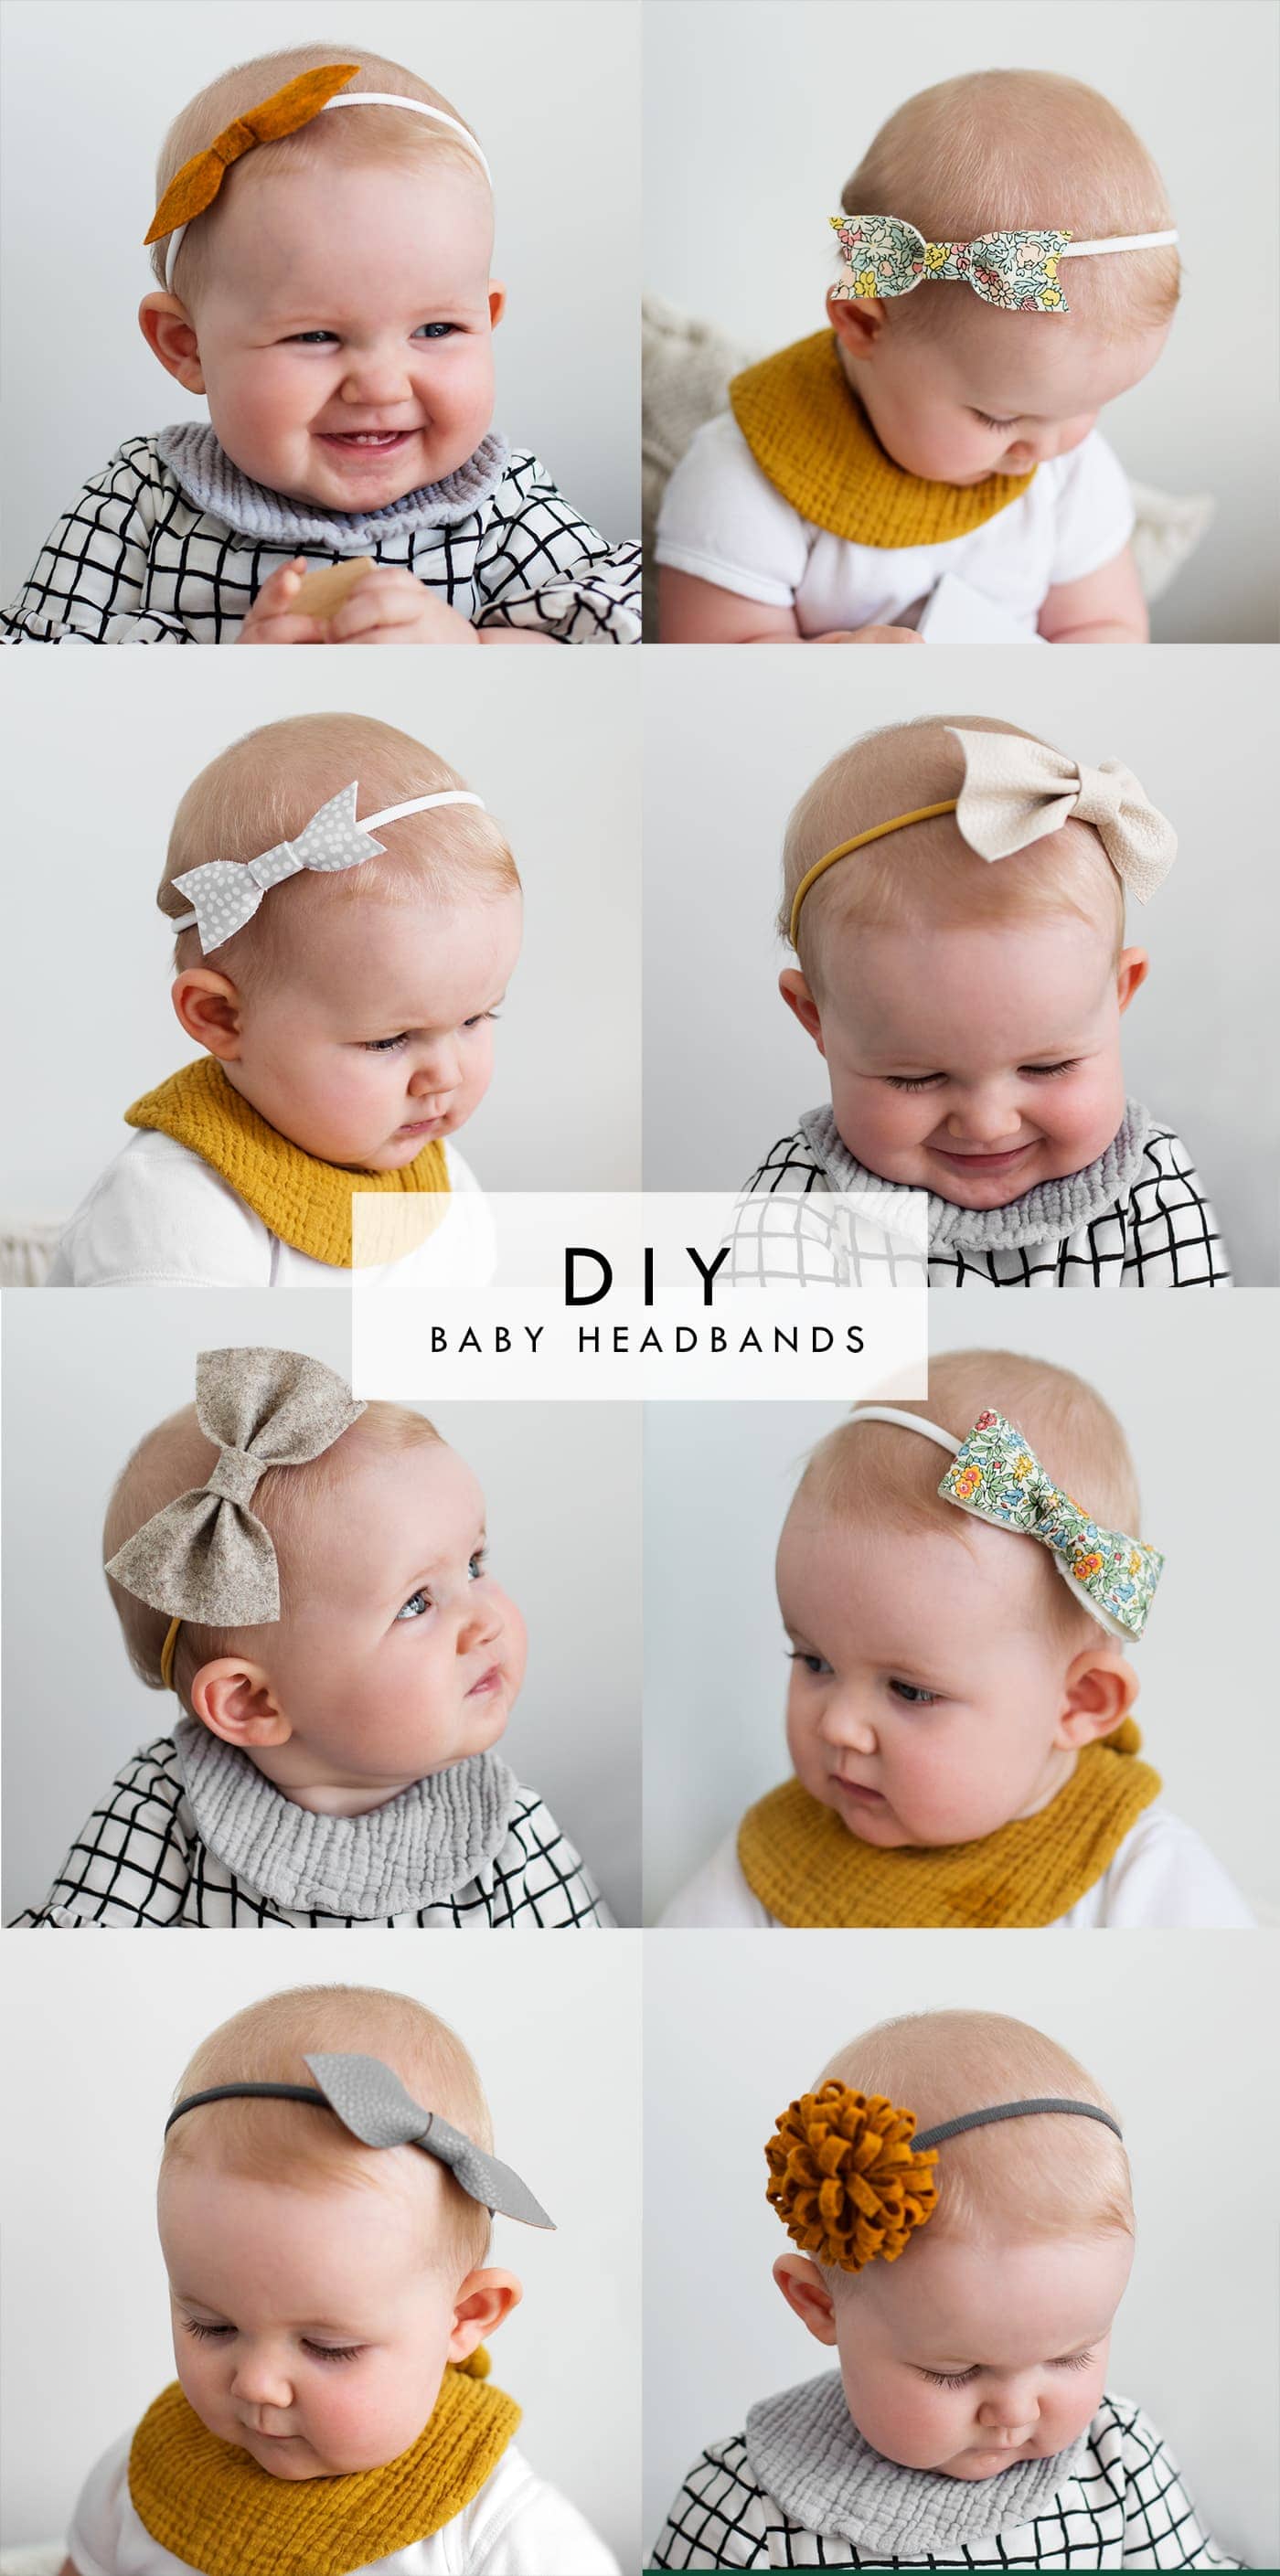
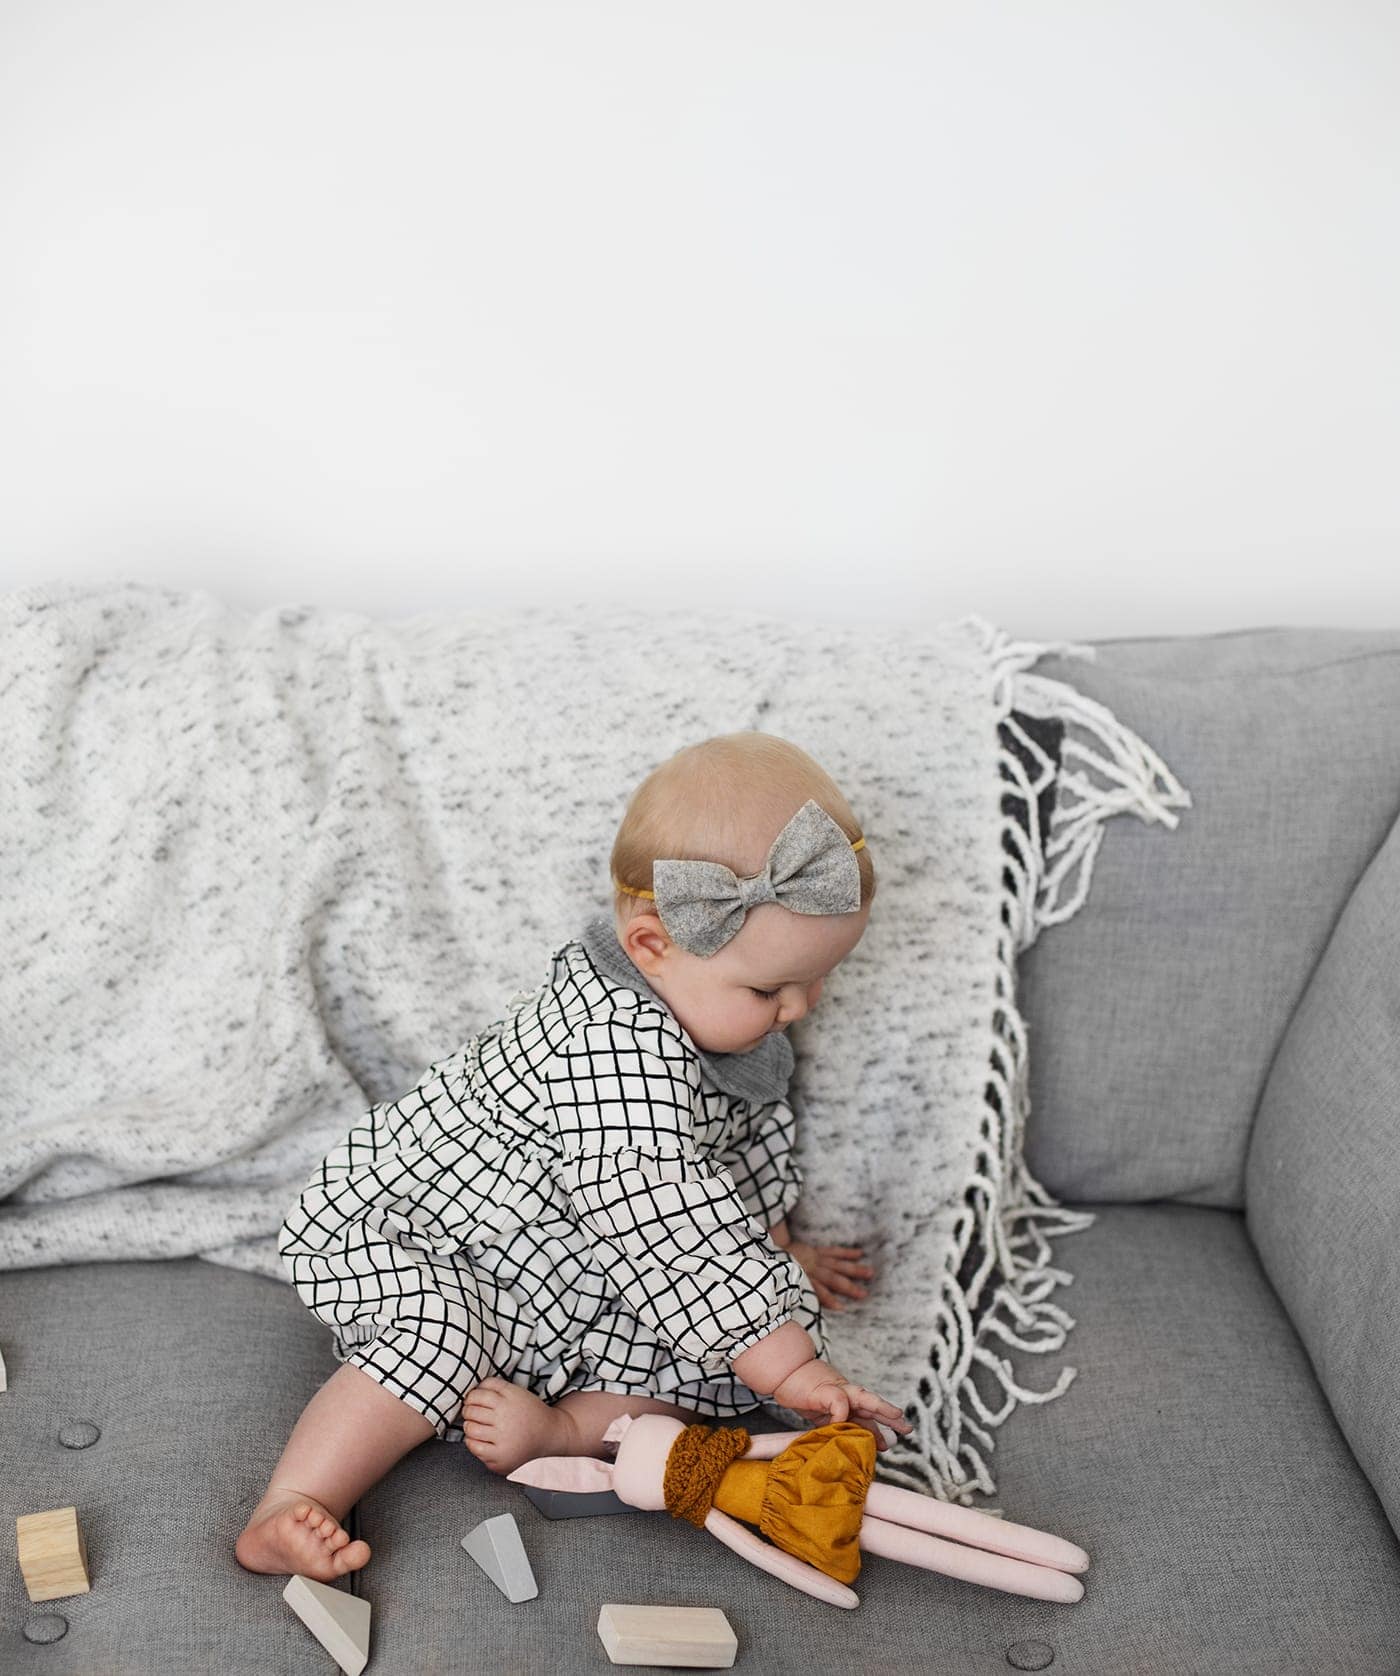
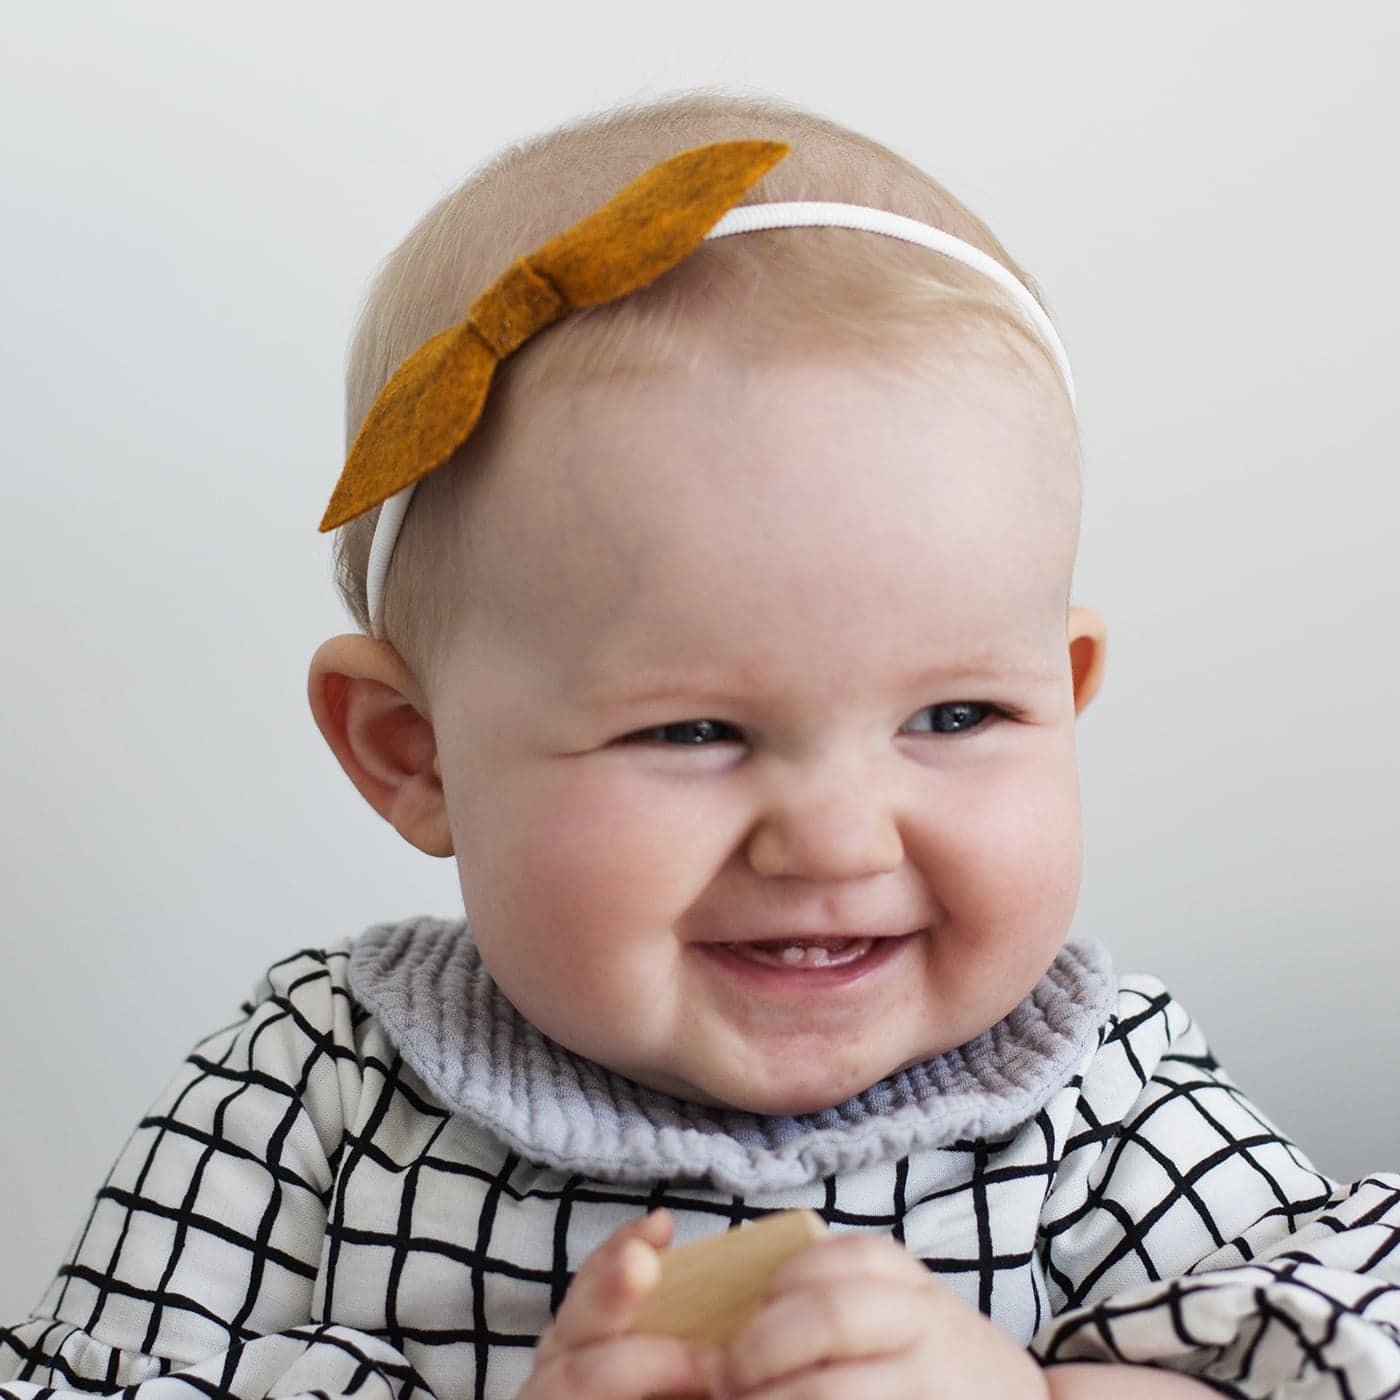
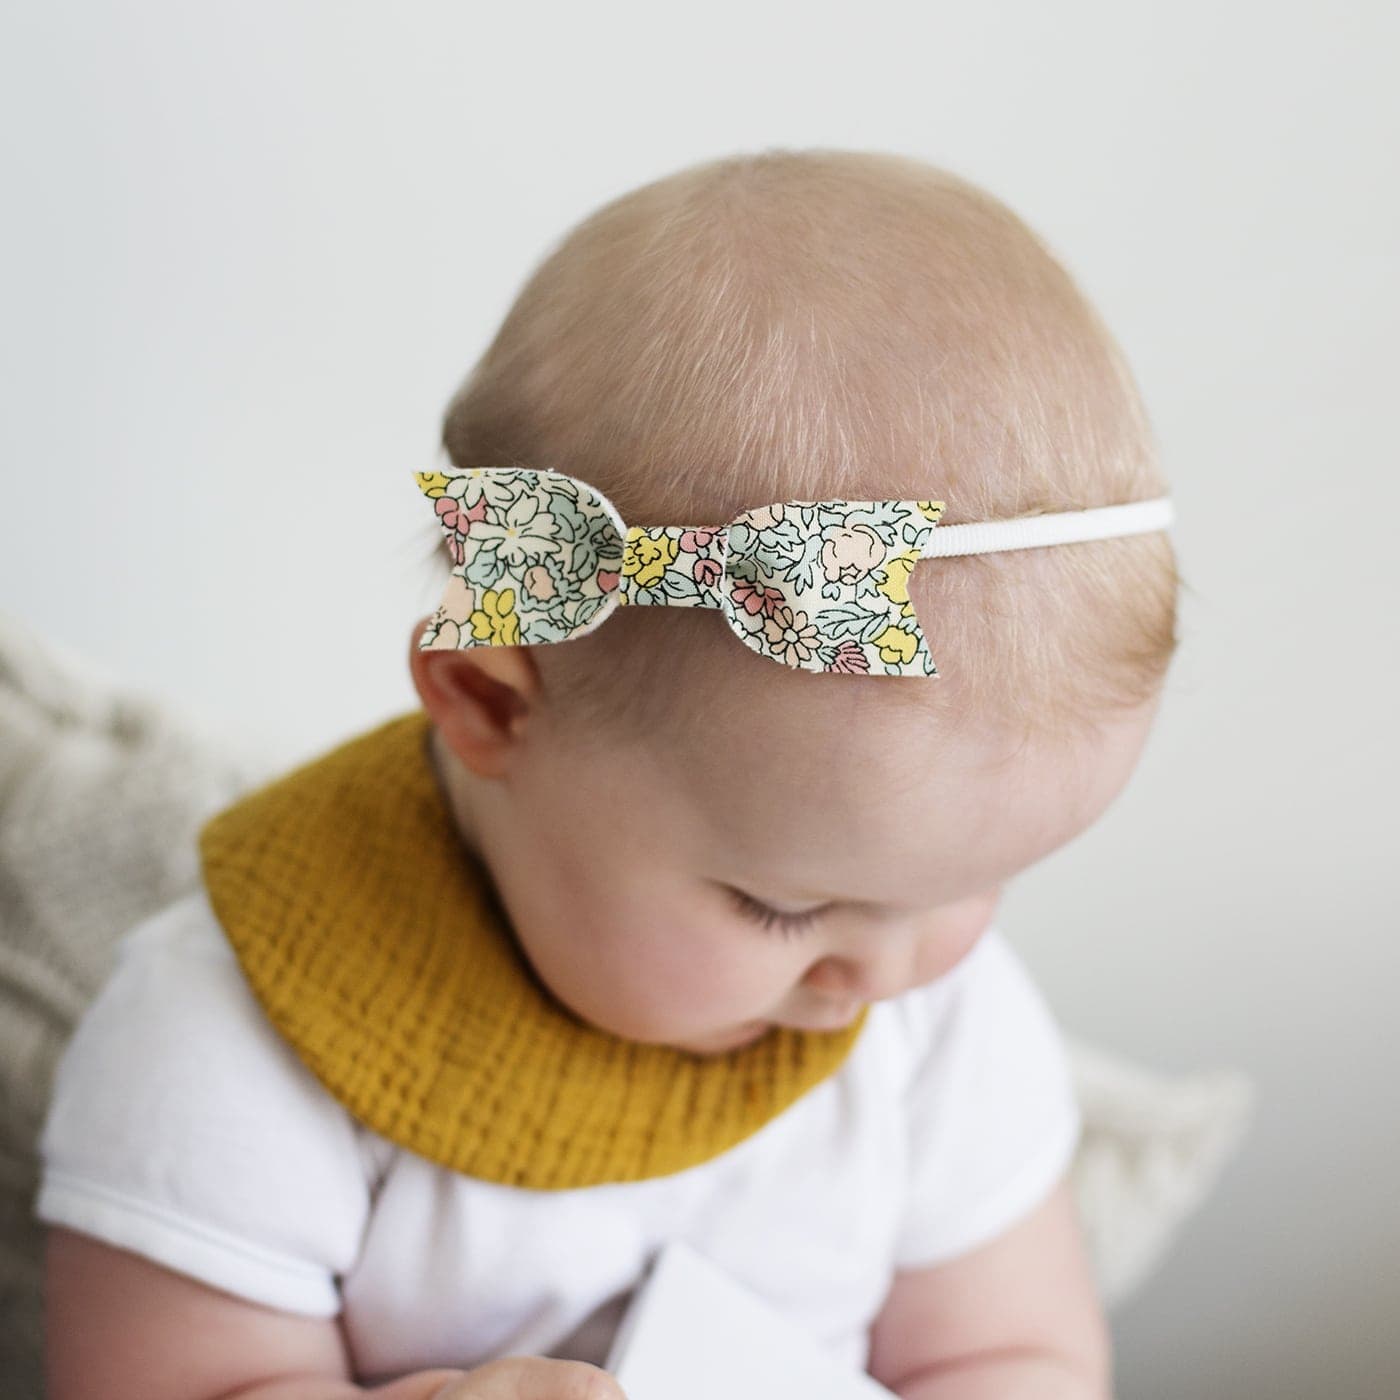
Since Maggie was born I’ve often dressed her in headbands because usually she isn’t wearing particularly girly outfits or colours and so it’s the easiest way to avoid the question, ‘is it a boy or a girl?’ Having said that I’ve definitely still been asked if she was a boy whilst sporting a bow on her head but what can you do eh?! I love being able to accessorise her outfits with headbands but recently the lovely ones I’ve been using from Evie Michelle since she was born, look a tad too miniature for the size of her growing head. It spurred me on to make some larger versions but with the same soft nylon bands that are so comfy for her, not to mention better at staying on than other her head than any other type. Turns out they’re refreshingly easy to make!
I teamed up with the Fabridasher who gifted me the materials for this project and I’d highly recommend checking out their huge range of felts, leathers and felt-backed cotton sheets. You can buy these in A4 sheets for smaller projects like this along with supplies like different adhesives to construct them. It’s always handy to be able to find all the supplies you need in one place! I’ve made some templates to help you!

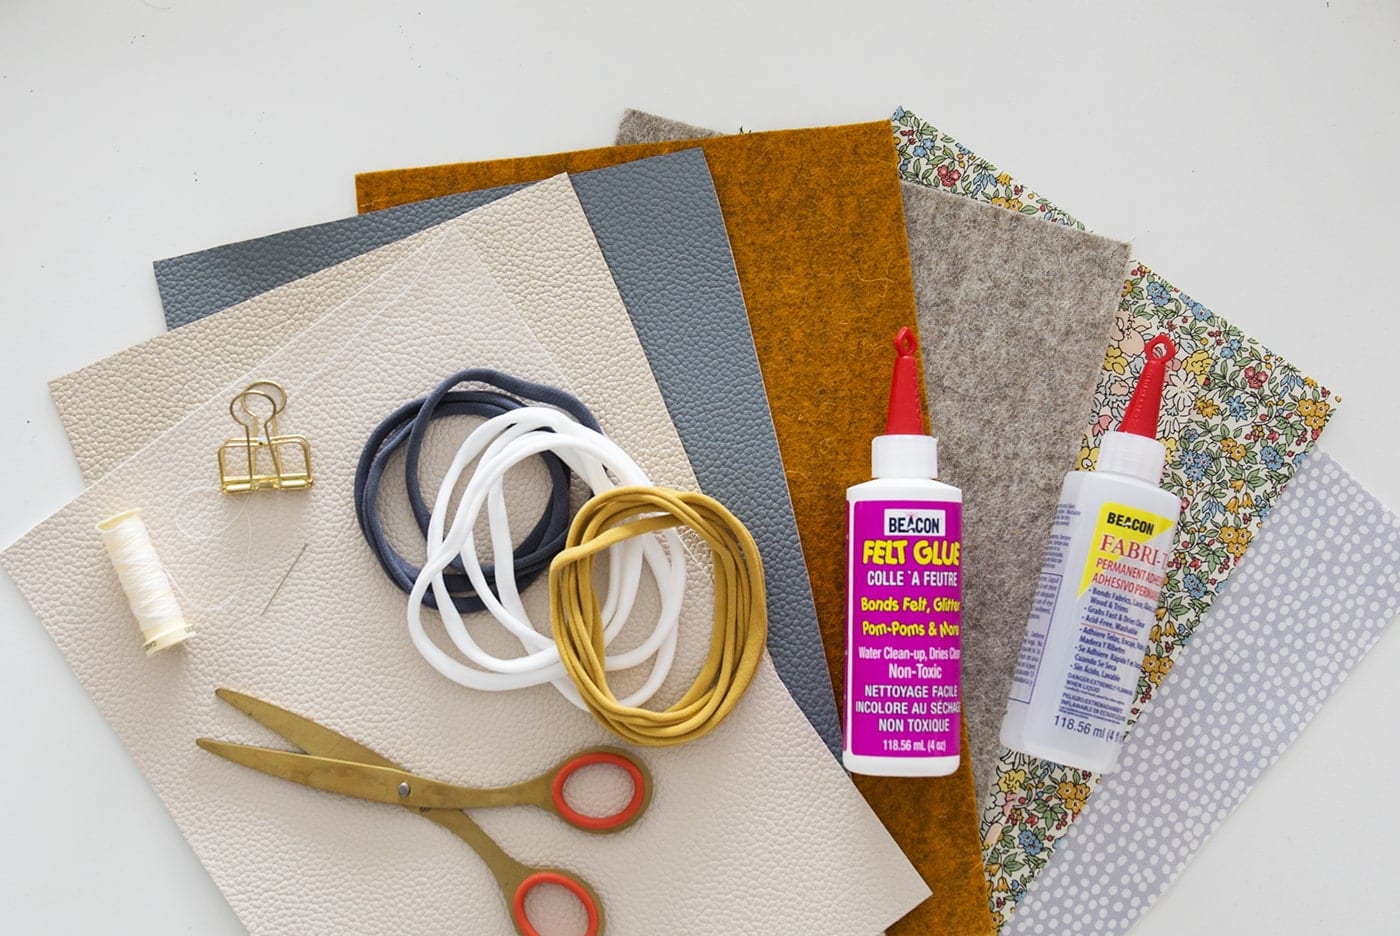
Materials
- Template sheet
- A4 sheets of leather, felt or felt-backed fabric like these from Fabridasher
- Soft nylon headbands
- Scissors
- Felt glue or multi purpose glue
- Cotton thread and needle
- Bulldog clip
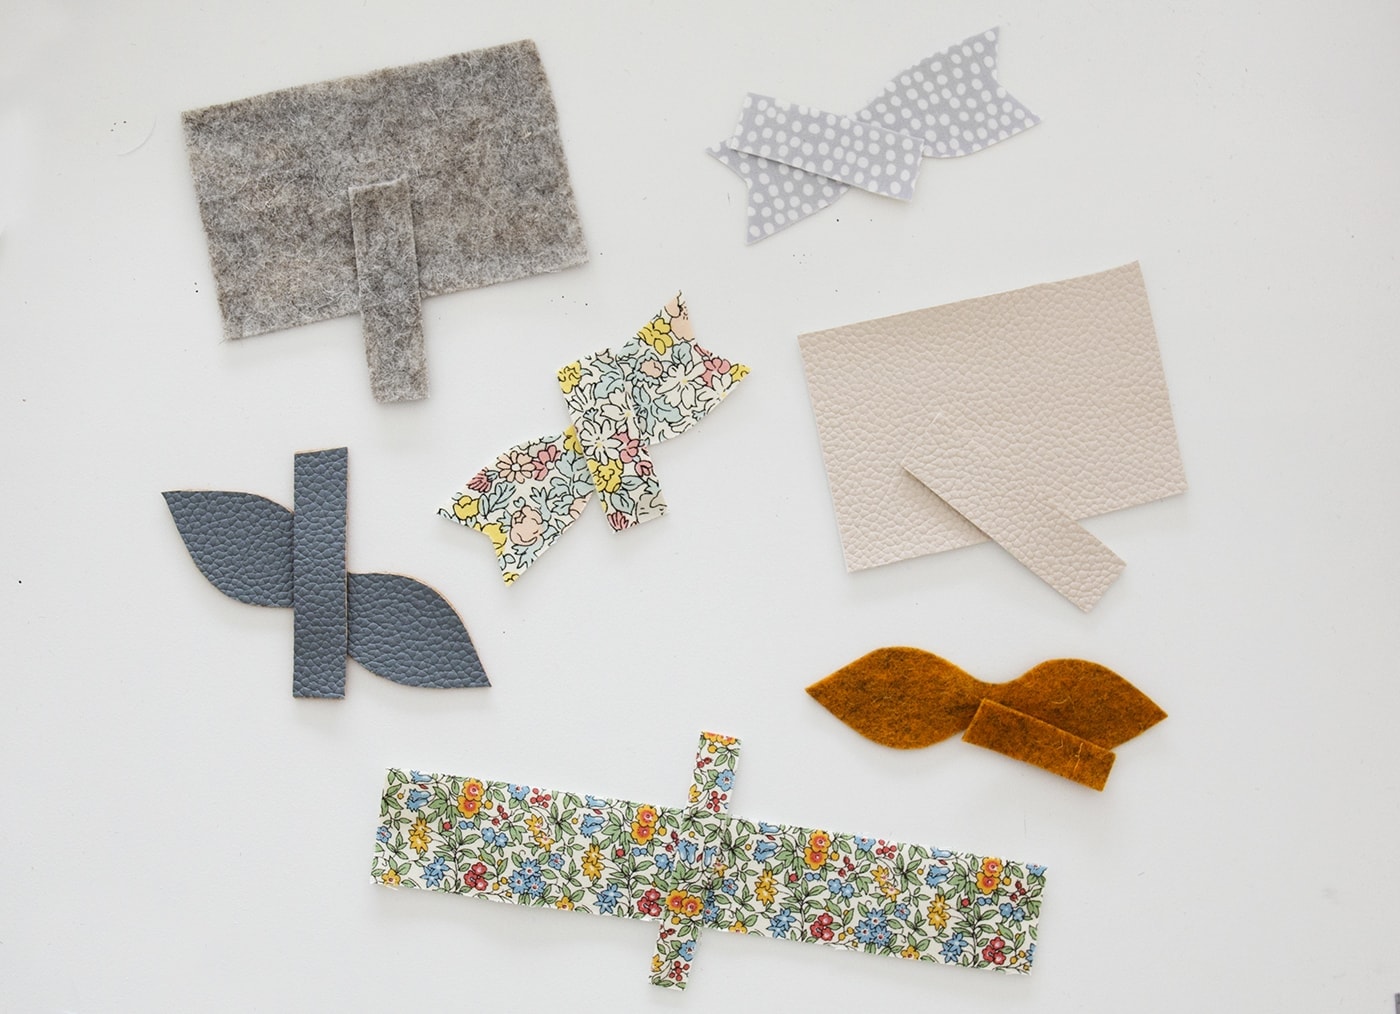
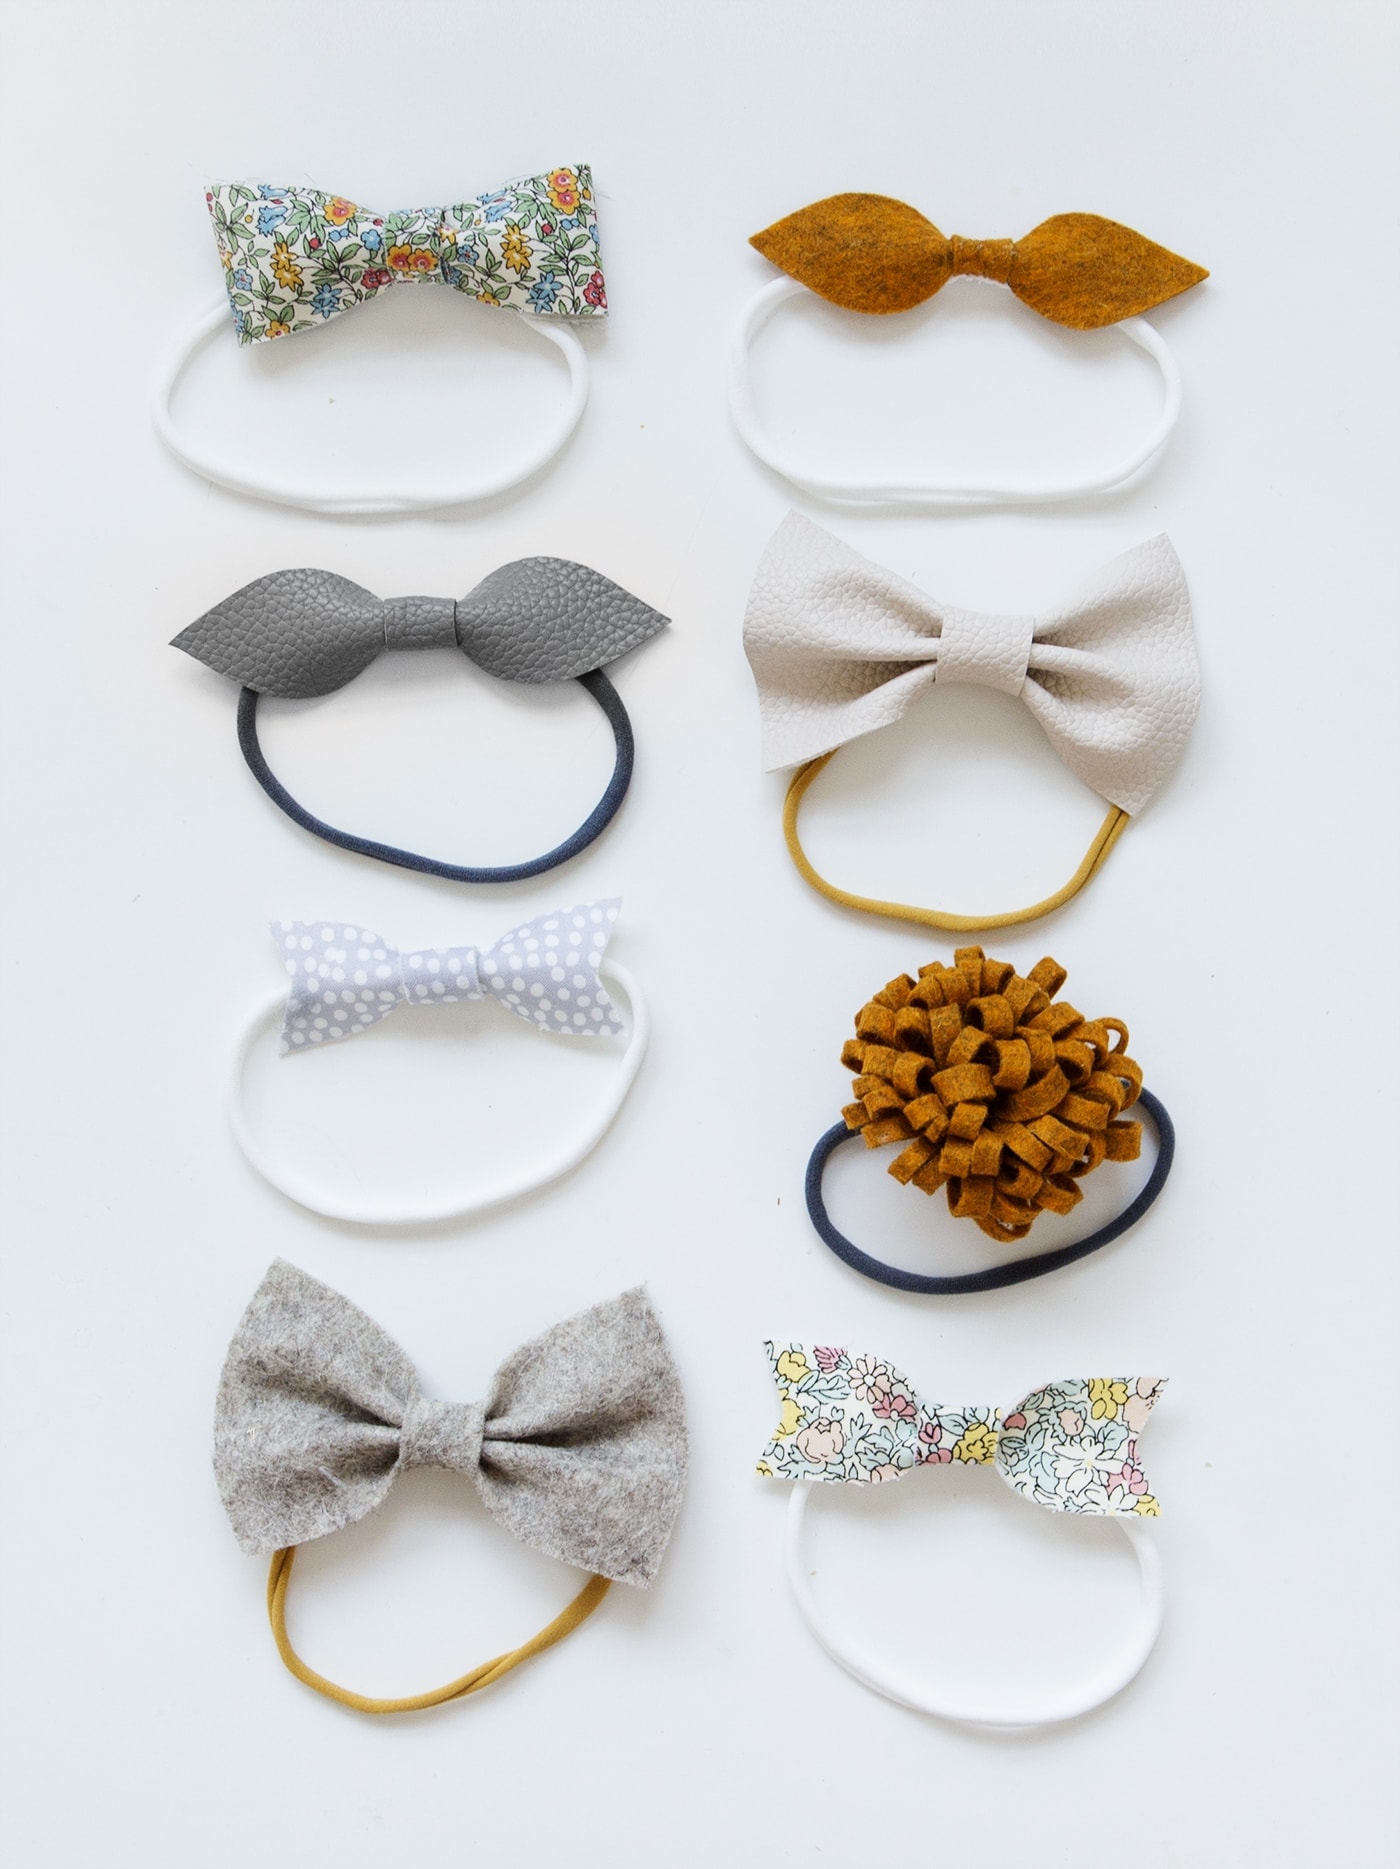
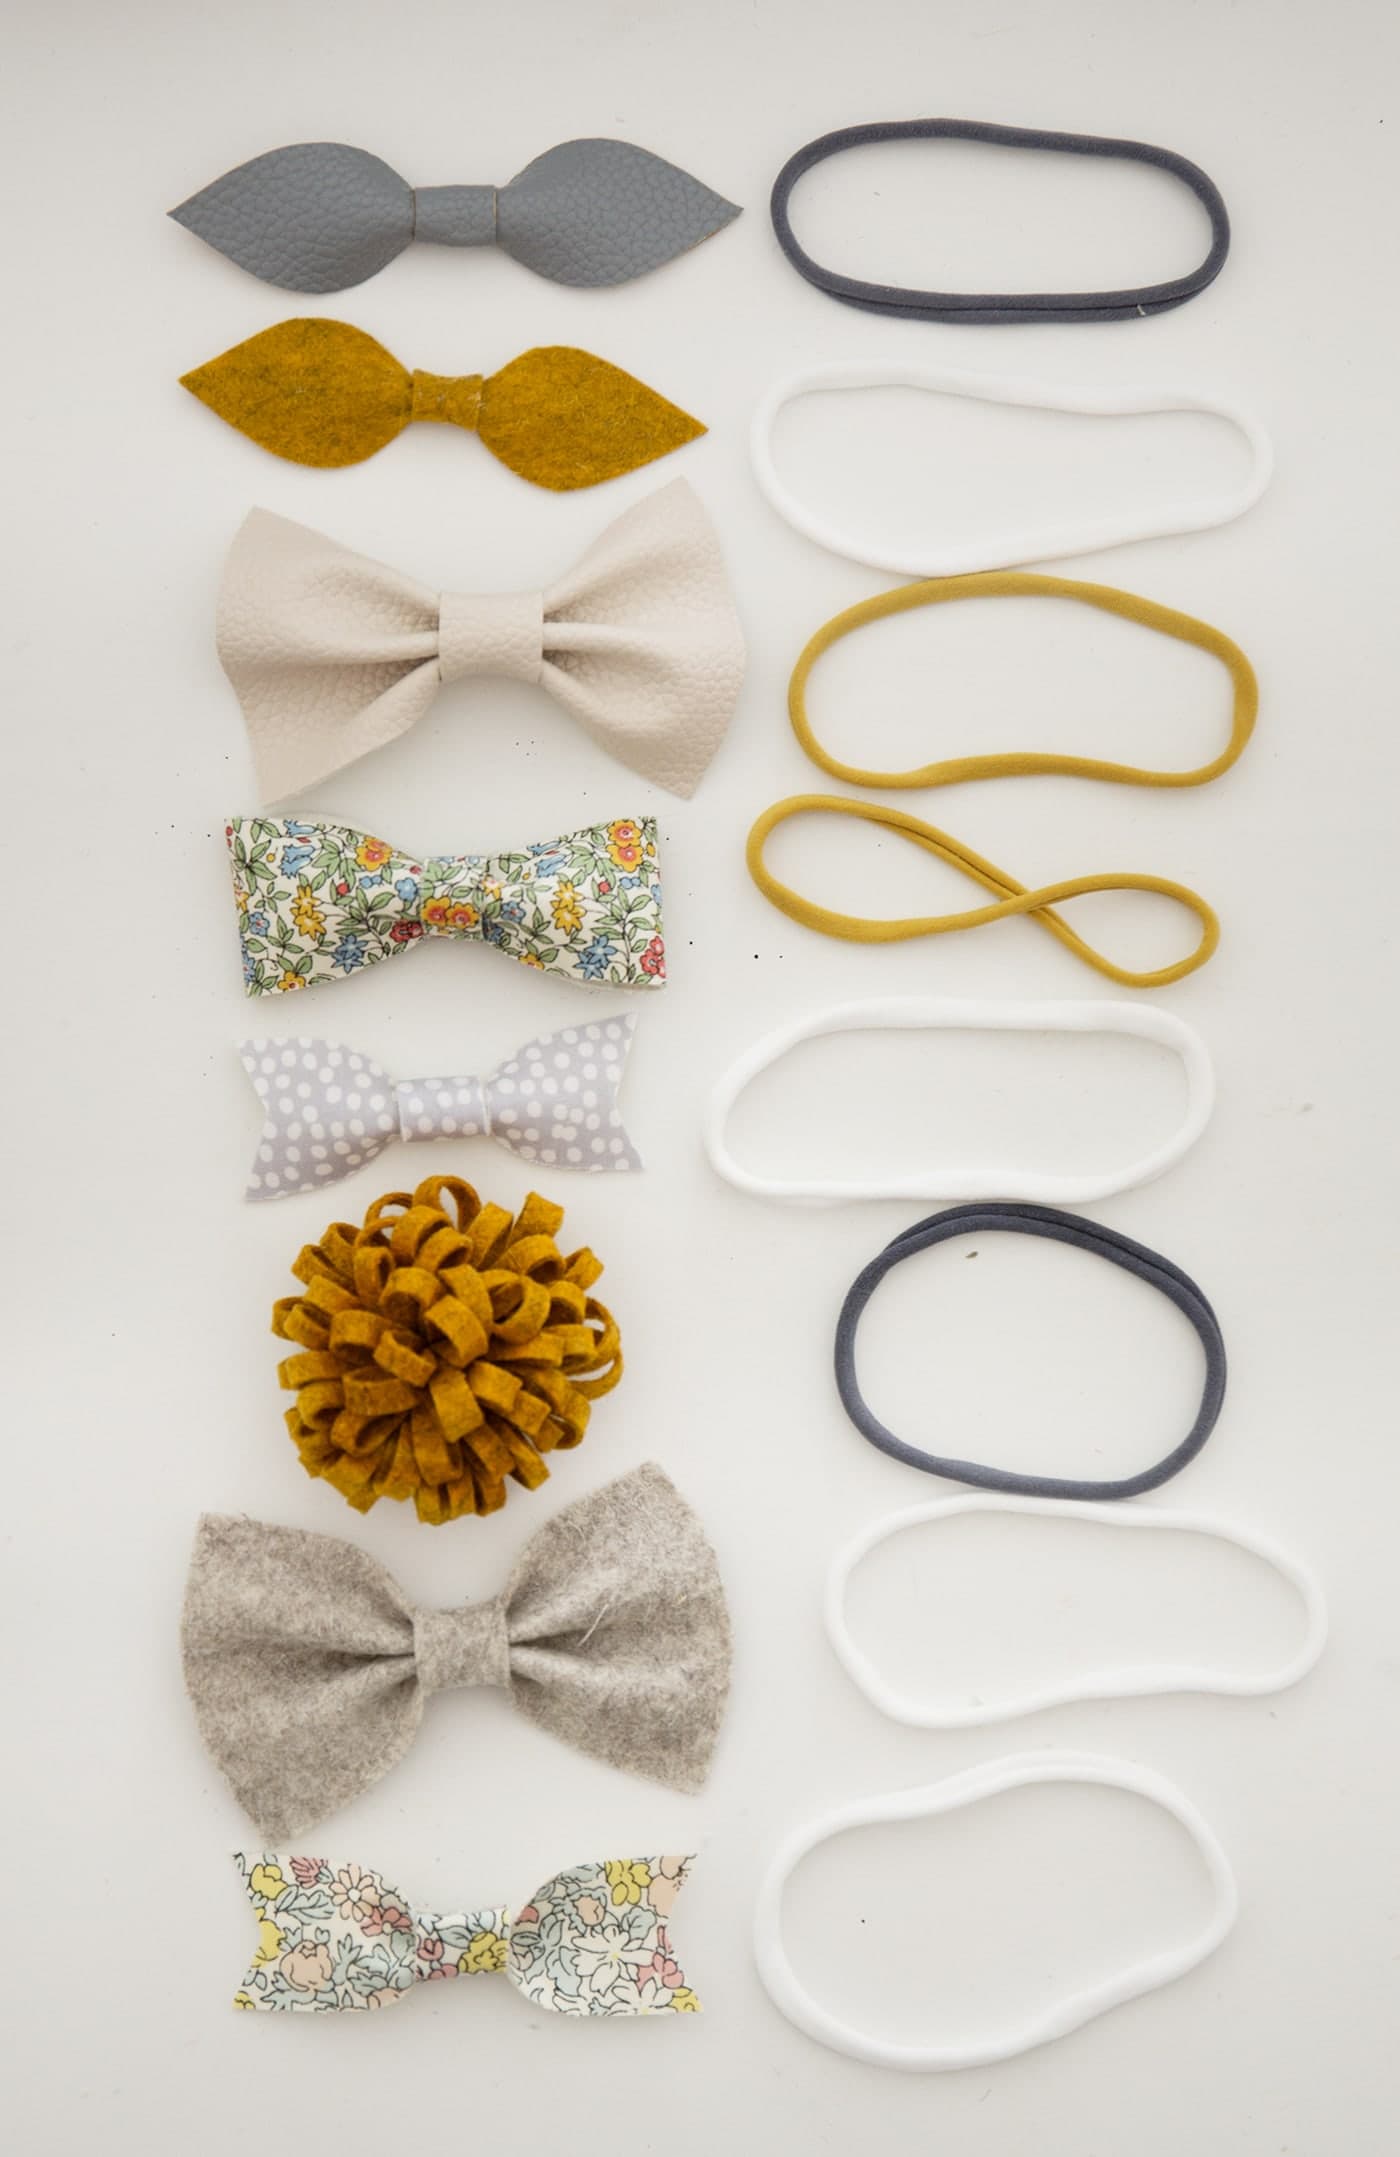
Cut out your fabric sections using the free downloadable templates. There are four different bows to try and one flower.
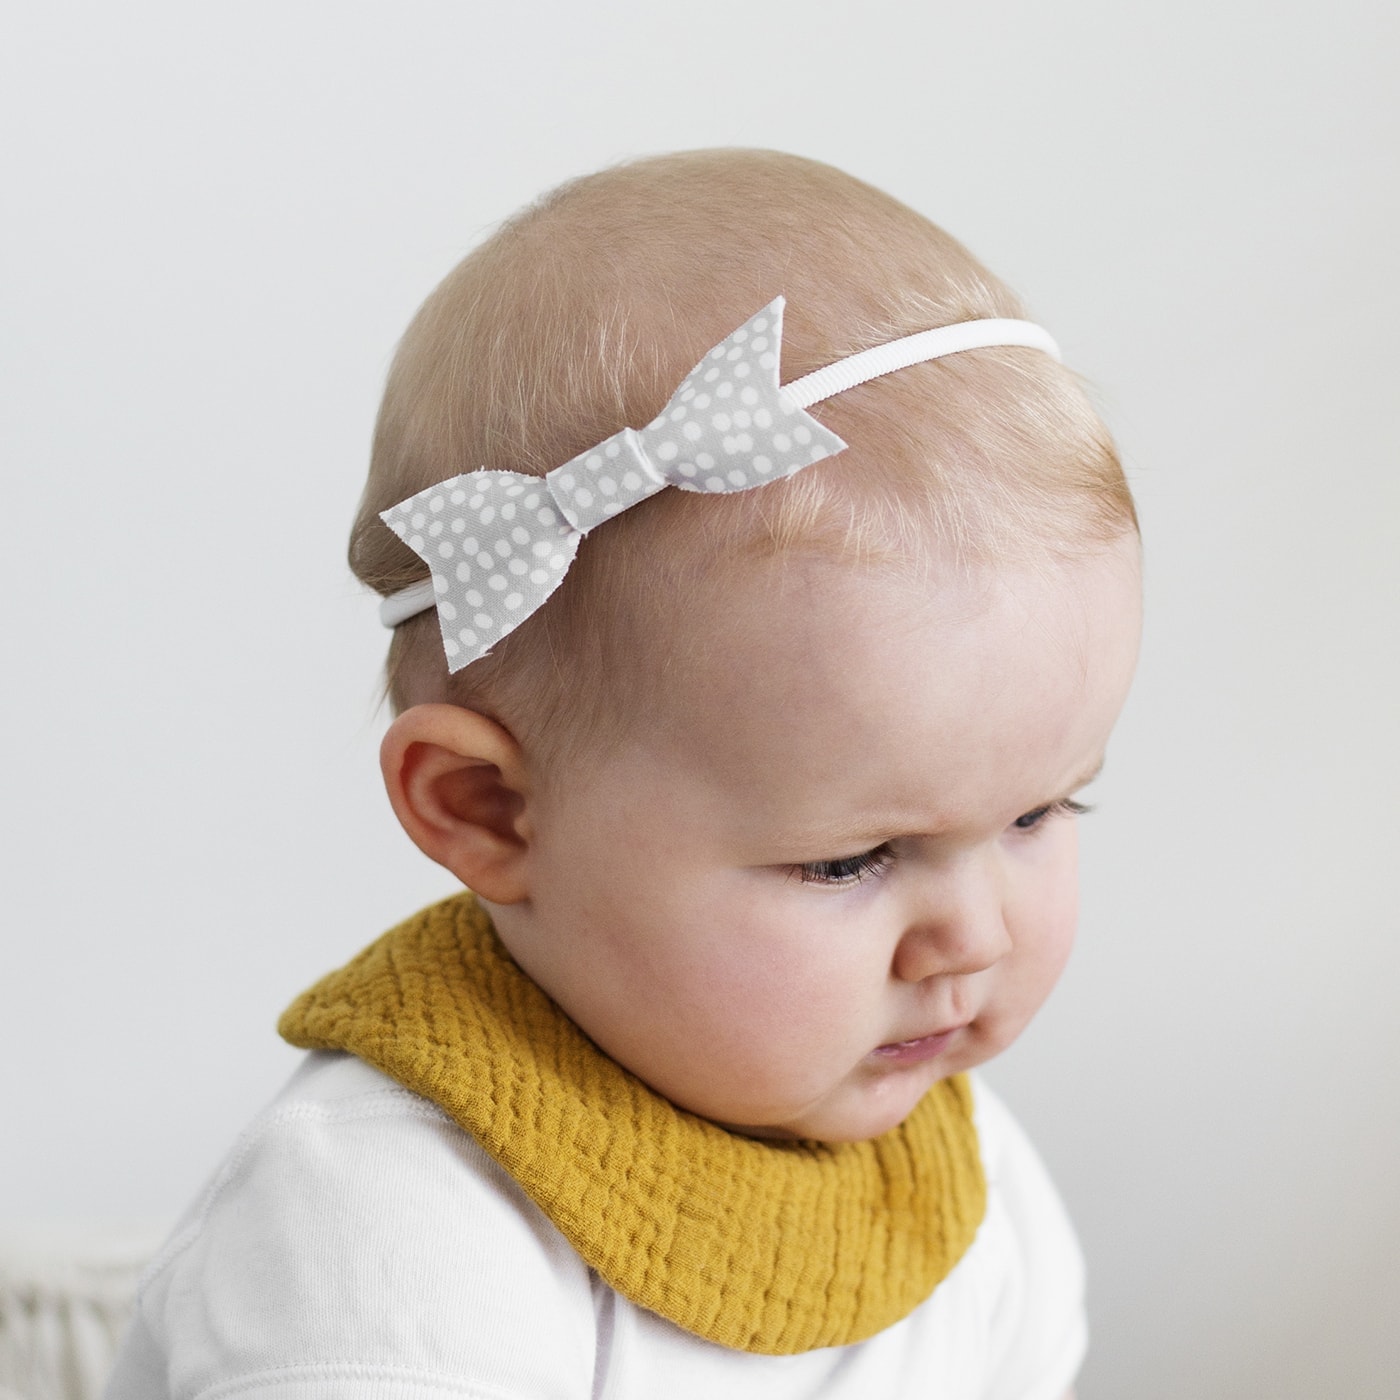
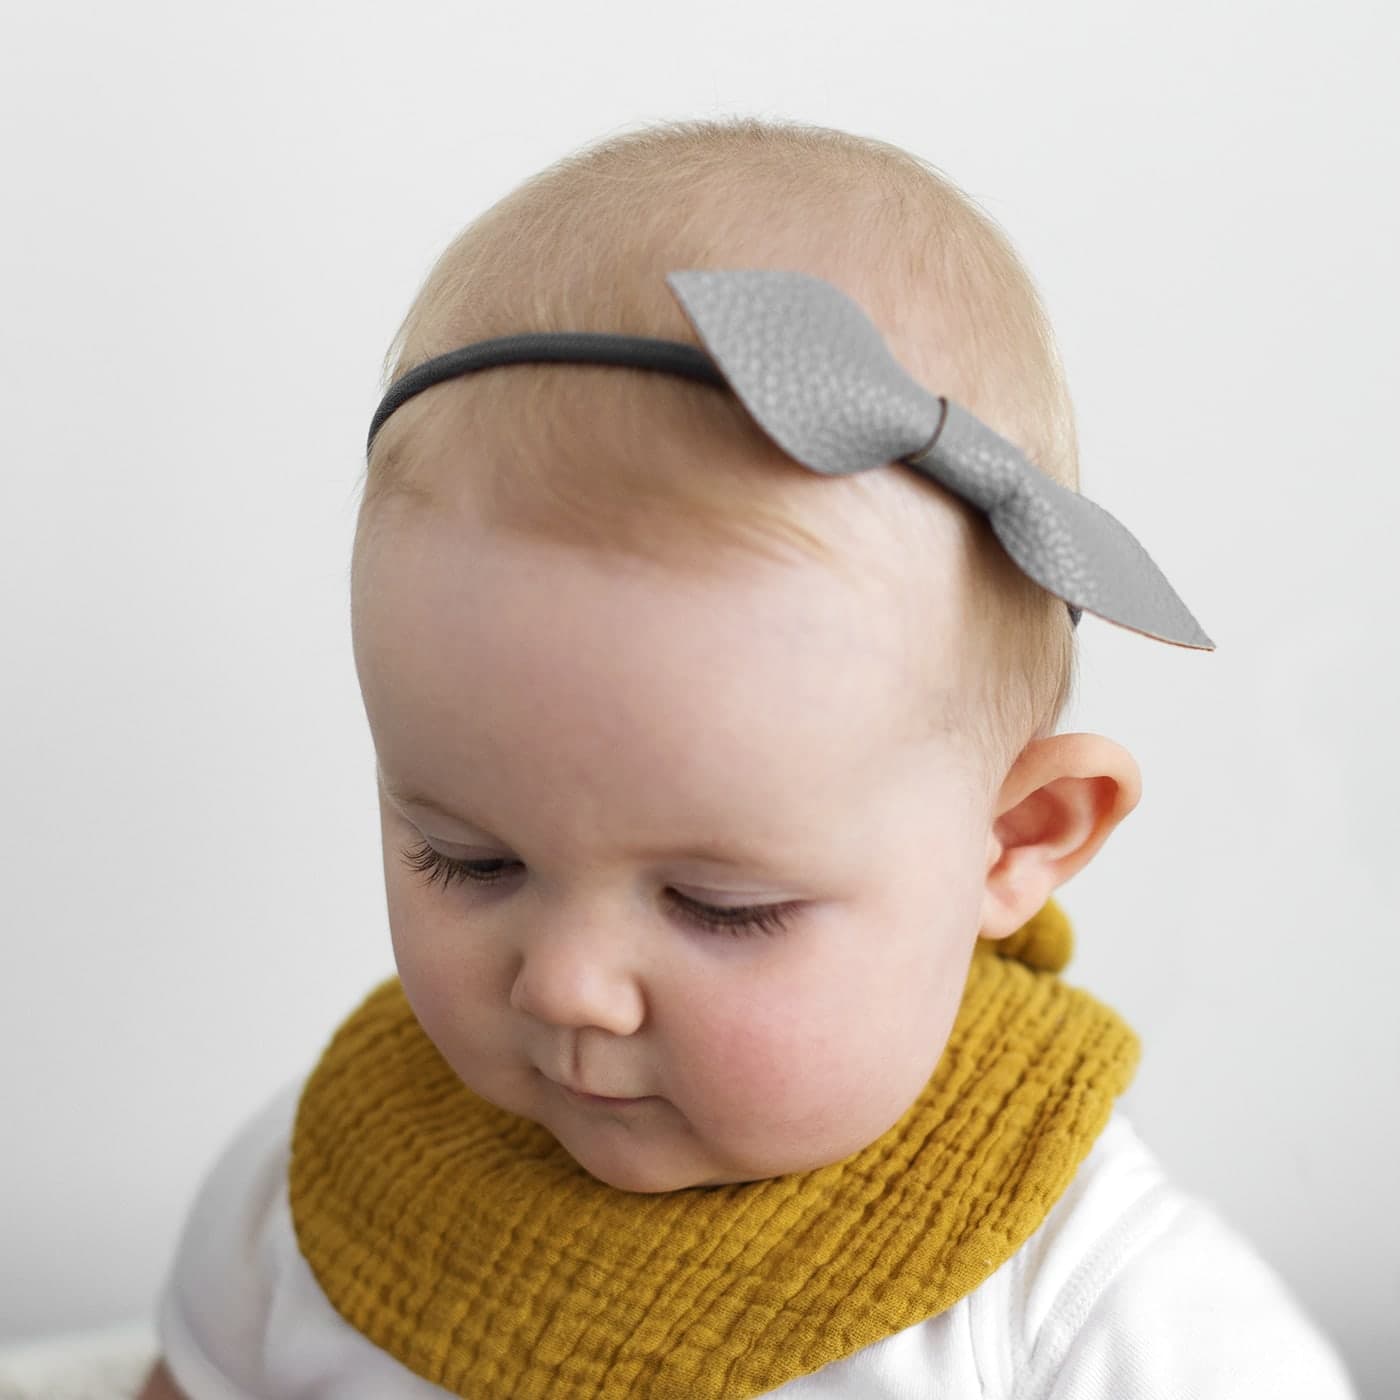
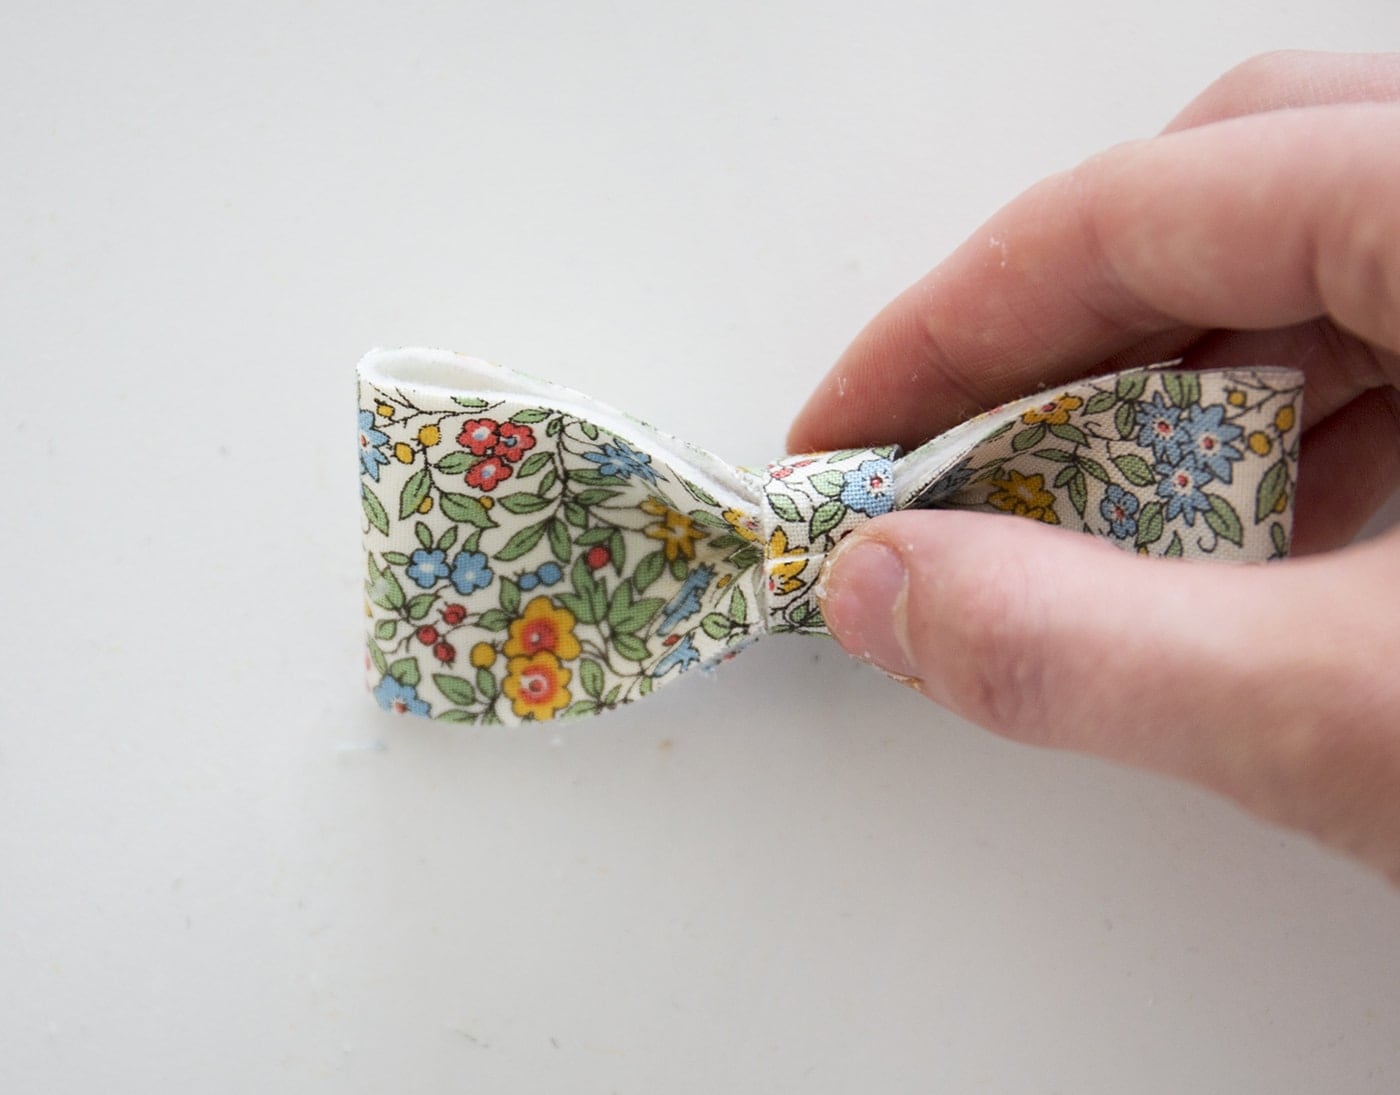
Pointed & ribbon bows
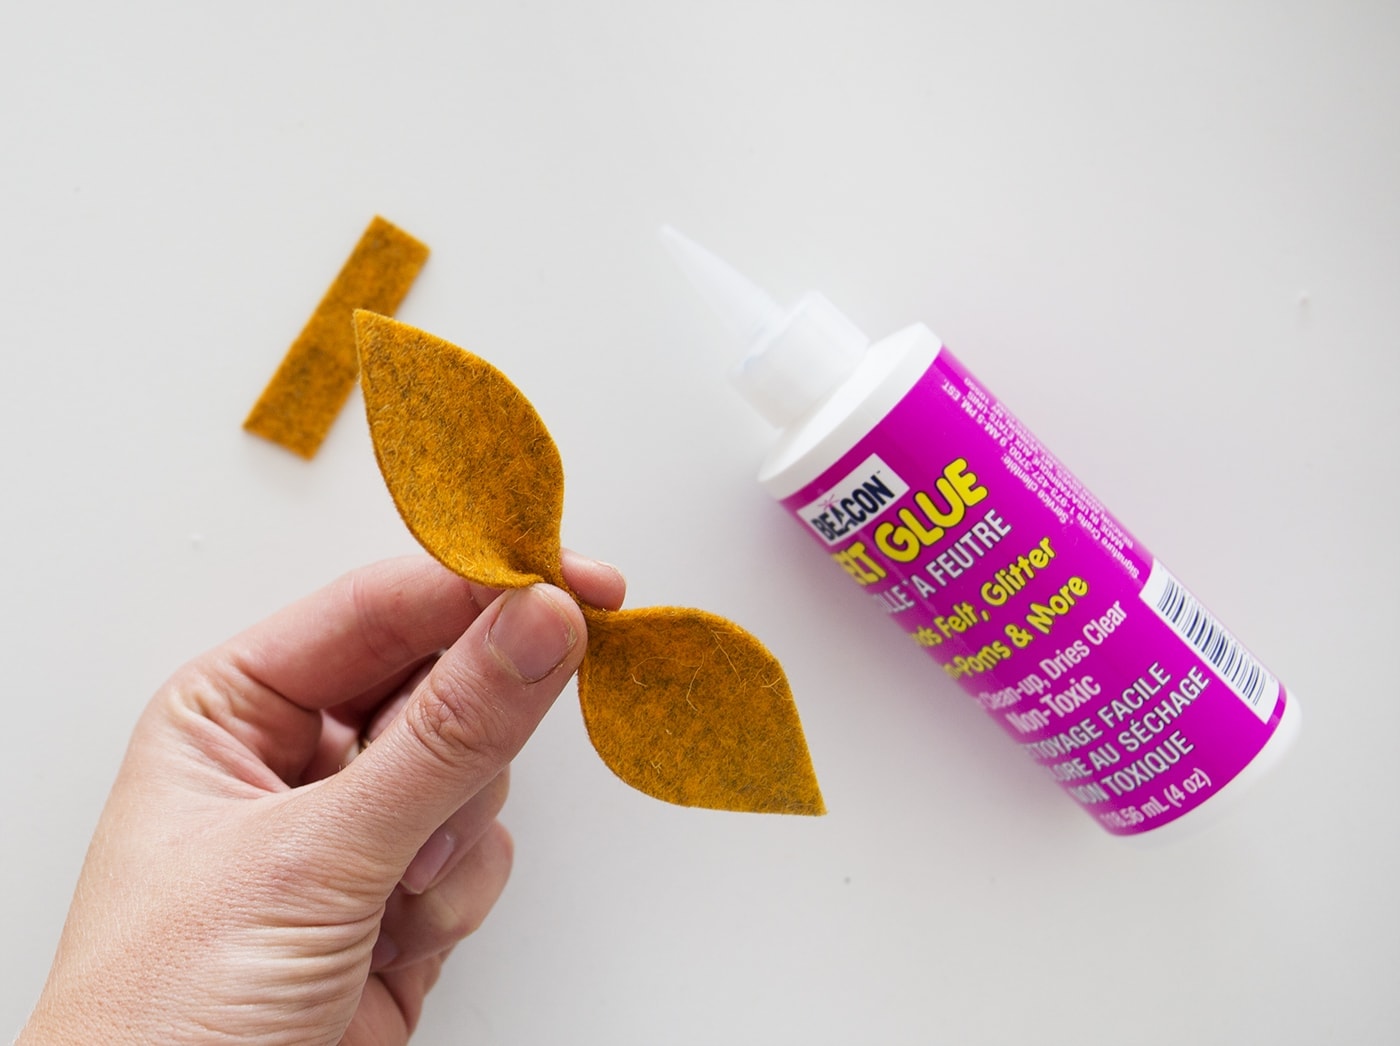
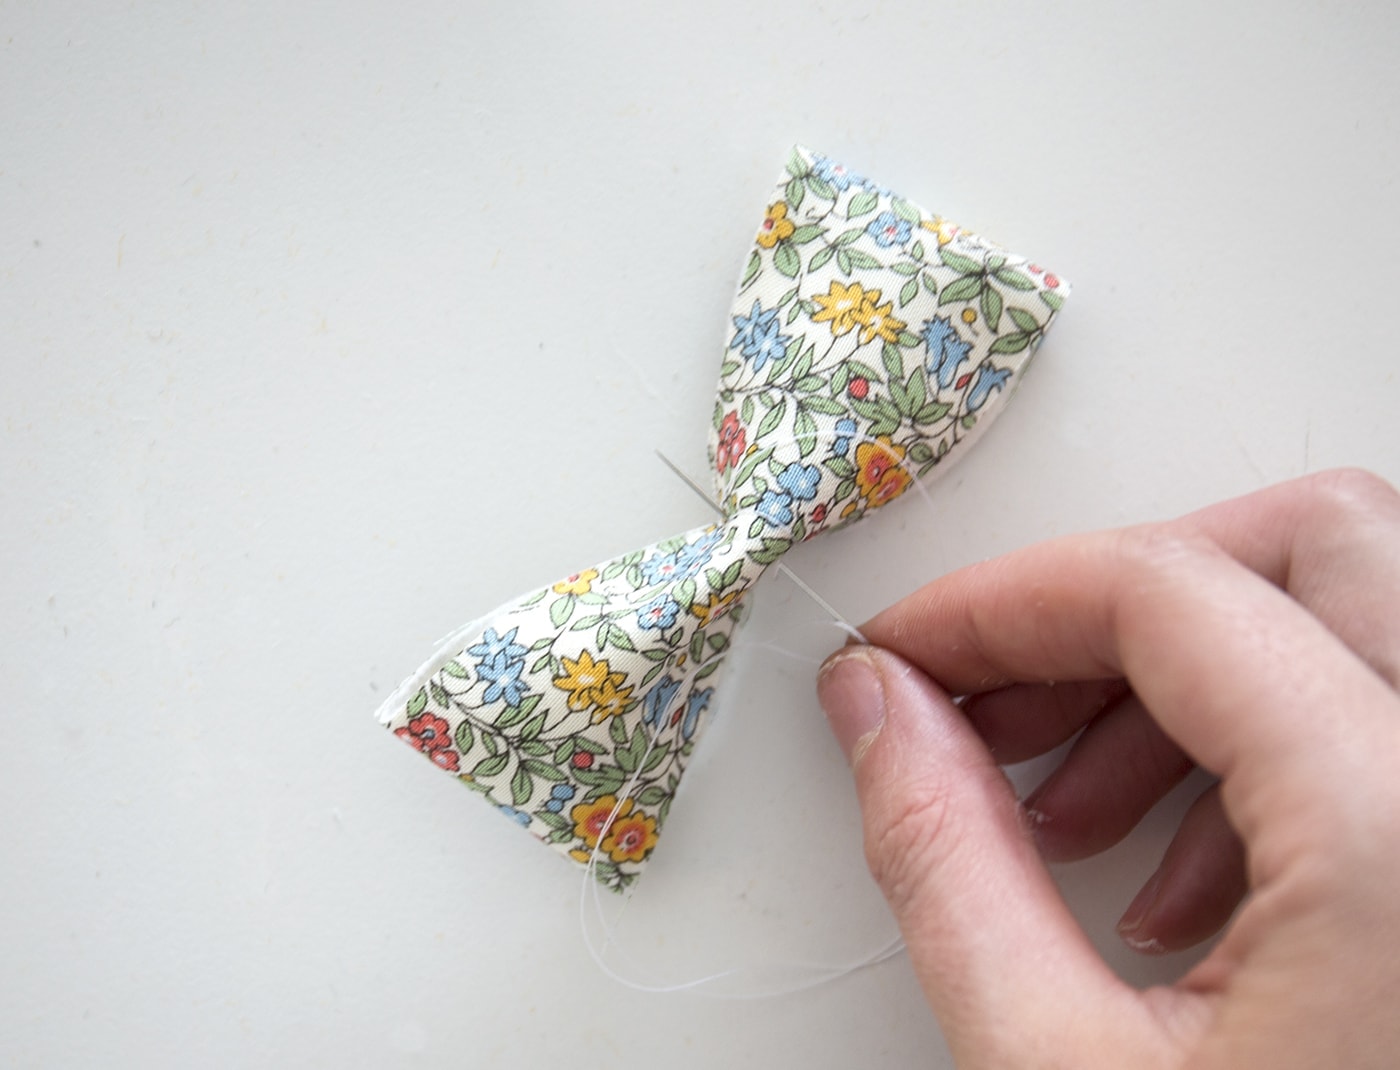
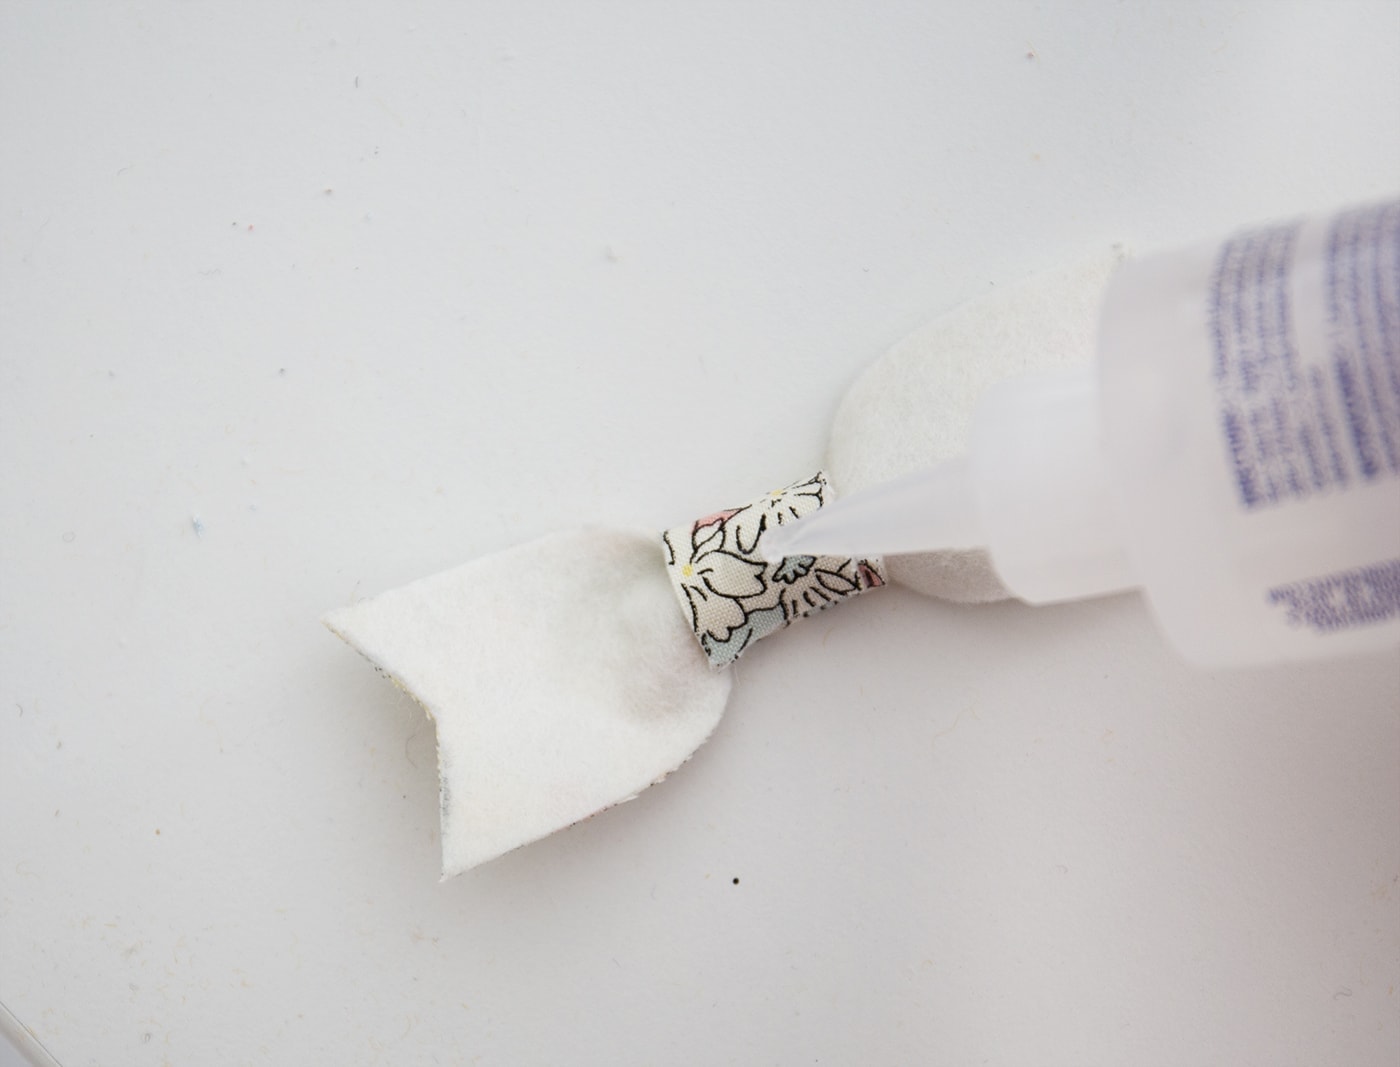
Put a dot of glue in the centre of the shape and pinch together.
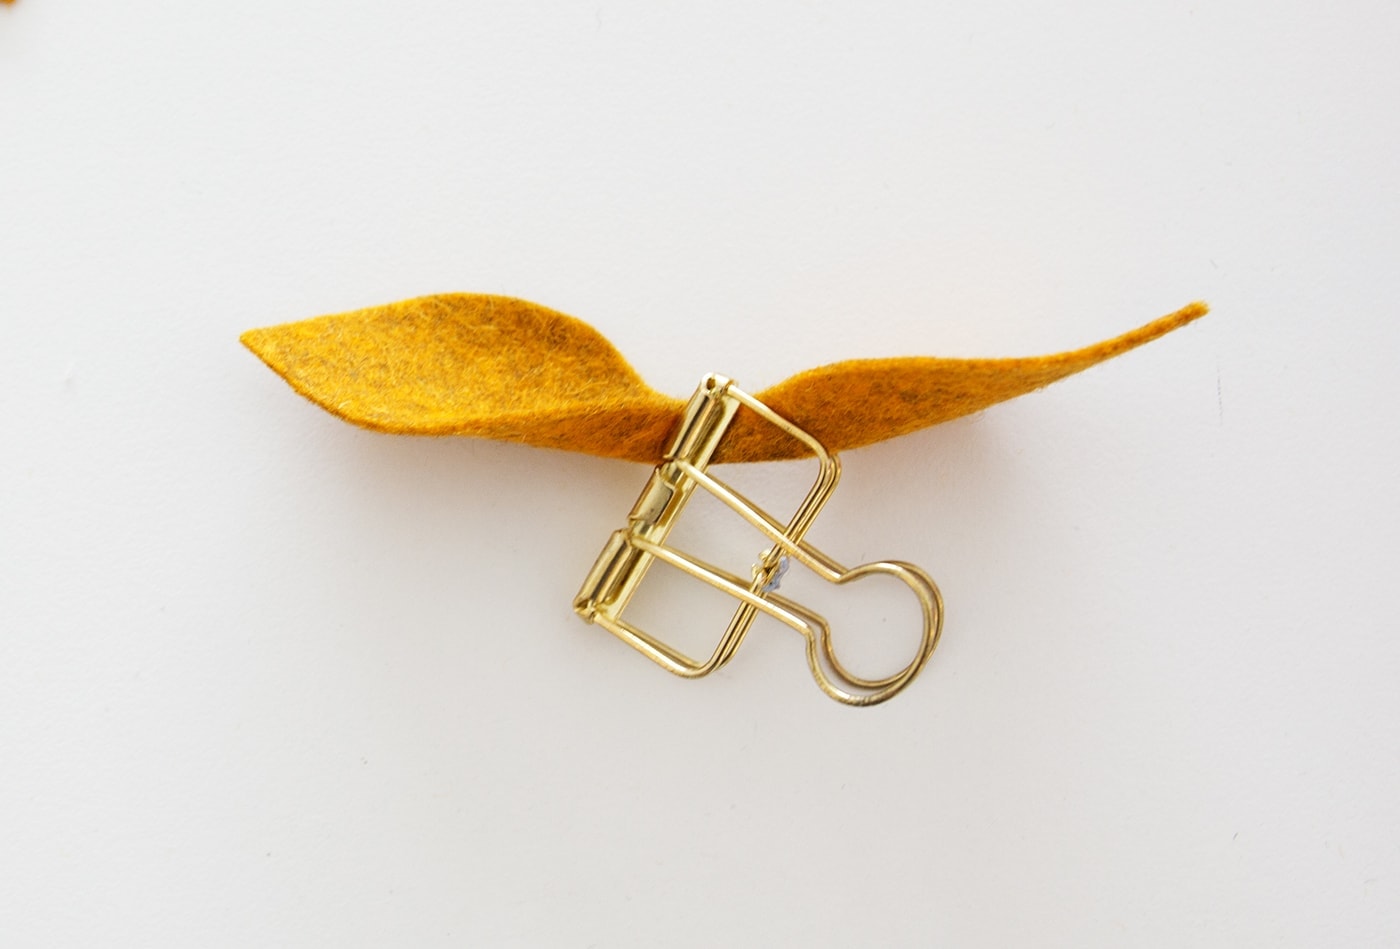
Clamp together with a bulldog clip so it dries in this way.
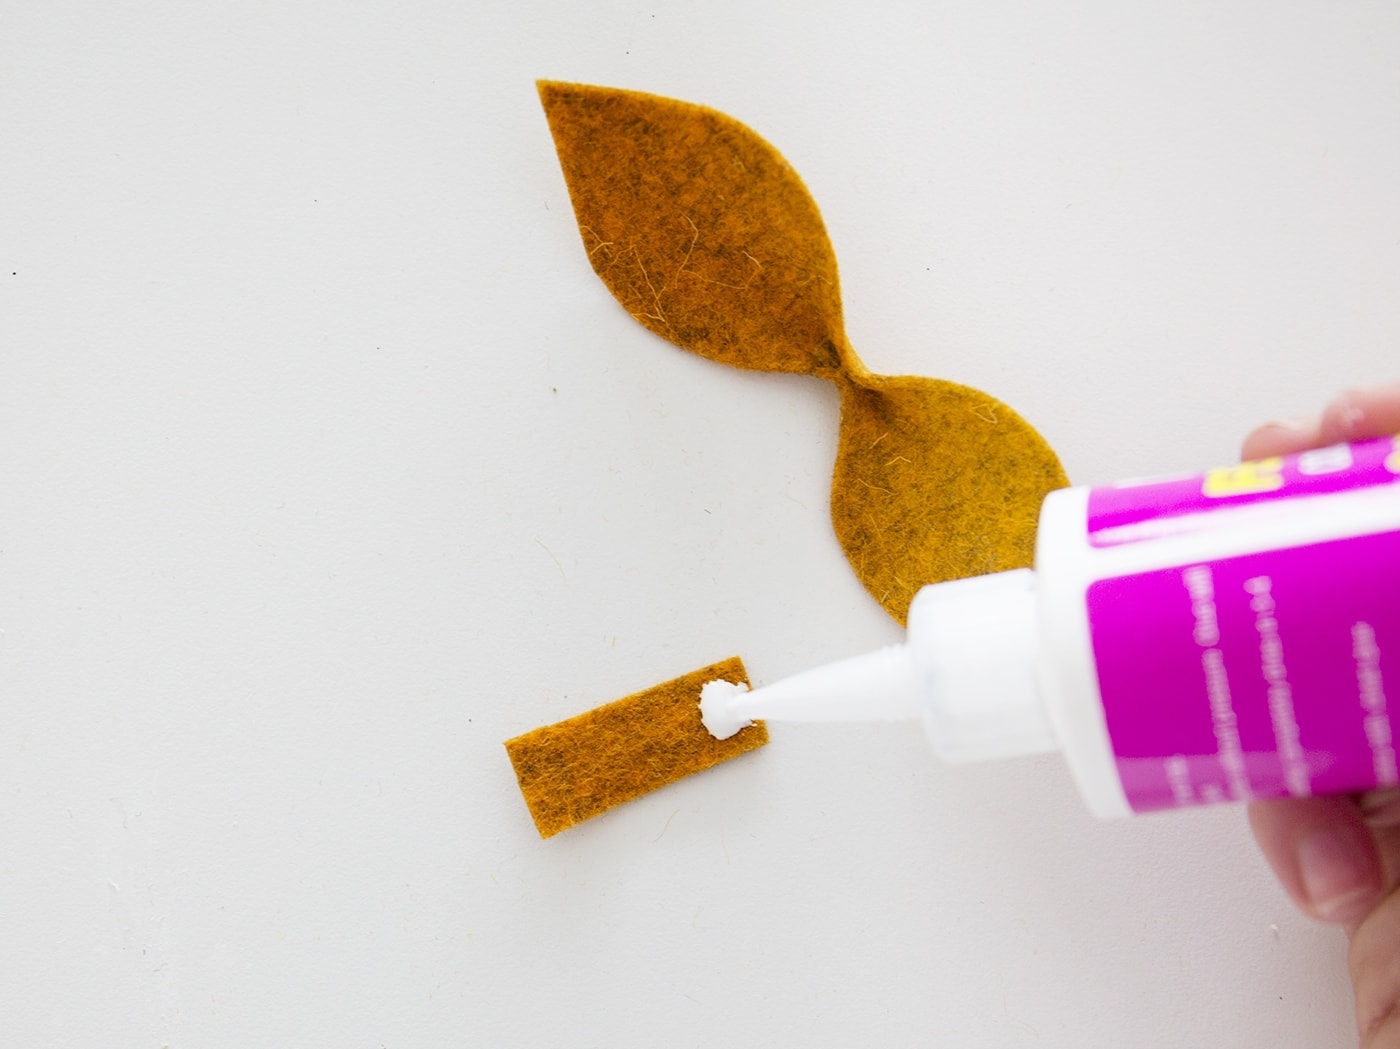
Once dry take your small rectangular piece and add a line of glue all the way along and wrap this around the centre of the bow shape, making sure the raw edge sits at the back. You could sandwich your nylon headband in the middle, before wrapping the rectangular piece around for a neat finish.
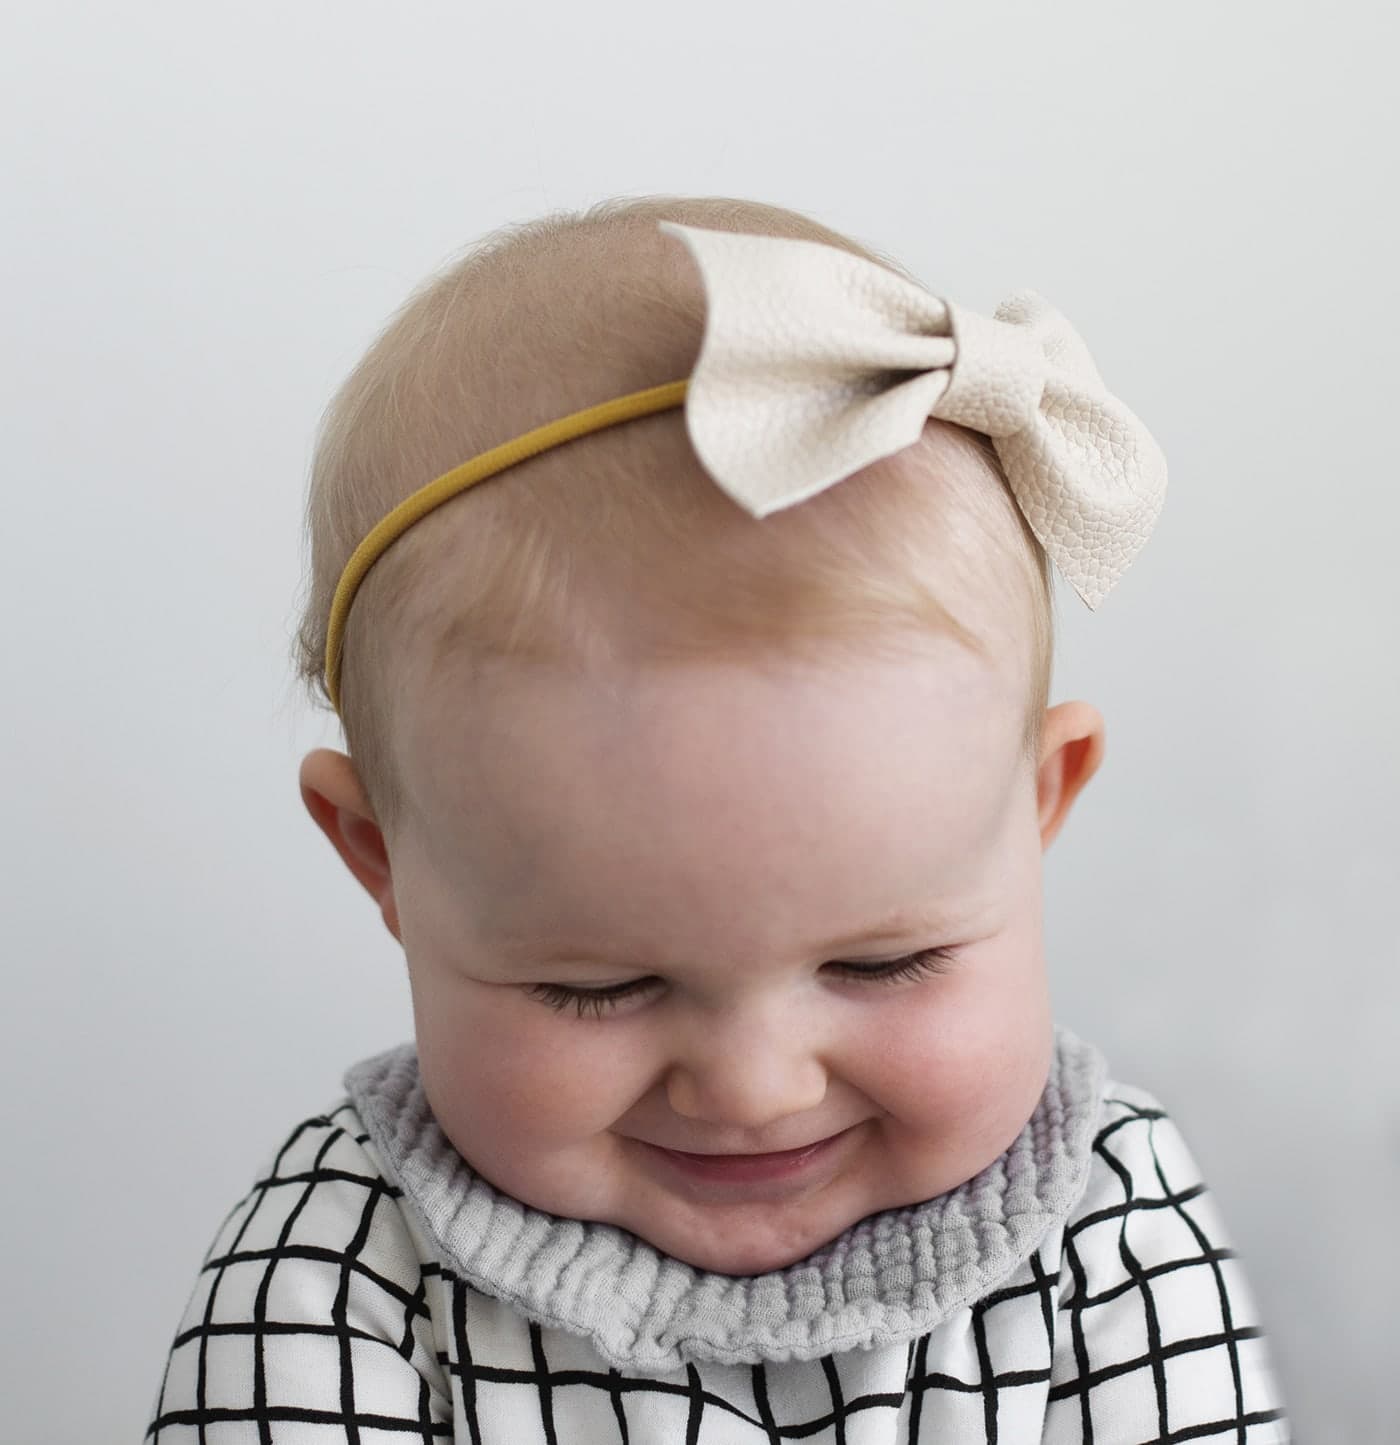
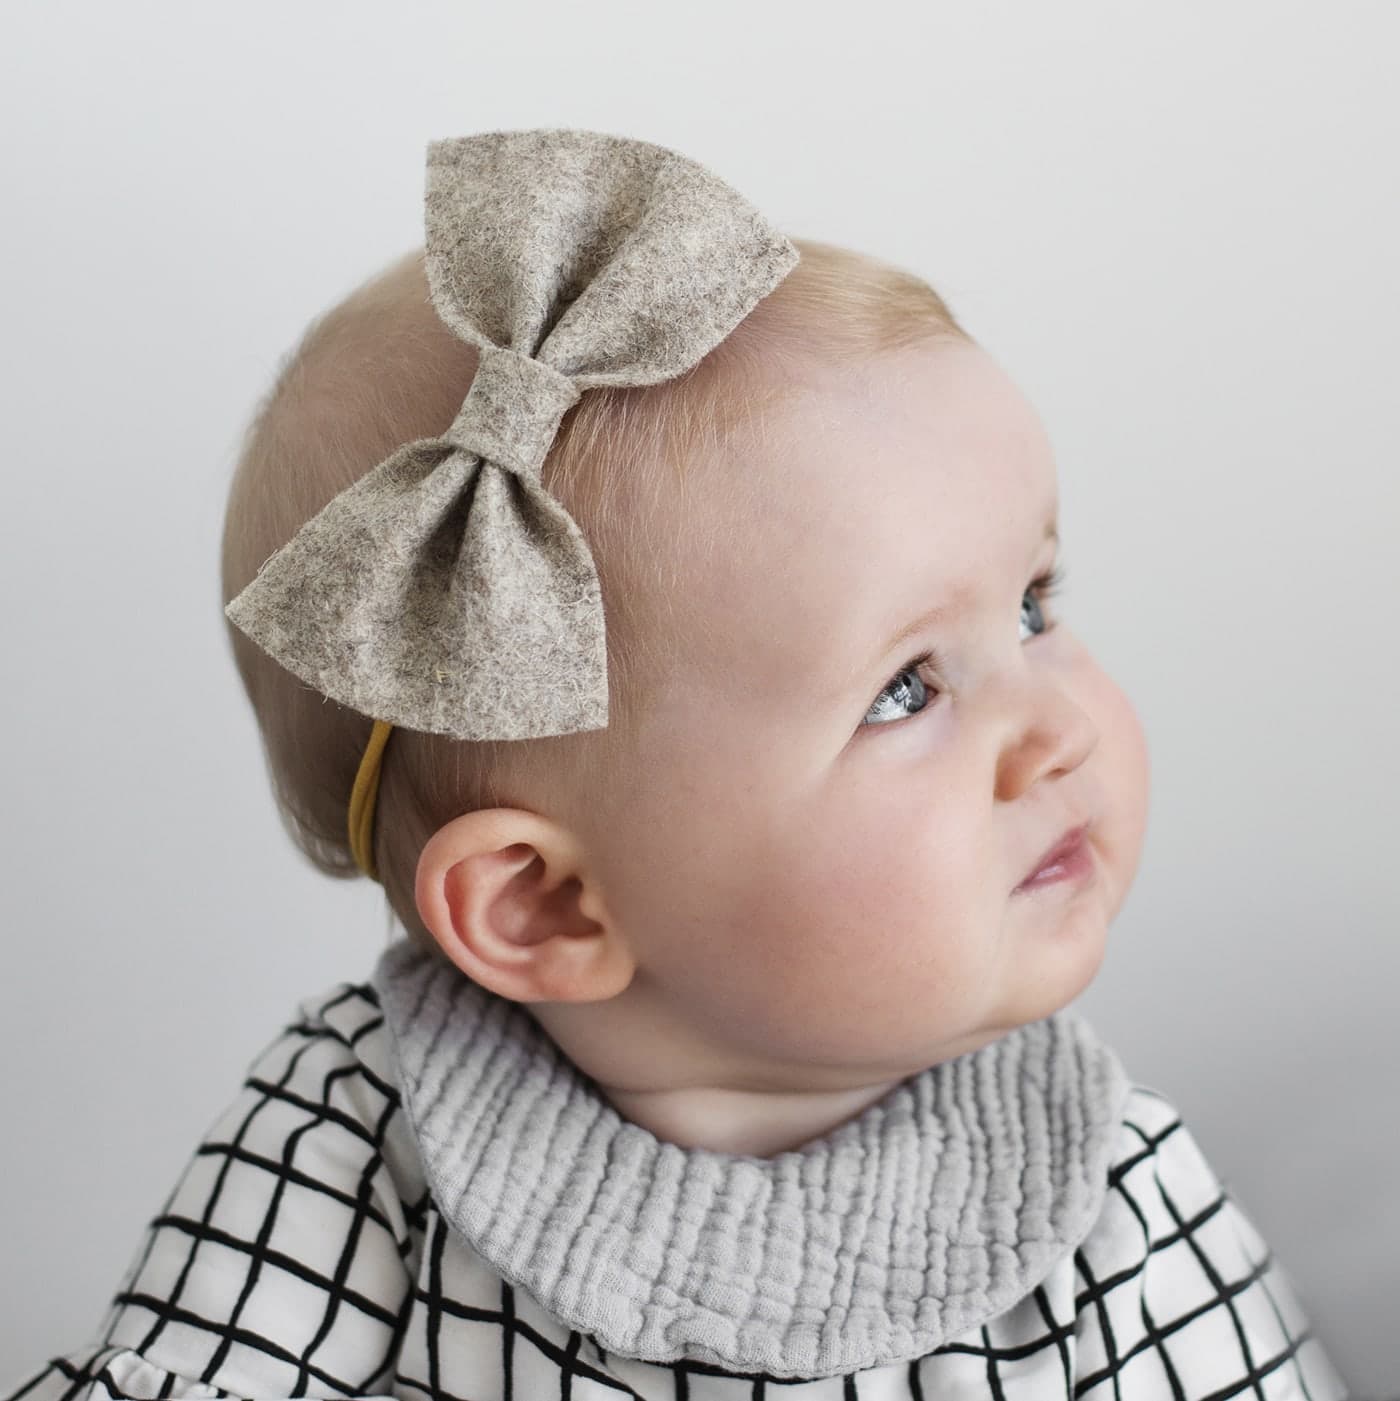
Large classic Bow
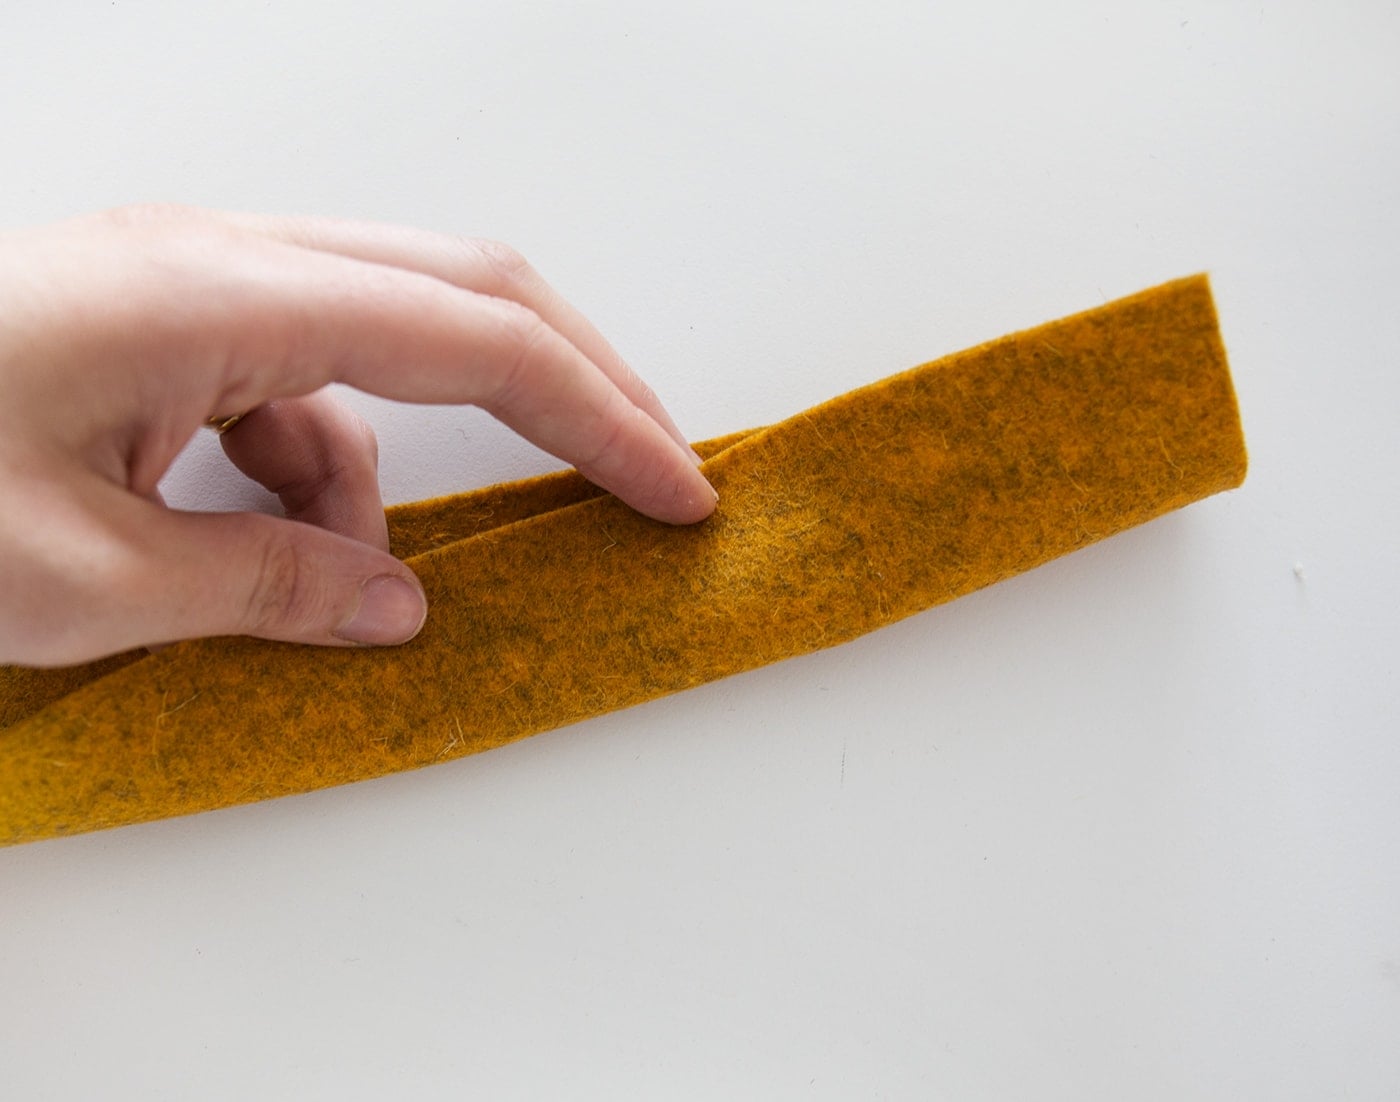
Take your felt rectangle.

Concertina the felt and pull in at the centre point.
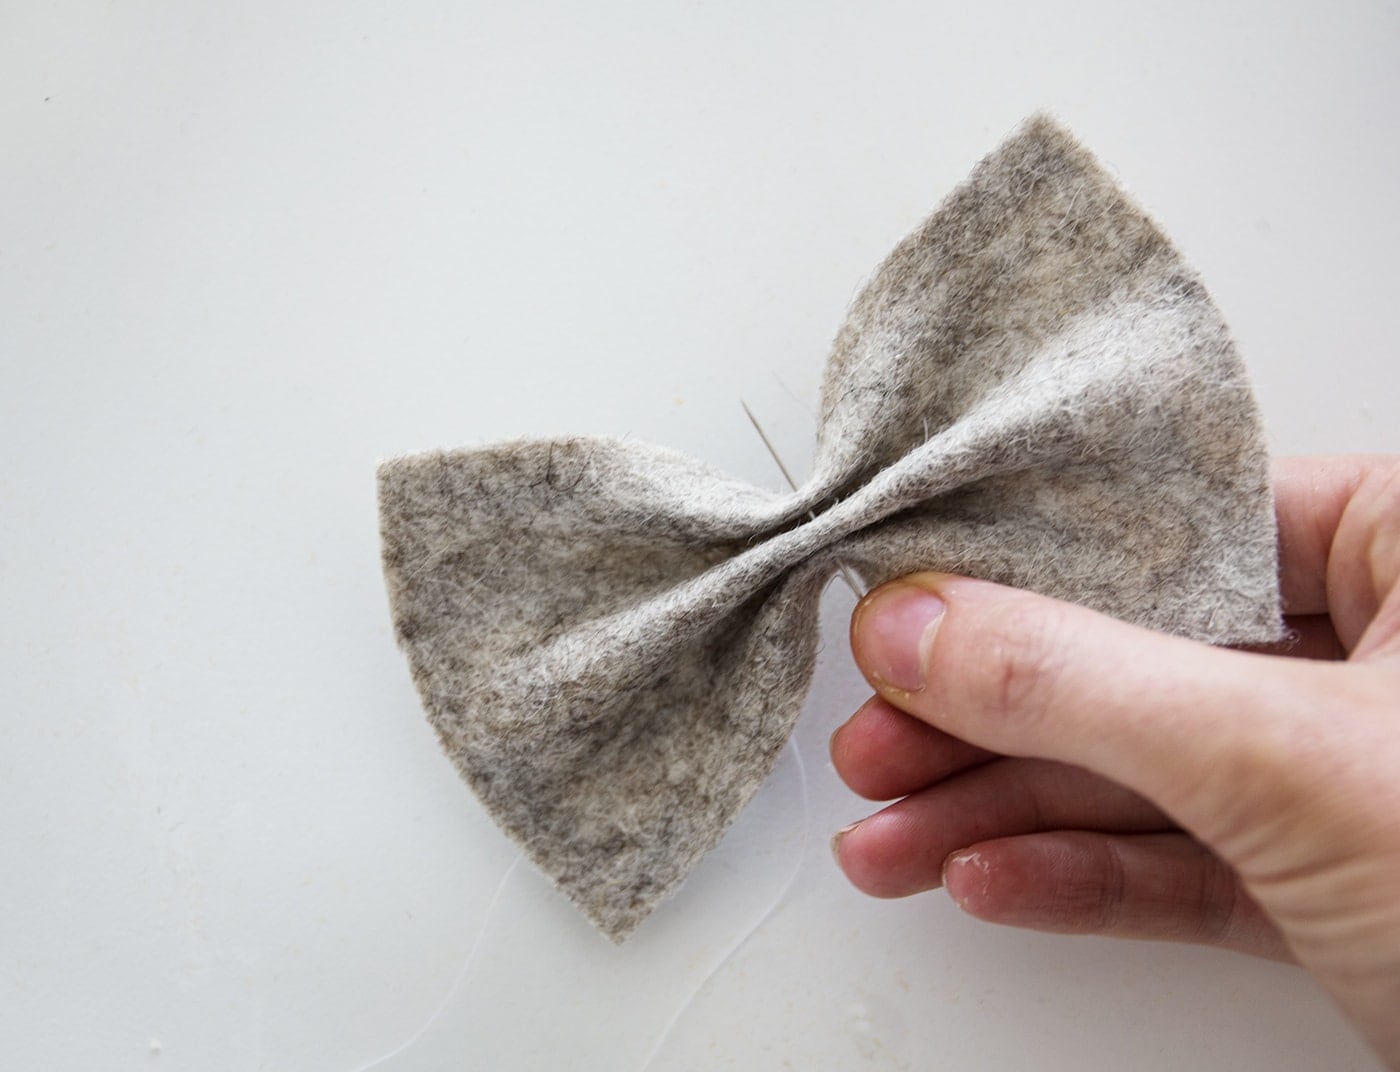
Fix this with a few stitches through the middle.

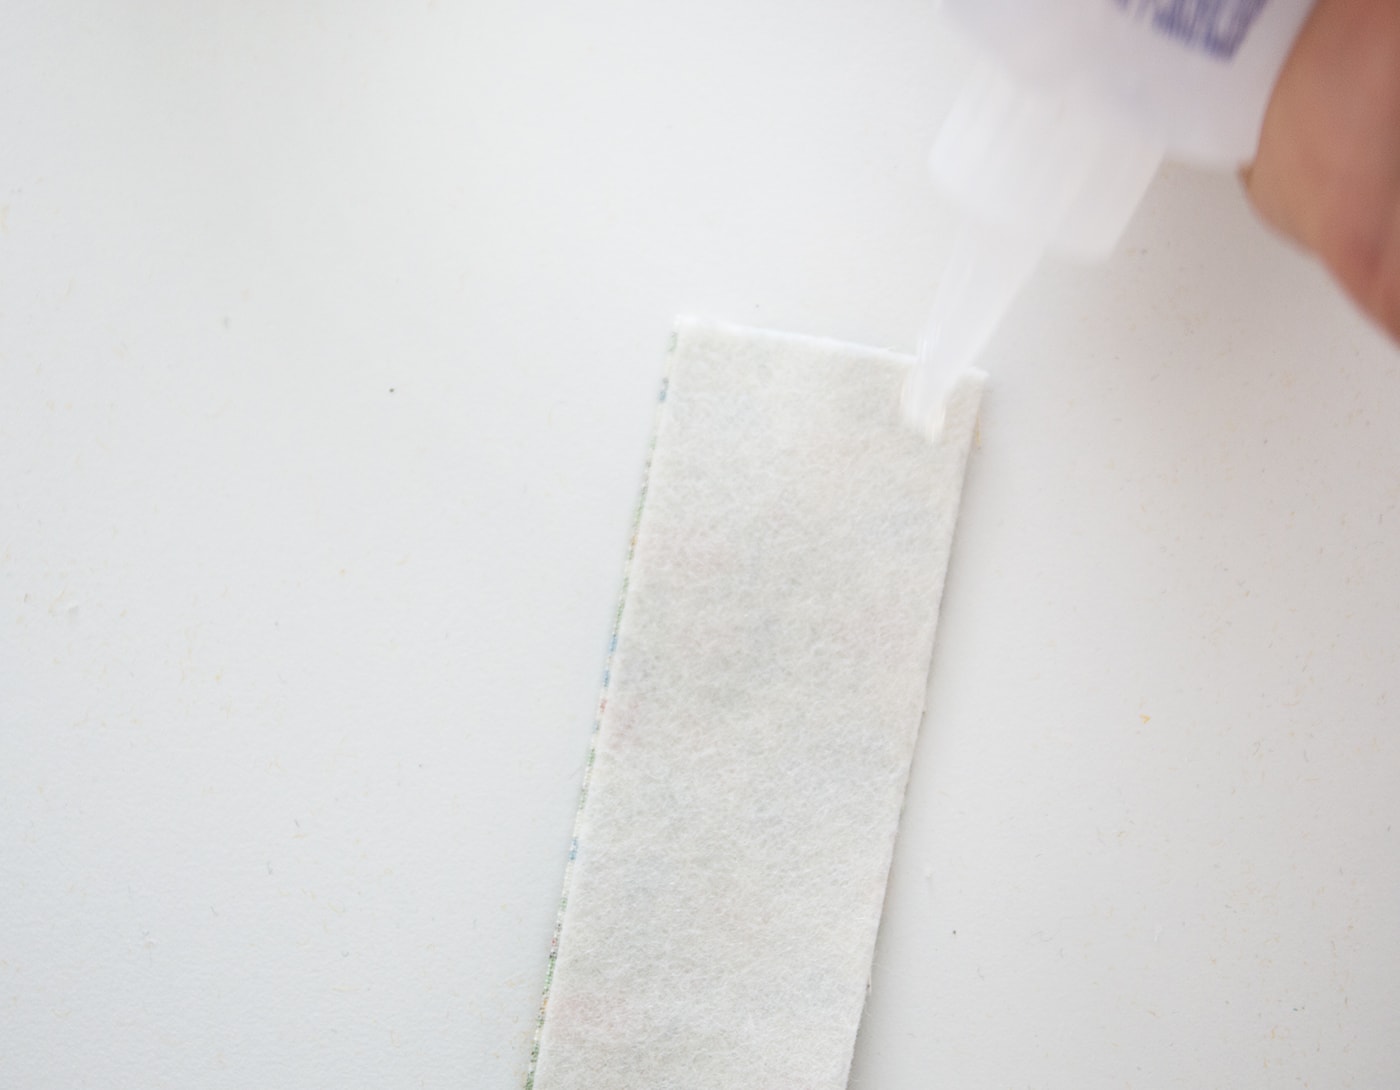
Once again put a line of glue along your smaller rectangular piece and wrap this around with the raw edge sitting at the back. You can sandwich the nylon headband on the back, between the bow and the rectangular piece as you wrap it round.
Looped bow
Add a line of glue along one of the shorter edges of your long piece.

Loop around with the fabric facing outwards and fix. You can use the bulldog clip to hold it together until it’s dry.
Draw the middle together and secure with a few stitches.
Once again put a line of glue along your smaller rectangular piece and wrap this around with the raw edge sitting at the back. You can sandwich the nylon headband on the back, between the bow and the rectangular piece as you wrap it round.
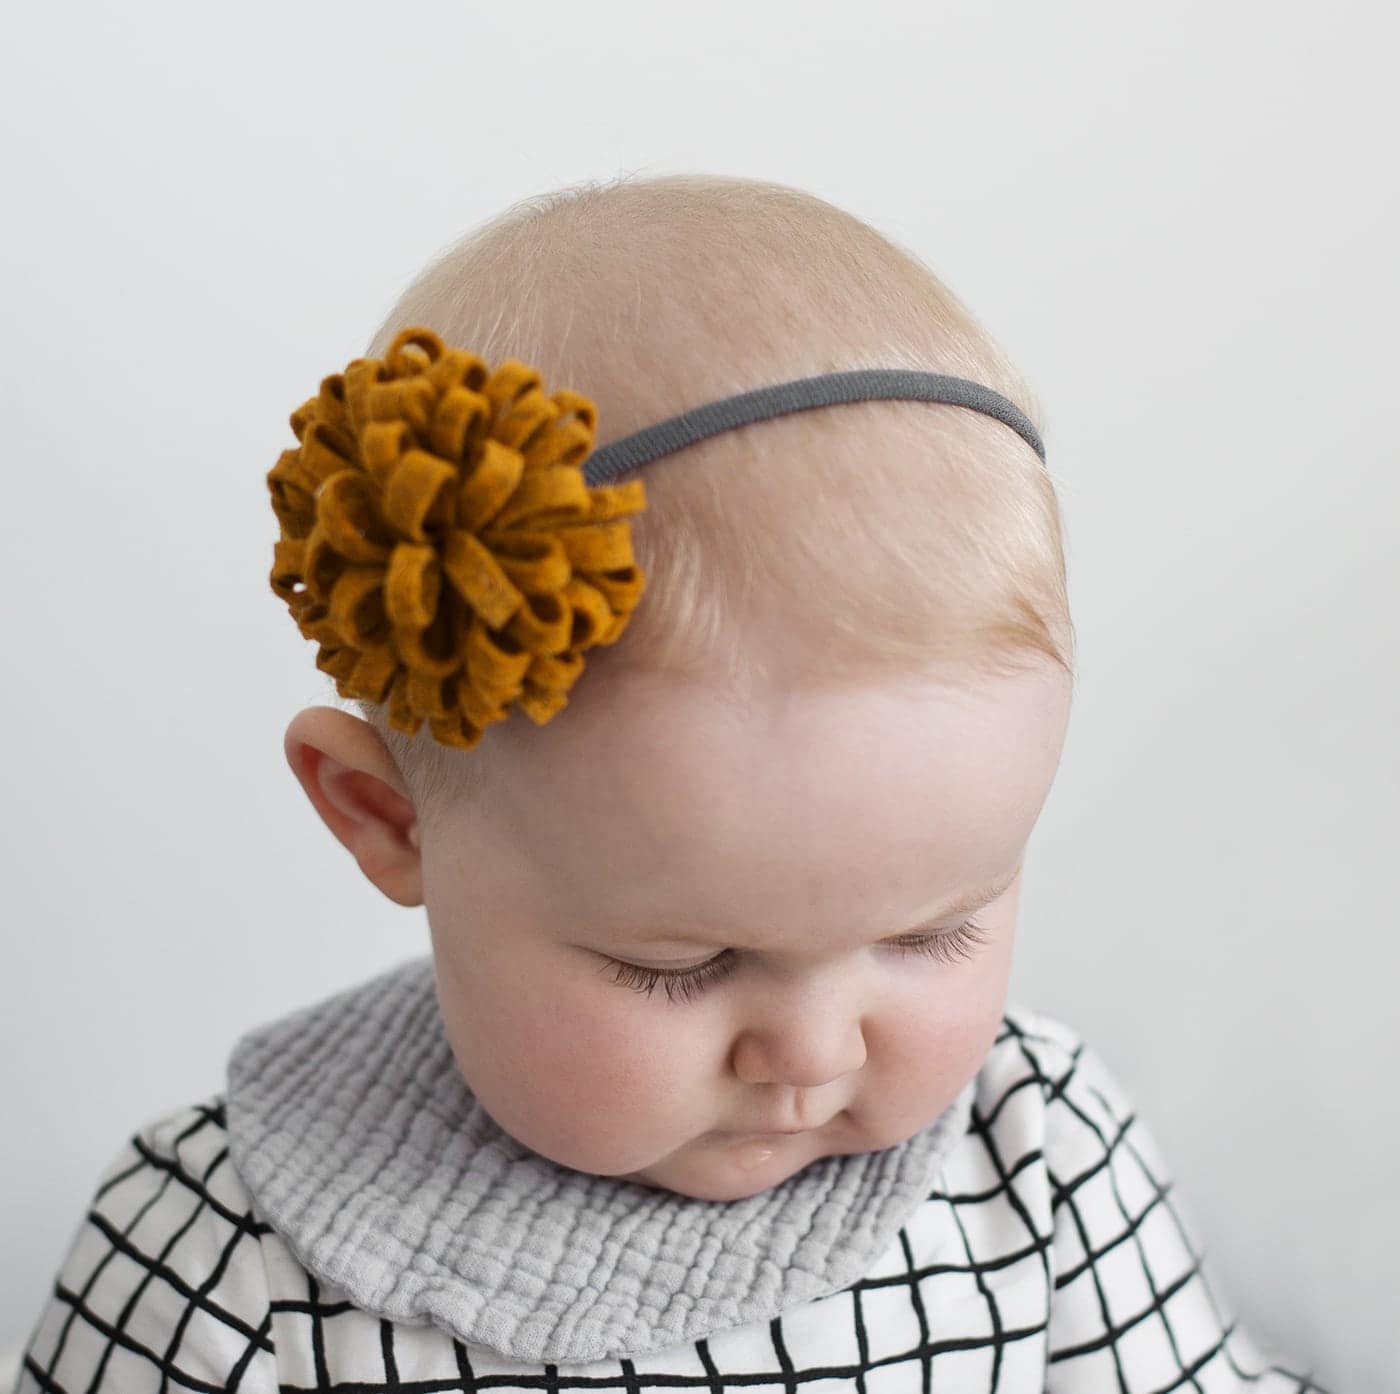
Flower detail
Fold your long piece in half.
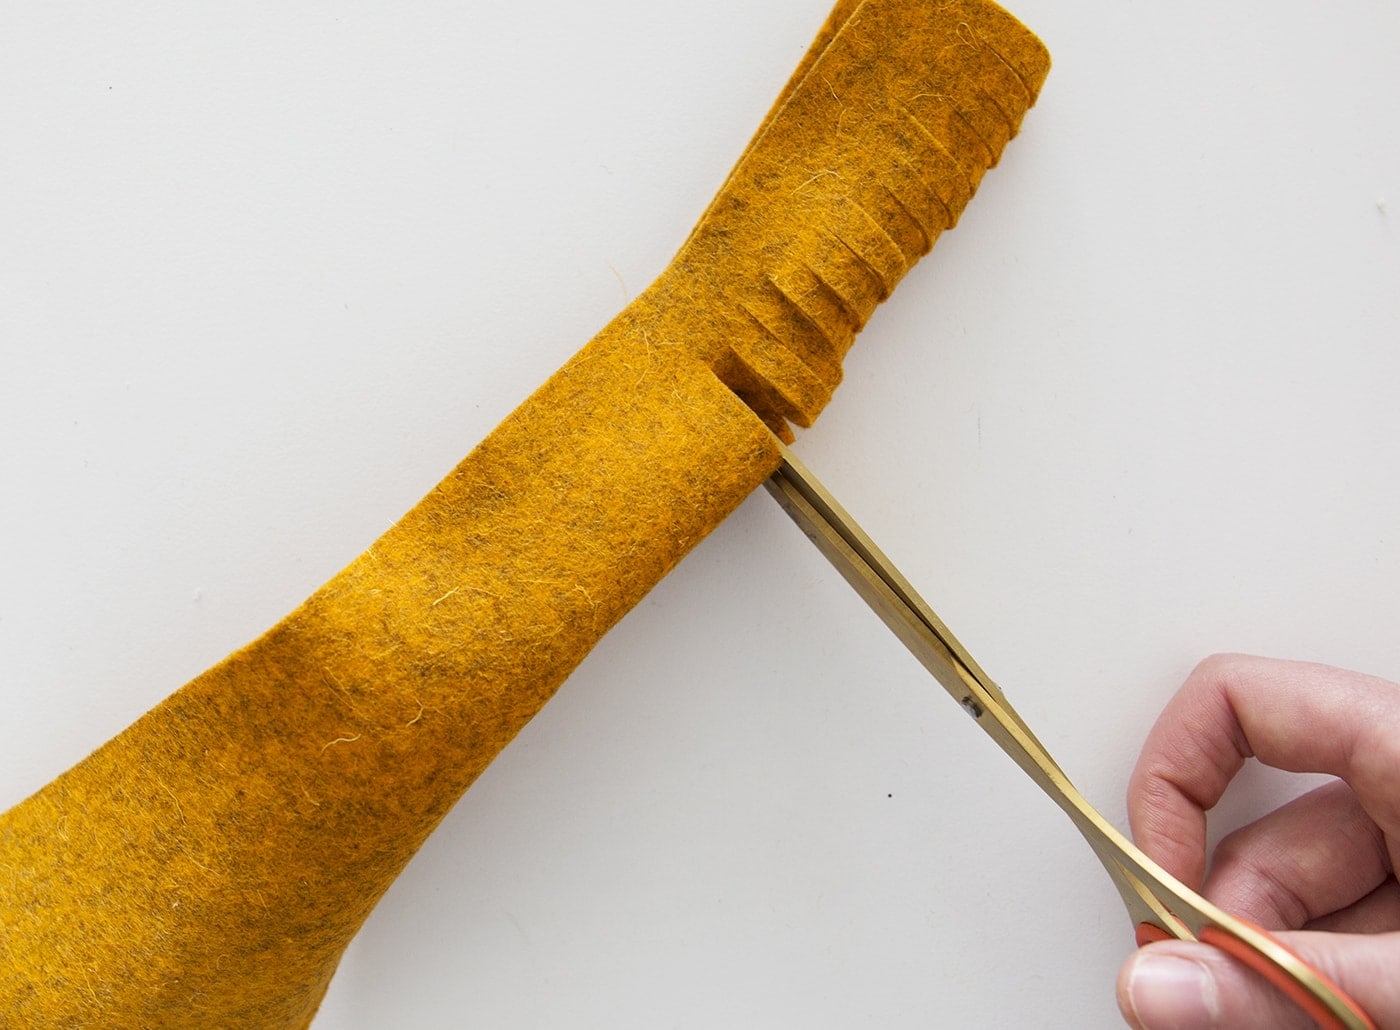
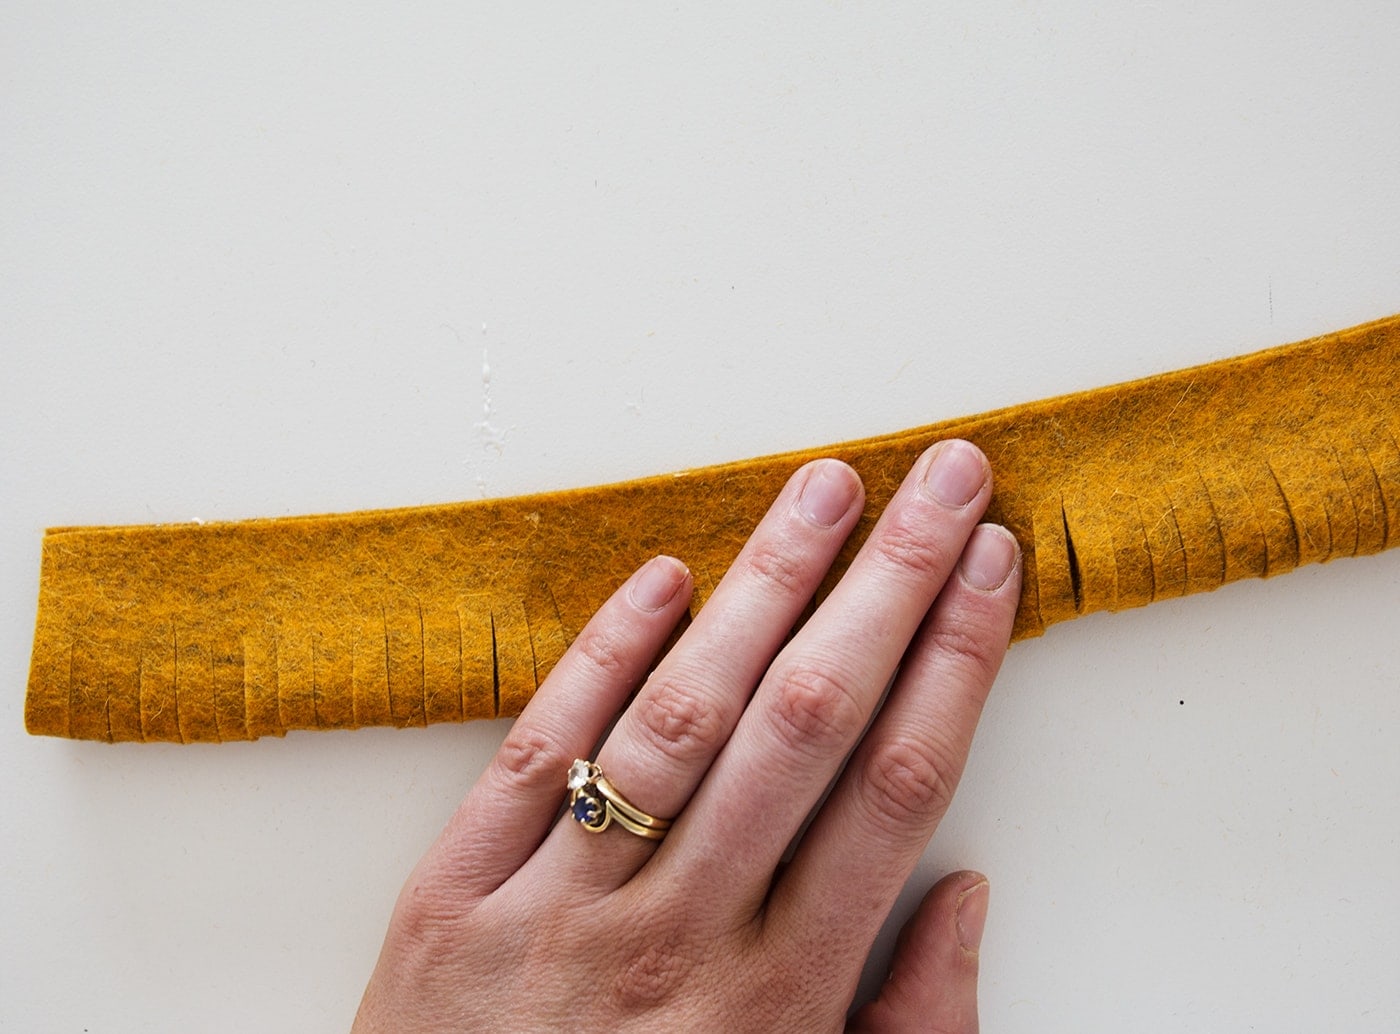
Then cut into the folded edge (not the open edge) all the way along, cutting down about 3/4 of the way down with each cut roughly 1cm apart.
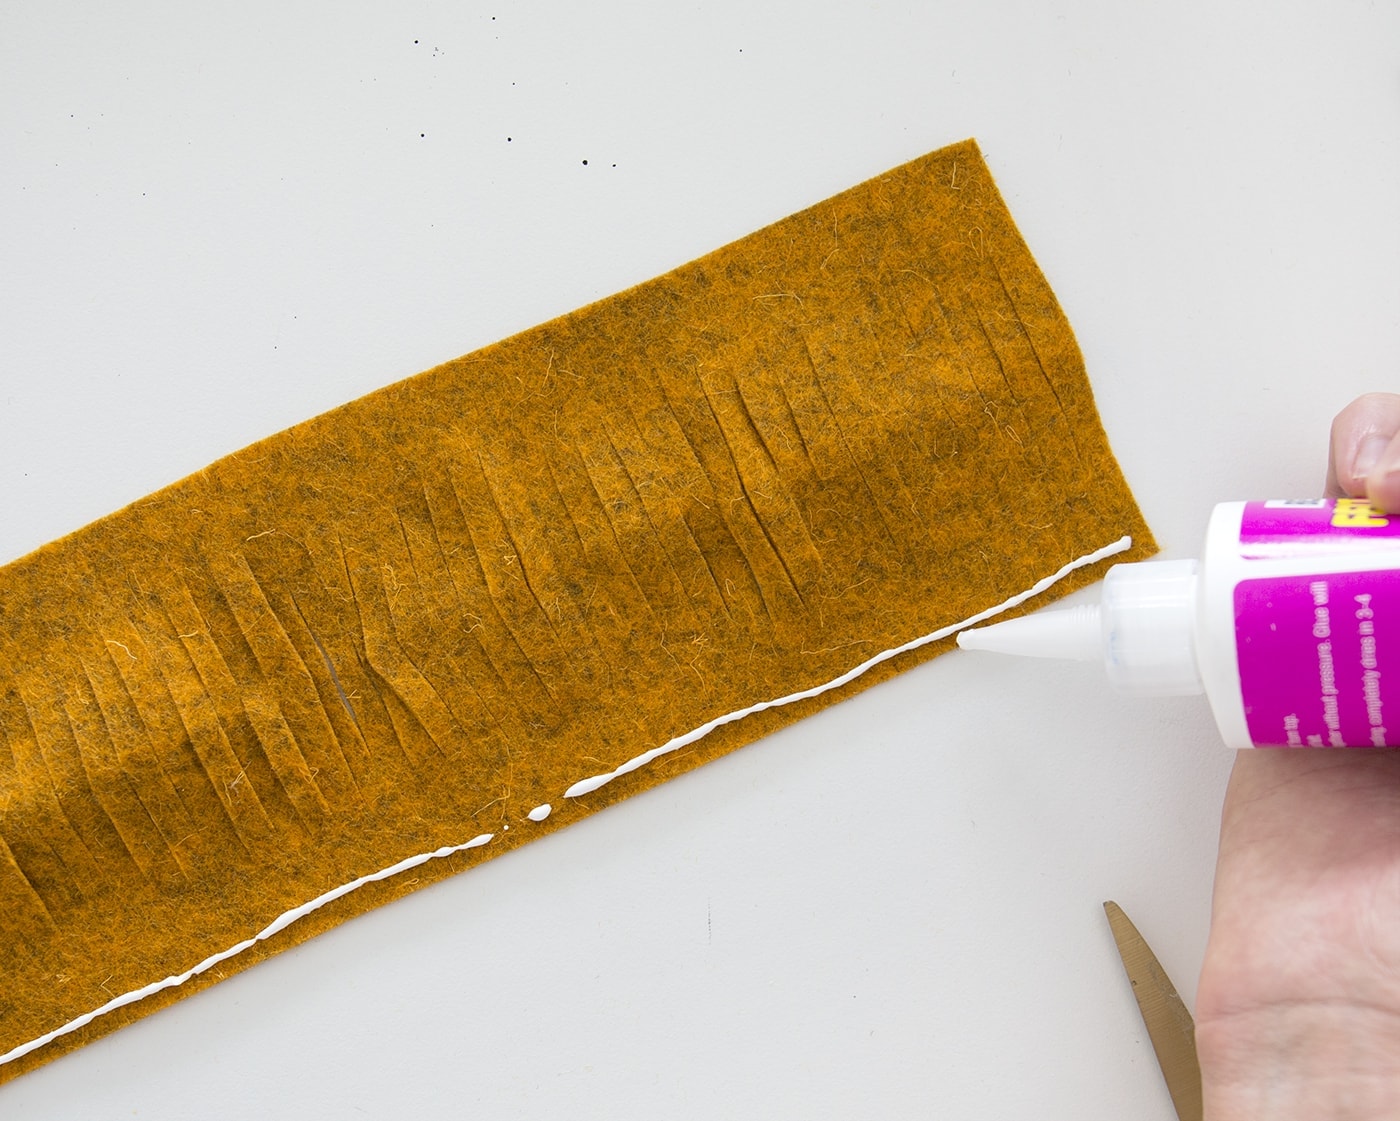
Open and turn the felt over. Glue down one of the longer edges.
Fold back over and secure. You could put a book over the edge to keep in place while it dries.
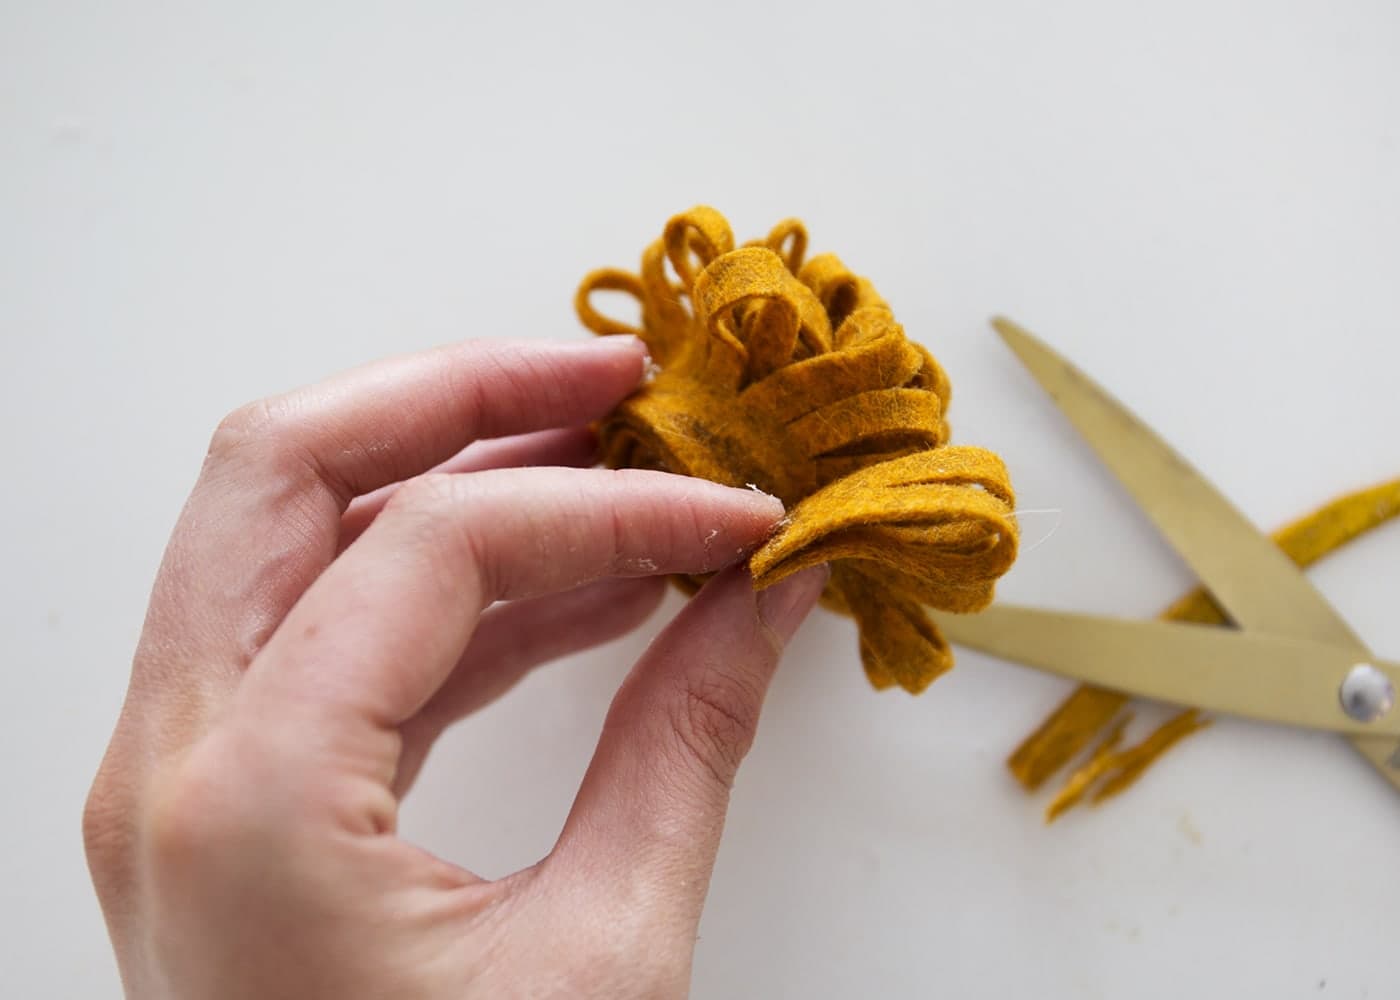
Now glue all the way along the long, uncut edge and start rolling and you’ll start to create a flower. Keep pressing together to secure as it dries.
Securing to the headband
Lay your bows and flowers out to see what would work well with each colour nylon headband. As I said before you can incorporate the headband into the bow when wrapping around the central piece but if you think the fabric might be a bit hard / uncomfortable against baby’s scalp then you can add the headband after the bow has been made.
Simply add a line of glue at the back of the bow and attach the nylon band, pressing to dry or using the bull dog clip to hold.
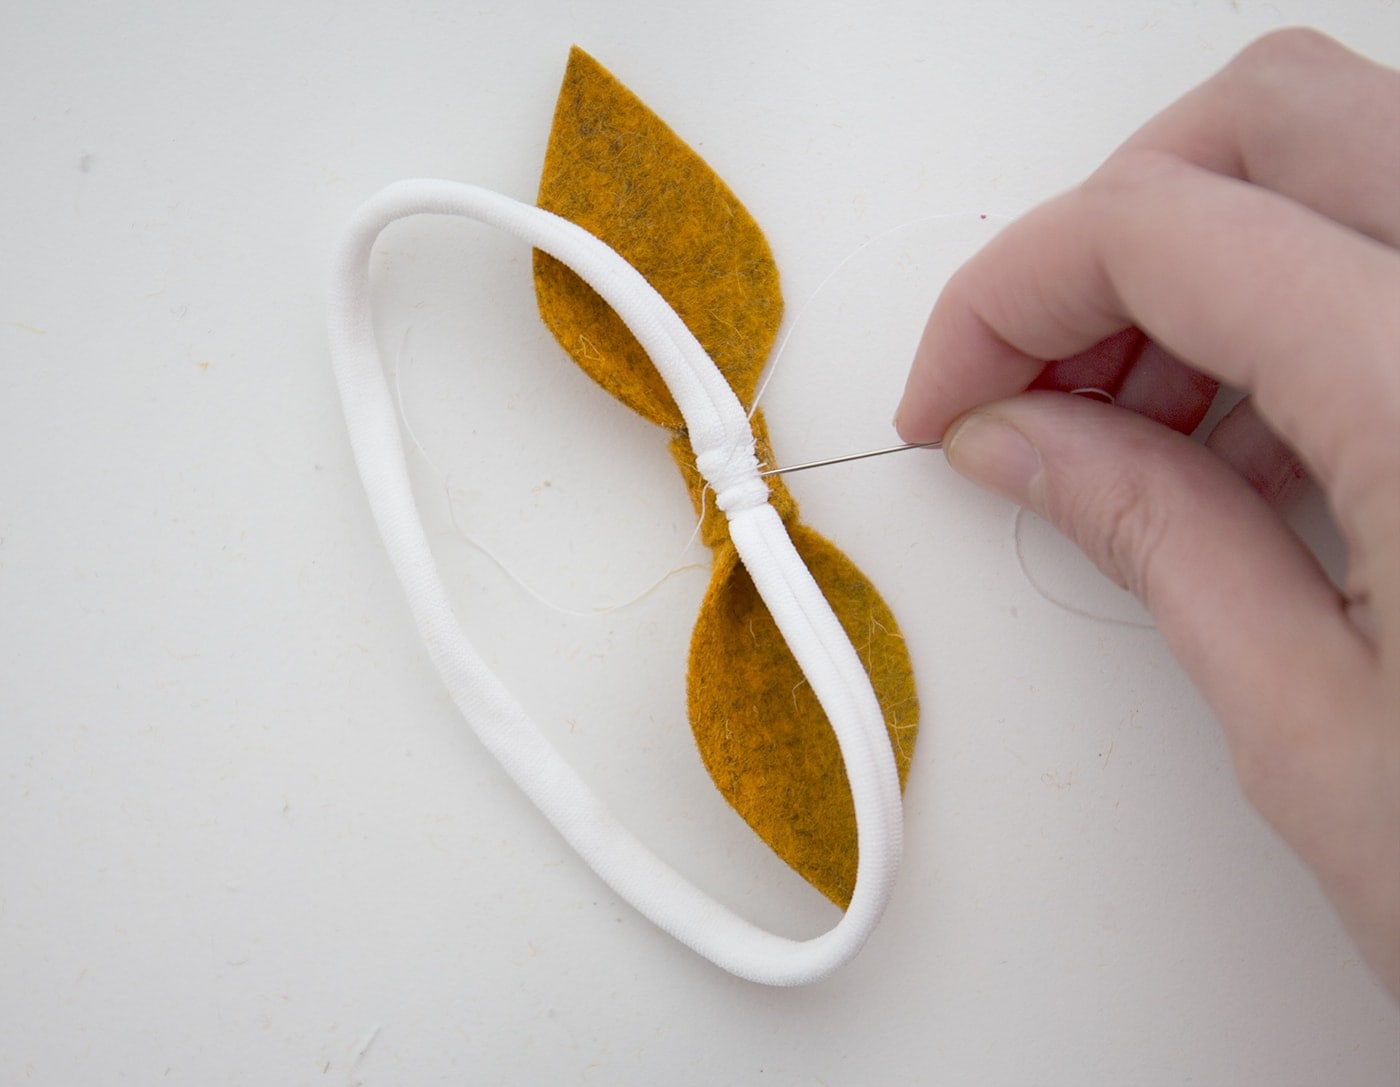
Then for added security add some simple stitched along the back to go around the nylon headband and just through some of the felt. 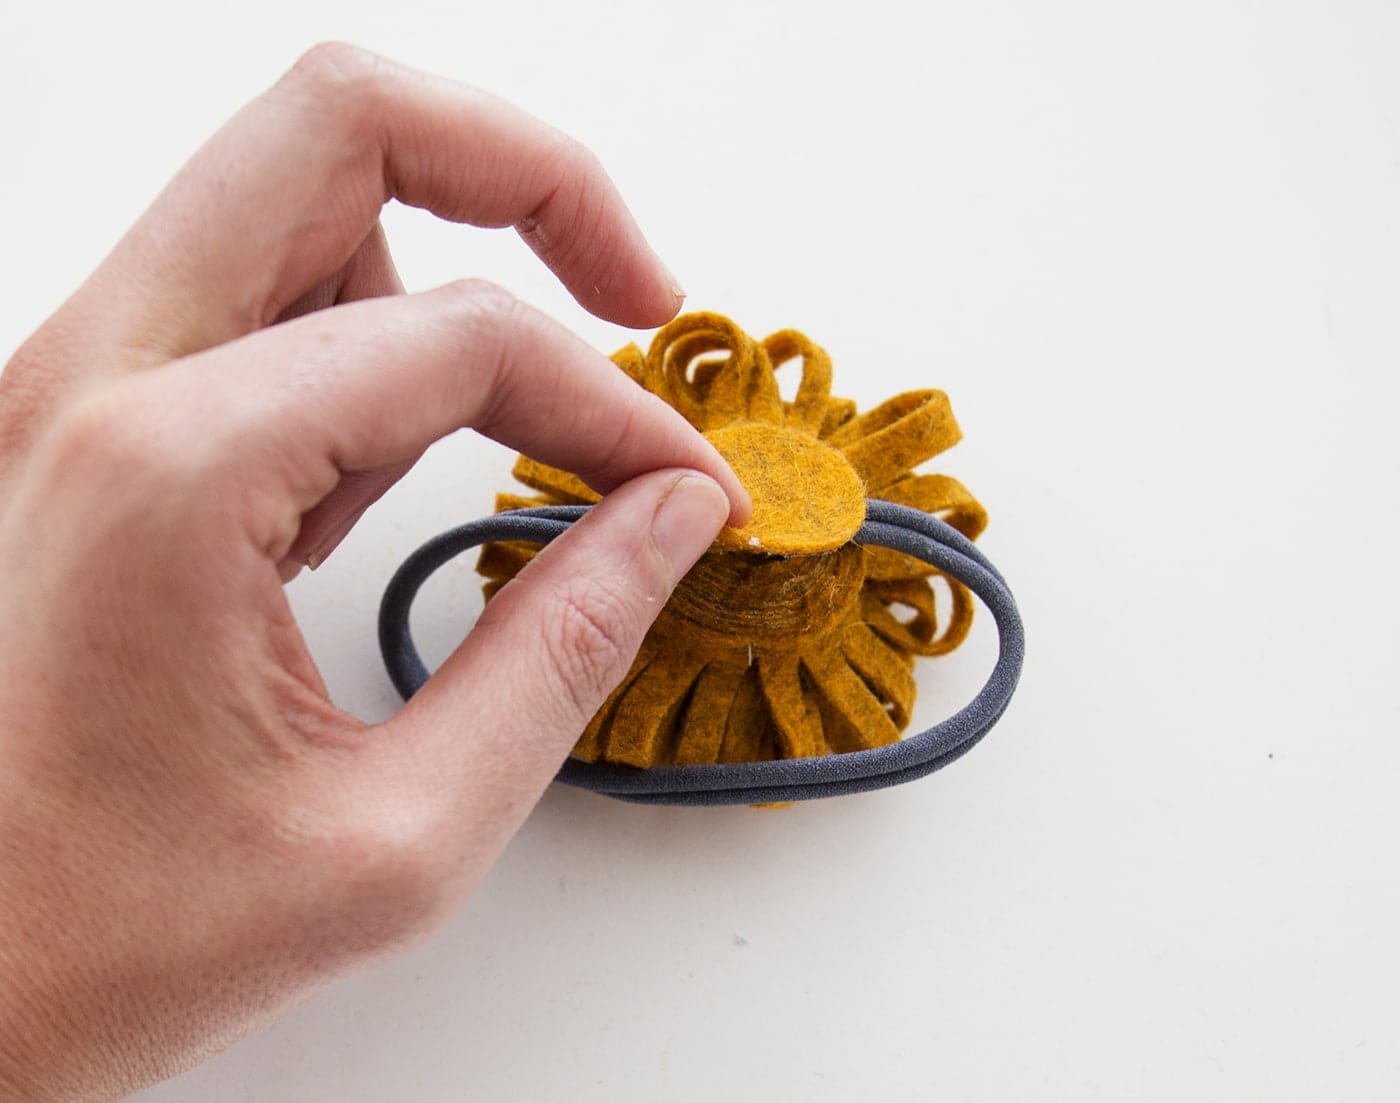
For the flower you can do the same when it comes to sticking the headband on and the cut out a circle of your felt, add glue and then press this over the top of the headband to create a sandwich with the flower to seal.
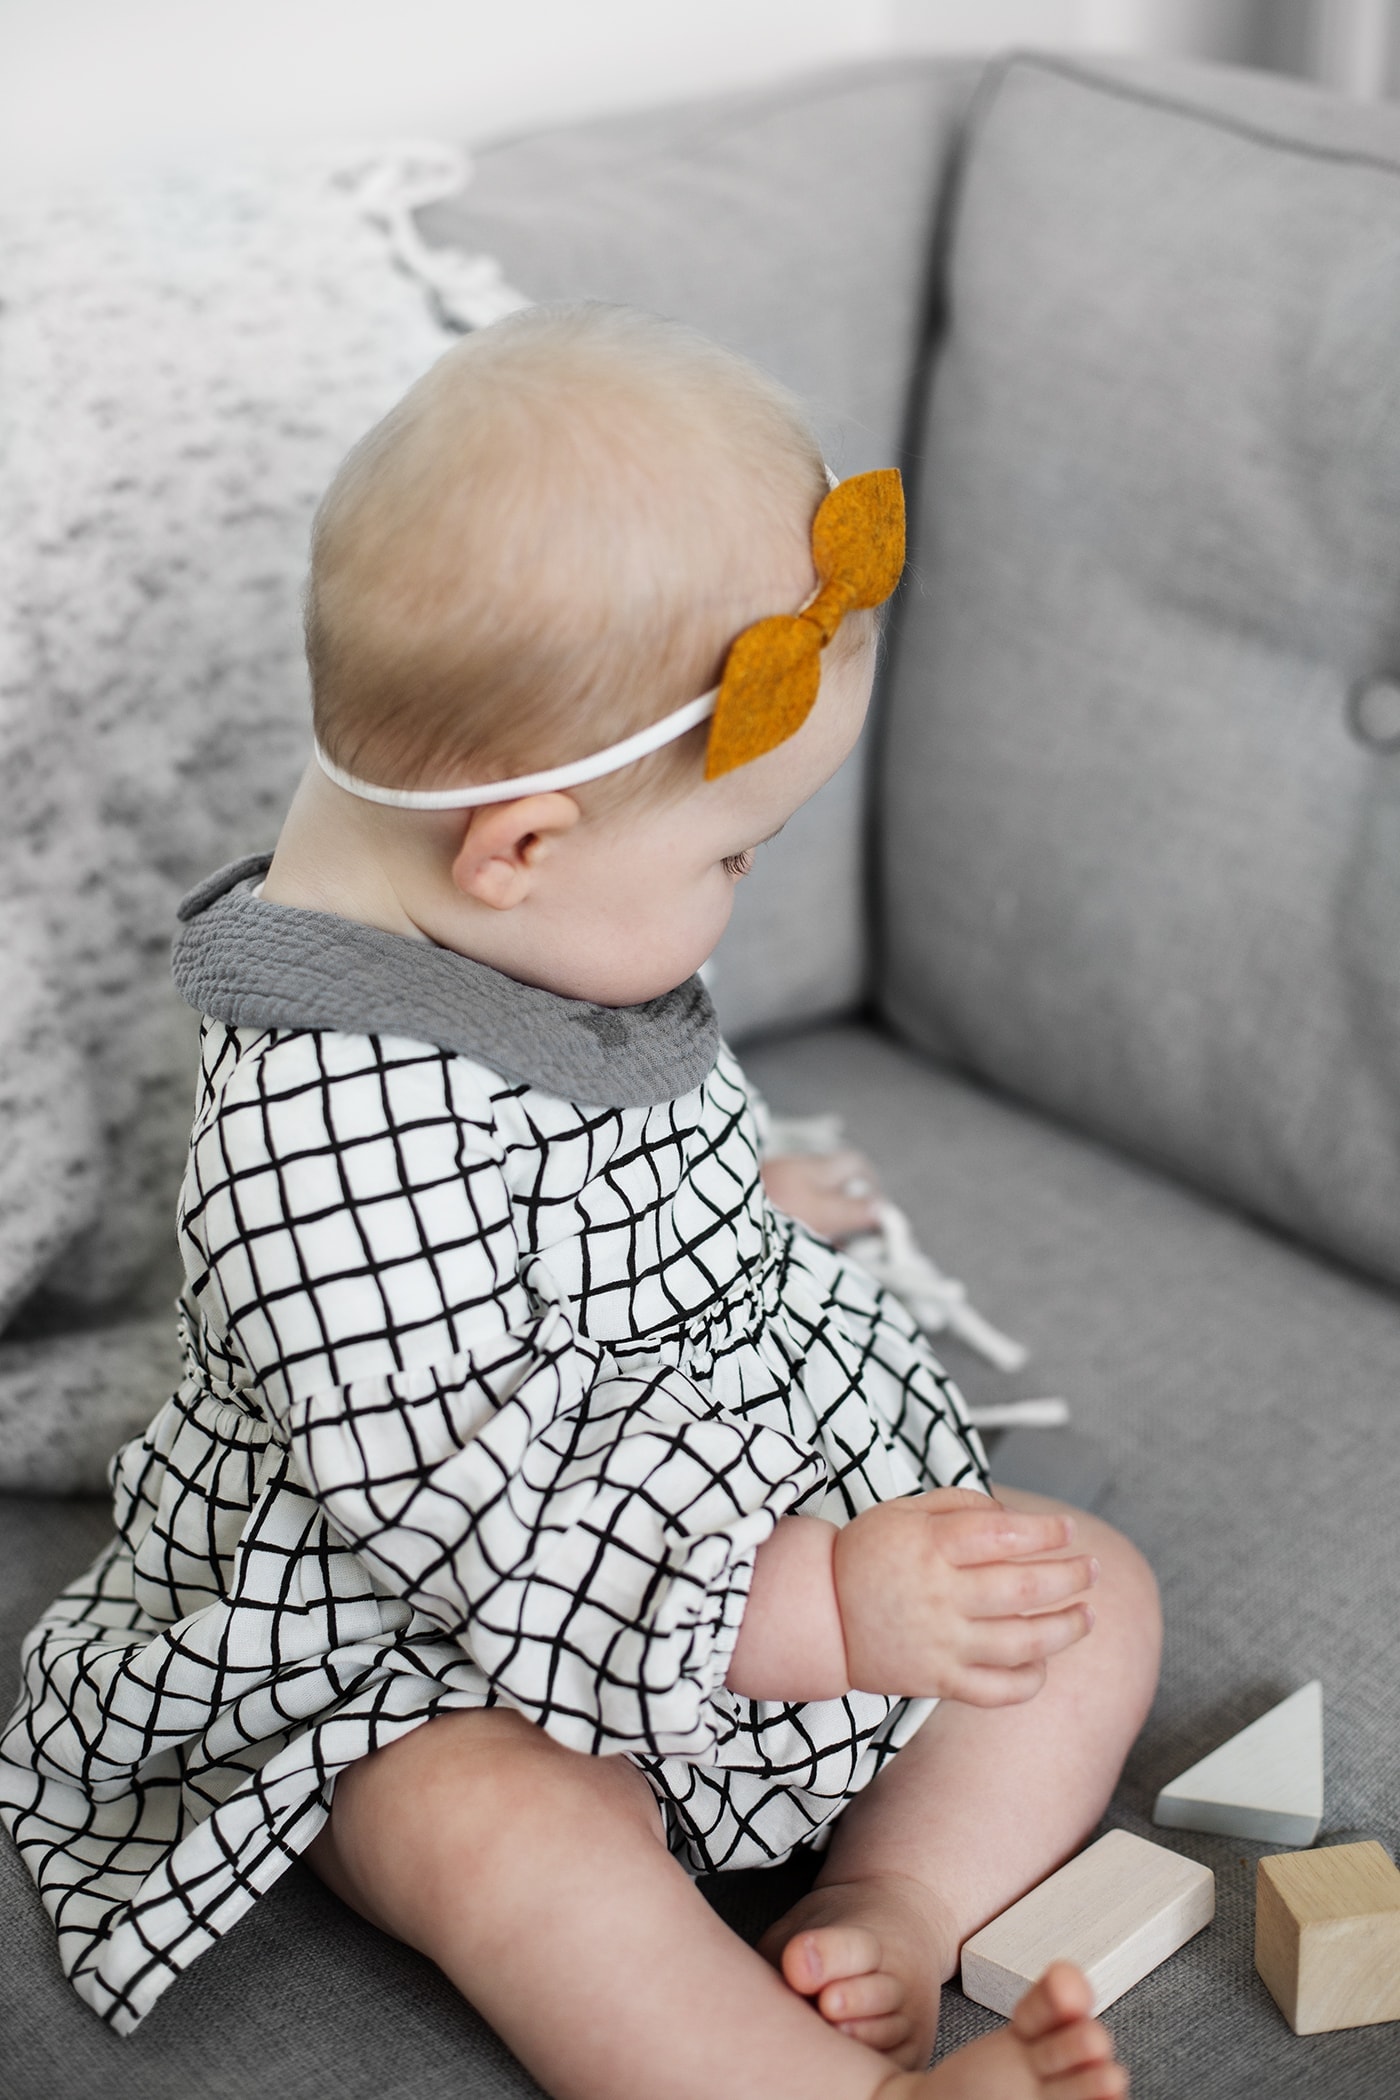
What an obliging model I have! She looks adorable in these so I couldn’t be happier with her new accessory wardrobe. Go give them a whirl for your little one or perhaps make a bunch as gifts for the small humans in your life.
Materials chosen by me but kindly gifted by the Fabridasher
You might also like


Meet The Lovely Drawer

Hi, I’m Teri and welcome to my own creative corner of the internet. I blog about interiors, DIY projects, design inspiration and my general life so stick around have a read and say hi.
In the shop

 Quick ViewSelect options
Personalised Cuddly Bunny
£30.00 – £35.00
 Quick ViewSelect options
Chicory
£20.00 – £25.00
Work with Me
The Lovely Drawer is an award winning blog with a loyal audience that has grown over the years. I love working with brands small and large on exciting collaborations that can bring products alive in my own signature aesthetic.