

affordable home tip no 1
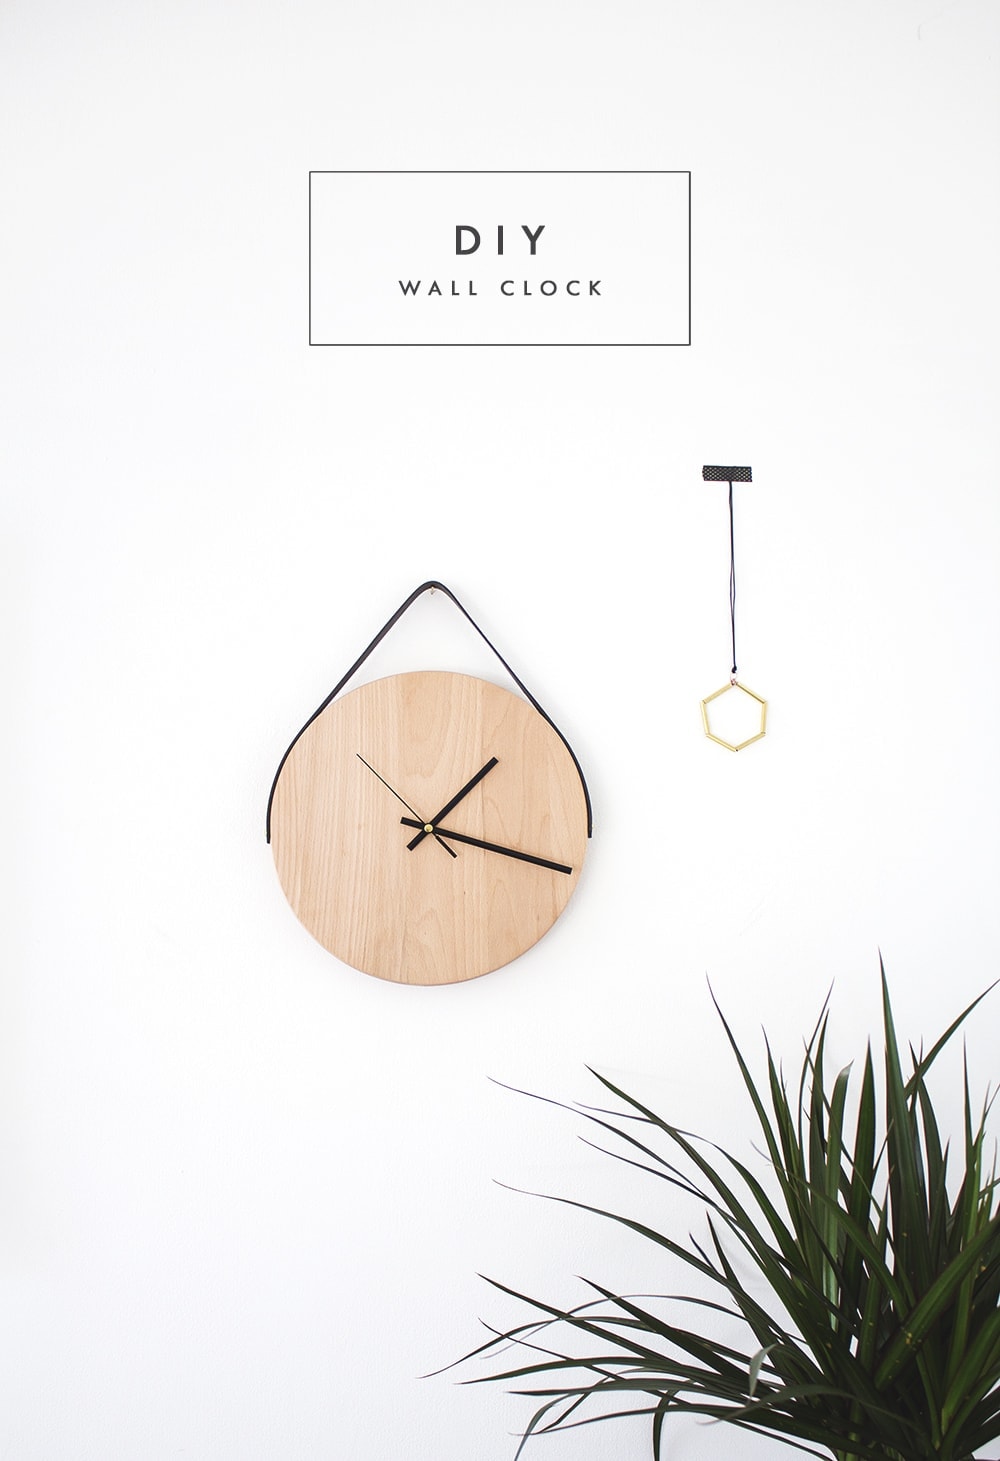
Hi chaps! I’ve got three exciting DIY projects to wheel out for you this week in association with Keep Moat as part of their ‘Affordable Home Tips’ project. Today I’m starting with this stylish minimal wall clock. I’ve actually been wanting one like this for a while so I’m so happy to have found a way to create the same affect on the cheap and using a chopping board of all things! However it has planted a seed of craziness as now I want to turn every boring household object into a clock. I’ll try and refrain.
You’ll need…
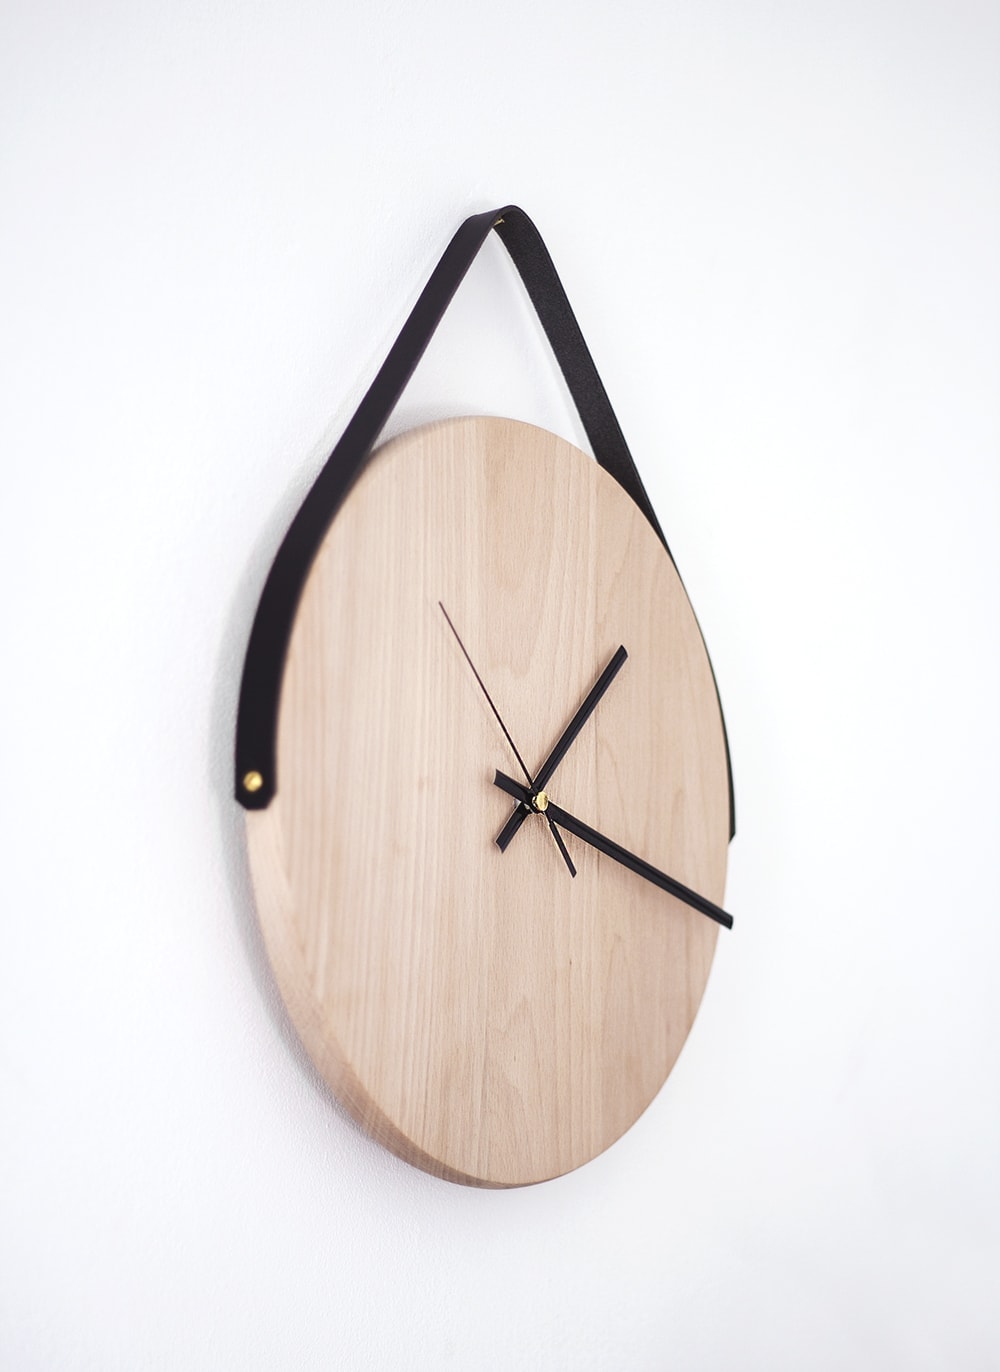
- A round wooden chopping board (mine was 30cm in diameter)
- Black leather strap or an old belt
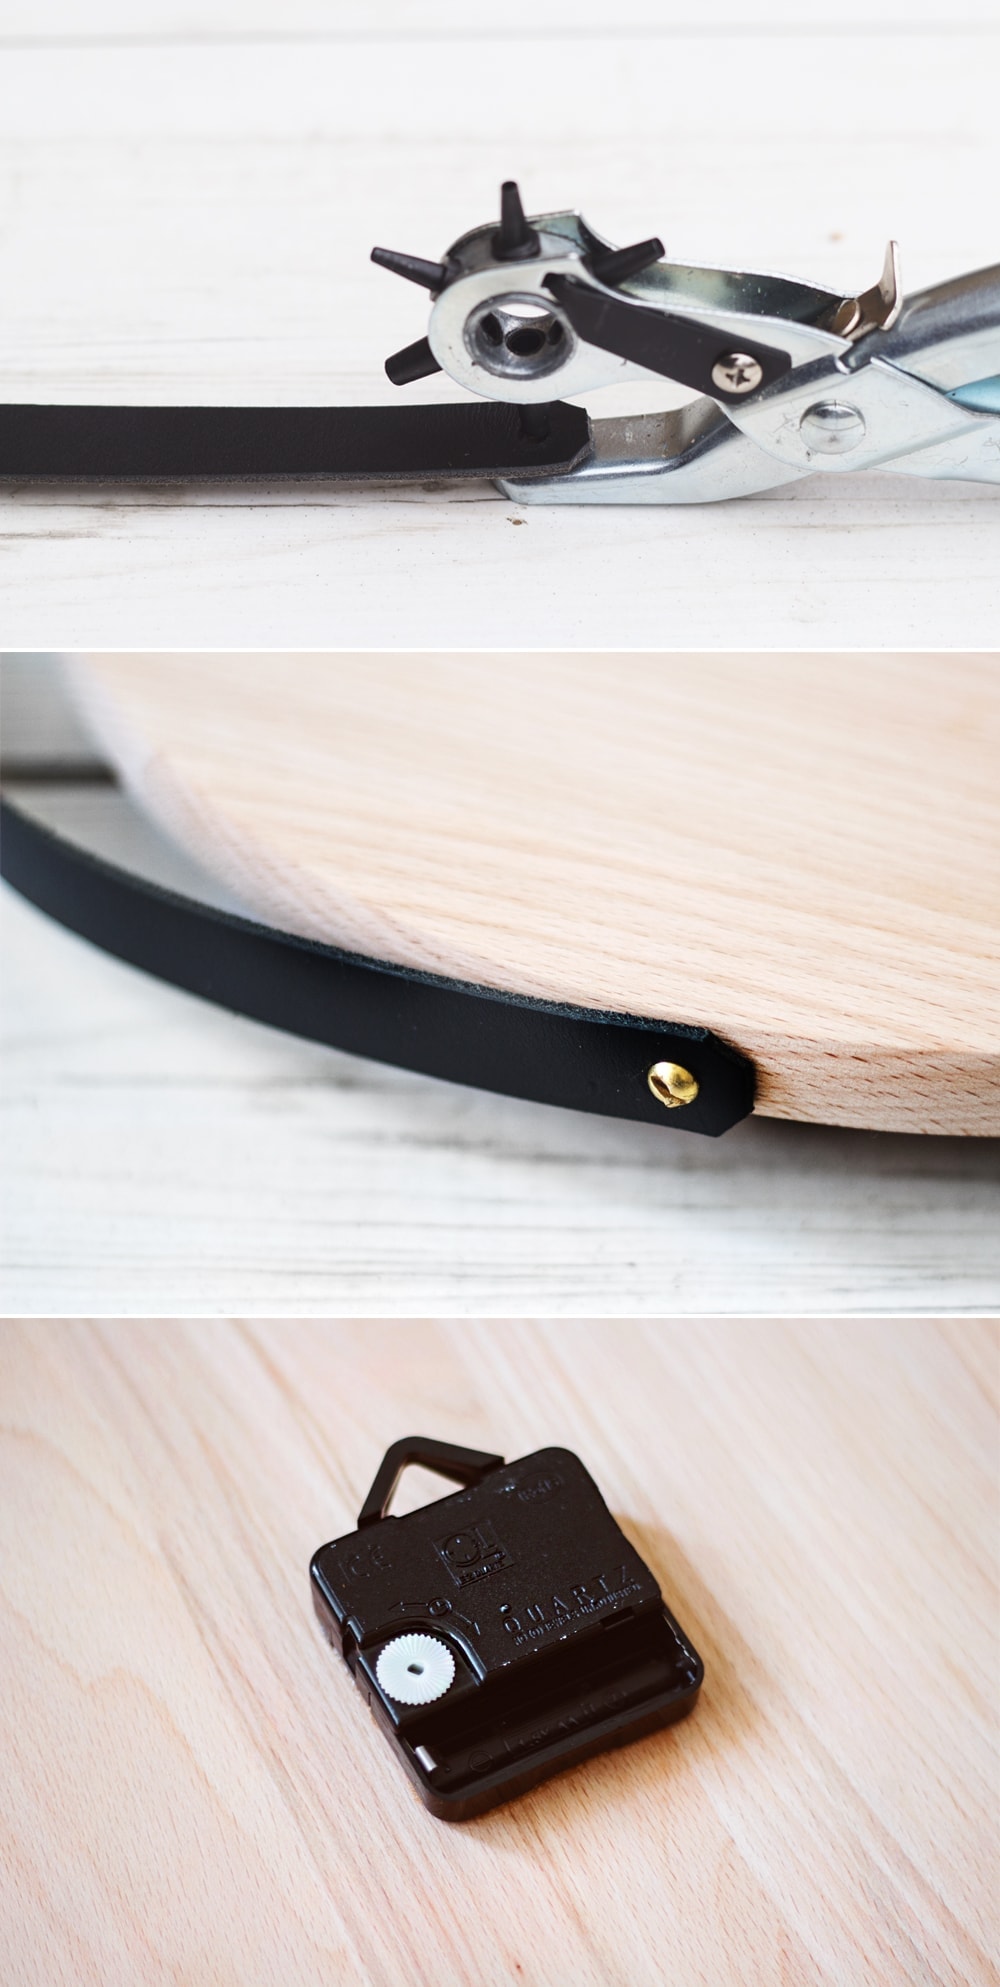
- Leather punch
- Clock mechanism (make sure it will go through the wood thickness fully)
- 2 small shallow brass screws
- Power drill
- Drill bit slightly bigger than the clock mechanism screw and a smaller drill bit for your screws
- Pencil & ruler
- Screwdriver

This is a very rare occasion where I got our power drill out but not without my husband’s supervision mind. Me being left alone with power tools would be asking for trouble when I could probably wound myself in a padded cell. Please do take a moment to appreciate my creepy double jointed thumb in the image below.

To make…
- Measure and mark the centre point point on your wooden chopping board with your pencil and ruler.
- Consider a stable surface to drill on where you will able to go all the way through. I laid the chopping board on two of our flat chairs with a gap in between. Drill the centre point the whole way through, holding steady.
- Cut a strip of the black leather to the length you want. Try holding it on the chopping board to see how long you need it. Trim the edges neatly and then make a hole in either end using the leather punch. Make sure the punch size fits the brass screws that will eventually go in.
- Then mark on the chopping board edge, where you want each screw to be fixed. I did this halfway on either side. At this stage use your drill again, with a smaller drill bit just to ever so slightly drill these points. This will give a small dip for your screws, making it much easier for them to go in.
- Place one leather end over the drilled dip, place your screw in and twist with a screw driver until the screw is flush to the leather (leather secure between the wood and the screw). Repeat on the other side.
- Thread your clock mechanism through the central hole in the chopping board and follow the instructions you received to put it all together with the hands. There will usually be a washer you need to tighten to stop it all coming apart.
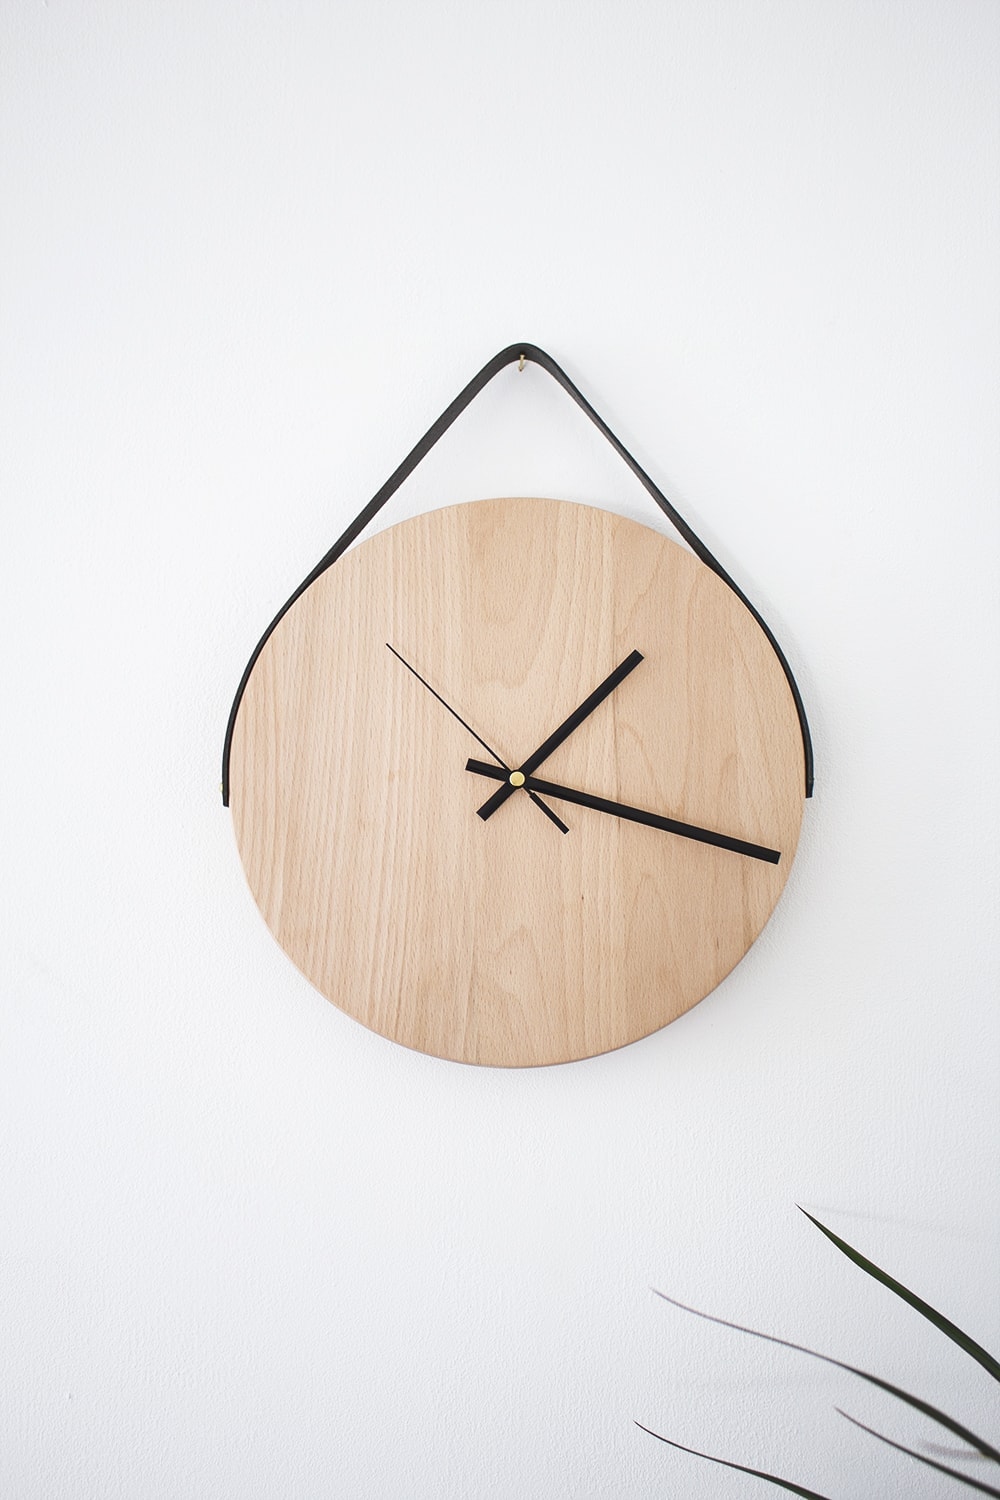
- Get yourself a battery and hang your clock in pride of place!
All those tools might sound a little intimidating but if I can do it, you guys definitely can! It’s simple, chic and will be a welcome addition to any room. I’m so looking forward to sharing another affordable home tip with you tomorrow!
 Thanks to Keep Moat for funding this series of DIY projects. All ideas however are my own.
You might also like


Meet The Lovely Drawer

Hi, I’m Teri and welcome to my own creative corner of the internet. I blog about interiors, DIY projects, design inspiration and my general life so stick around have a read and say hi.
In the shop

 Quick ViewSelect options
Terrace 1
£20.00 – £25.00
 Quick ViewSelect options
Personalised Cuddly Bunny
£30.00 – £35.00
Work with Me
The Lovely Drawer is an award winning blog with a loyal audience that has grown over the years. I love working with brands small and large on exciting collaborations that can bring products alive in my own signature aesthetic.