

Affordable home tip no 2
 Thanks for joining me for DIY no 2 as part of Keep Moat’s ‘Affordable Home Tips’ project. Each day I’m sharing a new idea to spruce up your home on a budget. Today I bring you this cute woven planter off the back of the huge weaving trend that’s been filling our Pinterest feeds for the last 6 months or so. Why keep weaving flat? This is a mini planter but you could easily make larger versions with different colours and threads woven through. You could get really creative with this one!
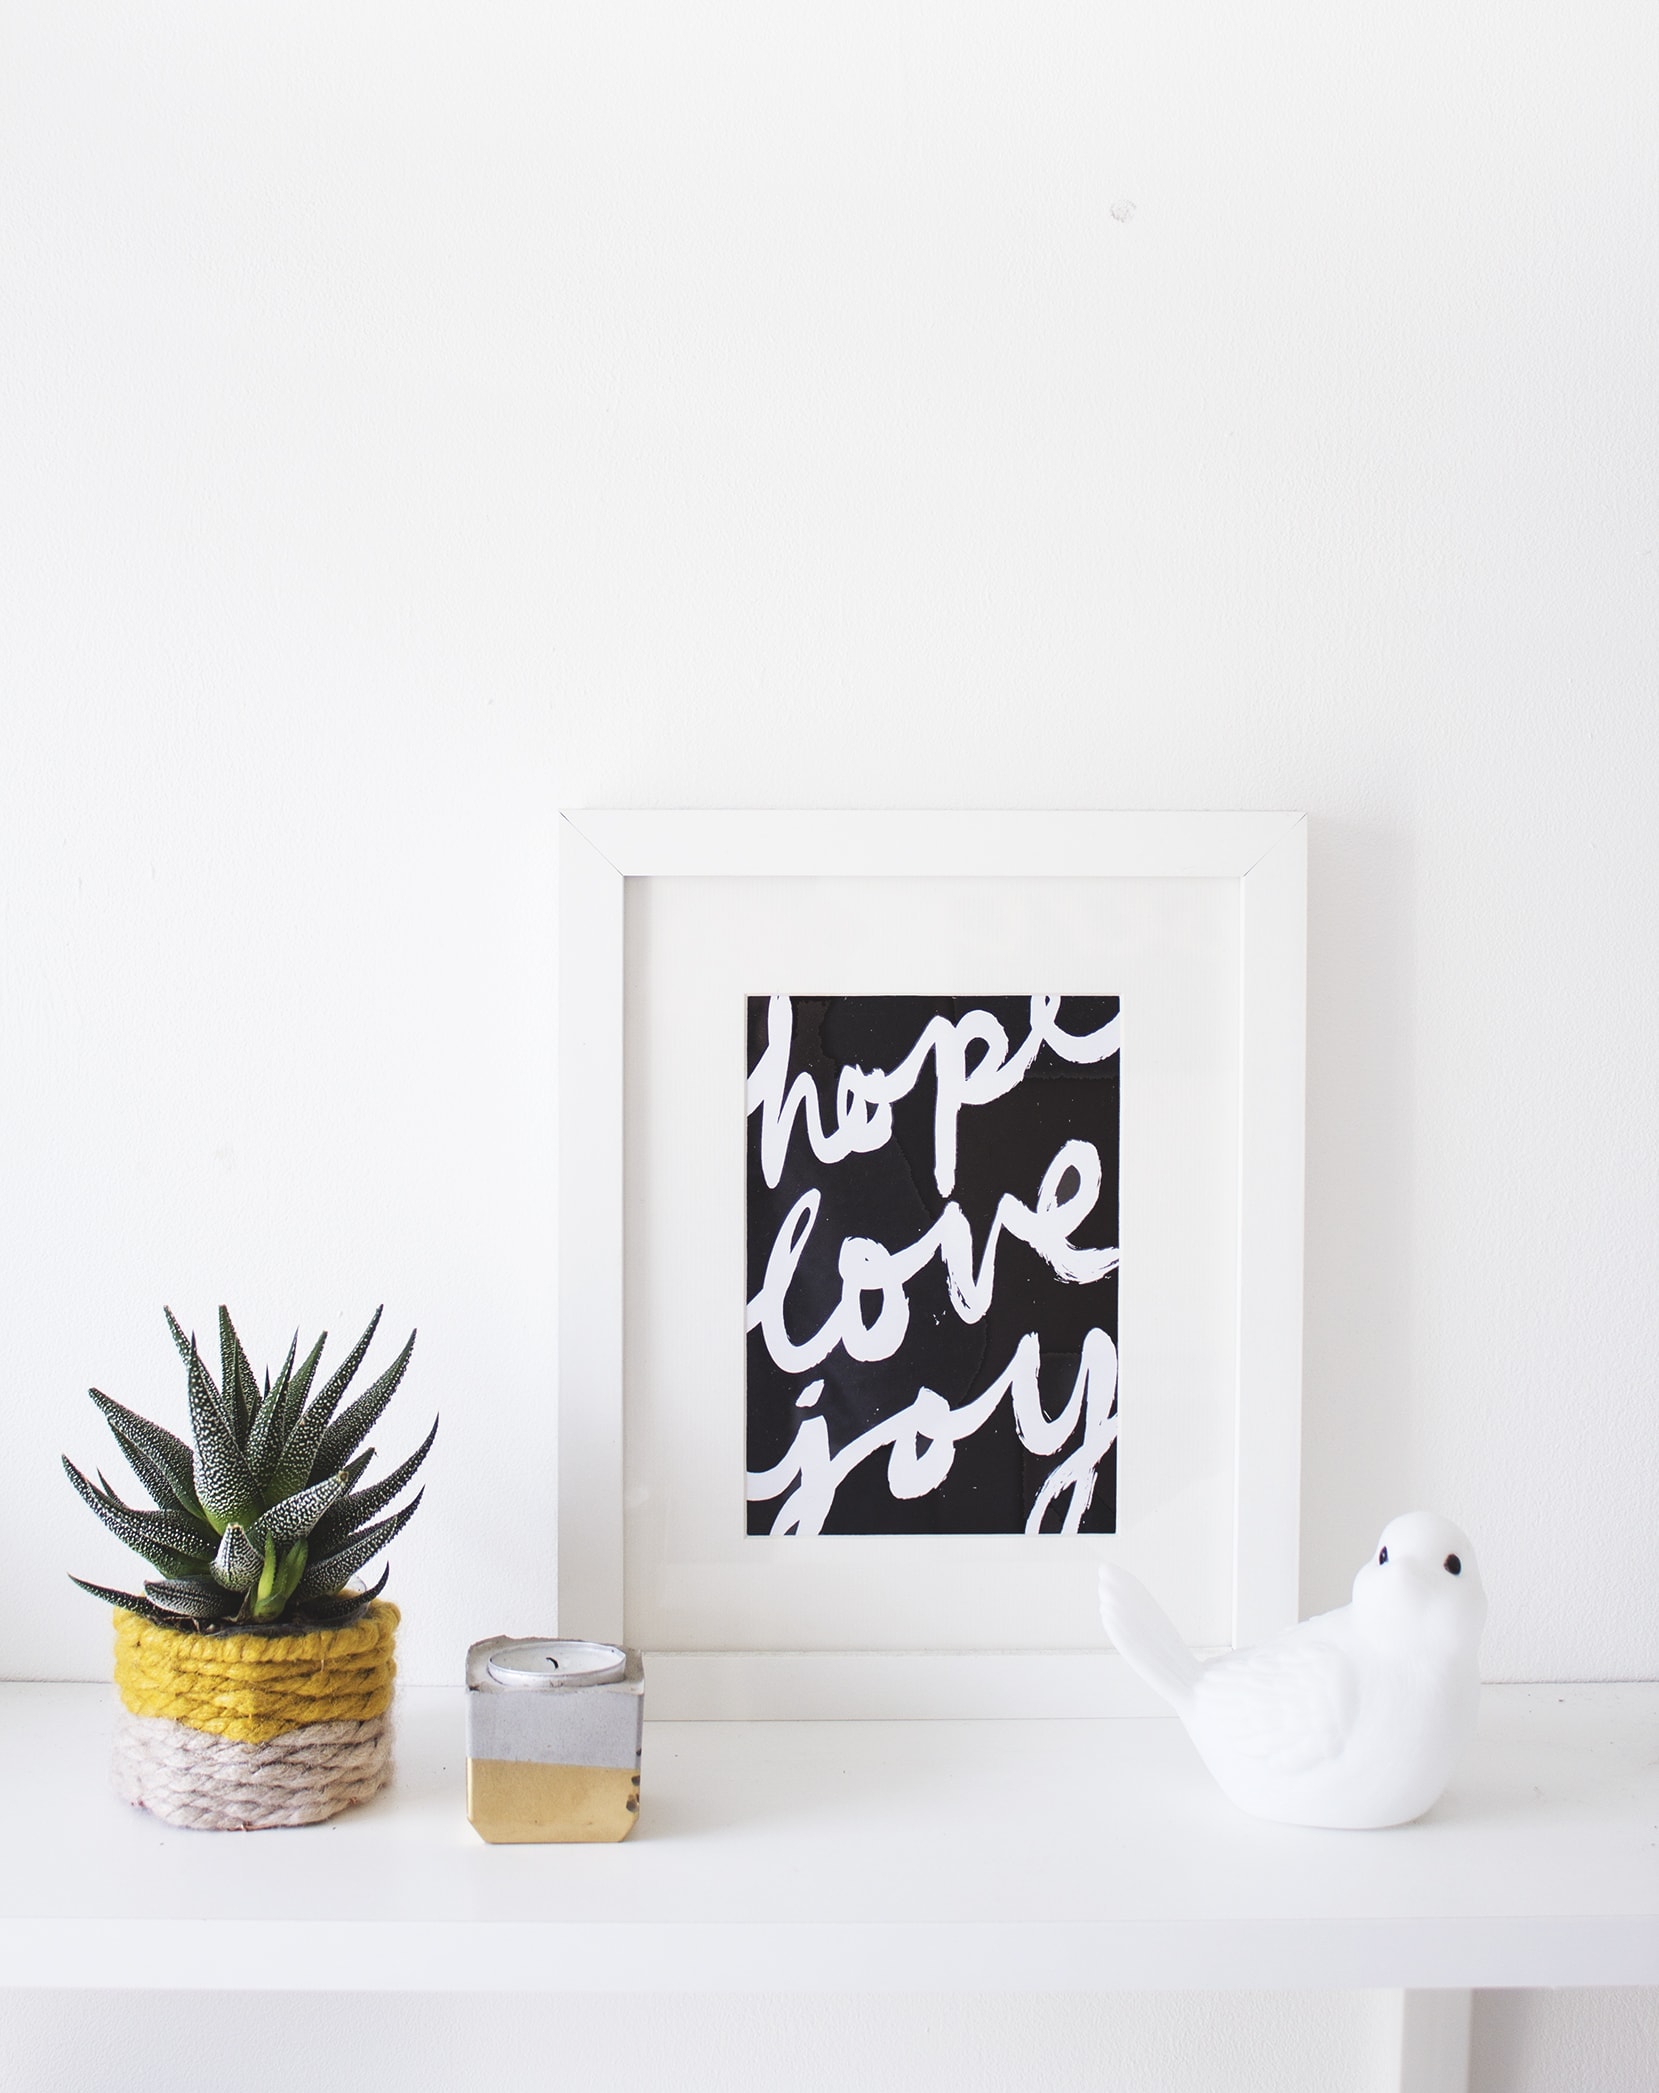 Look at this little guy brightening up the shelf! I’m imagining a whole shelf of them in different colour combos. I wasn’t sure how well the wire would hold up but it seems to have worked really well and what I love about this DIY even more is that it involves so few materials and they’re all things you’d usually find at home!
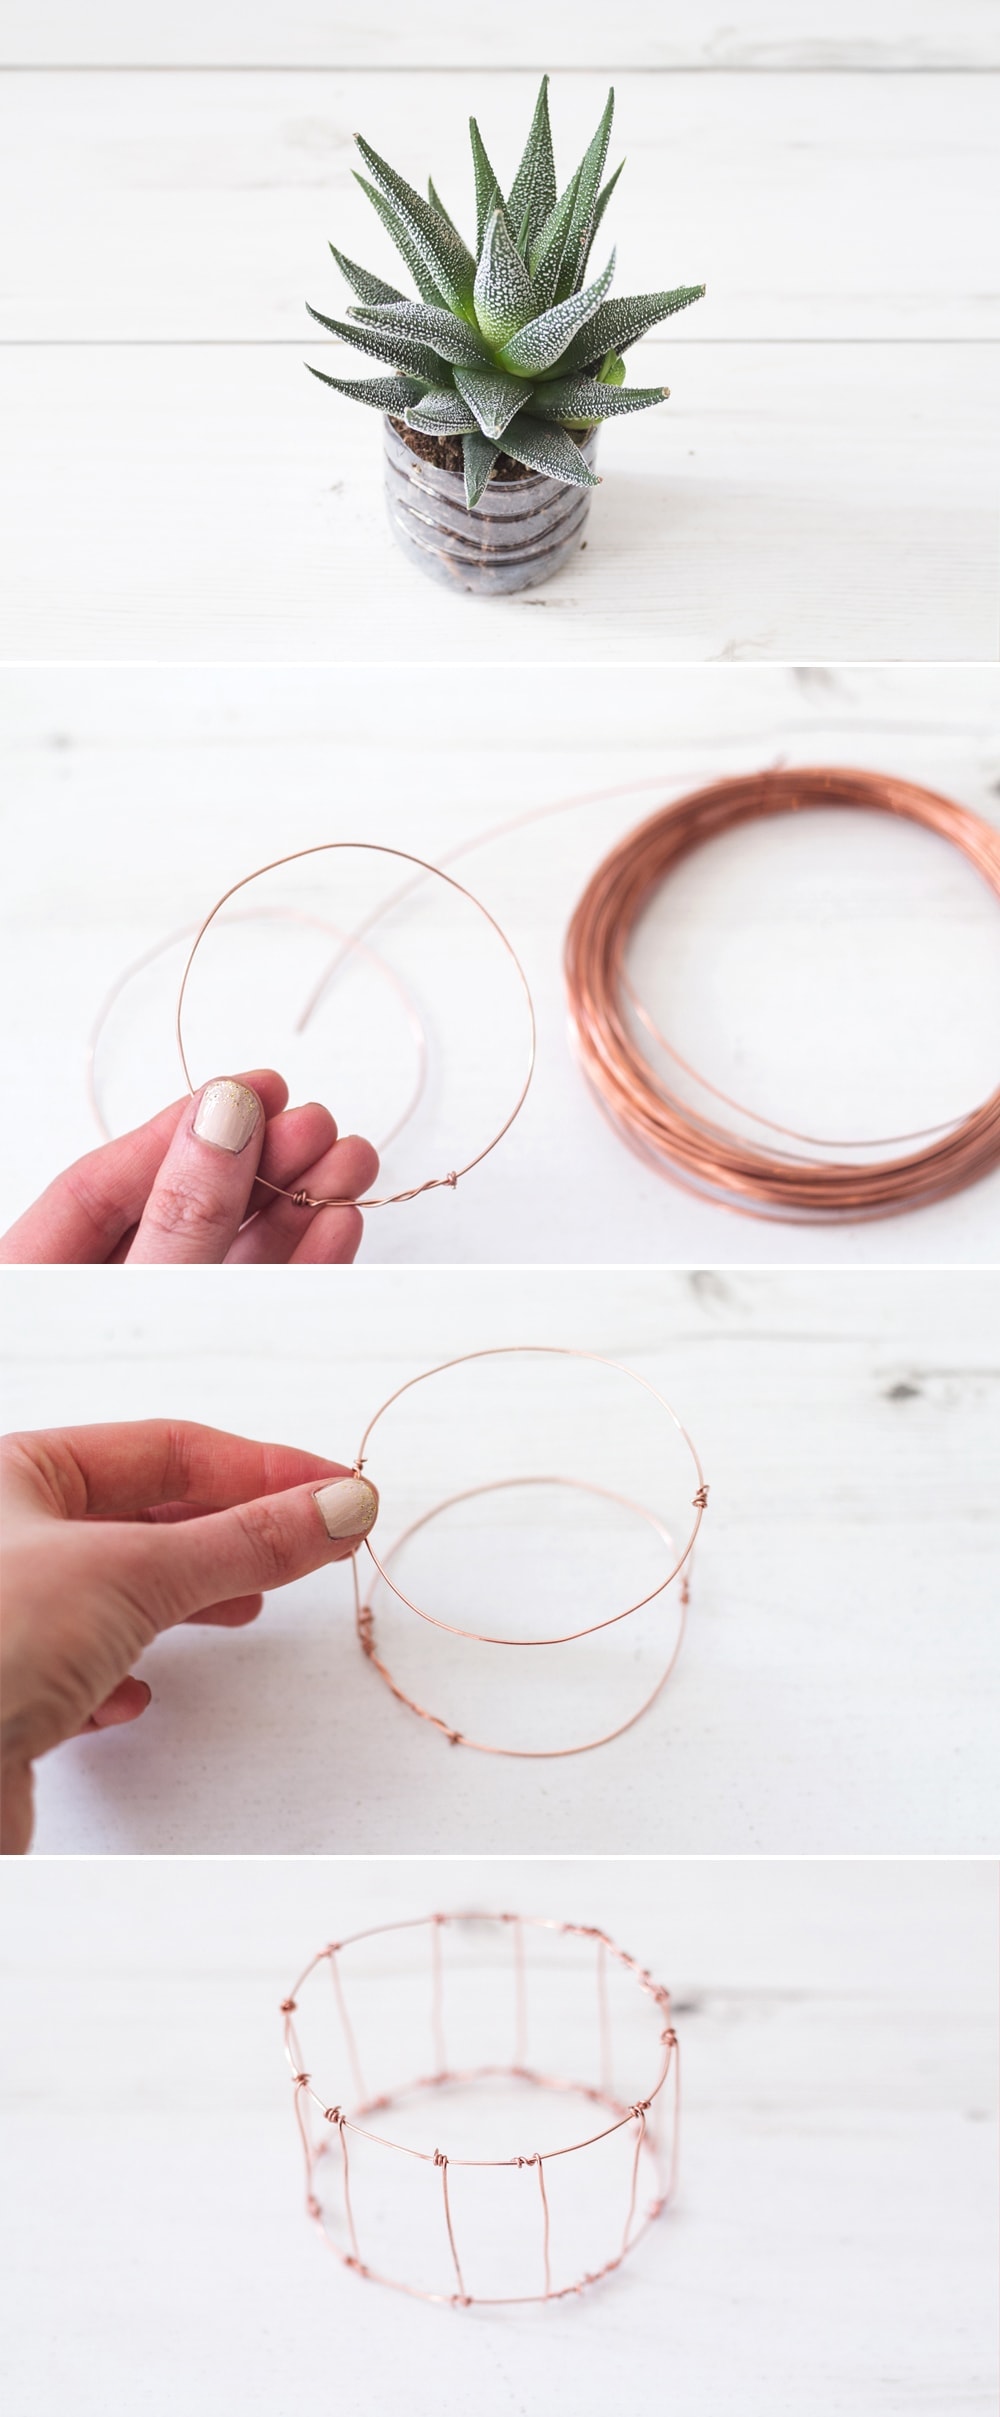
You’ll need…
- Thin wire that’s easy to handle but holds it’s shape
- Thick wool of your choice
- Pliers (although I just used my fingers)
- Wire cutters
- Plastic water bottle
To make…
- Start by cutting the top off your plastic water bottle to form a streamline, waterproof pot. Punch 3 holes in the bottom for when you water the plant in the future. Transfer your plant into the bottle.
- Make two circles with your wire. Twist the ends over to finish and trim the wire to remove spiky excess.
- Then cut lengths of wire to bridge the gap between the two wire circles. This will form your pot shape. Attach the wire to the top and bottom by once again twisting the ends round. Continue doing this so they are evenly spaced all the way round.
- Thread the wool under and over the wire always meeting at the same point at what will be the back. Tie in a tight knot so that the wool isn’t loose and yet not so tightly that it pulls the wire out of shape.
- Continue this, working your way up the the pot to the top, making sure you squish each layer together so there aren’t gaps.
- To finish the top off neatly, take another length of wool and wrap around the whole top circle of wire to cover it up and tie another knot in the same place at the back.
- Trim the excess wool as closely as you can to the knots to neaten it up and slide your plant in. The water bottle pot will protect the wool from getting damp and dirty and when you need to water the plant you just take that part out to do your thing!

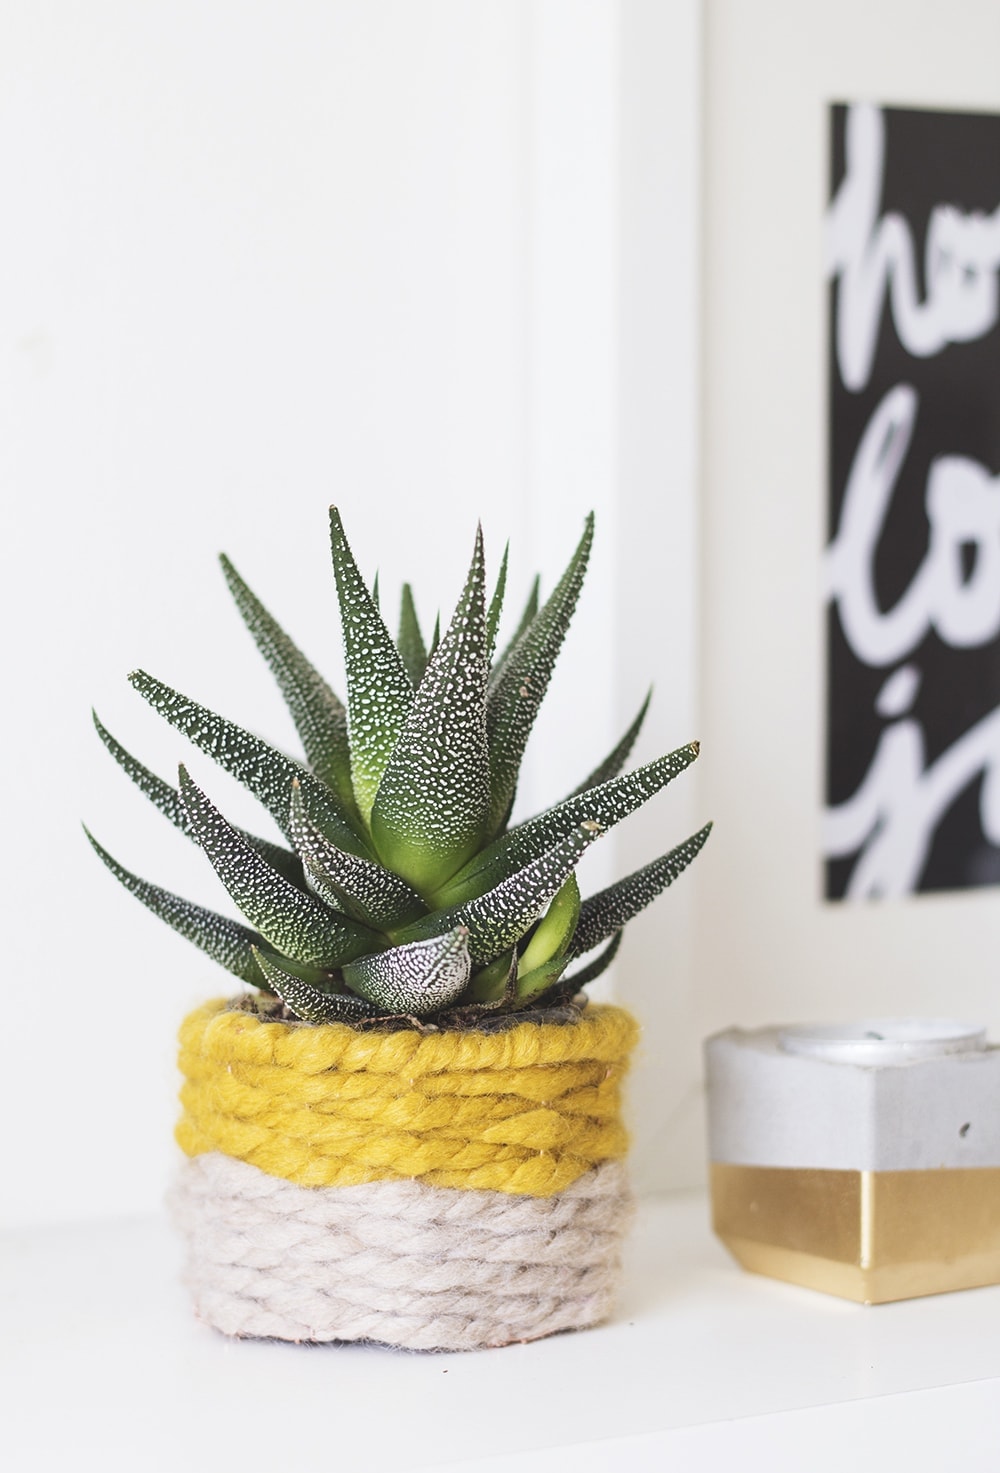
And there you have your sweet little planter. I’m slightly envious of how cosy it looks nestled in there. Tomorrow I’ll bring you my final affordable home tip in this series and it might be the simplest yet! A quick one to rustle up for the weekend perhaps.
 Thanks to Keep Moat for funding this series of DIY projects. All ideas however are my own.
You might also like


Meet The Lovely Drawer

Hi, I’m Teri and welcome to my own creative corner of the internet. I blog about interiors, DIY projects, design inspiration and my general life so stick around have a read and say hi.
In the shop

 Quick ViewSelect options
Terrace 1
£20.00 – £25.00
 Quick ViewSelect options
Orchard Days
£20.00 – £25.00
Work with Me
The Lovely Drawer is an award winning blog with a loyal audience that has grown over the years. I love working with brands small and large on exciting collaborations that can bring products alive in my own signature aesthetic.