

Celebrating National Tile Week

National Tile Week is back for it’s second year, running all this week (10-17th April) and to celebrate there will be various events to focus our attention on the best of British design and manufacture when it comes to the once humble tile. Tiles have definitely seen a massive growth in popularity over the last couple of years and if Instagram is a barometer then you’ll have notice capturing your pretty shoes on an even prettier tiled floor has become ‘total Instagram goals’ and even developed it’s own hashtag.
National Tile Week is being launched by Julie Kendell, best know for her work on DIY SOS and 60 Minute Makeover and says,
“I’m a huge advocate of tiles as they are virtually indestructible and brilliantly practical in the home. Hygienic and easy to clean, they will take all the knocks that day–to-day life can throw at them, making them a superior surface material,” explains Julia. “National Tile Week is a great opportunity to focus on and celebrate tiles in all their colourful glory! It’s a great way to inspire creativity and illustrate the many ways they can be used around the home to create beautiful and unique interiors.”
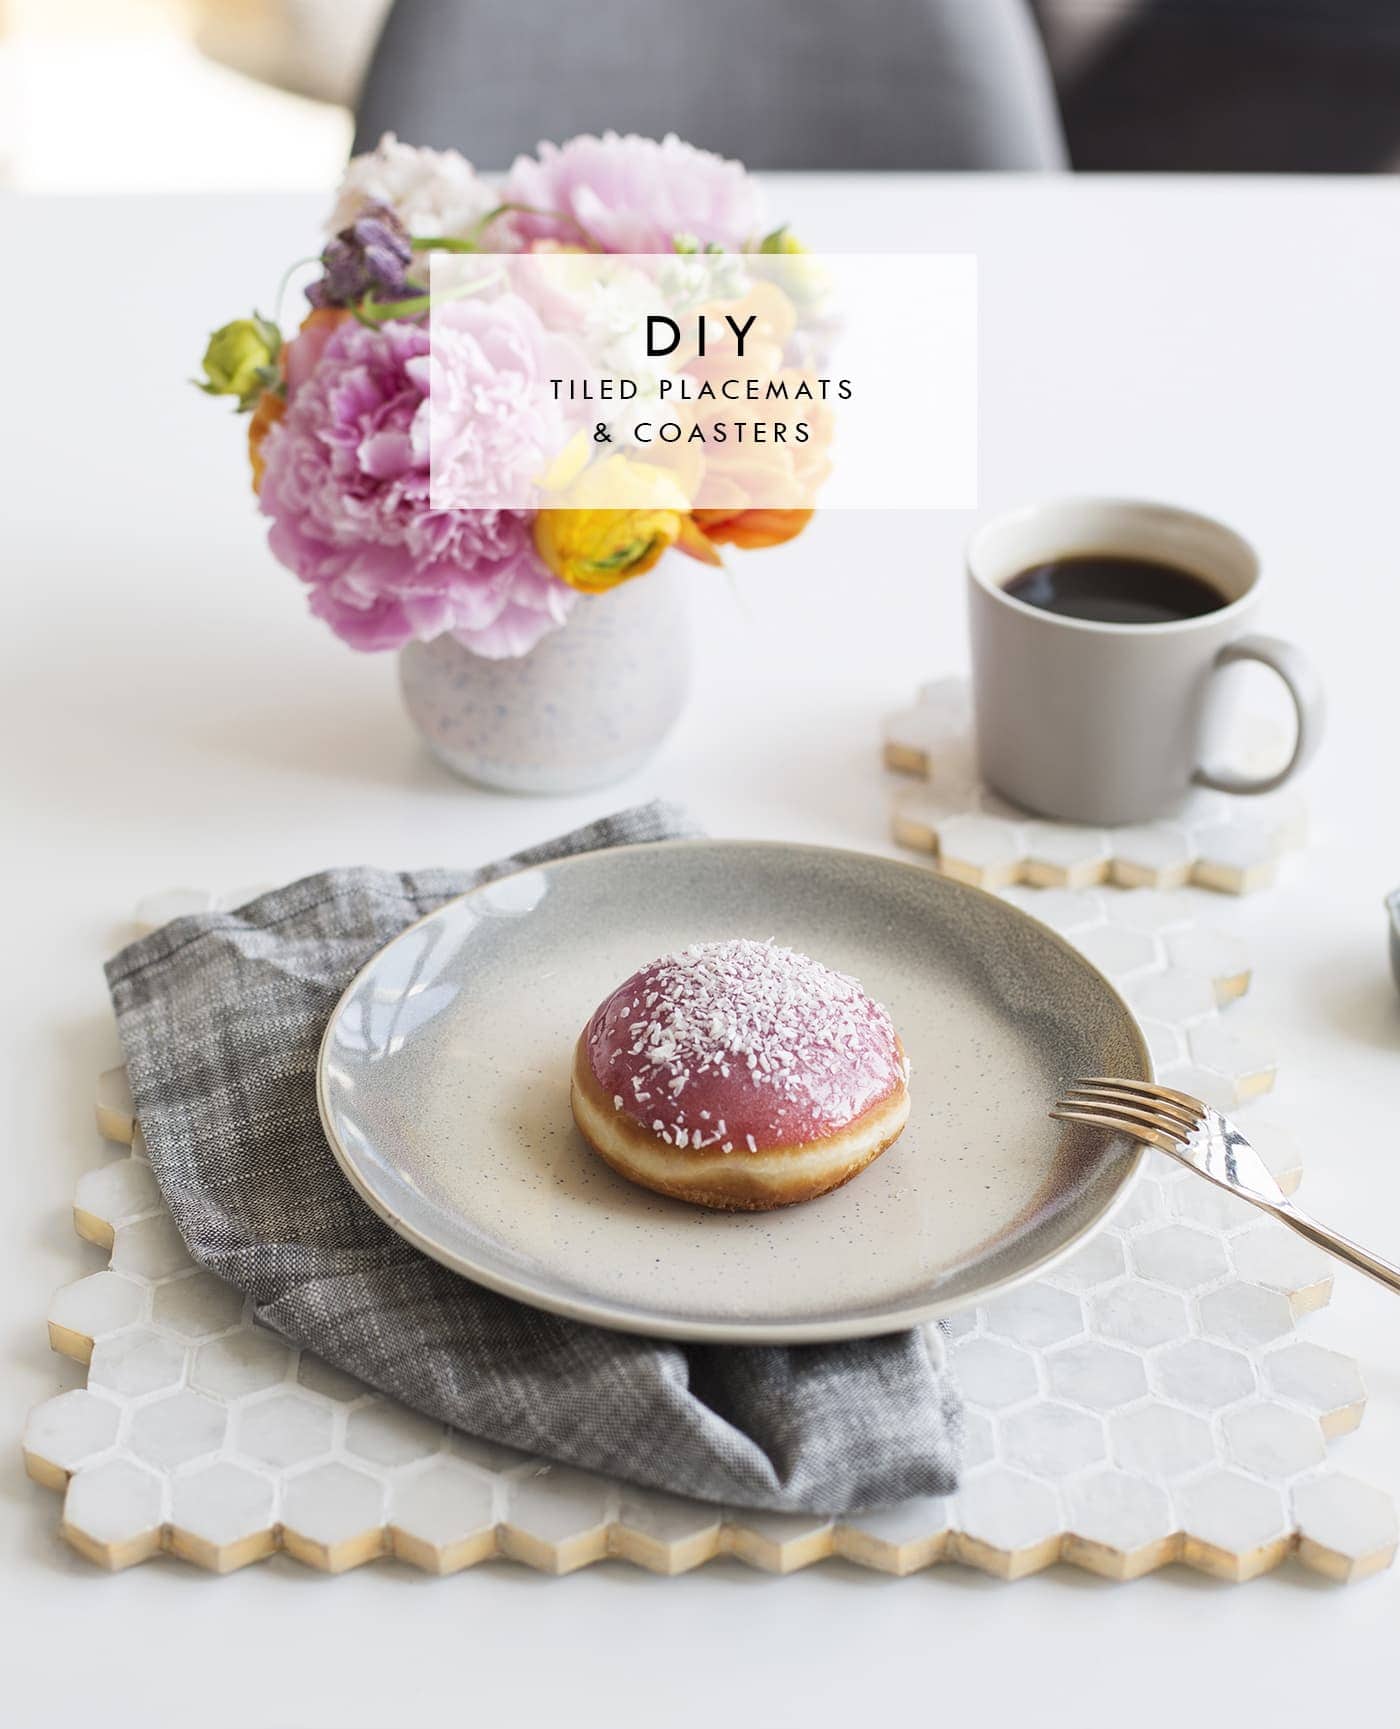
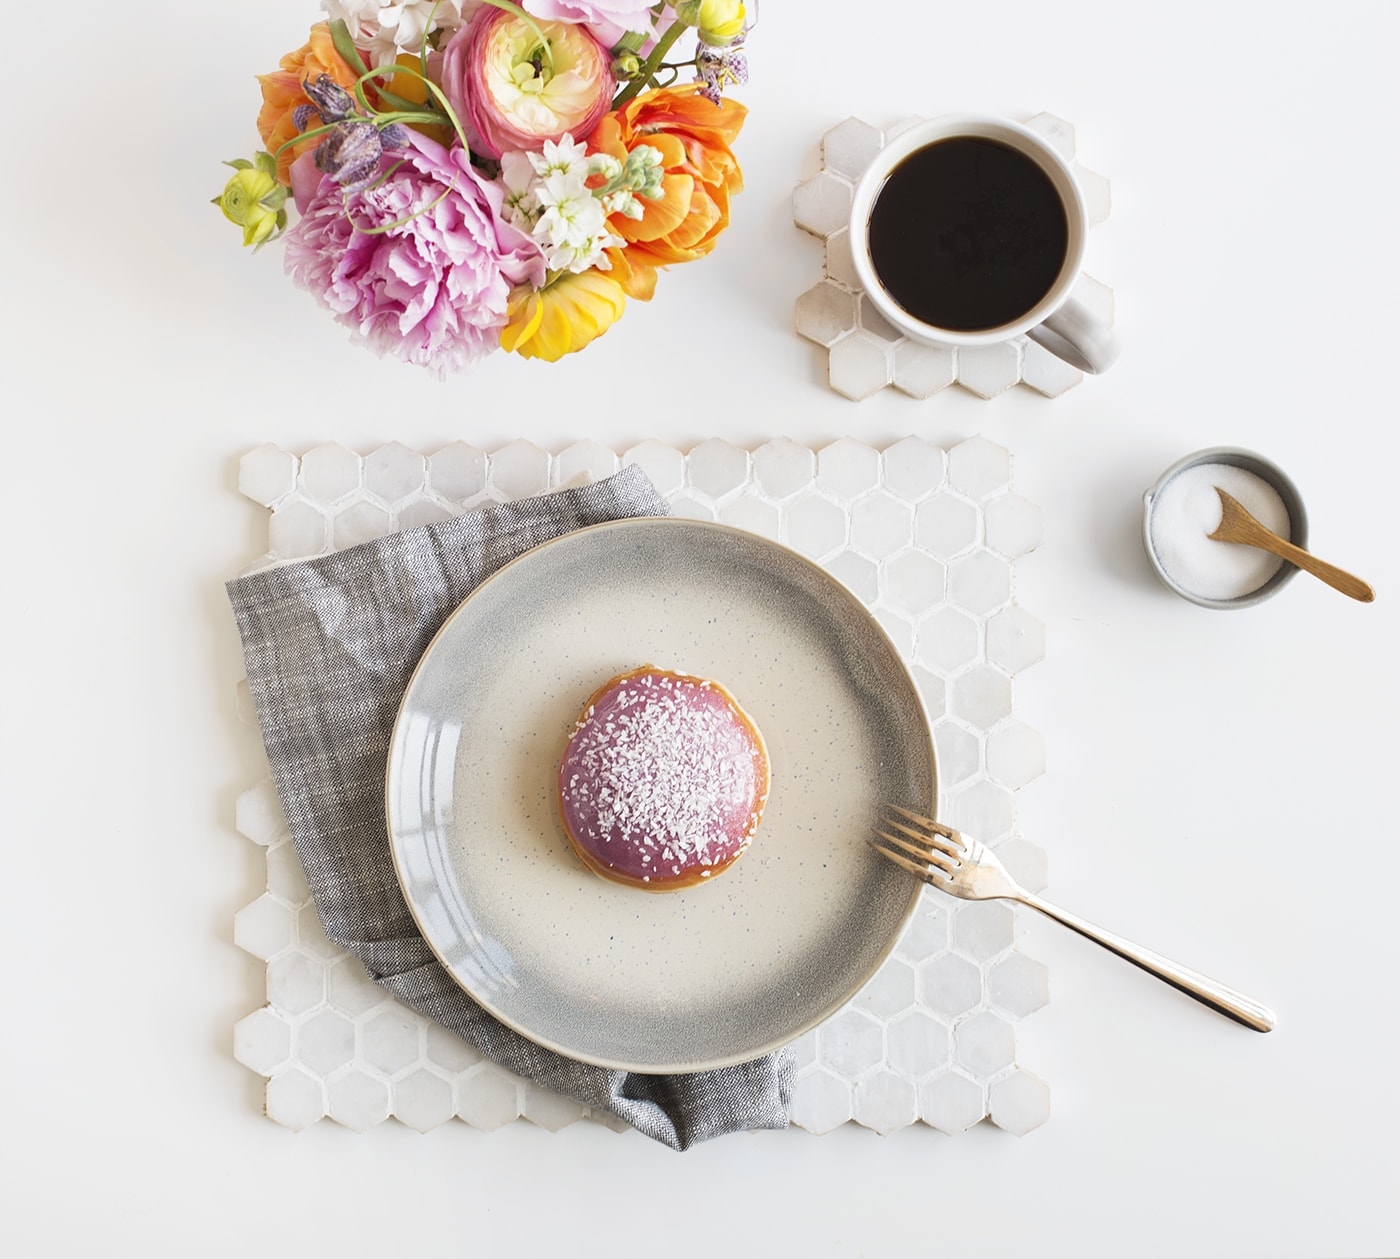
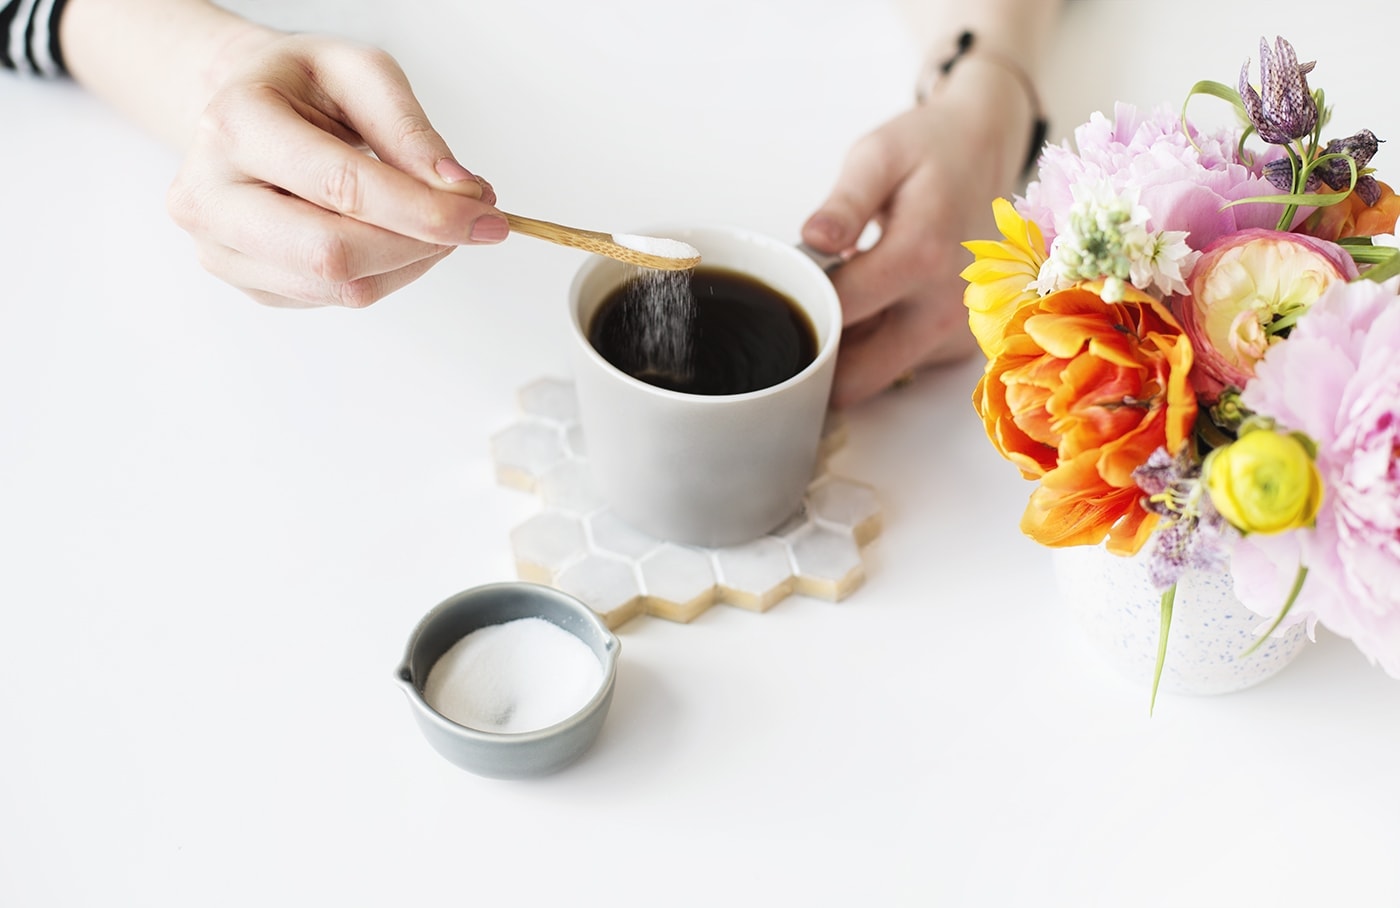
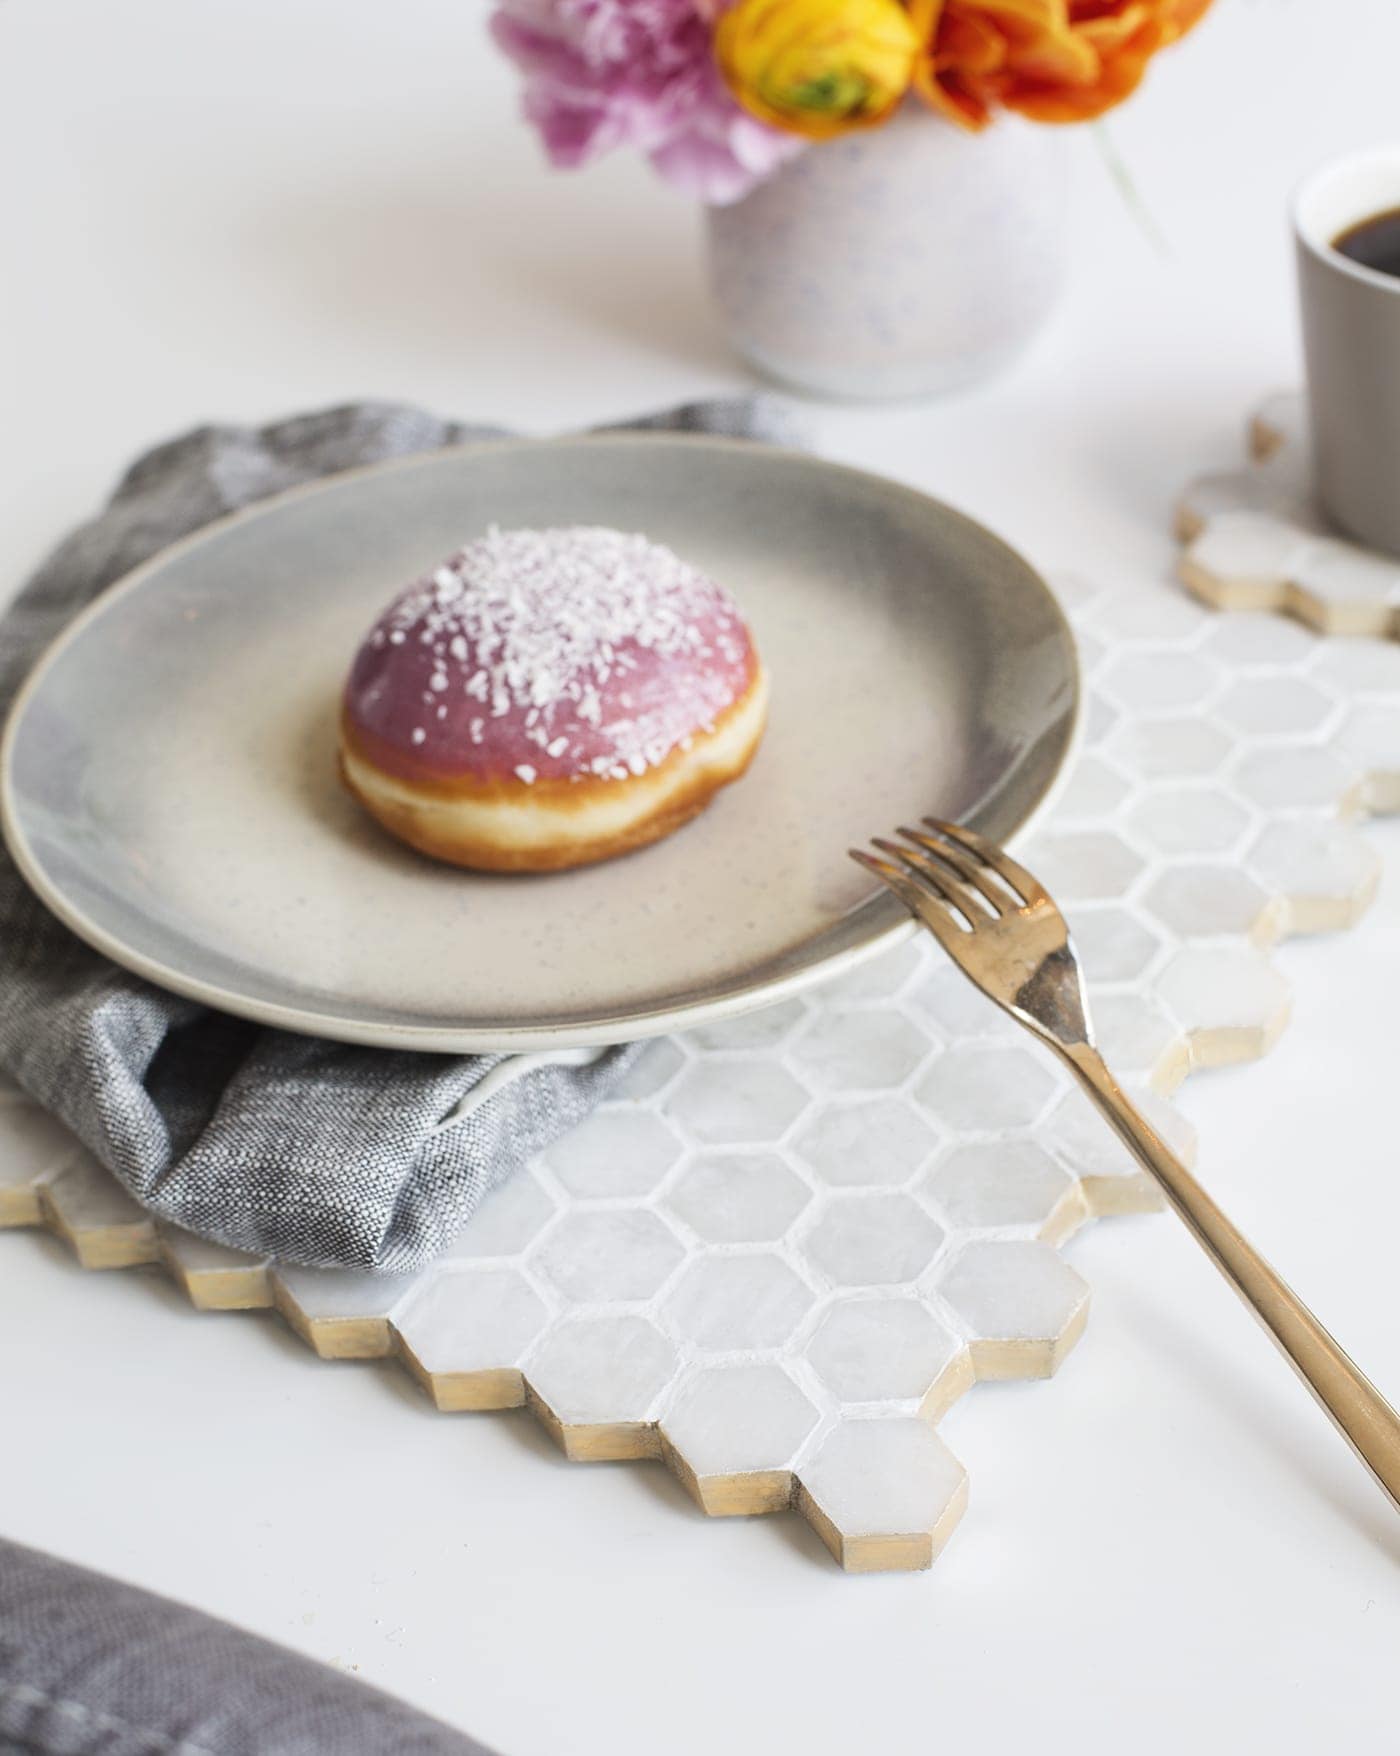
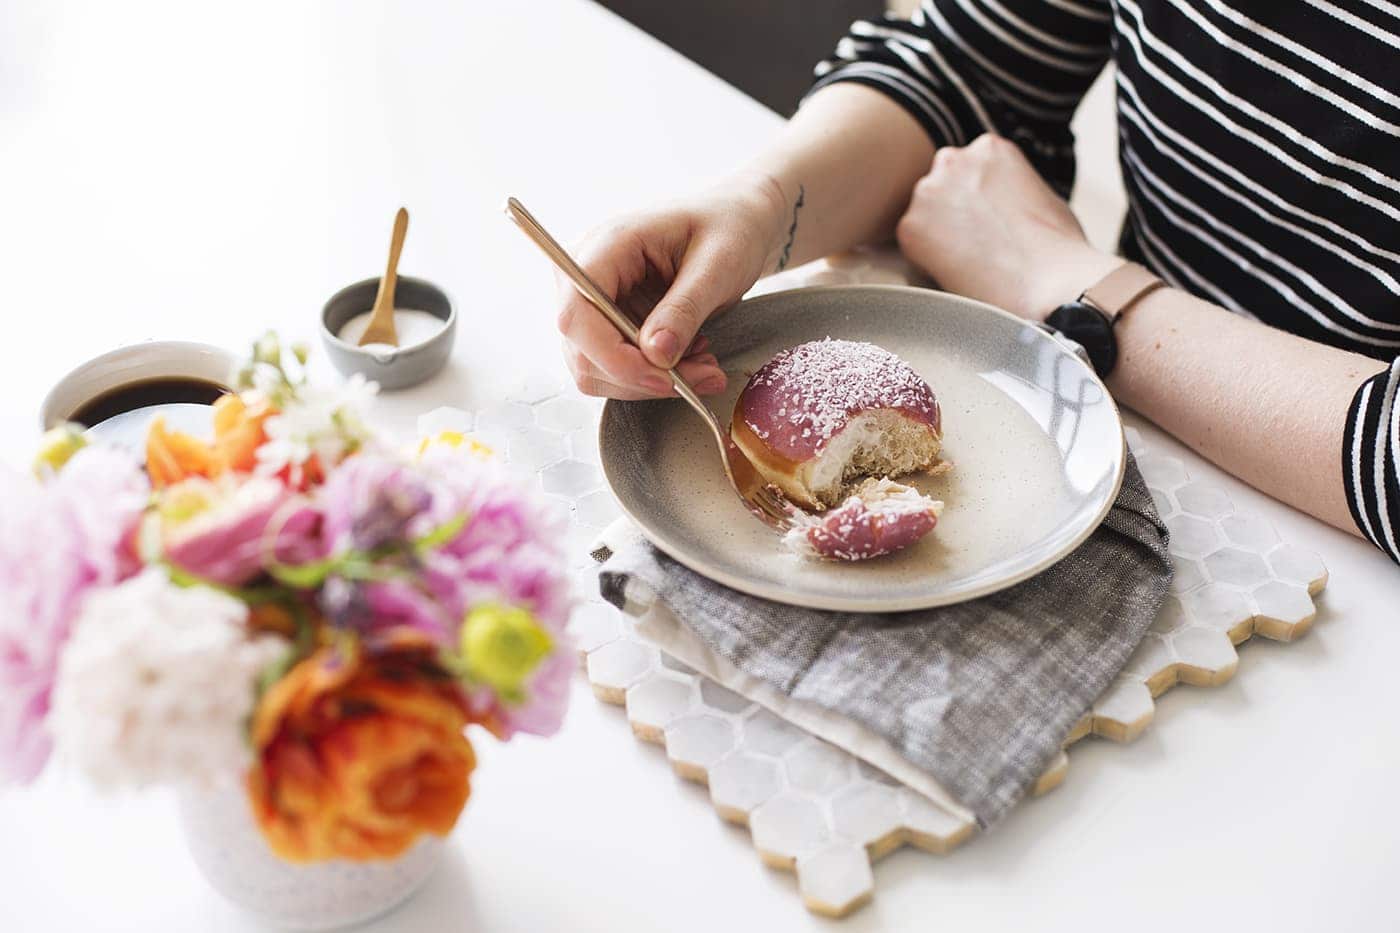
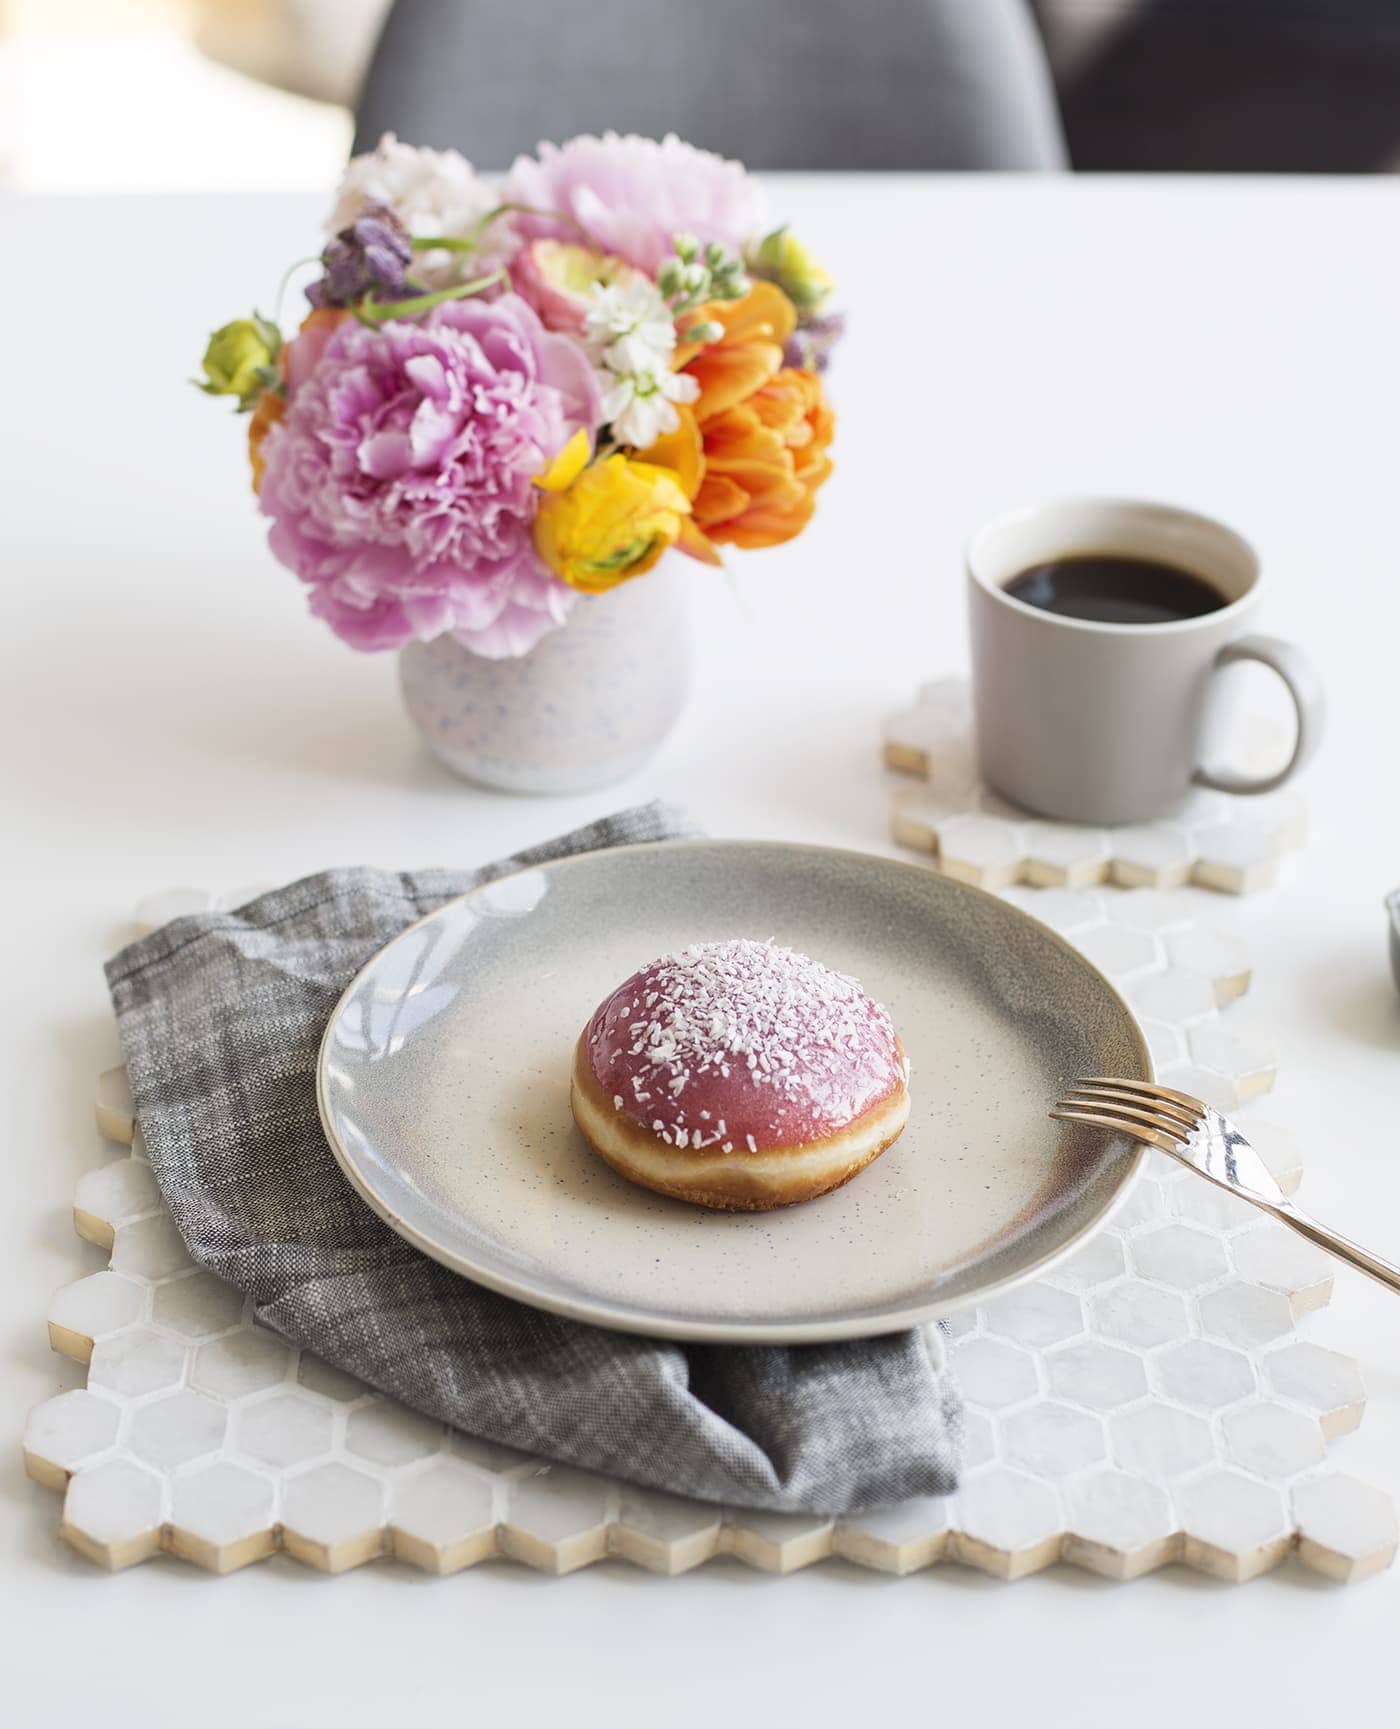
British Ceramic Tile have been supporting this tile appreciation party by trying to show us how tiles can be re-purposed for all sorts of uses around the home and it just so happens that I’ve teamed up with them to transform one of my favourite of their tiles styles into these DIY place mats and coasters. Pretty stylish huh? Their also running an exciting competition to win a swanky trip to London for the duration of National Tile Week. Enter right here.
For this DIY I was really inspired by these beautiful hexagonal tiles and wanted to bring them to the dining table for those times when I want things to look a little more special. The tonal effect running through them works really well against the metallic gold trim.
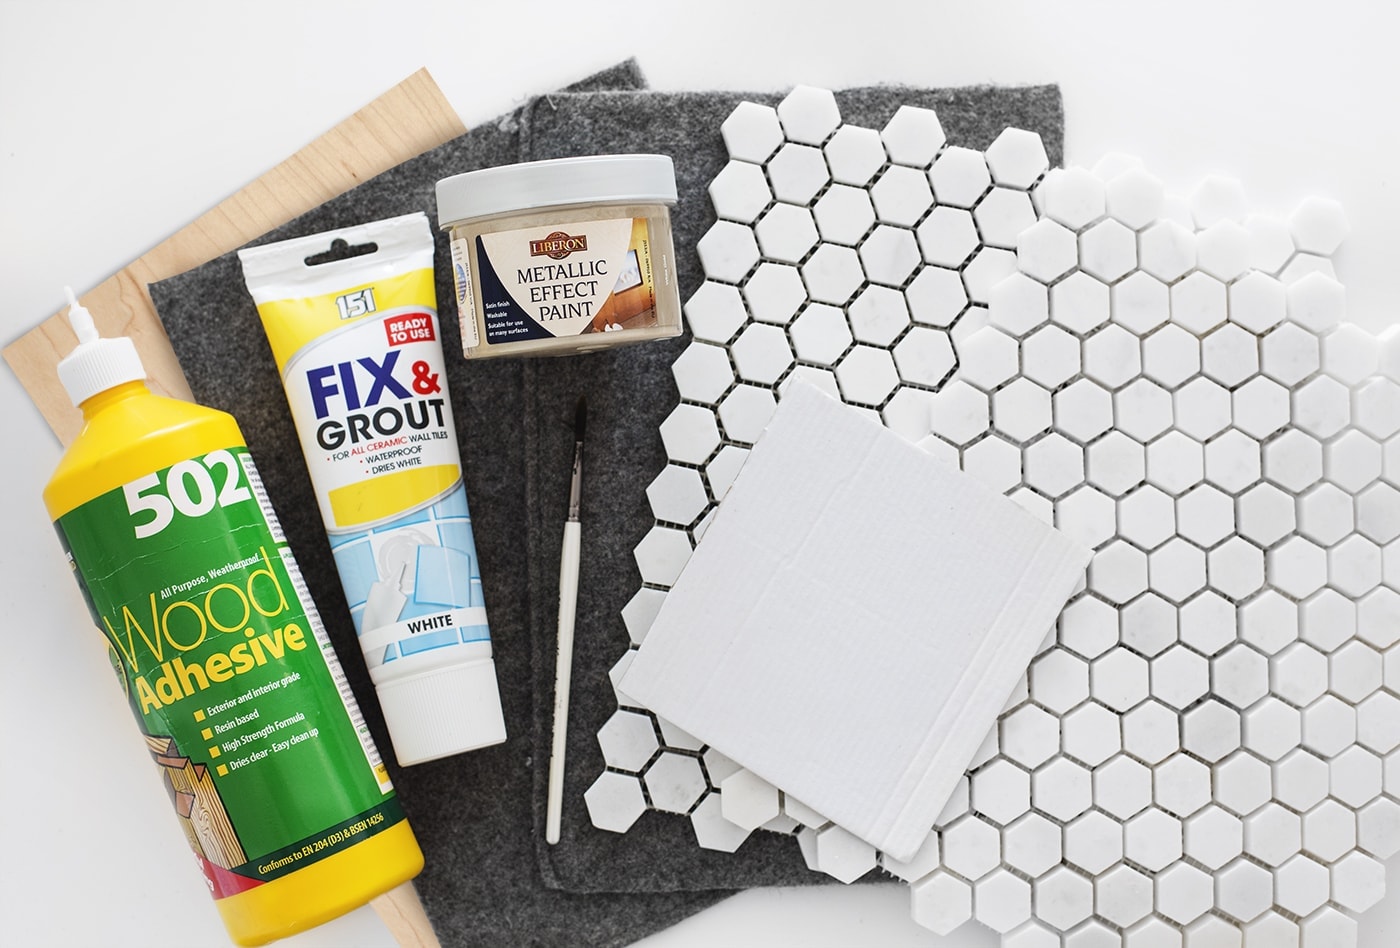
Materials:
- White Hexagon Stone Mosaic tile sheets ( 1 tile sheet will make 1 place mat / 4 coasters
- 1 x felt rectangle per placemat and a smaller version for each coaster
- 1 x plywood rectangle per placemat (not totally necessary for the coasters)
- Strong wood adhesive
- Scissors and a kraft knife a scalpel
- Tube of Fix & Grout in ‘white’ (1 tube will make about 1.5 place mats and about 3 coasters
- Squares of cardboard if you don’t fancy buying a grouting trowel
- Metallic effect tile paint
- Paint brush
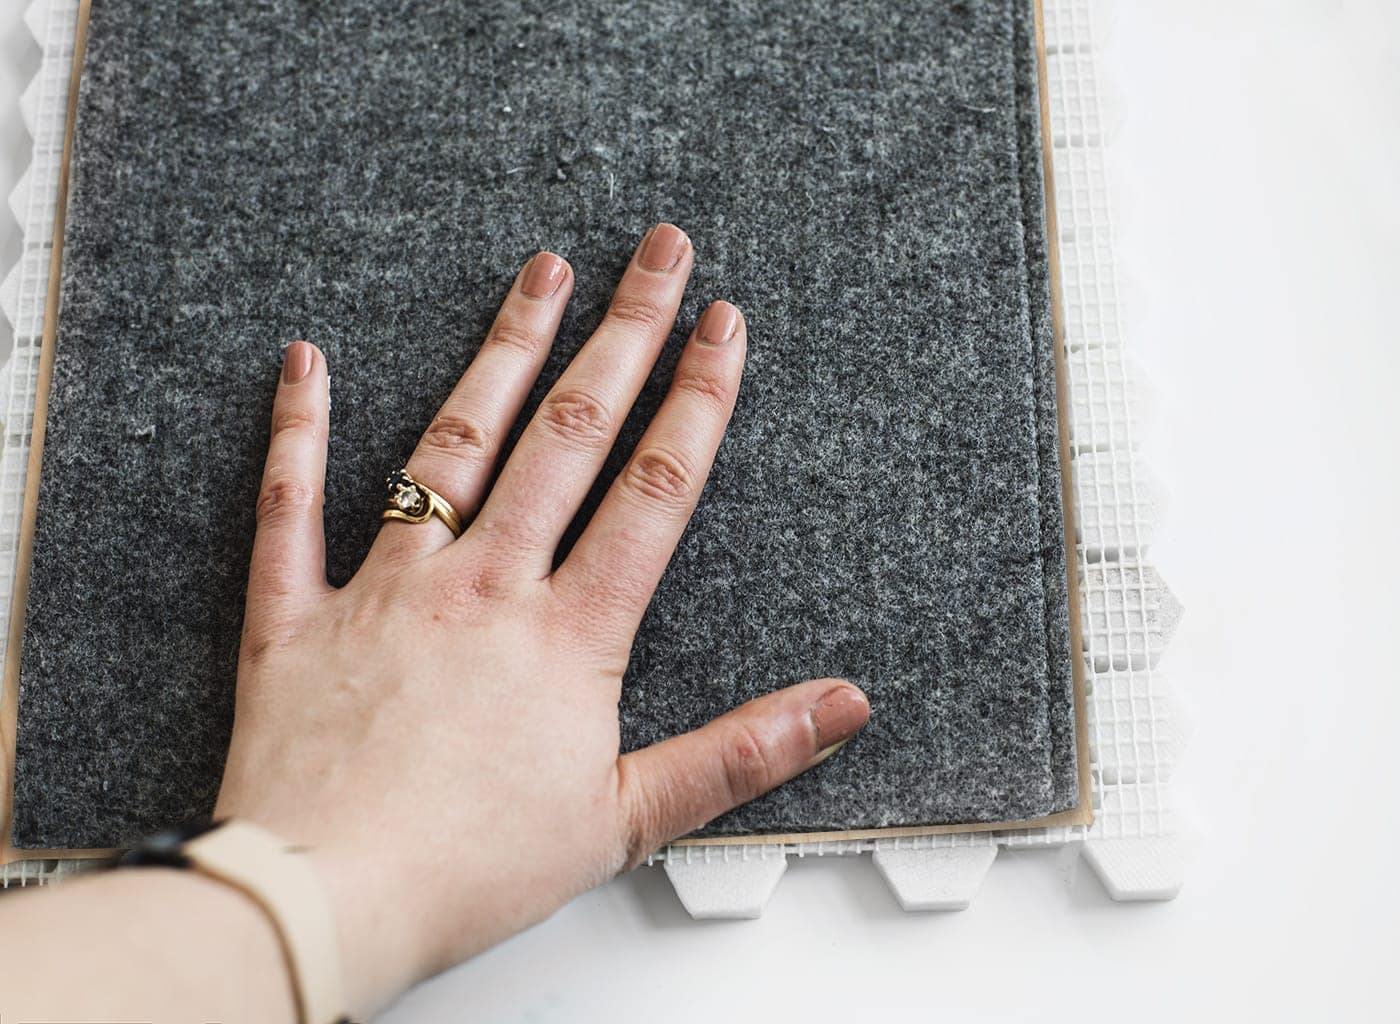
Start by taking a tile sheet and first of all glueing this with the wood glue, onto the back. Ideally yours would reach even closer to the edge of the tile sheet than mine as this gives maximum support, but make sure it’s not poking out the edges. Then you can use the same glue to secure the felt rectangle over the top. This will prevent scuffing and scratching on any table surfaces. Place something heavy on top to give the layers pressure as they dry.
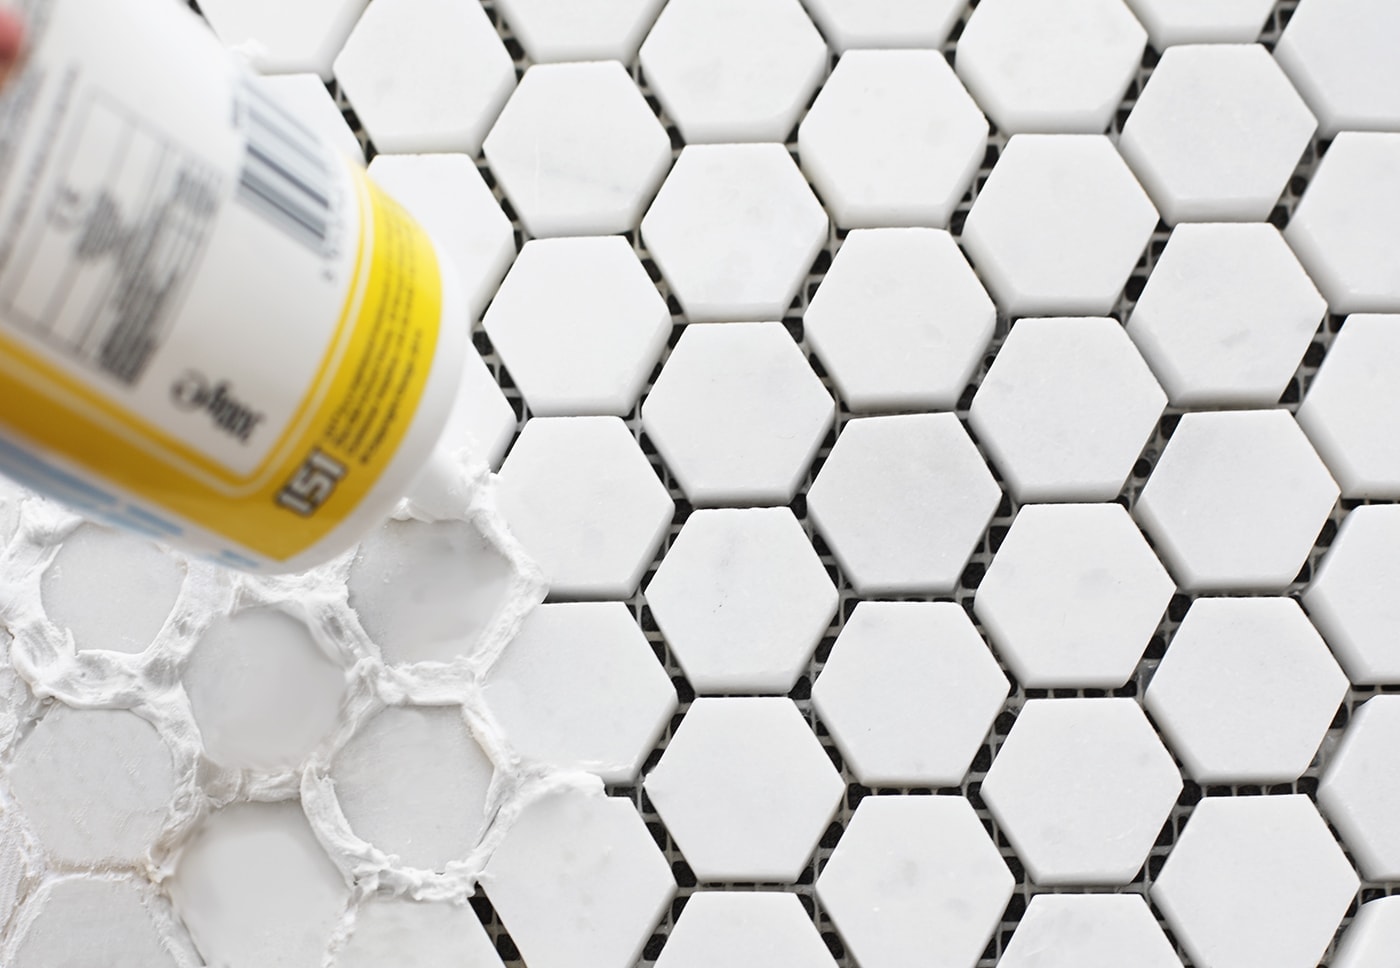
The glue should be dry within an hour. The next step is to turn the mats over and apply the grouting. Trim the nozzle and start squeezing into the gaps, allowing the substance to fill them right to the bottom. Work in sections, taking a quarter at a time but make sure you work right up to each edge. If you’re making the coasters there’s no need to take this is sections, just complete this step and move on to the following two.
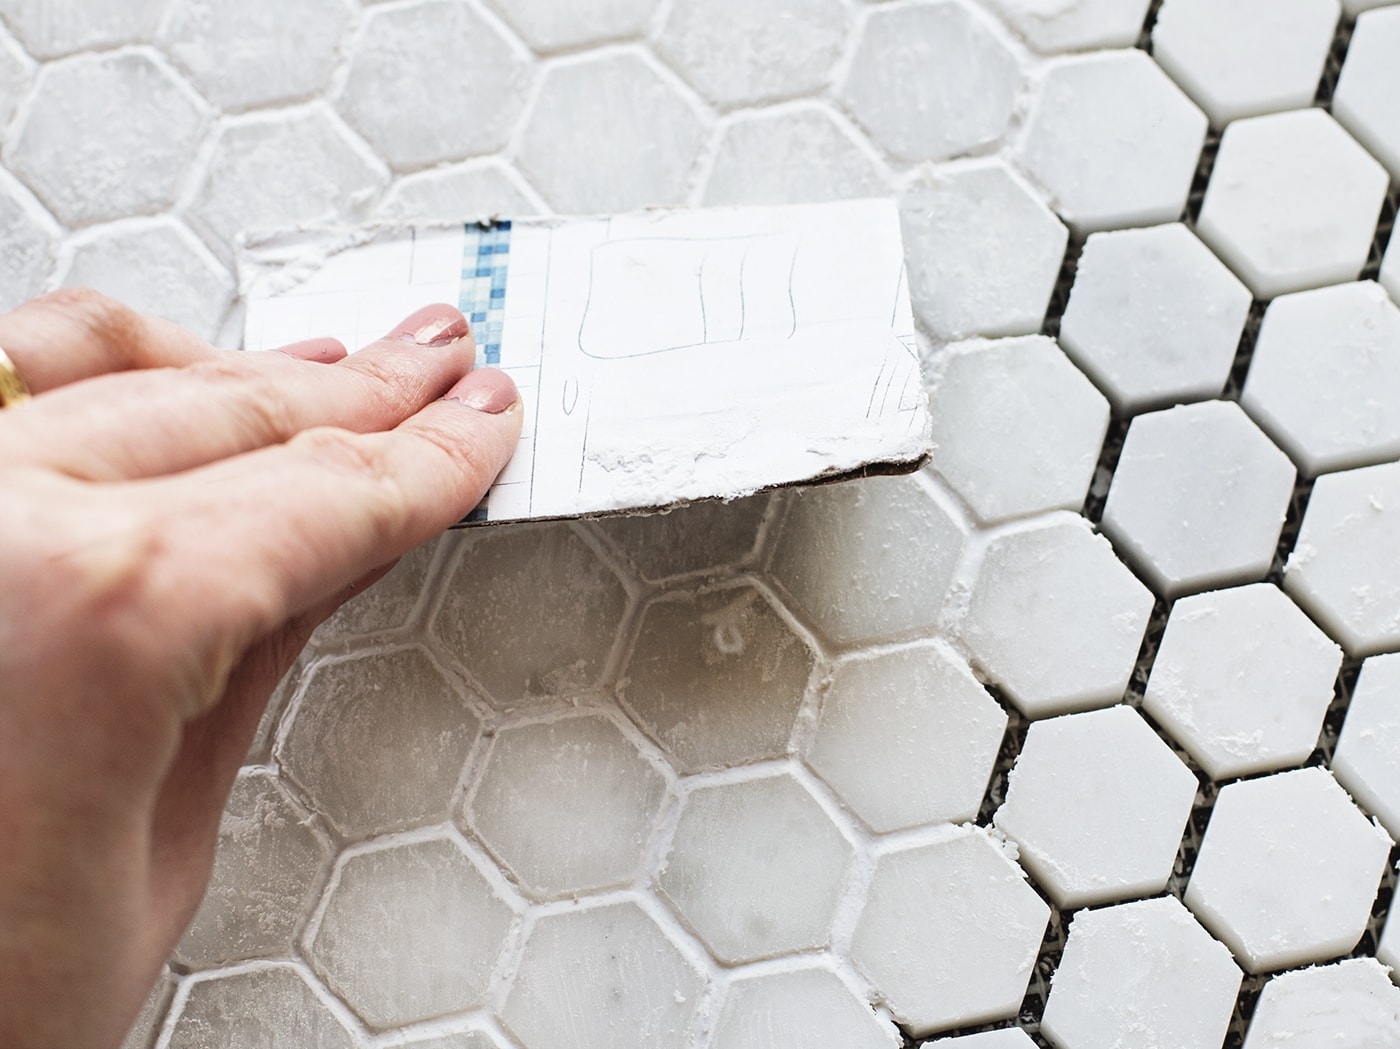
Then scrape off the excess with the cardboard or be a bit more professional and use a grouting trowel. Try and flatten off the grouted areas against the tiles and smooth any edges to retain the hexagonal shape.
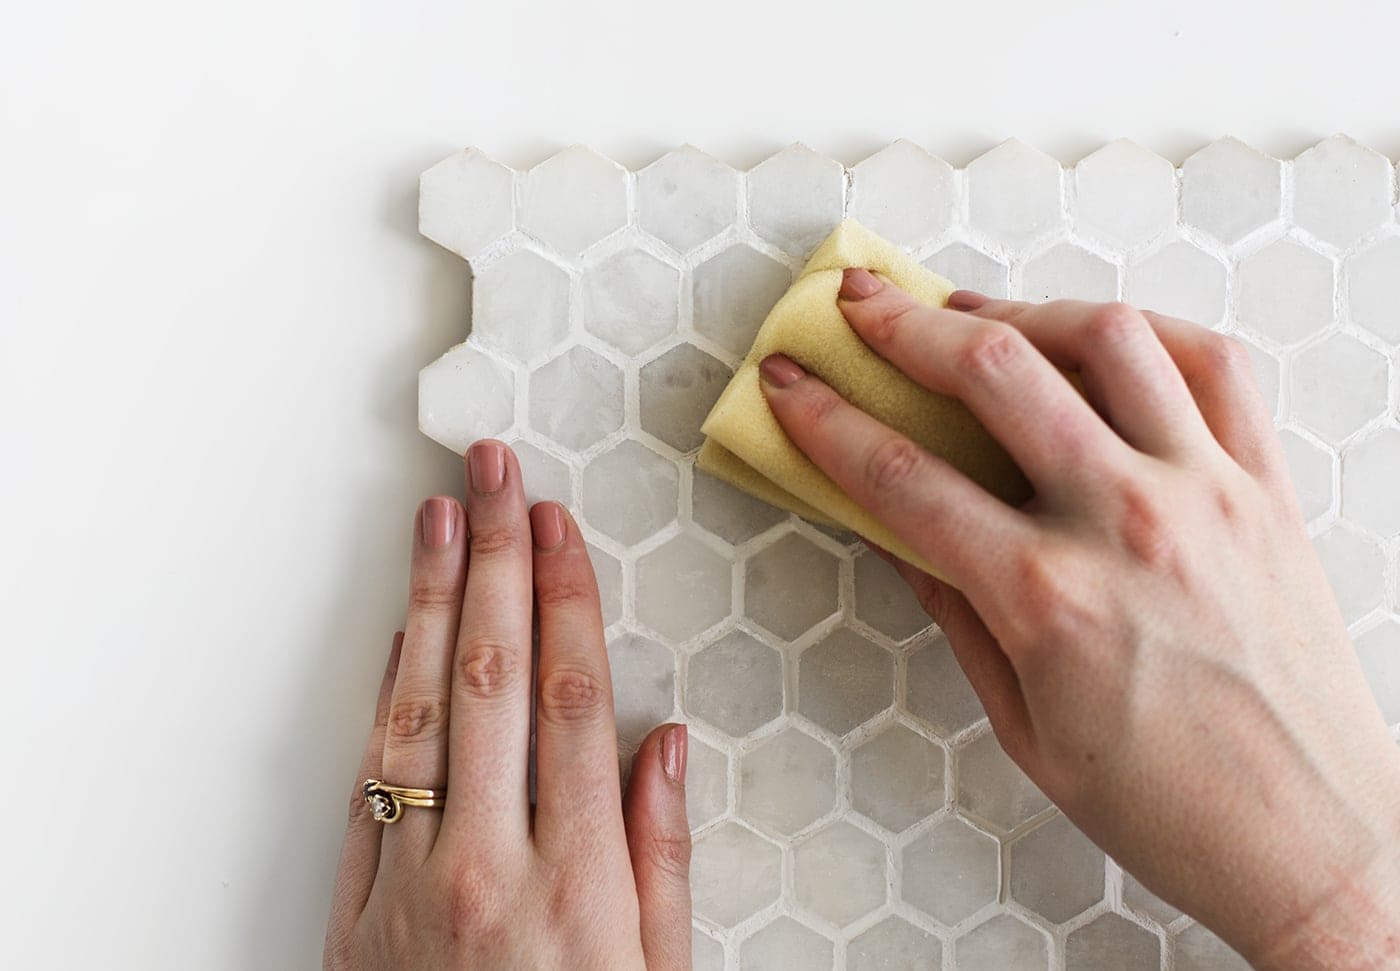
Ideally as you take each section one at a time, use a slightly damp scourer or scouring sponge to rub off the excess grouting that will be masking the pretty tiles. Don’t get too much moisture on the grouting in between. When you’re happy that it’s clean you can move onto a new section and repeat steps 2, 3 & 4. Try and work relatively quickly as the Fix & Grout dries quickly. When the whole thing is finished, leave to dry overnight.
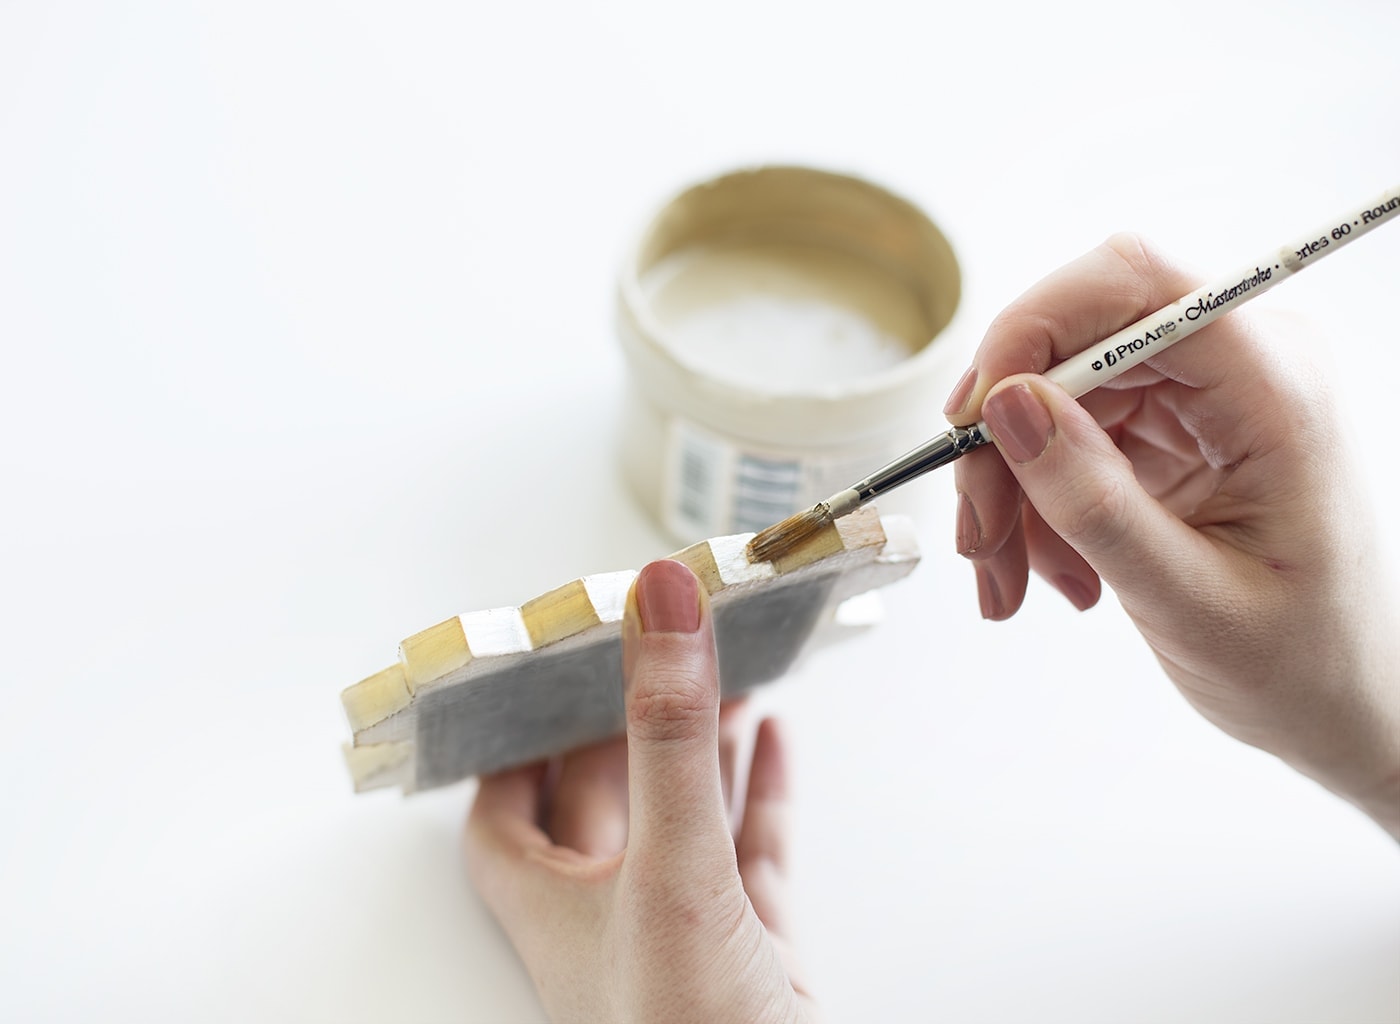
Now you can paint the edges in this pretty gold to add a splash of luxe. If the edges feel at all rough you could smooth them with some sandpaper. Do a couple of coats with the paint for added impact, leaving each to dry in between. The coaster are easy to lift up and paint but for the place mats I sat them on teacup of box so they were raised and I could easily turn them as I painted.

 This post was sponsored by British Ceramic Tile but all choices, ideas and styling are very much my own. Thanks for supporting the brands I work with that help keep this blog going.B
You might also like


Meet The Lovely Drawer

Hi, I’m Teri and welcome to my own creative corner of the internet. I blog about interiors, DIY projects, design inspiration and my general life so stick around have a read and say hi.
In the shop

 Quick ViewSelect options
Personalised Cuddly Bunny
£30.00 – £35.00
 Quick ViewSelect options
Terrace 1
£20.00 – £25.00
Work with Me
The Lovely Drawer is an award winning blog with a loyal audience that has grown over the years. I love working with brands small and large on exciting collaborations that can bring products alive in my own signature aesthetic.