diy embellished necklaces
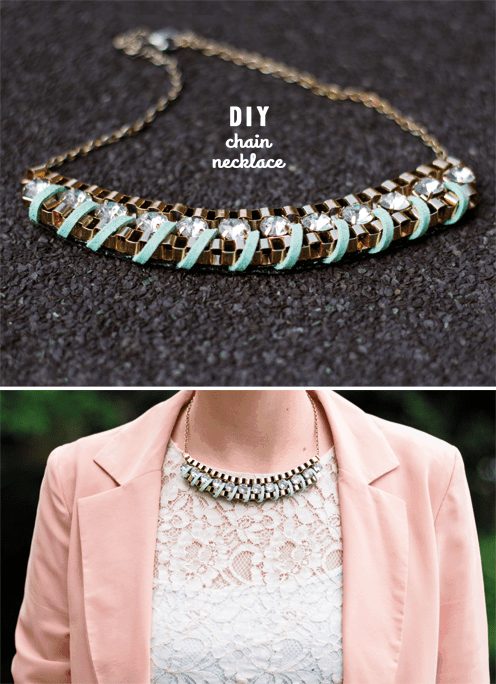
This first necklace could really be easier! I’ve wanted a statement necklace like this for a while and thought why not just make it? Here’s what you’ll need…
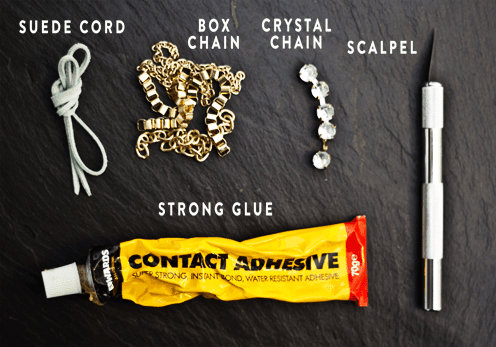
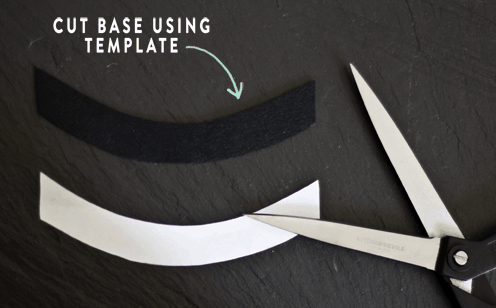
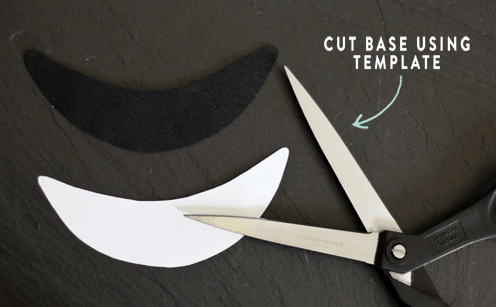
You’ll also need a cheap chain of some description. I have many old necklaces that I never really wear anymore so I simply cut those up for these projects but they are also easily bought on Ebay. You also find some very cheap necklaces in trusty, old Primark. The box chain I used was actually part of a necklace I bought from there for £2 (woohoo, bargain!). You’ll also need some black sturdy black backing that won’t fray. I found something that seems like a cross between foam and felt at my local fabric shop but I have no clue what it’s called! You could look for something similar or just use black felt for the top layer and black foam for the bottom. This will be the base for all your embellishments. You’ll need to cut this out to match the template which can be found here.
- Once you have your base, cut two lines of the box chain and a line of the crystal string to fit on top and carefully glue them down.
- Then using your scalpel, poke holes all along the base, between the crystal string and the bottom box chain.
- Feed the suede cord through the holes to weave throughout the whole necklace, making sure you glue down the ends.
- Cut another piece of your base material using the above template again and stick this over the top to hide all the nasty bits.
- Use two metal rings (slightly wider than your chain) to attach at either end of the top box chain and use these to attach the rest of your chain, which can be cut to size as you like.
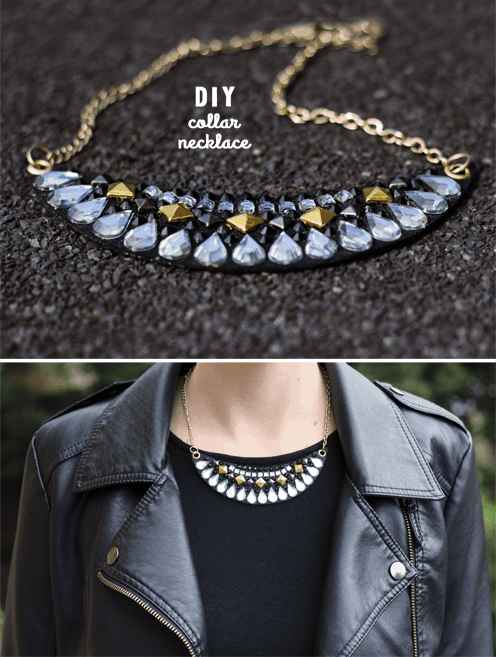 Here’s another necklace for you to try your hand at. It may be a little more fiddly than the last one but it’s equally straightforward. You’ll need the following…
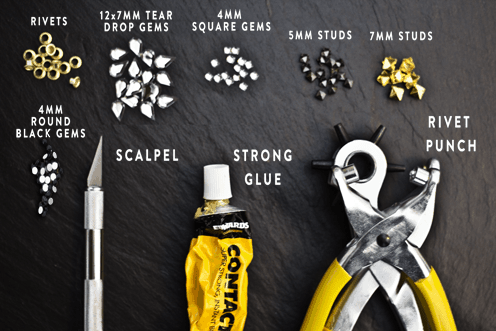 rivet punch / 4mm black rounds / 12 x 7mm tear drop gems / 7mm gold studs / 5mm gun metal studs / 4mm square rounds
Once again you’ll also need a cheap chain and base material for all your embellishments to stick on. You’ll need to cut this out to match the template which can be found here.
- Firstly make holes in each corner of the black base using the punch and add rivets (following packet instructions).
- Then start sticking on the embellishments. Start with the larger gems/studs and work your way down in size, painting the back of each one with your strong glue. The 4mm round black gems can be used to fill in the gaps. Hold each one down with your finger or a scalpel for a few seconds to make sure it adheres. Follow the pattern pictured above.
- The studs won’t need glue as you can punch the clasps through and fold them over at the back to secure.
- Cut another black base using the template shape but cut each corner off to ensure that the rivet holes aren’t covered. Stick to the back to cover the nasty bits.
- Use two metal rings (slightly wider than your chain) to attach at either end of the top box chain and use these to attach the rest of your chain, which can be cut to size as you like.
You might also like
Meet The Lovely Drawer

Hi, I’m Teri and welcome to my own creative corner of the internet. I blog about interiors, DIY projects, design inspiration and my general life so stick around have a read and say hi.
In the shop

 Quick ViewSelect options
Terrace 1
£20.00 – £25.00
 Quick ViewSelect options
Orchard Days
£20.00 – £25.00
Work with Me
The Lovely Drawer is an award winning blog with a loyal audience that has grown over the years. I love working with brands small and large on exciting collaborations that can bring products alive in my own signature aesthetic.
