

good looking storage
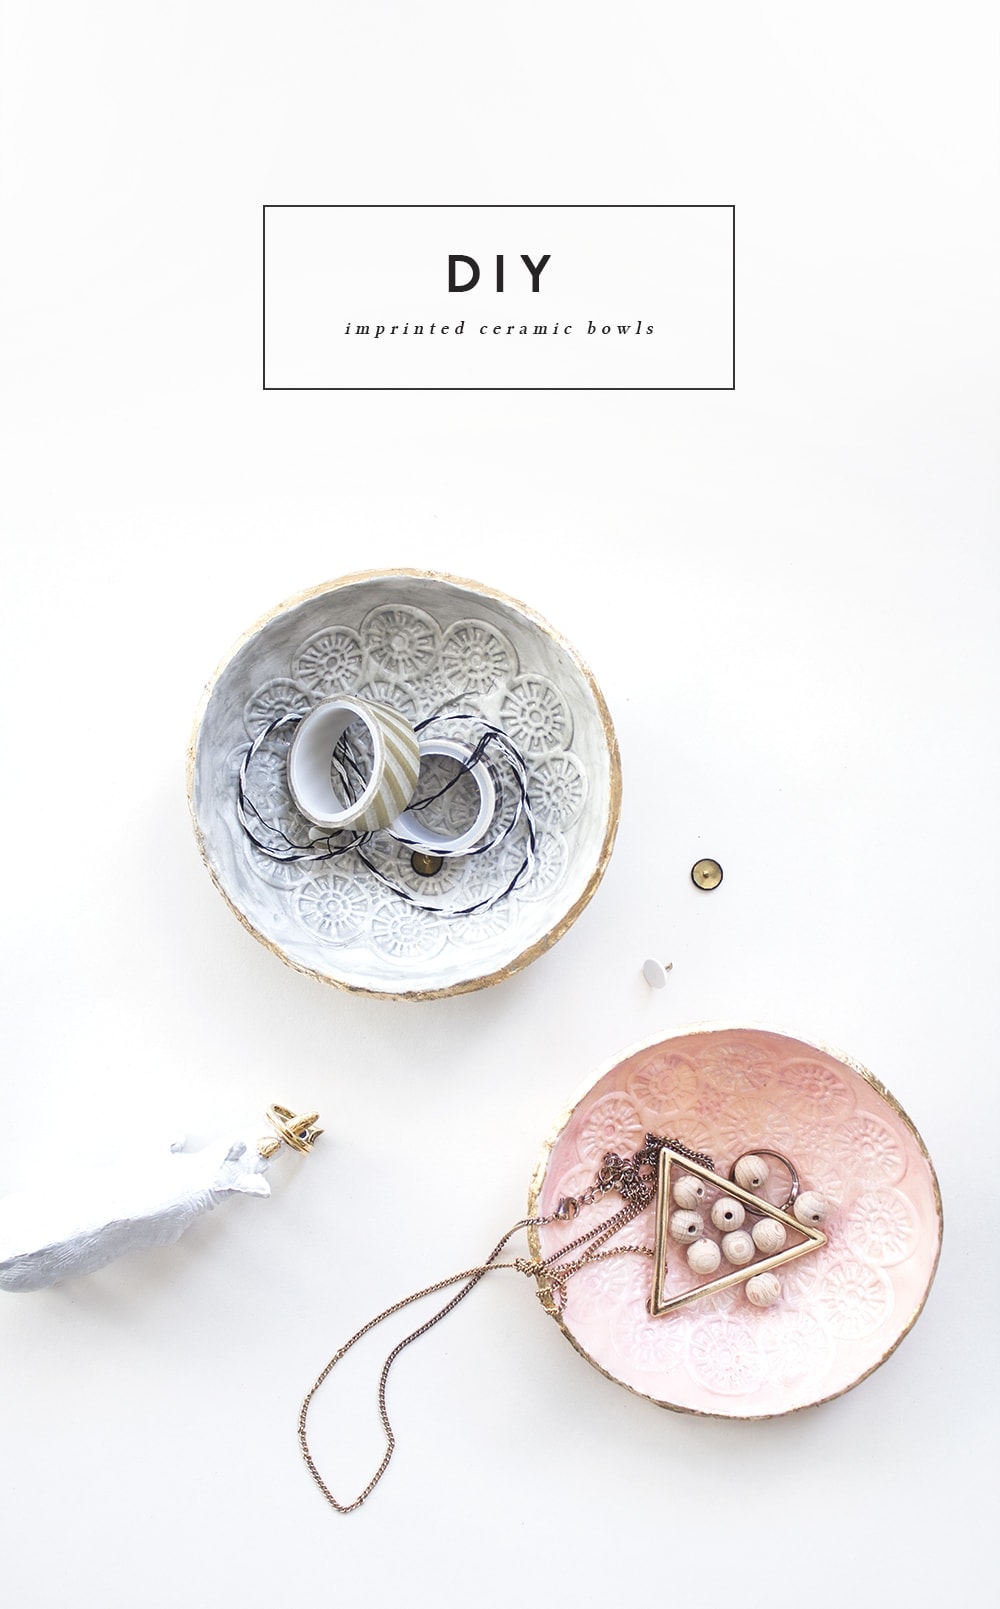
Hello! Sorry things have been a bit slow on the blog. It is a lovely problem to have so much design work I don’t have much time for posts, but I still have itchy feet to format all the DIY projects I have mounting up. Here’s a little bit of crafty action for your (snowy for some) Tuesday. I’m whipping out my favourite DIY weapon (aside from spray paint) once again. Enter Fimo or polymer clay as you might know it. It’s so versatile I decided to make some cute trinkets bowls with it this time.
I used a silicone lace mould to get the pattern but you could imprint them with anything. Lace or crochet doilies would also work.
You’ll need…
- white polymer clay / fimo ( I would choose the ‘soft’ version for this )
- smooth chopping board or other even surface
- rolling pin
- scalpel
- oven proof bowl
- silicone lace mould or a lace / crochet doily
- acrylic paint
- mod podge glue
- gold leaf or alternatively metallic gold paint
- paint brush
To make…
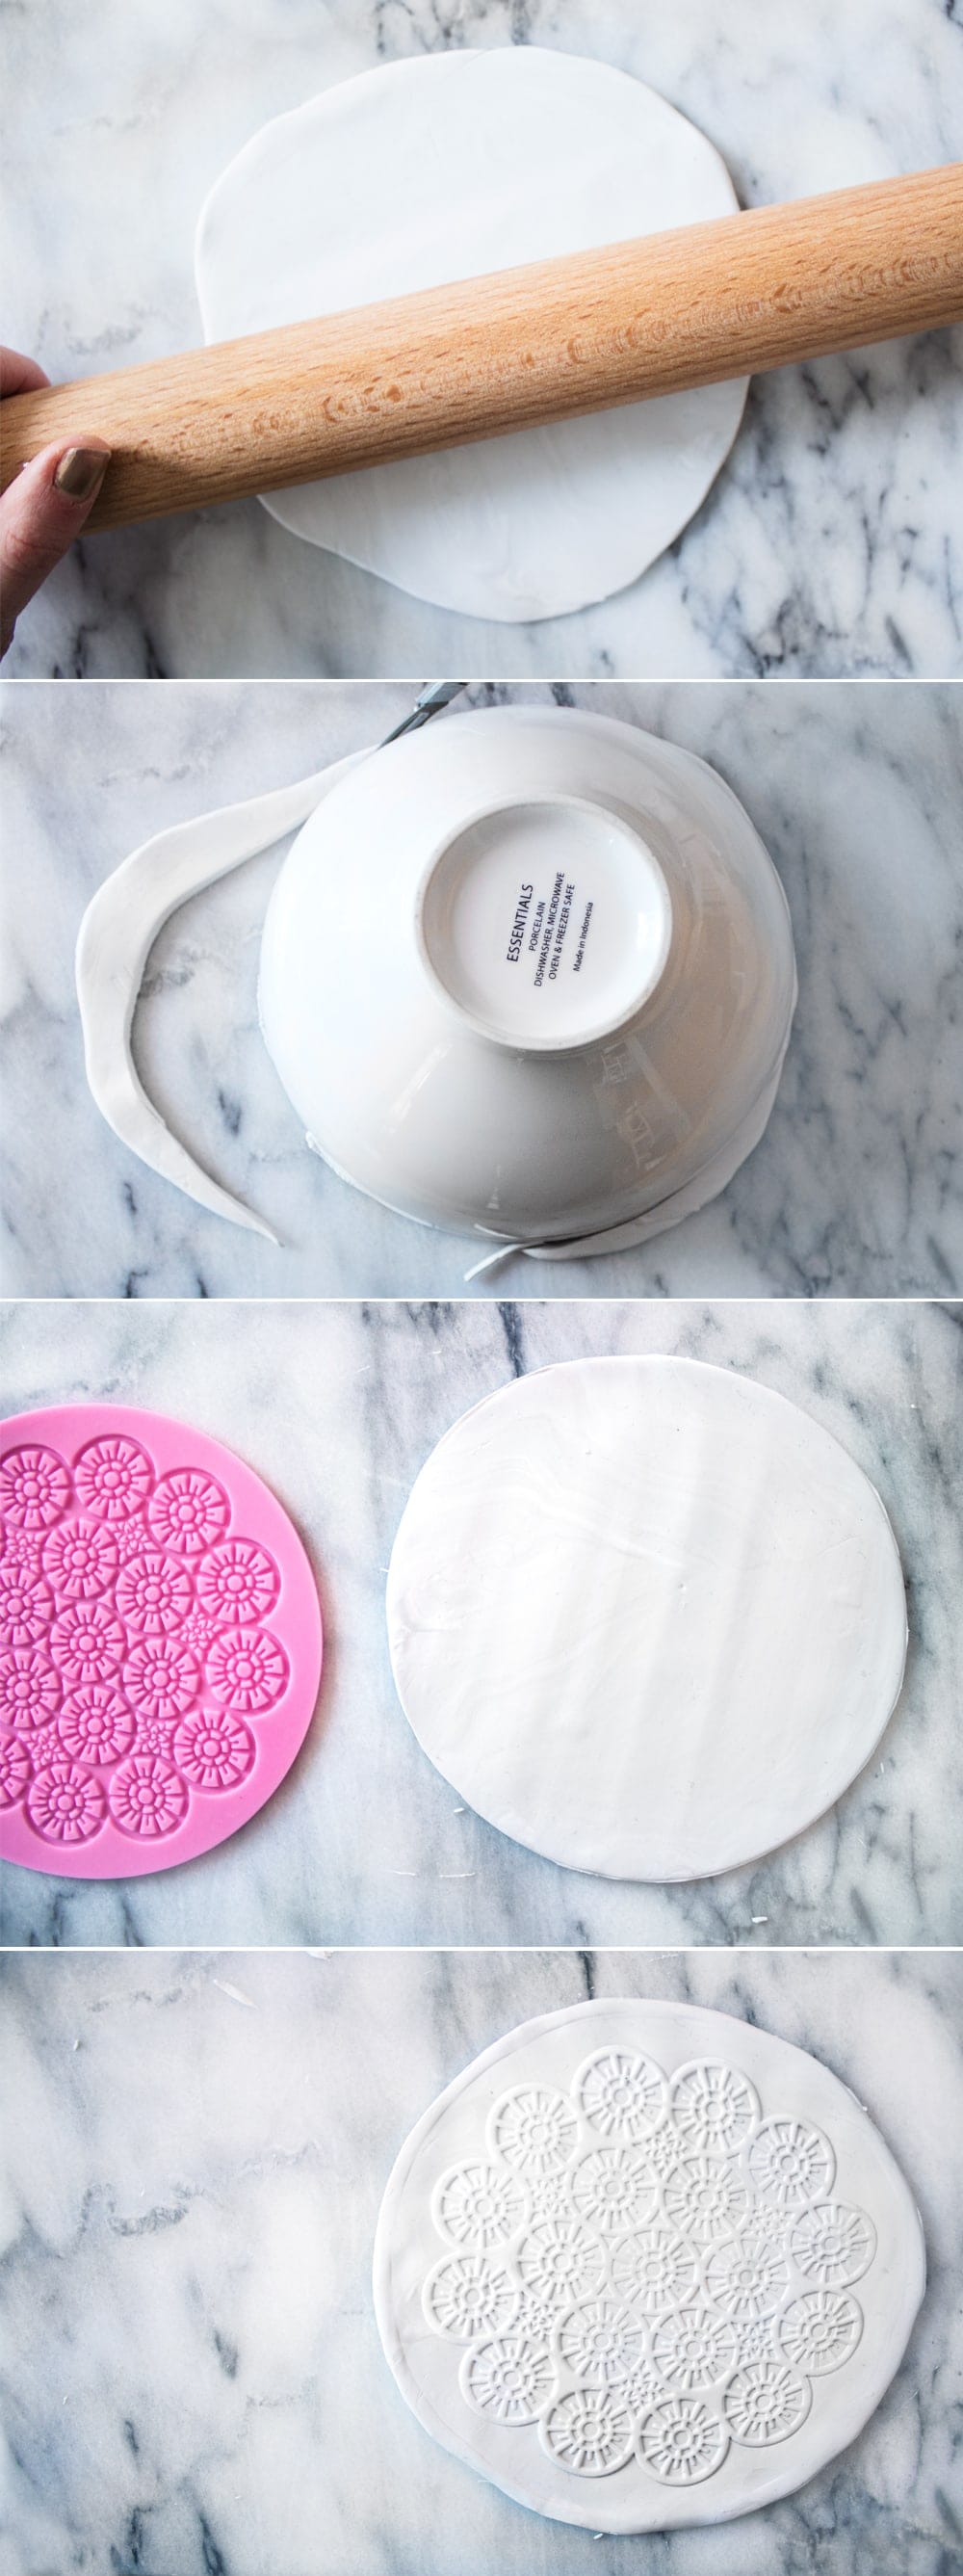
- Cut a chunk of fimo. It will depend on the size of the bowl you’re using as to how big you want it but for these bowls I used about half a 56g block.
- Roll in your hand to soften and then use your rolling pin to roll it out into a flat disc.
- Then place your bowl on top and trace around the edge to cut out a circle shape. Discard the off cuts.
- Take your silicone lace mould or doily and press with a decent amount of pressure into the clay. Work your way over the whole surface, pushing the pattern in before lifting it off to reveal the imprint.
- Then gently peel the clay away from the surface and transfer to the bowl, pattern side up. Make sure the clay disc is central and then start by gently pressing the centre down and working your way out to the side so that it fits to the bowl. Where there are gathers at the edges, simply push them down and smooth out slightly.
- Your edges may well look a bit wonky so take the scalpel and trace around the edge to get an even circle. Discard the excess. Make sure there are no bubbles in your clay. All of it should be flush with the bowl.
- Then place on a baking tray and bake in the oven for 30 mins. Once baked leave to cool completely before popping it out of the bowl. The easiest way to do that is by turning the bowl upside down.
- In order for the paint wash to go on smoothly I applied an under coat of mod podge and left that to dry but I don’t think this step is essential.
- Once dry, mix the acrylic paint in a dish with some water. I wanted to create a painterly look to give it more of a handmade ceramic feel so the water helps give variation in the colour and allows brush strokes to stay slightly visible. Leave to dry.
- When the paint is dry you can then use the gold leaf to glam up the rim. Paint a layer of mod podge around the rim and when it feels tacky you can delicately start placing your gold leaf sheets on top. I cut my squares into thin lengths to make it easier. Give a little rub on the backing paper before pulling off. Work your way around the rim. Patch up any areas you’ve missed
- Alternatively you can use metallic gold paint to paint the rim gold. The finish won’t be quite as gorgeous but this would be a cheaper and quicker method.
- When the rim is dry you can glaze the whole thing with modge podge. This will leave a nice sheen and protect the paint and the clay.
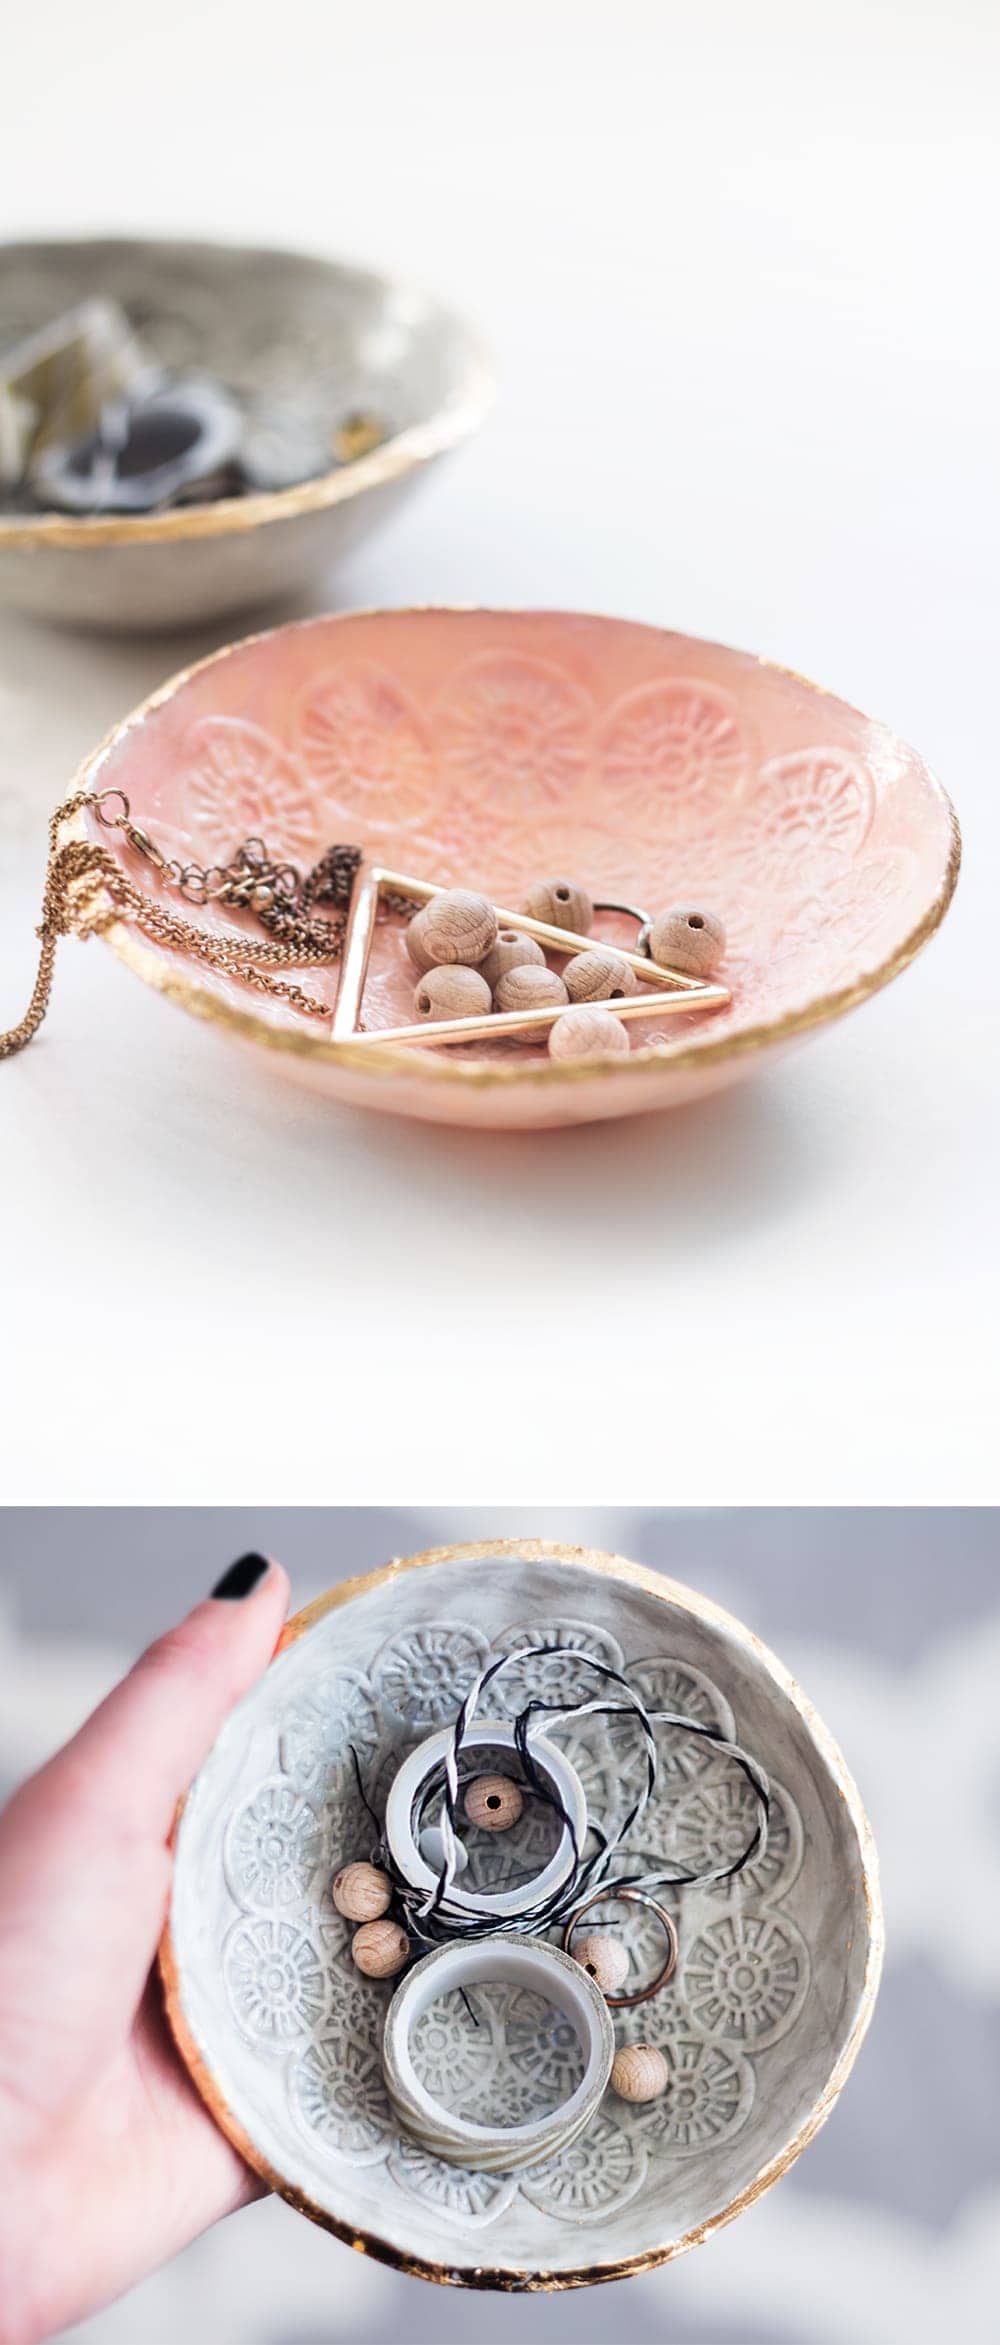
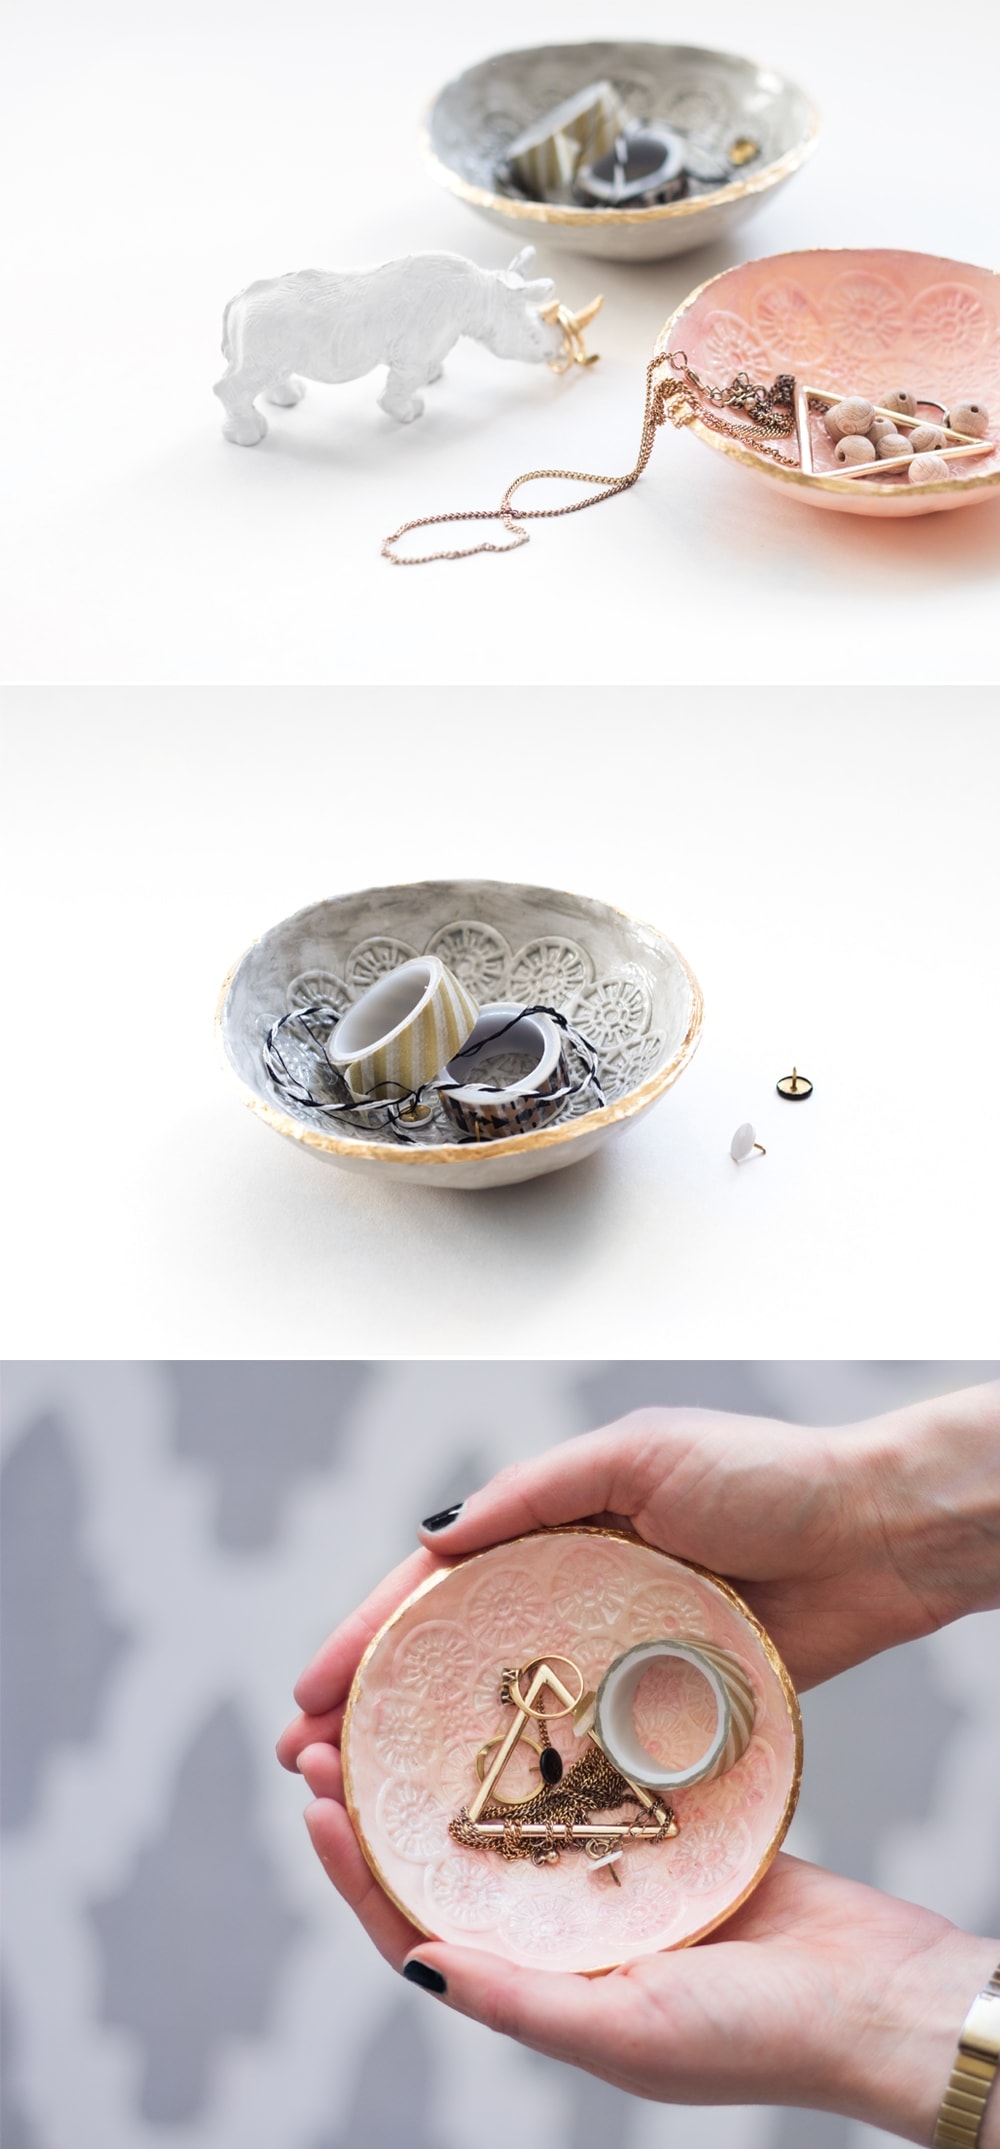
You can fill them with jewellery or make up or just odds and ends. They would also make sweet gifts if you make a batch. Go on, give it a try!
You might also like


Meet The Lovely Drawer

Hi, I’m Teri and welcome to my own creative corner of the internet. I blog about interiors, DIY projects, design inspiration and my general life so stick around have a read and say hi.
In the shop

 Quick ViewSelect options
Personalised Cuddly Bunny
£30.00 – £35.00
 Quick ViewSelect options
Terrace 1
£20.00 – £25.00
Work with Me
The Lovely Drawer is an award winning blog with a loyal audience that has grown over the years. I love working with brands small and large on exciting collaborations that can bring products alive in my own signature aesthetic.