

light up

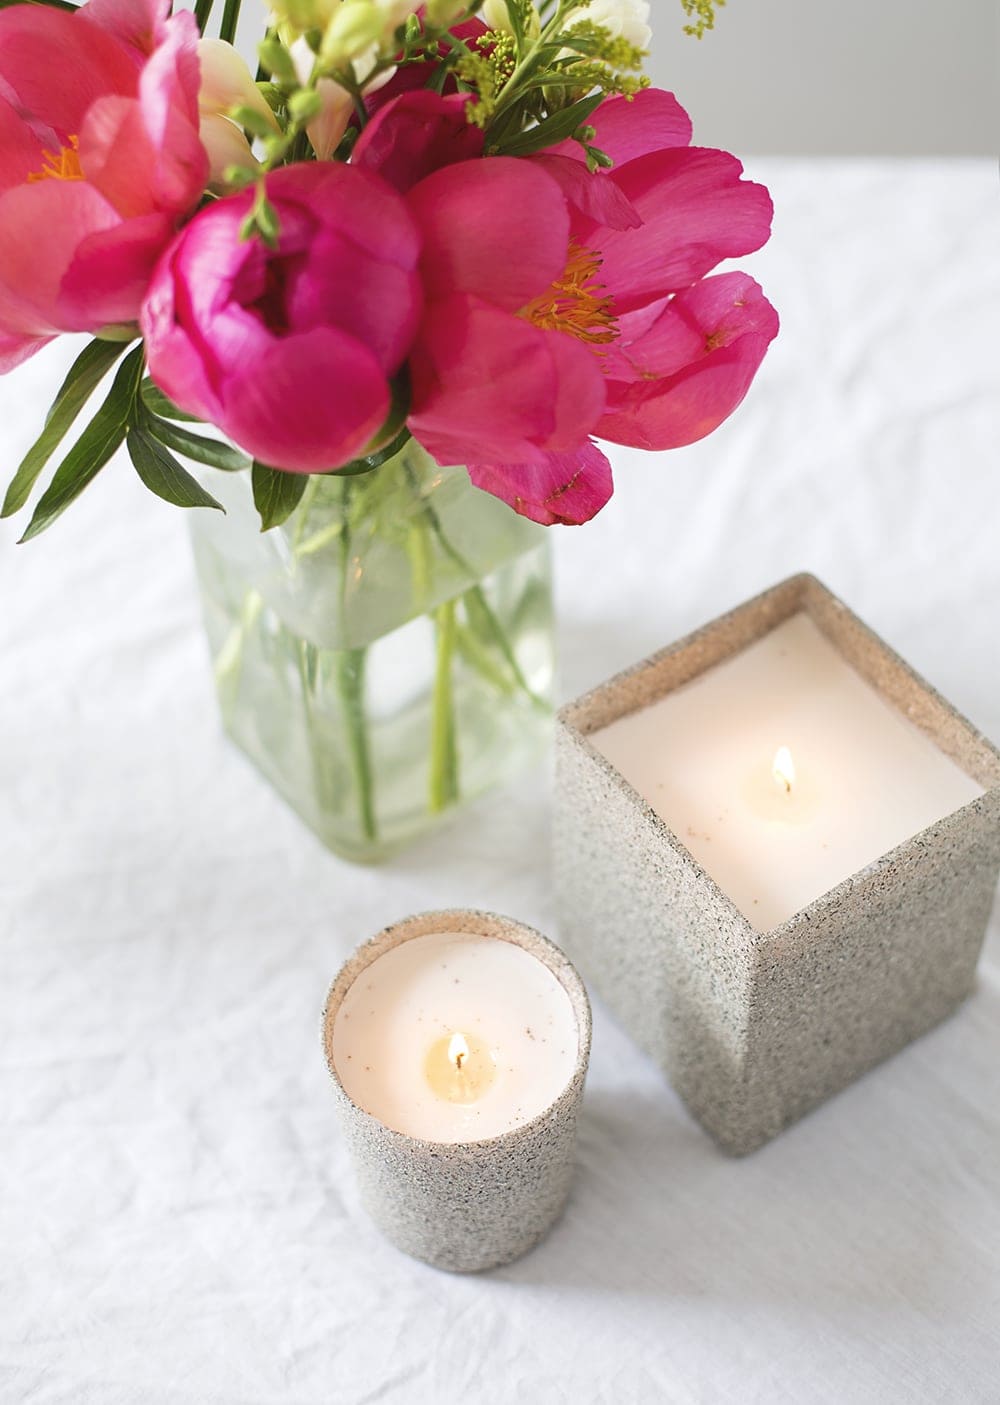
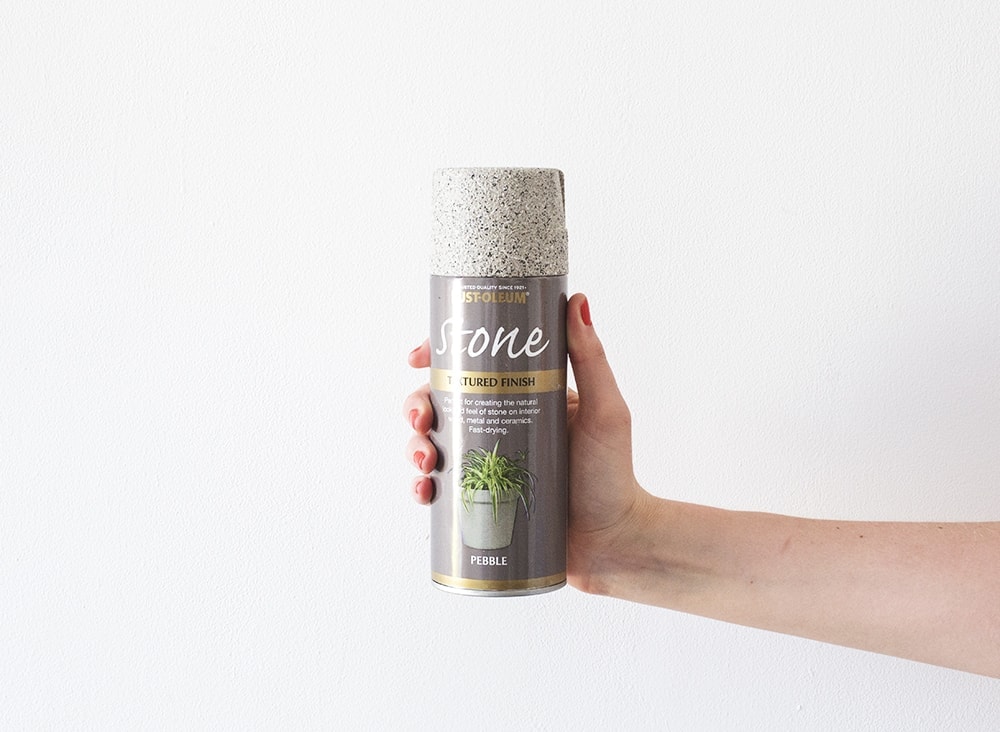
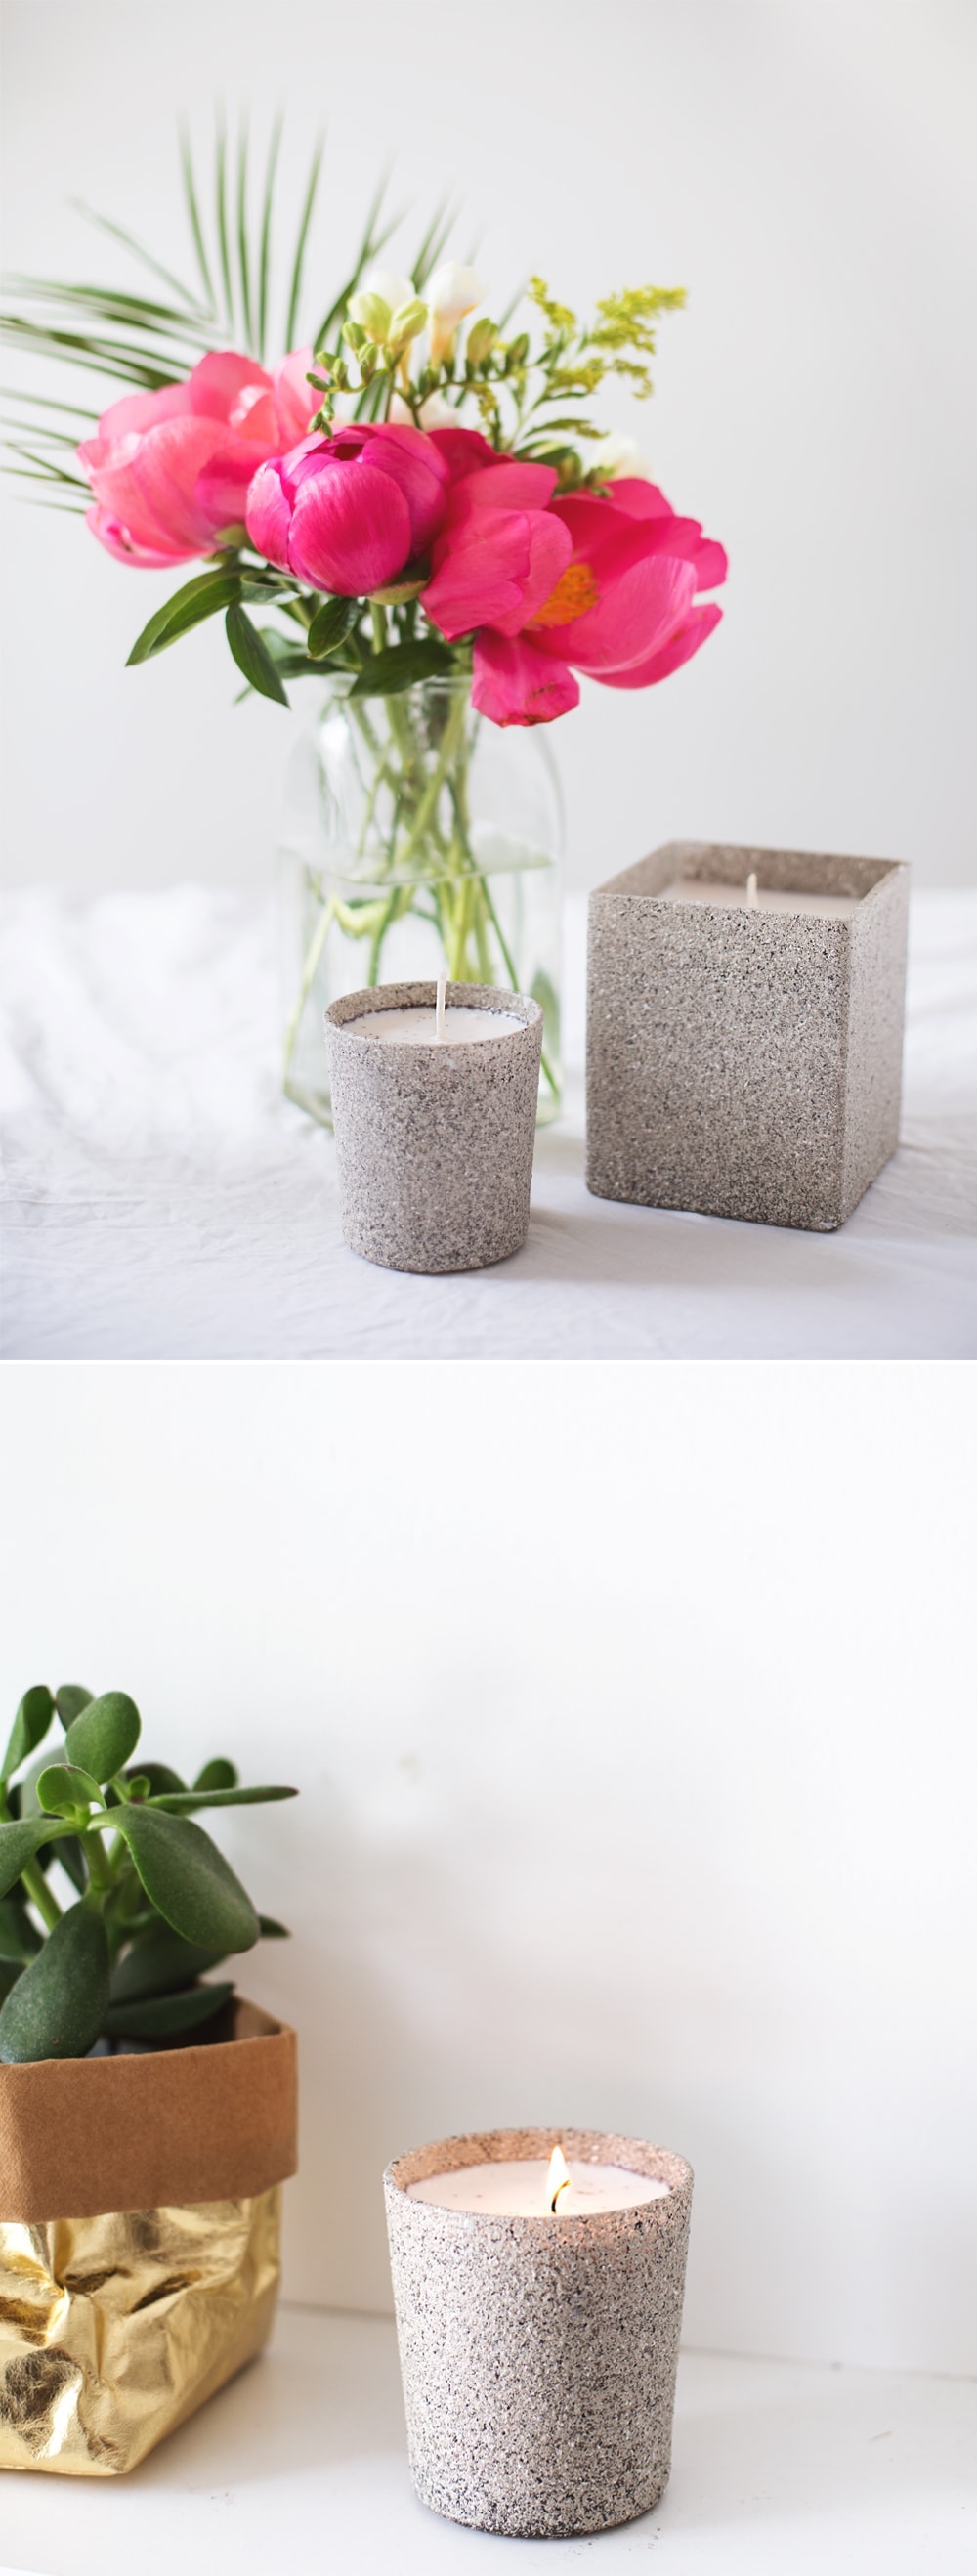
I’ve never done a candle DIY before people! How did that happen eh? Well this little number is here to put that right and it all stemmed from a trip to Homebase where I discovered this crazy new spray paint which creates a stone effect. It may not actually be new but it was new to me and as you may be well aware of I’m a spray paint fiend so this find was like uncovering a new sparkly jewel! You can buy this in pebble (which I used) or grey stone or even granite . At first I thought I could make rustic planters and then I remembered that I’ve kind of over done it on the plant front recently and you deserve a break along with something new.
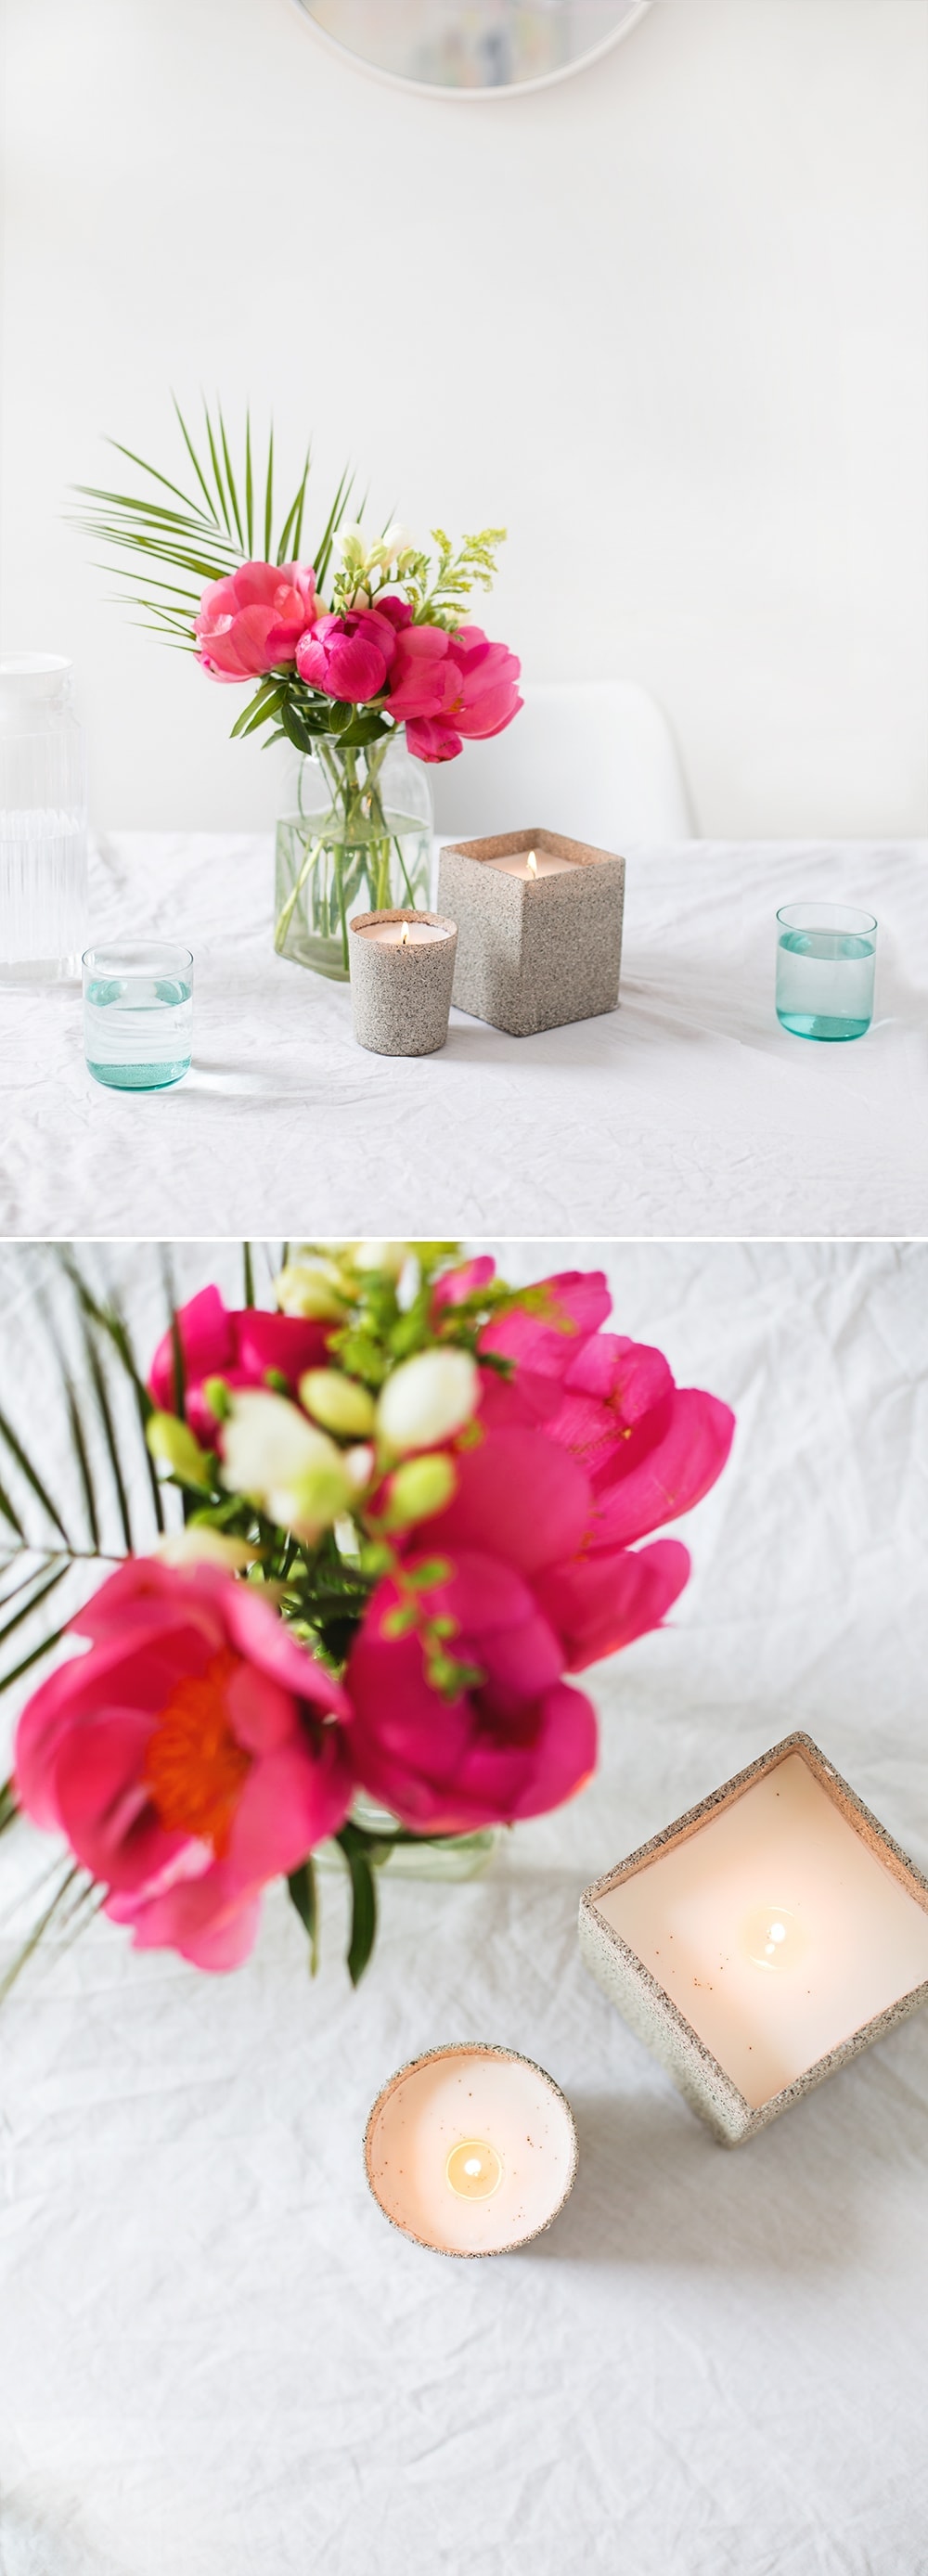
These candles are made with soy wax and scented with my husbands prized coffee beans ground up. He’s a coffee nutter and so much kit our kitchen sometimes looks like a science lab but even though I’m not big on coffee, I do (along with everyone else in the world) love the smell of it! Cement style coffee candles were born and I hope you appreciate that pleasing alliteration right there.
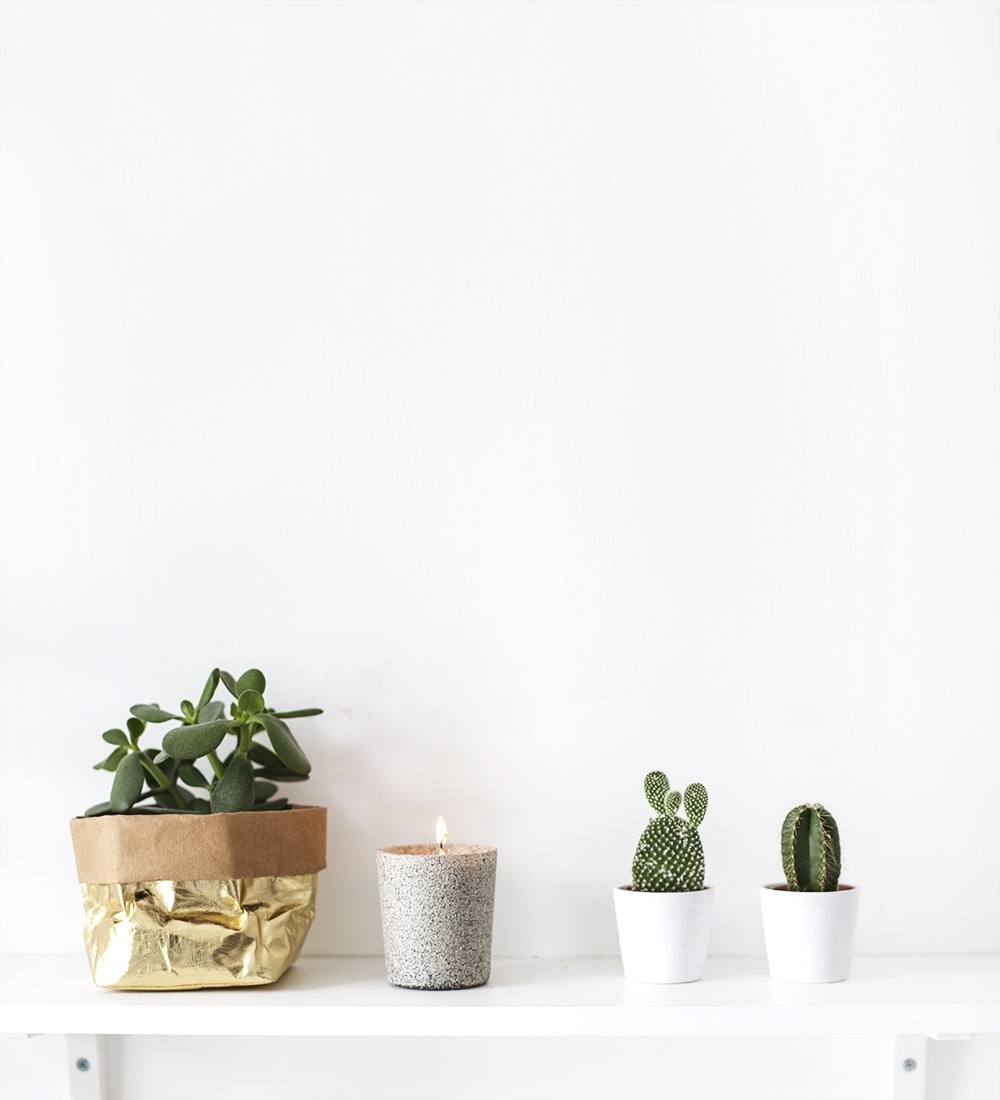
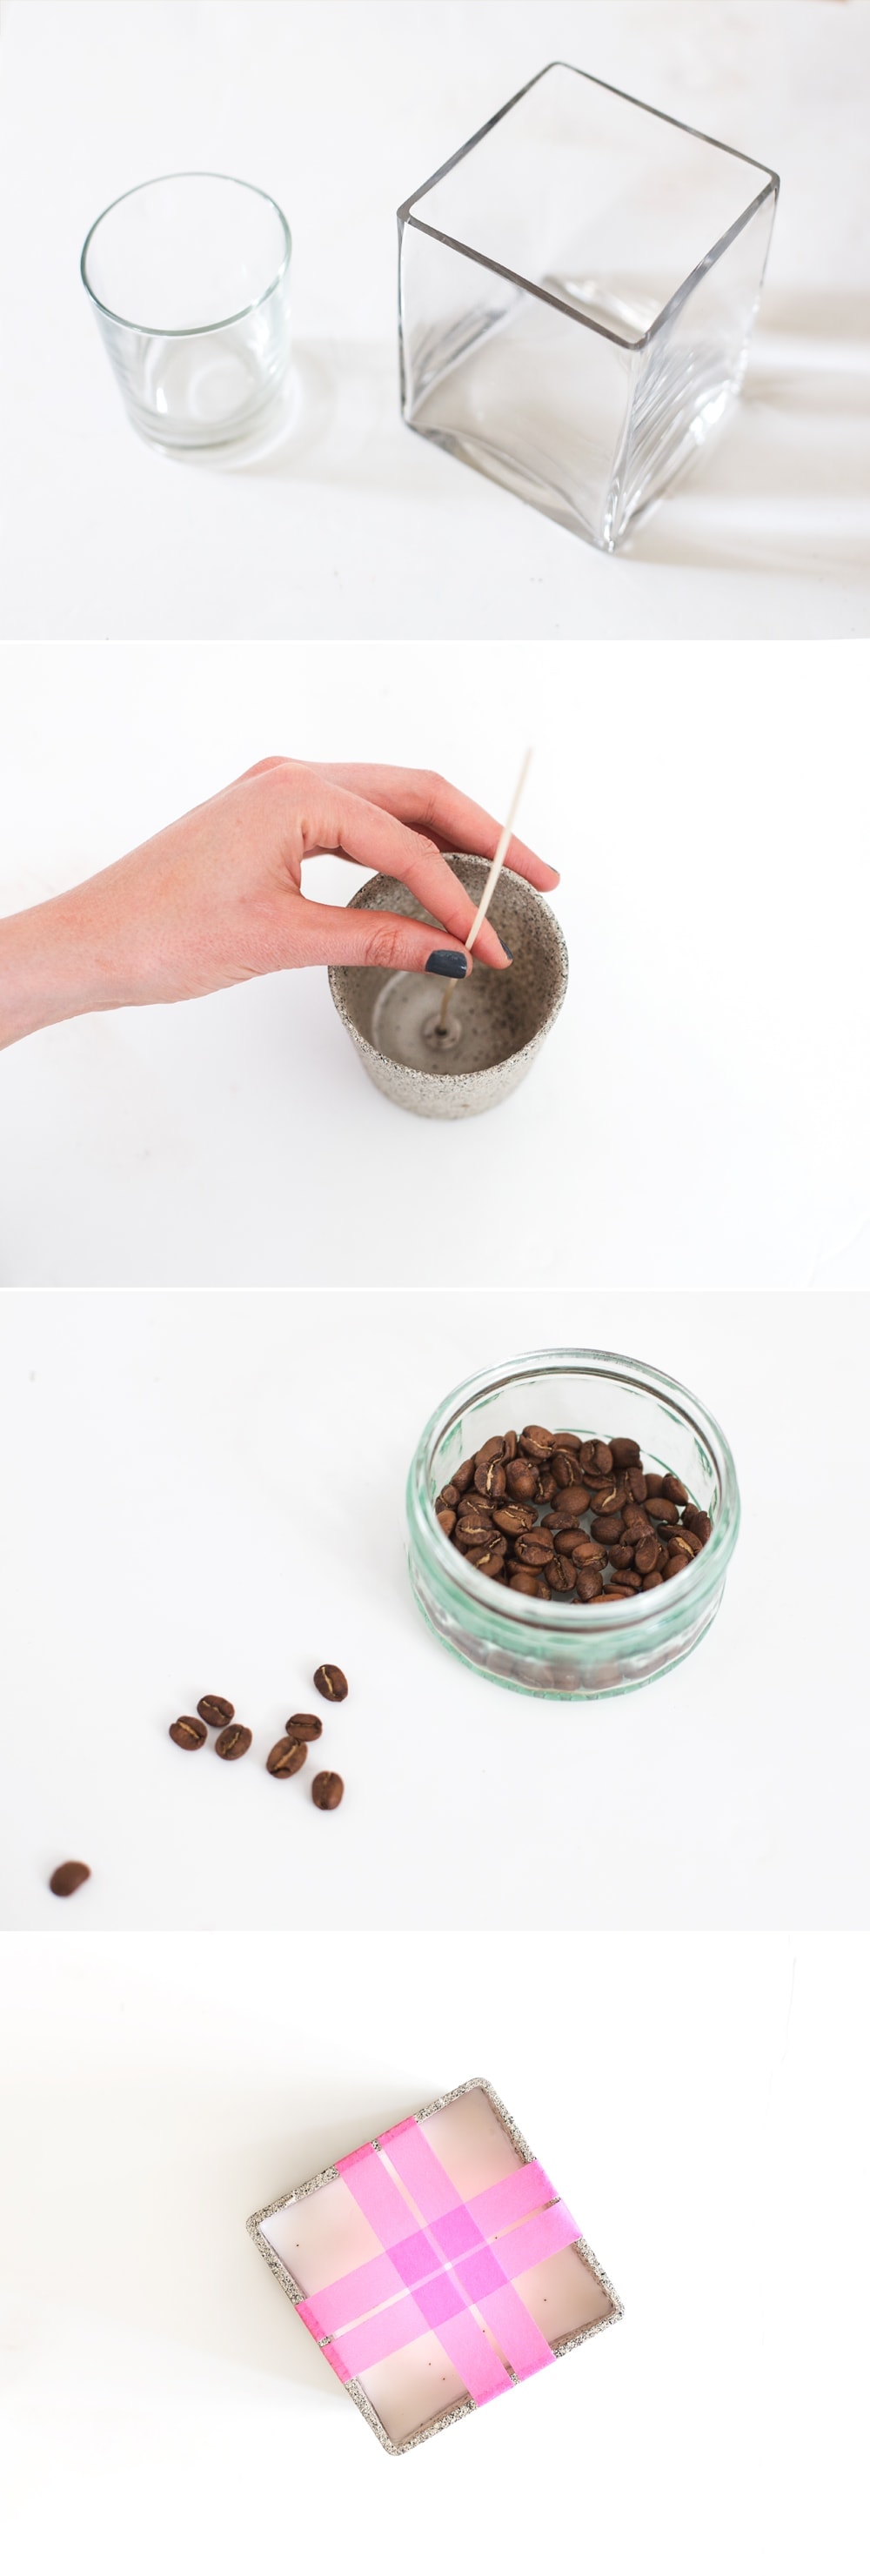
There aren’t even many things you’ll need for this one folks and you could just keep on making them in all shapes and sizes! I picked up my glassware from a charity shop so you could have a rummage in your local to find a collection of different sizes.
You’ll need…
- Stone textured spray paint
- Glass tumblers / vases
- Soy Wax flakes or candles you are willing to melt down
- Coffee beans (roughly a cups worth per candle unless they’re very large)
- Self standing wicks
- Glass pouring jug / measuring jug
- Wash tape
To make…
- Start by spray painting your glassware. Preferably do this outside on some old newspaper. Do about 3 thin coats, leaving to dry well in between as this does stay sticky longer on glass. Make sure you go some of the way into the inside so there’s no bare glass showing at the end.
- Then in the jug (must have a pourer spout) melt your wax flakes in the microwave in 30 second bursts. You usually need double the amount of flakes to how many will fit in your vessel in their unmelted state.
- While it’s melting grind up your coffee beans however you usually do so. Obviously you can use pre ground coffee for this but my husband would tell you off of course.
- Take a little of the melted wax and drop in the bottom in the bottom so you can adhere the metal bottom of the wick to the glass. Hold it until it dries, which should be very quickly.
- Then tip some of the ground coffee into the bottom.
- Make sure you’ve left the wax about 5 minutes by this point so that it’s just a little cooler. Start by pouring a thin layer into the bottom of your glass. This way your wick should sit tight and be stable for the rest of pouring. After another few minutes gradually pour the wax in stages, each time sprinkling some more of the coffee in until the glass is almost full.
- Hold the wick in place by taping a little grid around it and leave to set. This will take about an 1-2 hours depending how big your glass is.
- Remove the tape grid and there you have it.
These would make sweet gifts or work really well in all different sizes as a dinner party centre piece. So go my friends! Go and get your hands on this crazy cool spray paint and fill your homes with the scent of coffee while you’re at it!
You might also like


Meet The Lovely Drawer

Hi, I’m Teri and welcome to my own creative corner of the internet. I blog about interiors, DIY projects, design inspiration and my general life so stick around have a read and say hi.
In the shop

 Quick ViewSelect options
Terrace 1
£20.00 – £25.00
 Quick ViewSelect options
Orchard Days
£20.00 – £25.00
Work with Me
The Lovely Drawer is an award winning blog with a loyal audience that has grown over the years. I love working with brands small and large on exciting collaborations that can bring products alive in my own signature aesthetic.