

Right on Time
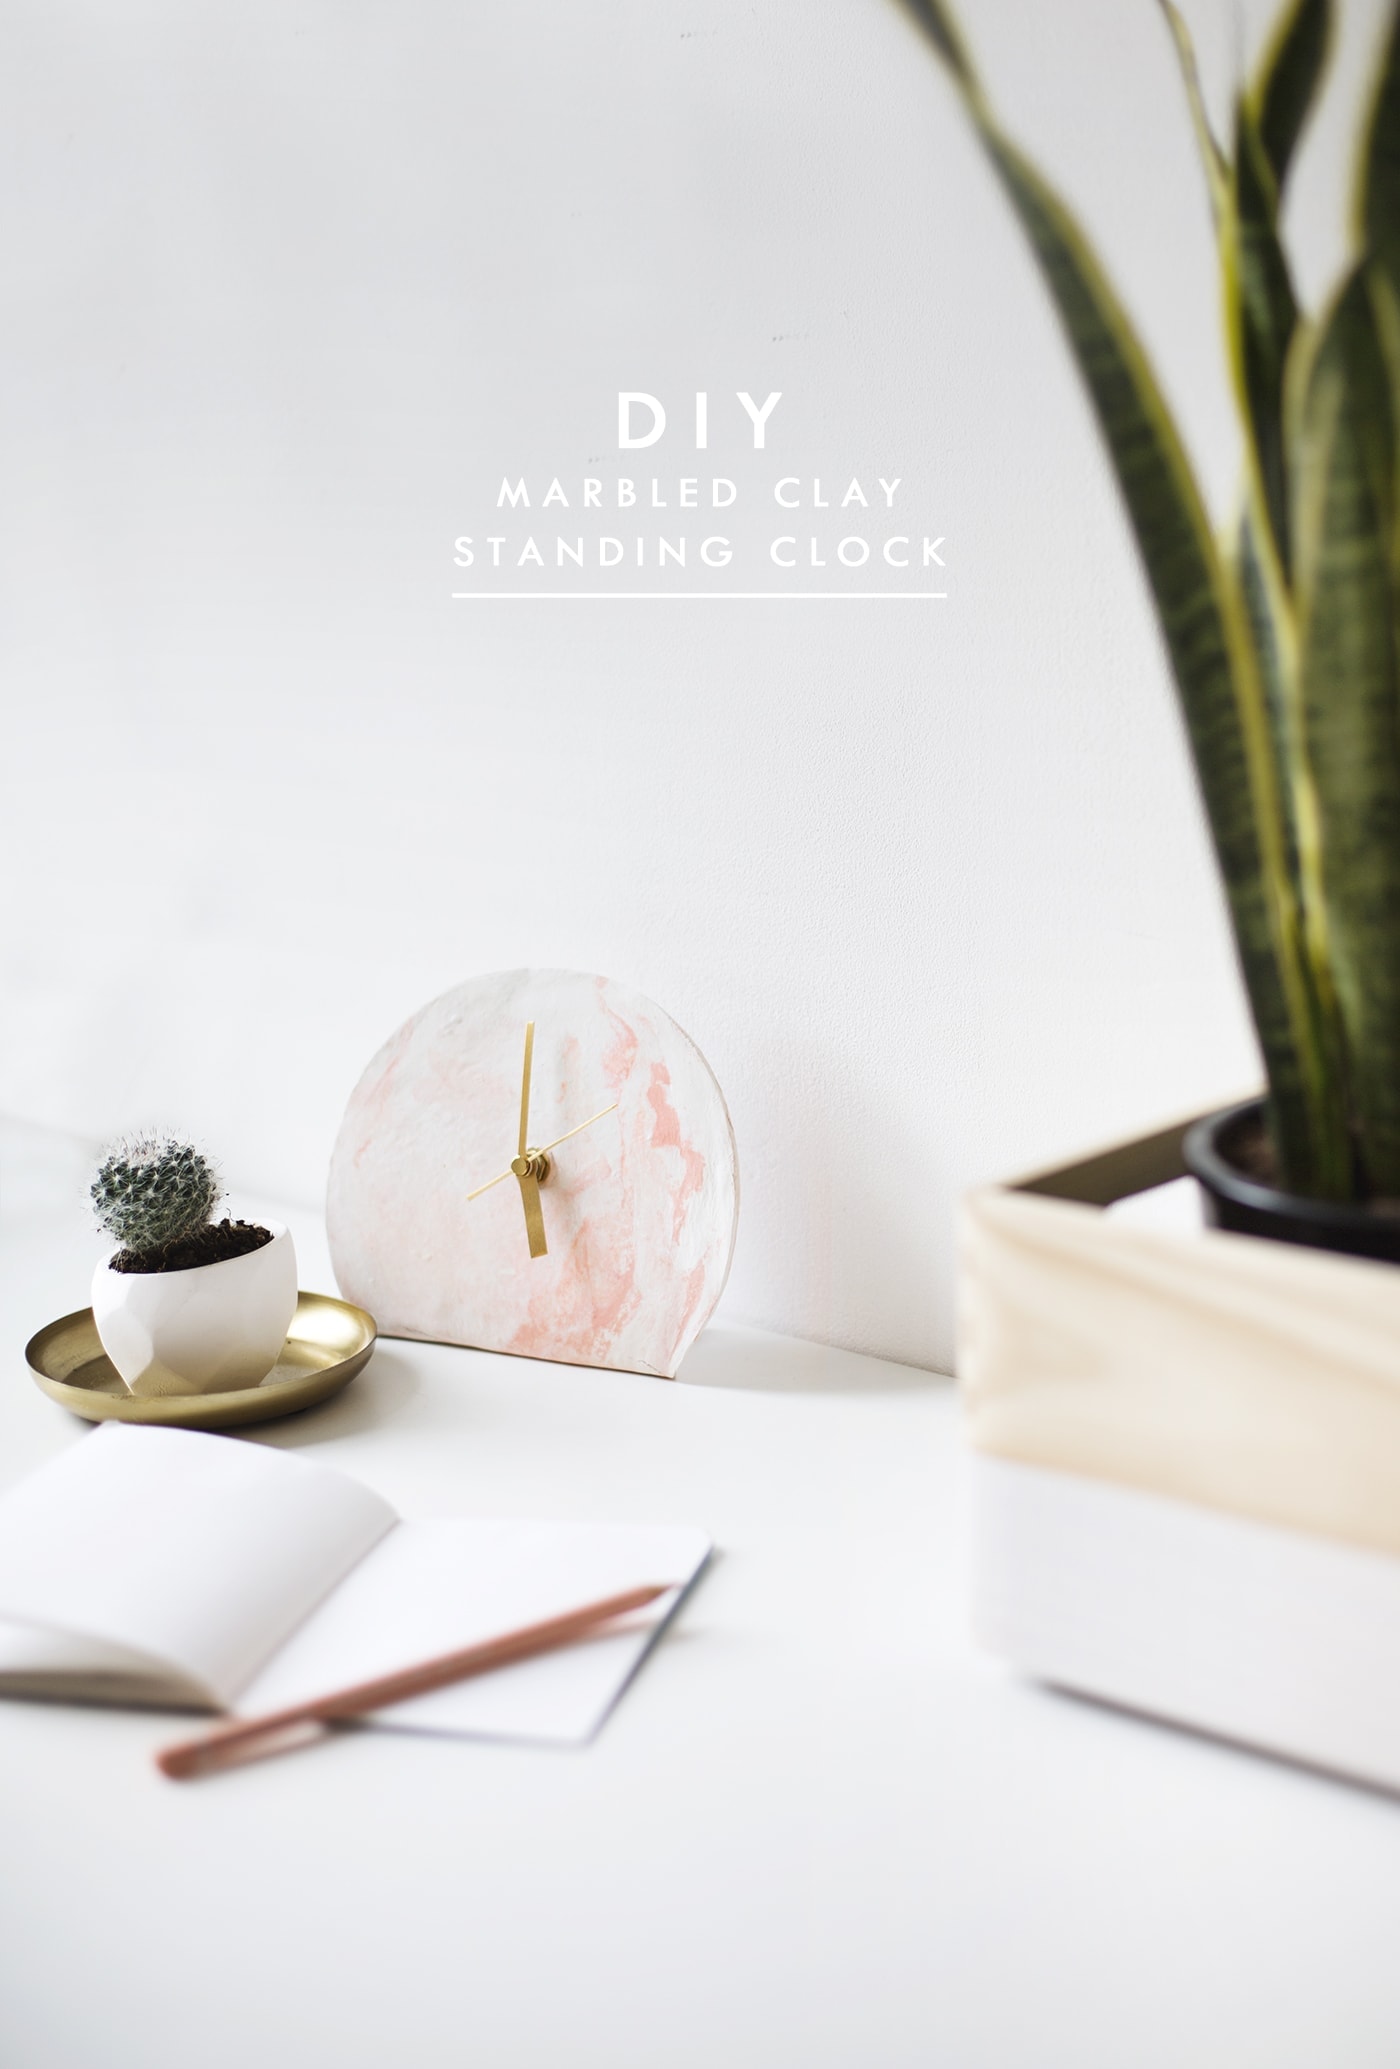
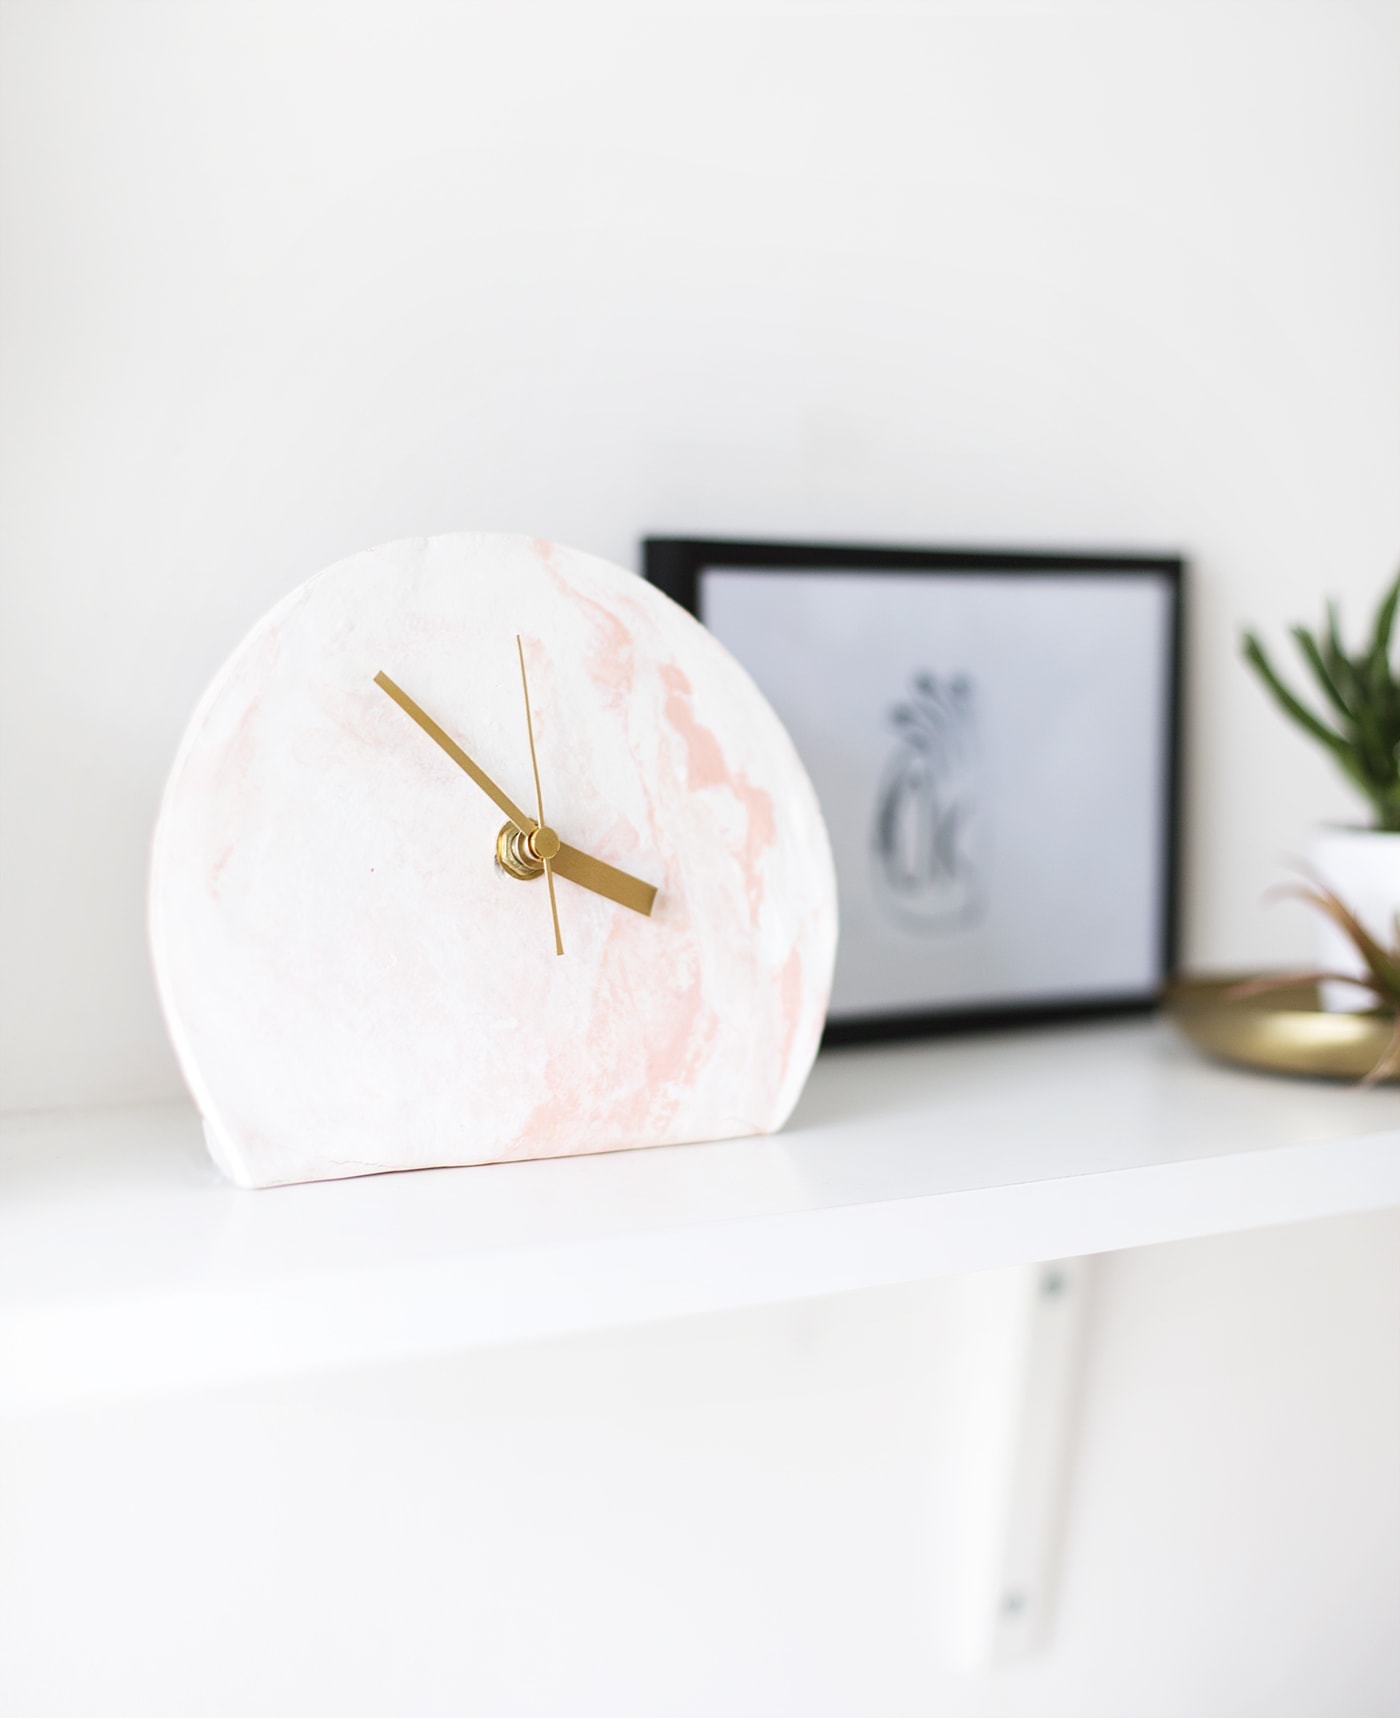
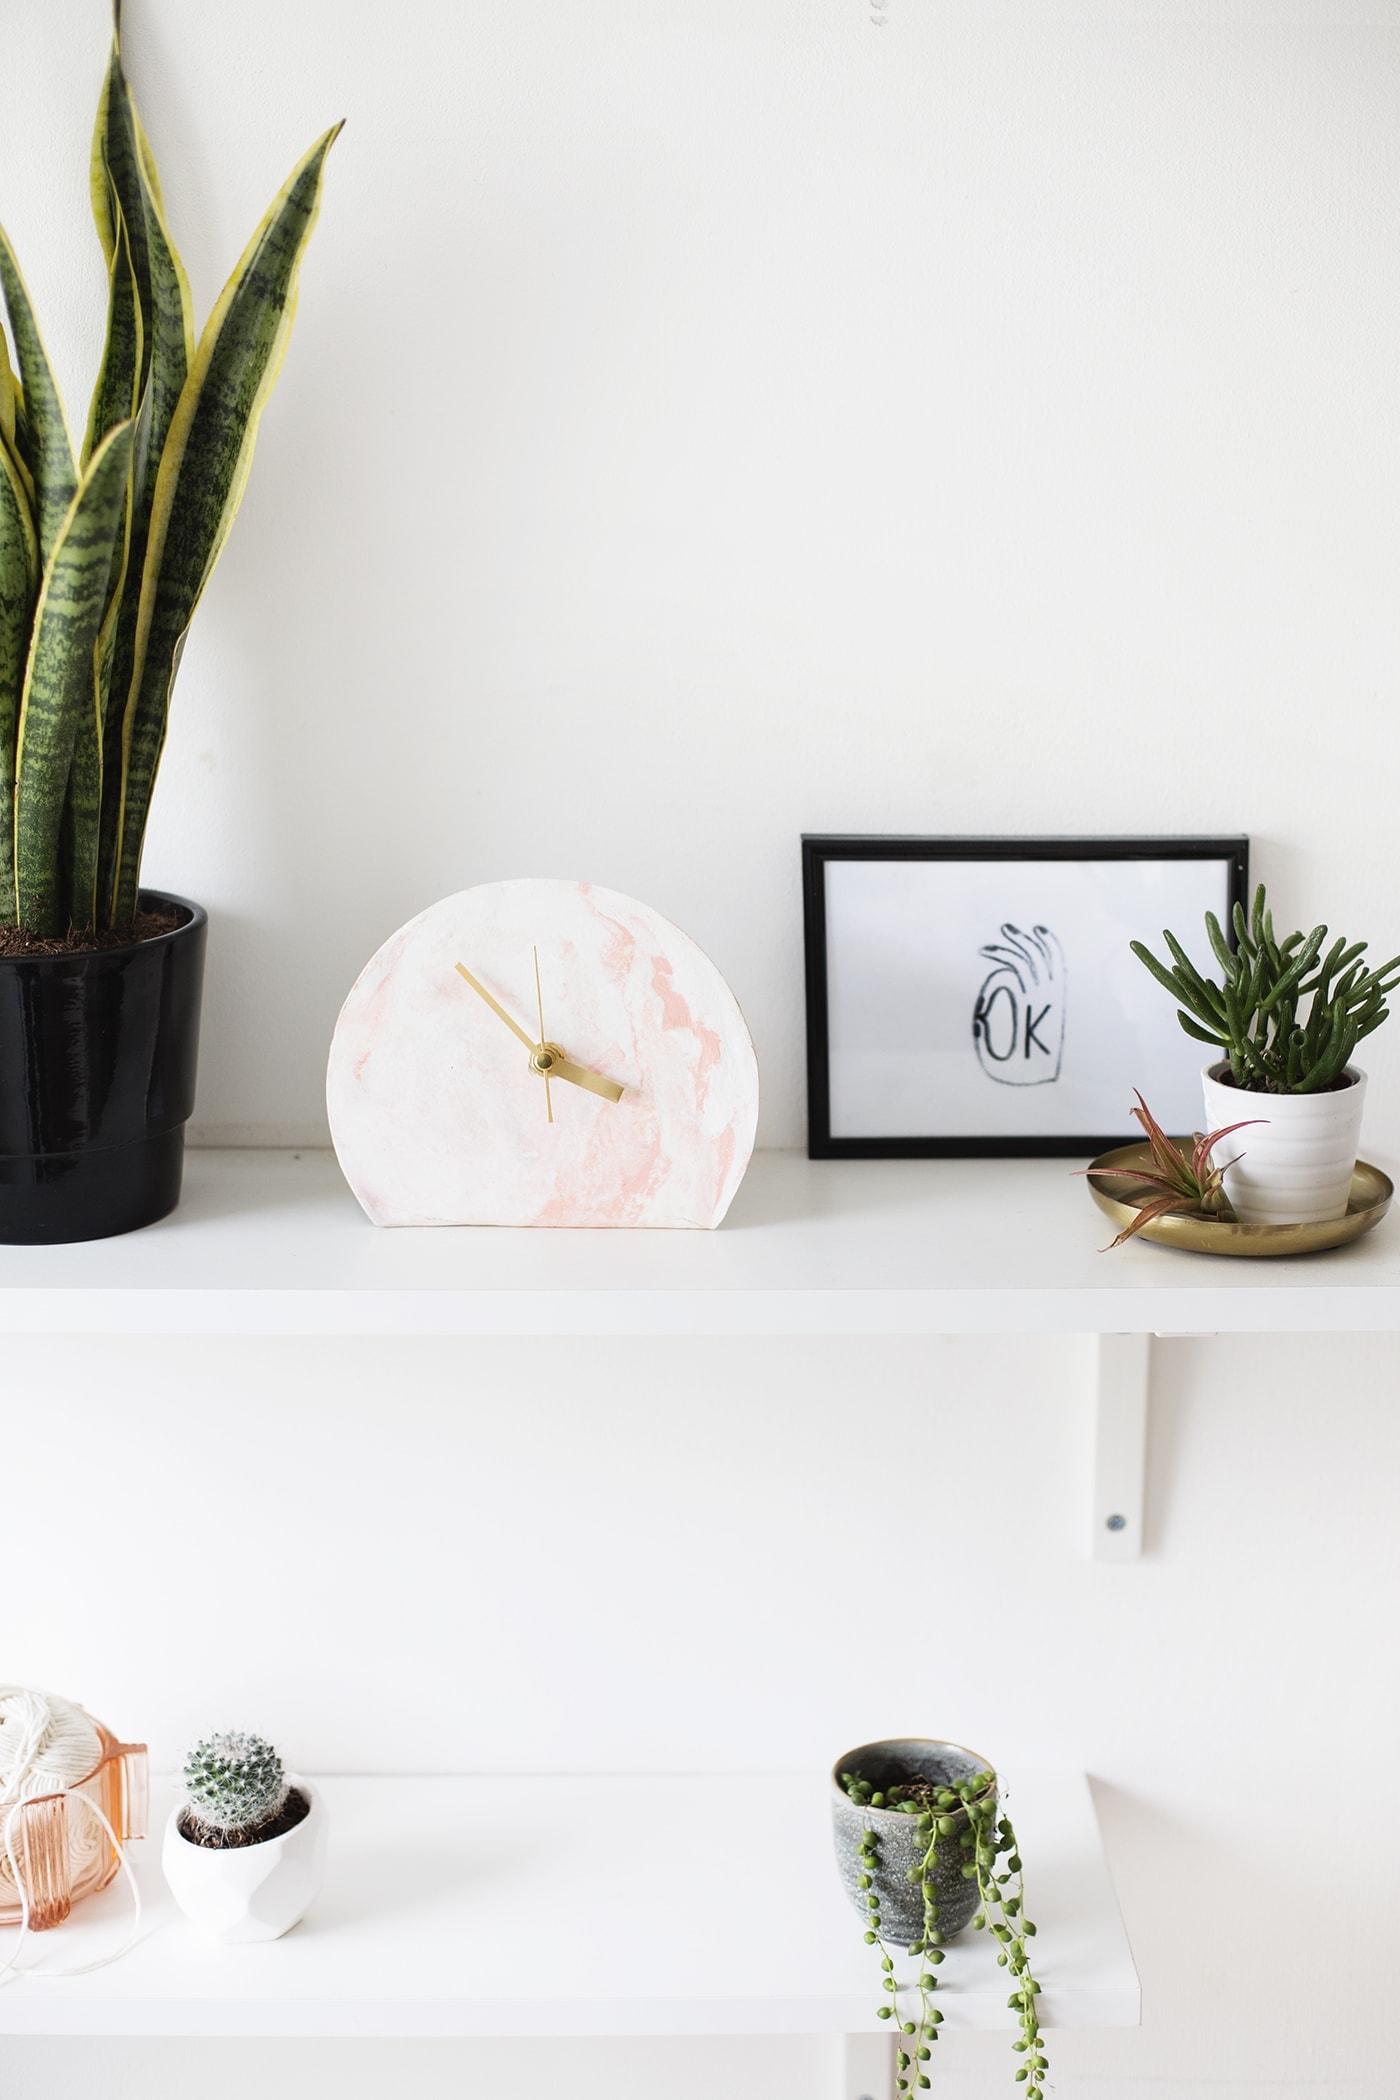
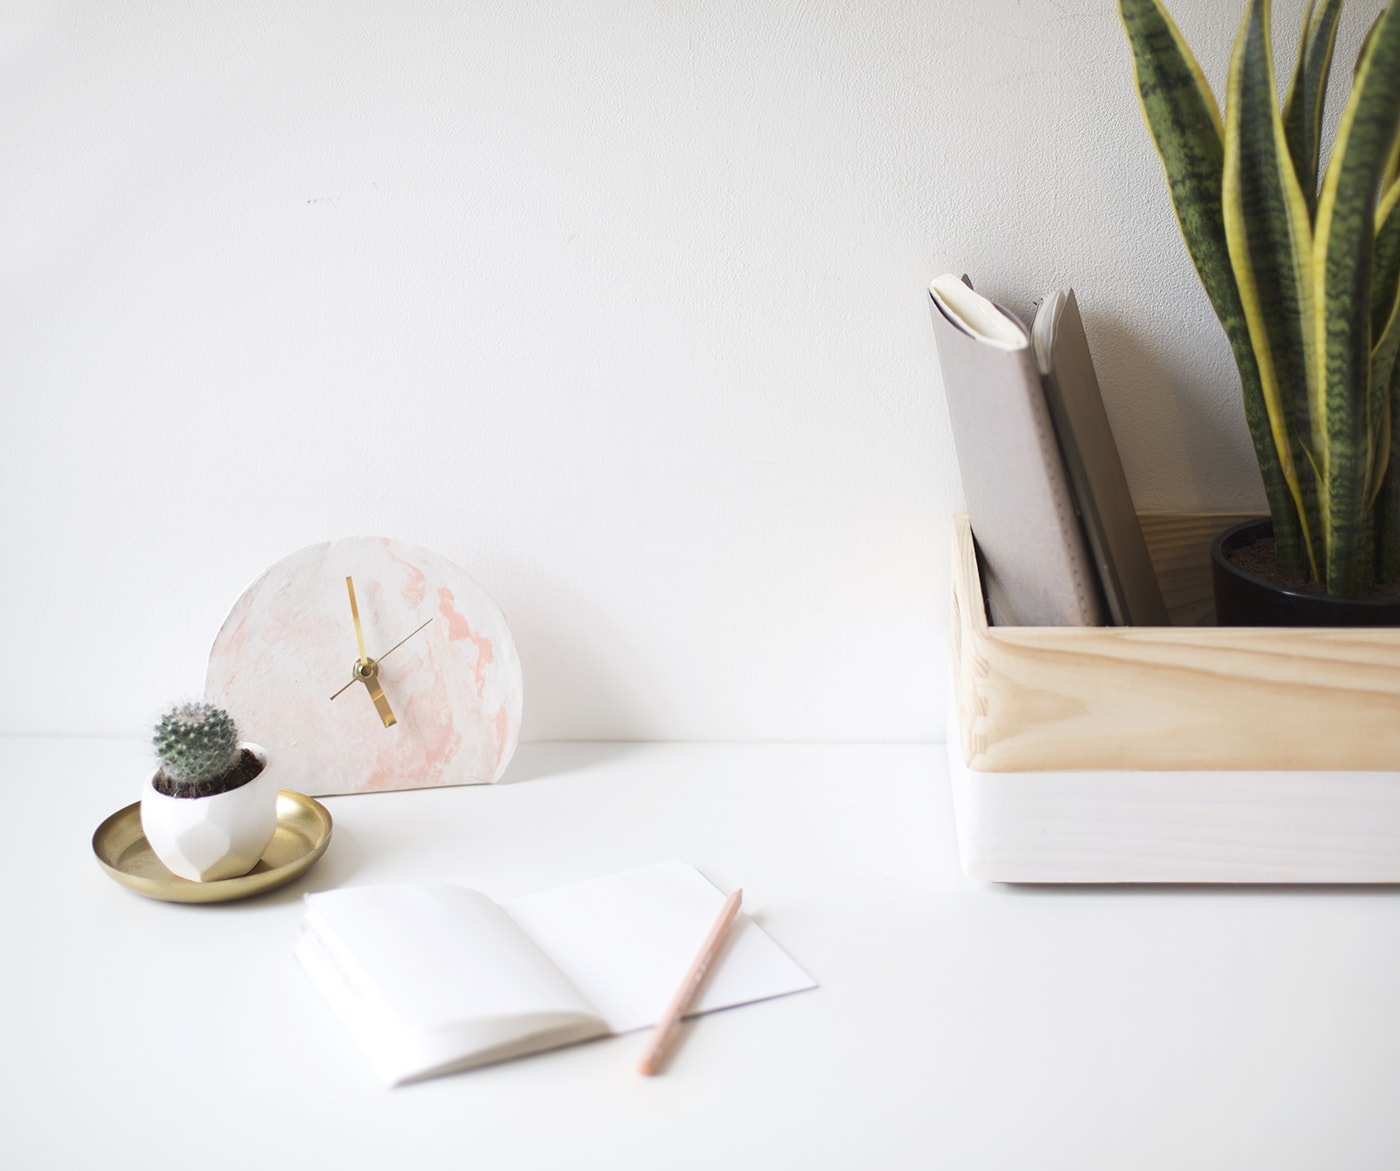
Happy Sunday! Here’s a fun DIY idea for the weekend. After the DIY wall clock I made a while ago, I really fancied dreaming up a desk clock that could stand of it’s own accord. In all fairness it doesn’t have to sit on your desk, it would work just as well on a shelf or even on your bedside table too. To make this a reality, I turned to my age old friend, clay. We really are the best of buddies but for this project I decided to use the air dry version rather than the stuff you bake as I didn’t have anything oven-safe to sit it on to hold it’s shape. If you do however (i.e something with a clean right angle) then go for it! Oven bake clay is definitely easier to work with if you have the choice. I also added a marble effect because you can’t really go wrong with blush marbling can you? It’s always a winner in my eyes and paired with a brass set of hands, it’s a perfect combo.
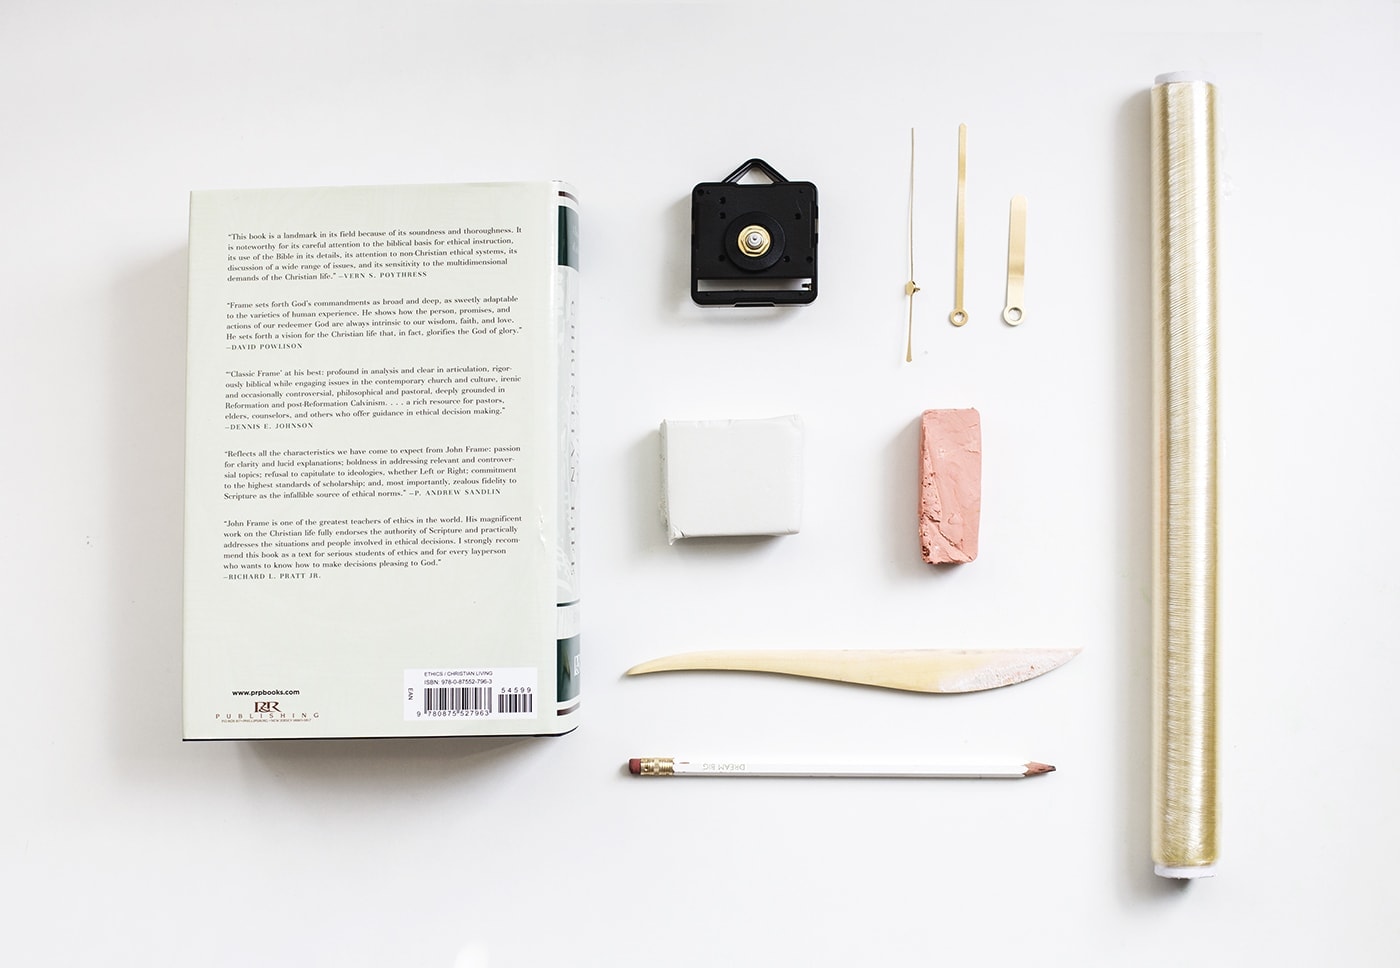
Materials:
- Roughly 250g Air Dry White Clay
- Roughly 150g Air Dry Peach Clay
- Scalpel
- Rolling pin
- Pencil
- Cling film
- Clock mechanism (If you can’t find the hands small enough then you can simply cut them)
- Thick book
- Circular object to draw around like a side plate

Start by cutting sections of the clay and working both the white and peach in your hands (separately) to soften them up. Then roll into long sausage shapes, making sure the peach sausages are thinner proportionally to the white.
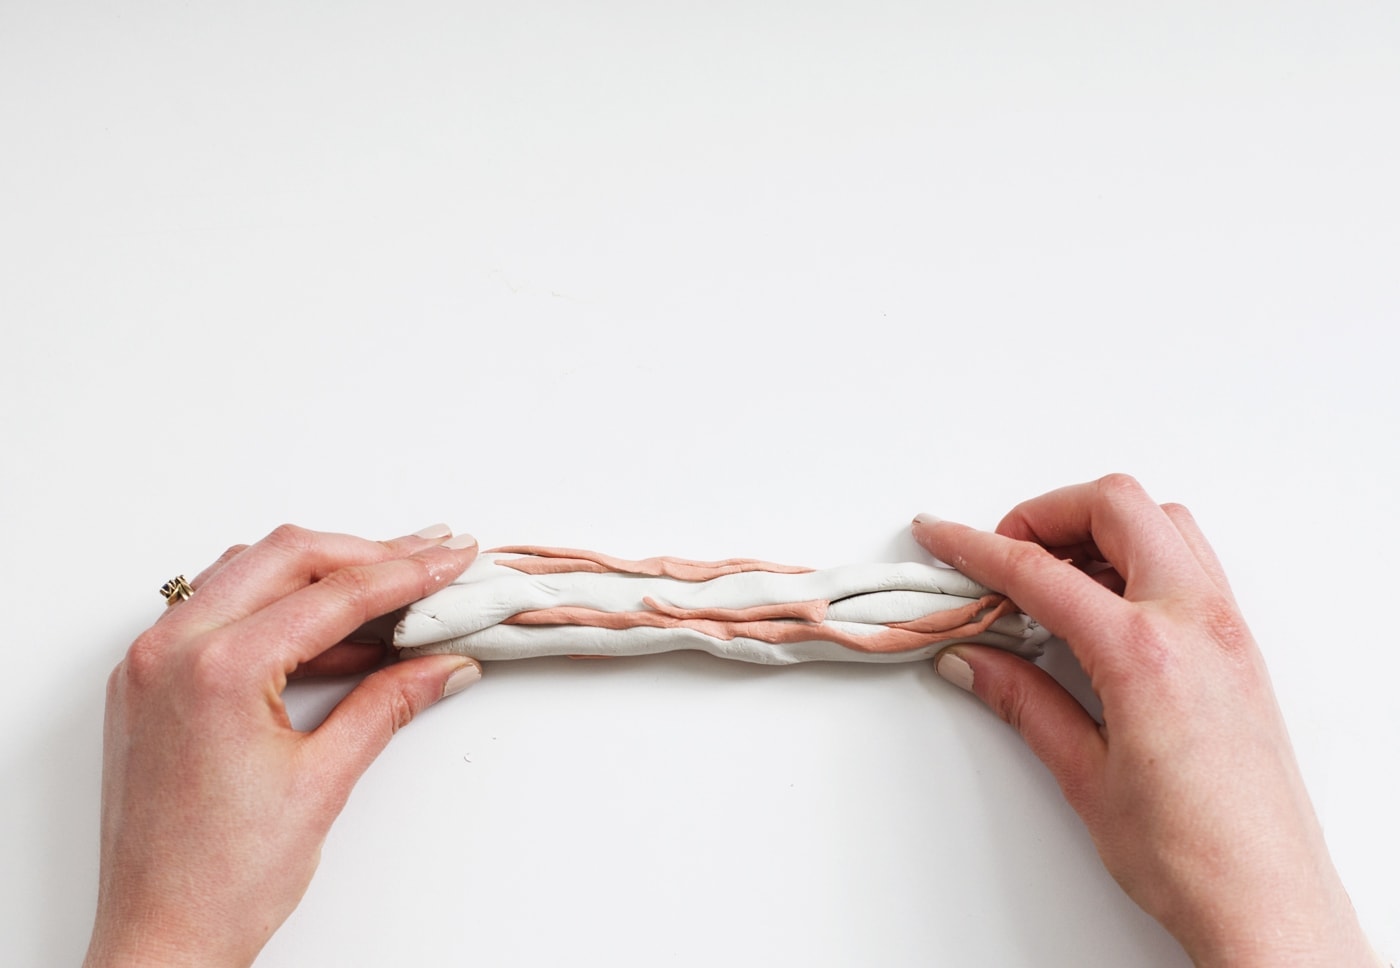
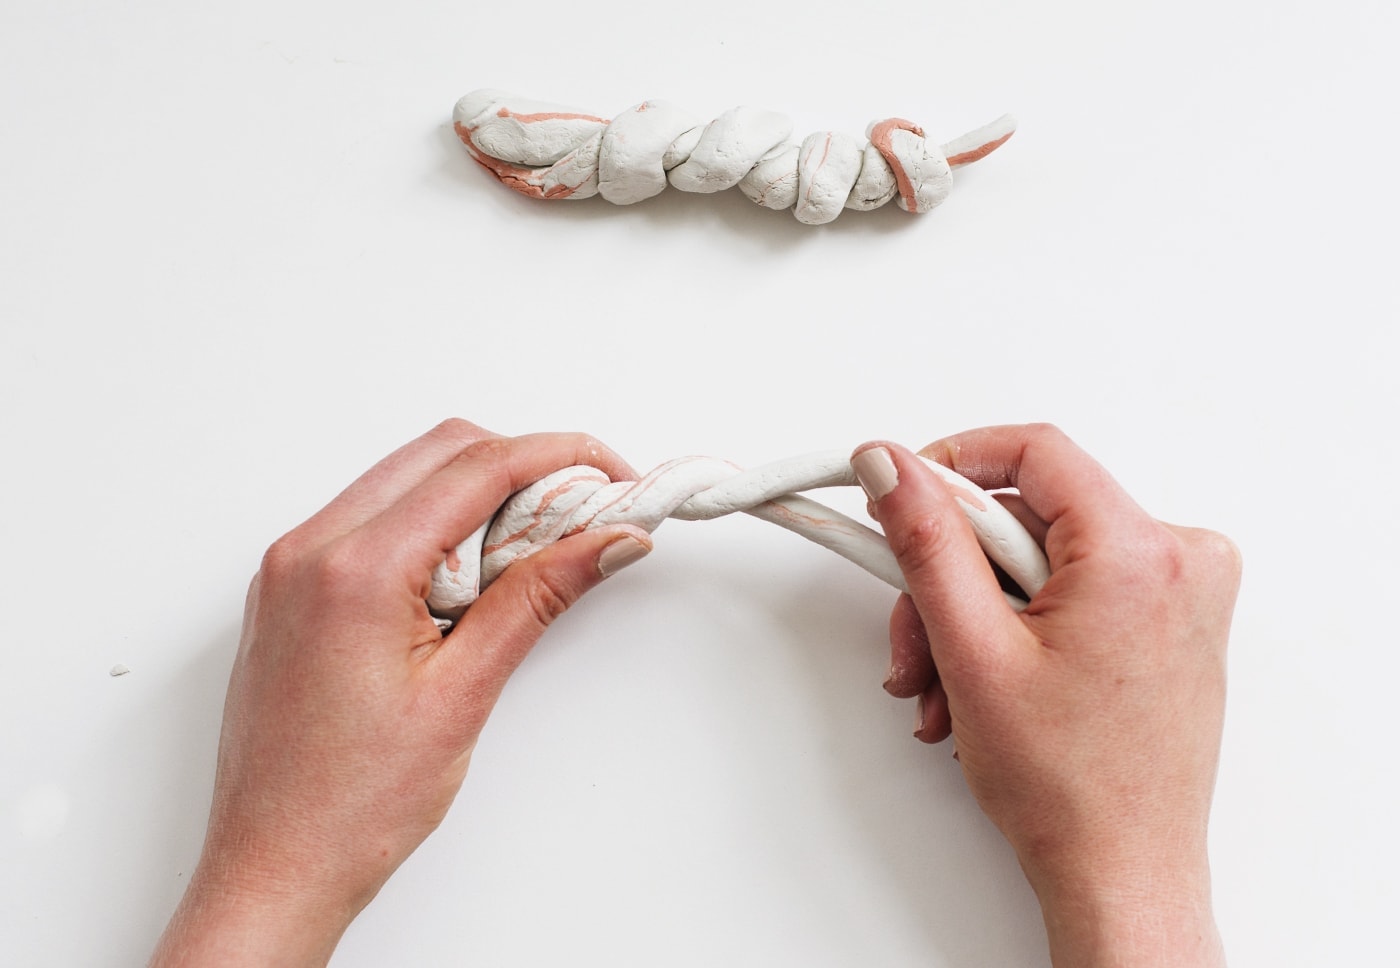
Then bring all the clay sausages together into one large sausage shape (how many more times can I use the word sausage?)
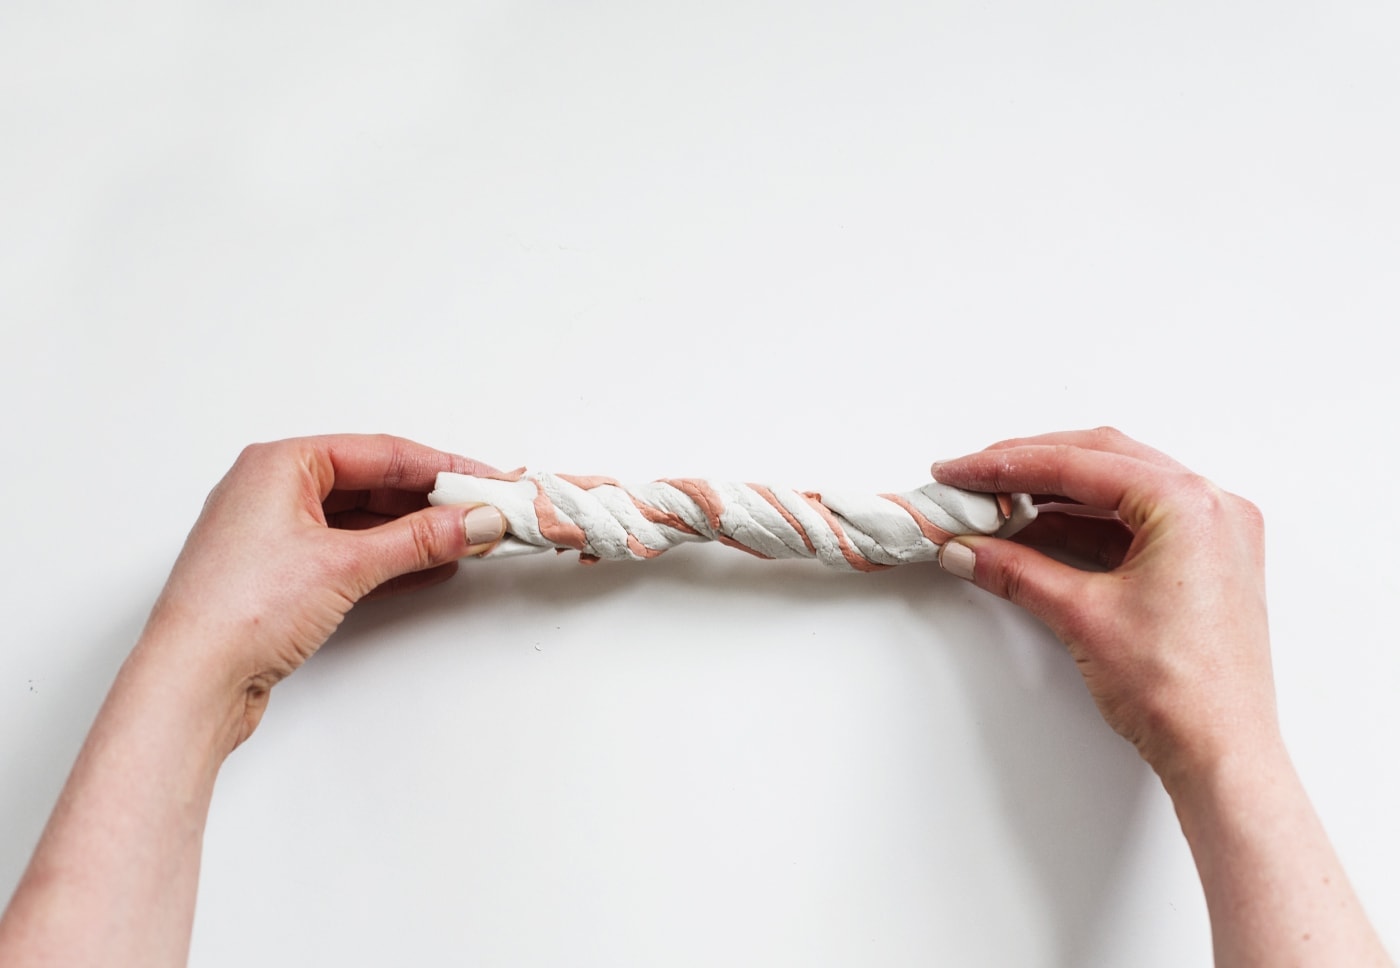
Then twist this all to start merging the colours together.
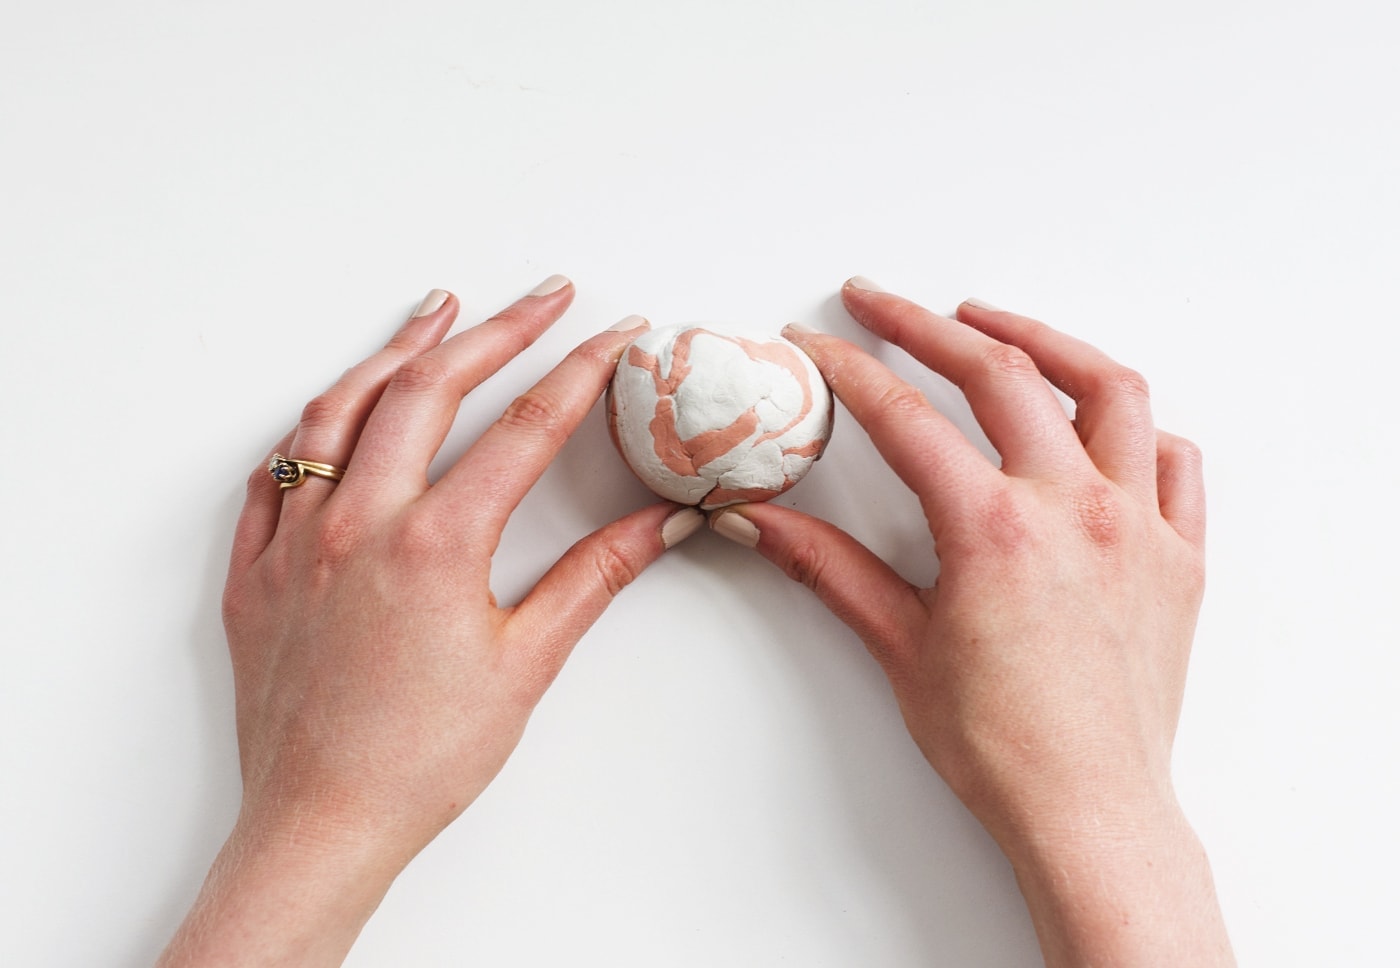
Roll into a ball in your hands
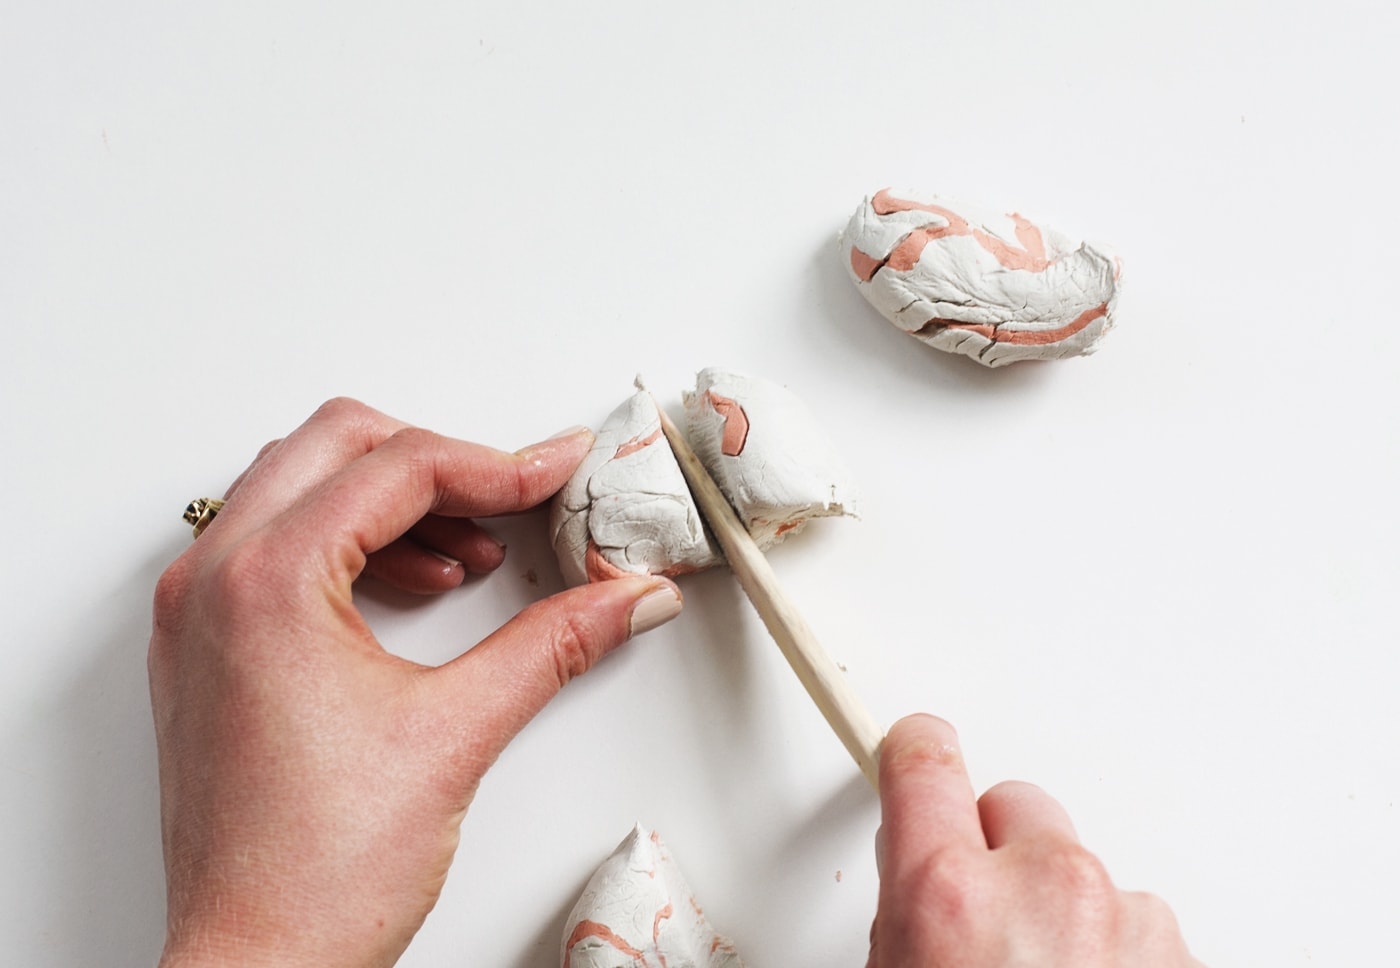
Then cut the ball into 4 segments and repeat the process of rolling each into a long sausage shape but this time they will all be the same thickness.
Twist two of the sausage shapes round each other and do the same with the other two. Roll them to combine and then bring it all together into a ball again.
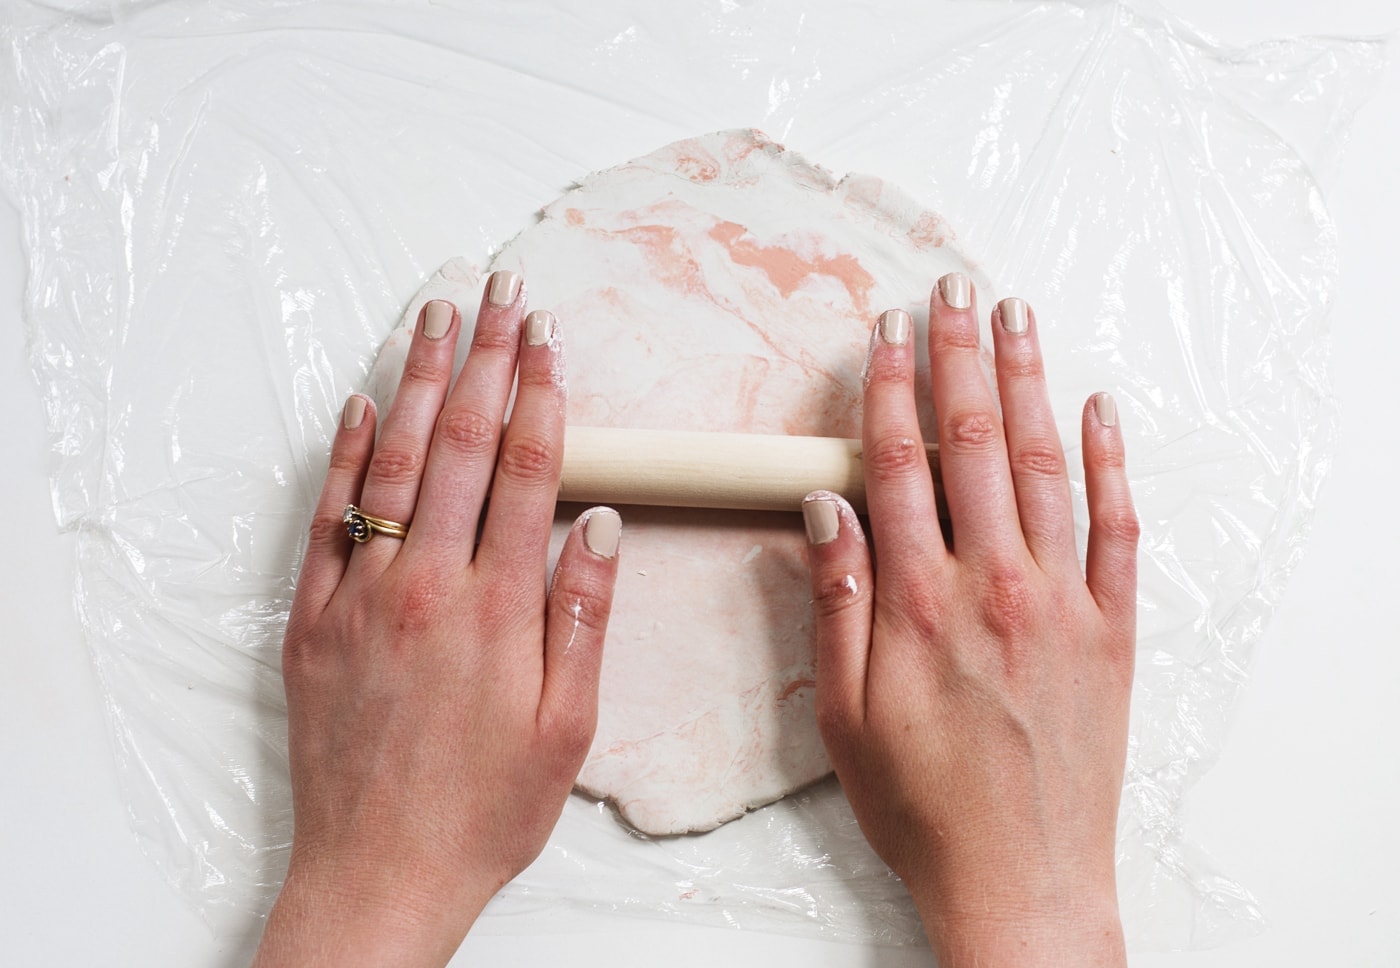
This time roll this out flat with a rolling pin and you’ll start to see the marbling effect happening but make sure you put a layer of cling film down so it’s easily transferable later. If you want the colours to marble even more you can divide it into sections give them a bit of a twist, roll them into a ball and roll out flat with the rolling pin again.
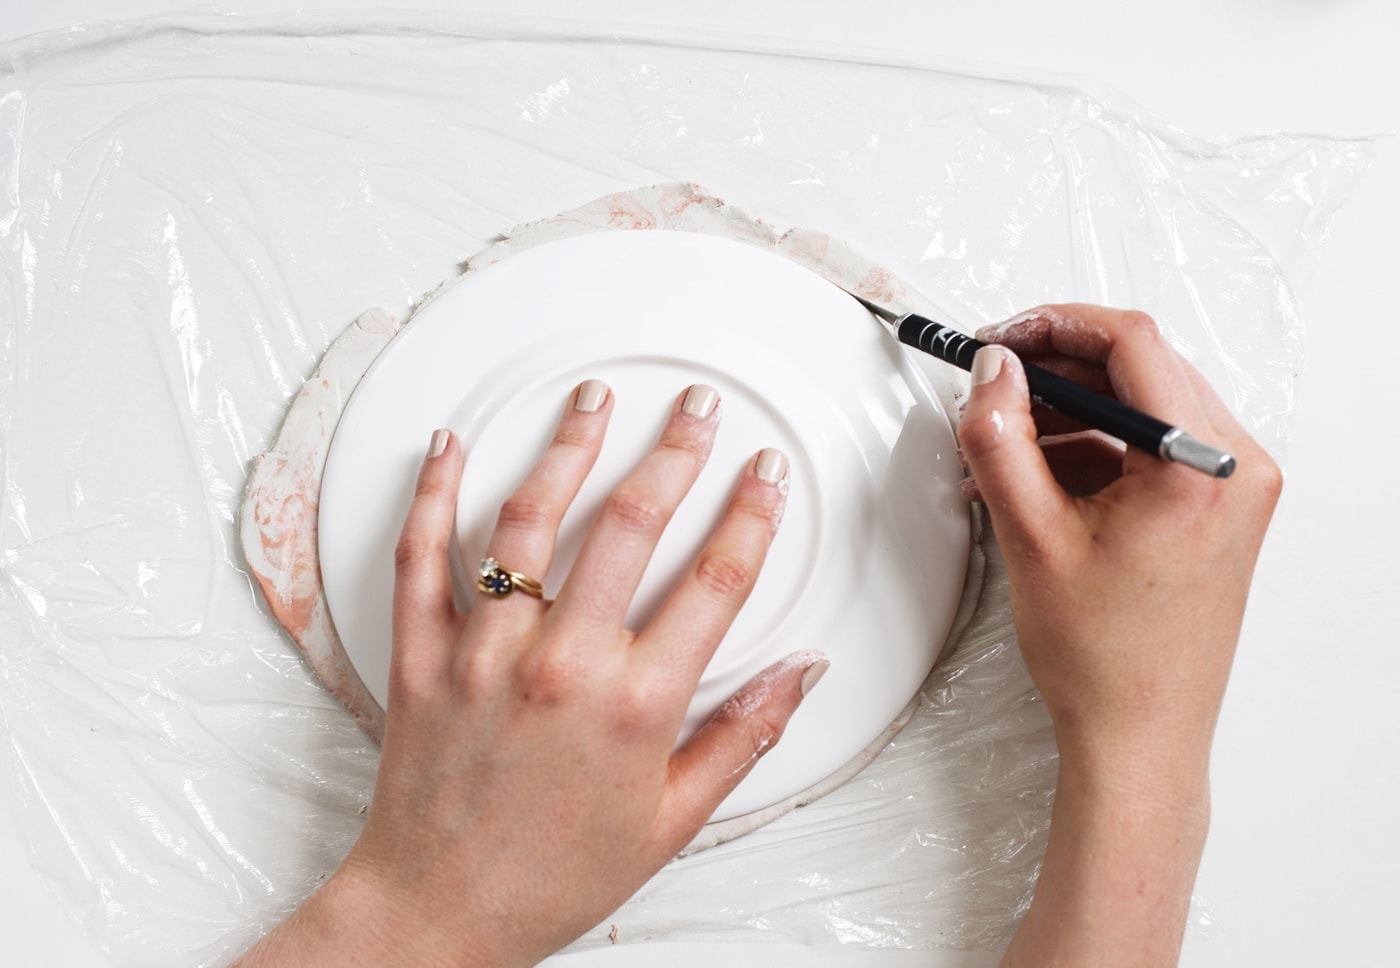
When you have the desired effect roll to an even thickness about take the object you want to draw around and place on top of the rolled clay. Trace around with your scalpel to cut out a clean circle.
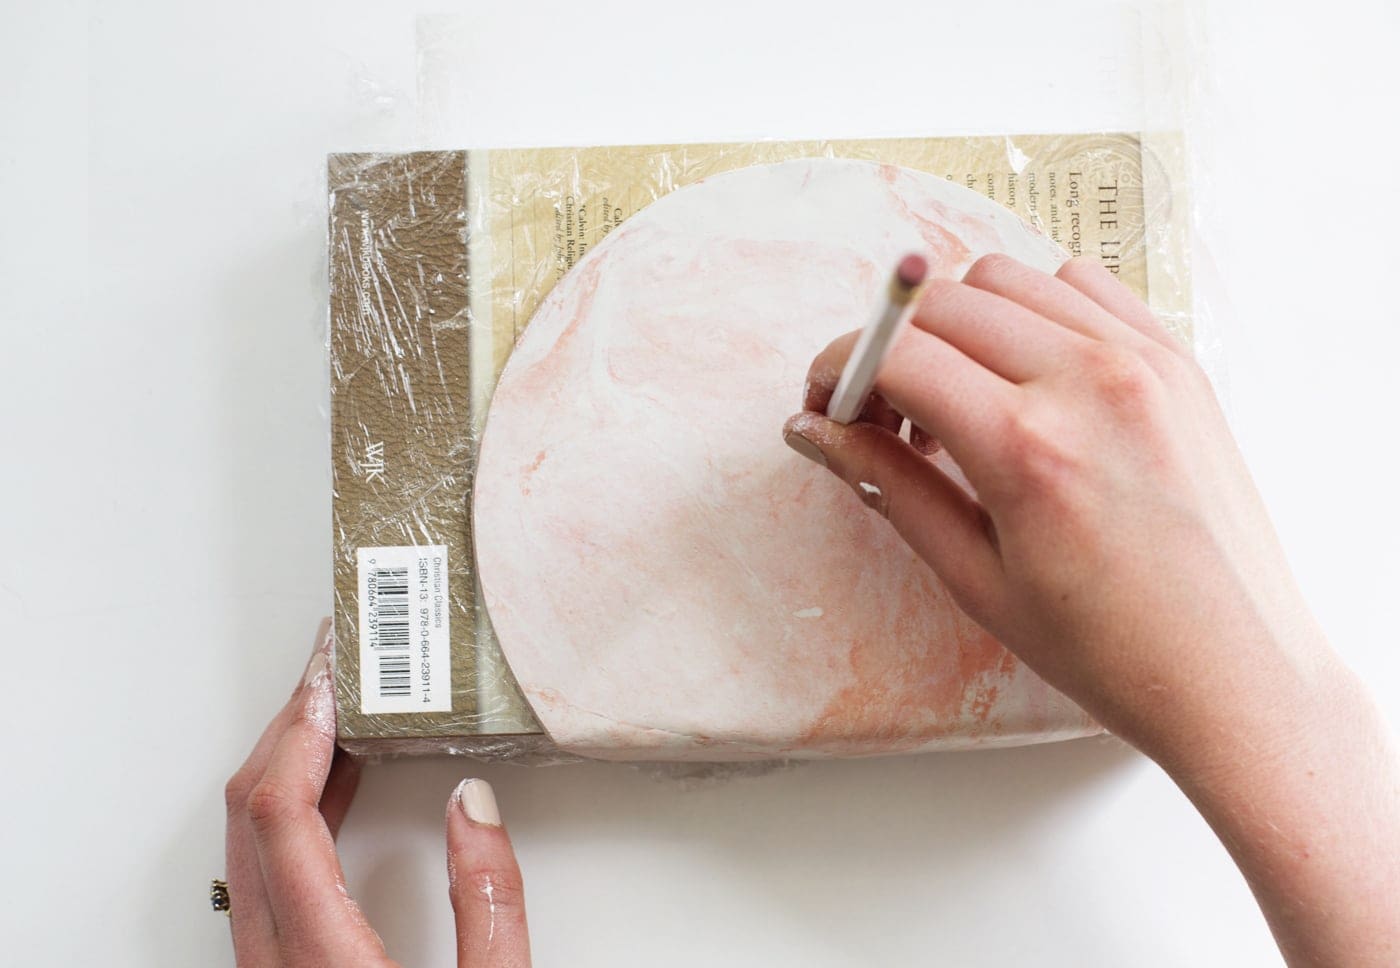
Transfer over onto the book holding the cling film and allow the bottom fifth of the circle to hang over the edge of the book, carefully folding it round the spine to create a right angle. If any cracks appear just use a bit of water on your finger to smooth them over. Use a pencil to make a hole in the centre of the area that will be upright. Use a ruler to find that point if it helps. Make sure the hole is large enough for your clock mechanism to get through.
Set this aside to dry. You can even sit another book on top and prop something else flat against the under side to make sure the clay stays flat as it dries. Mine actually took about 48 hours to be totally bone dry and hard but this probably differs between makes. It’s quite handy if after 24 hours (it should be stiff but still a little malleable) you check that the hole will house the clock mechanism as it gives you the opportunity to still make it a little larger with the scalpel if needs be.
Place the mechanism through the hole once dry, tighten the screw and fit the hands in the correct order. Now you can add a battery and put your new creation to good use!

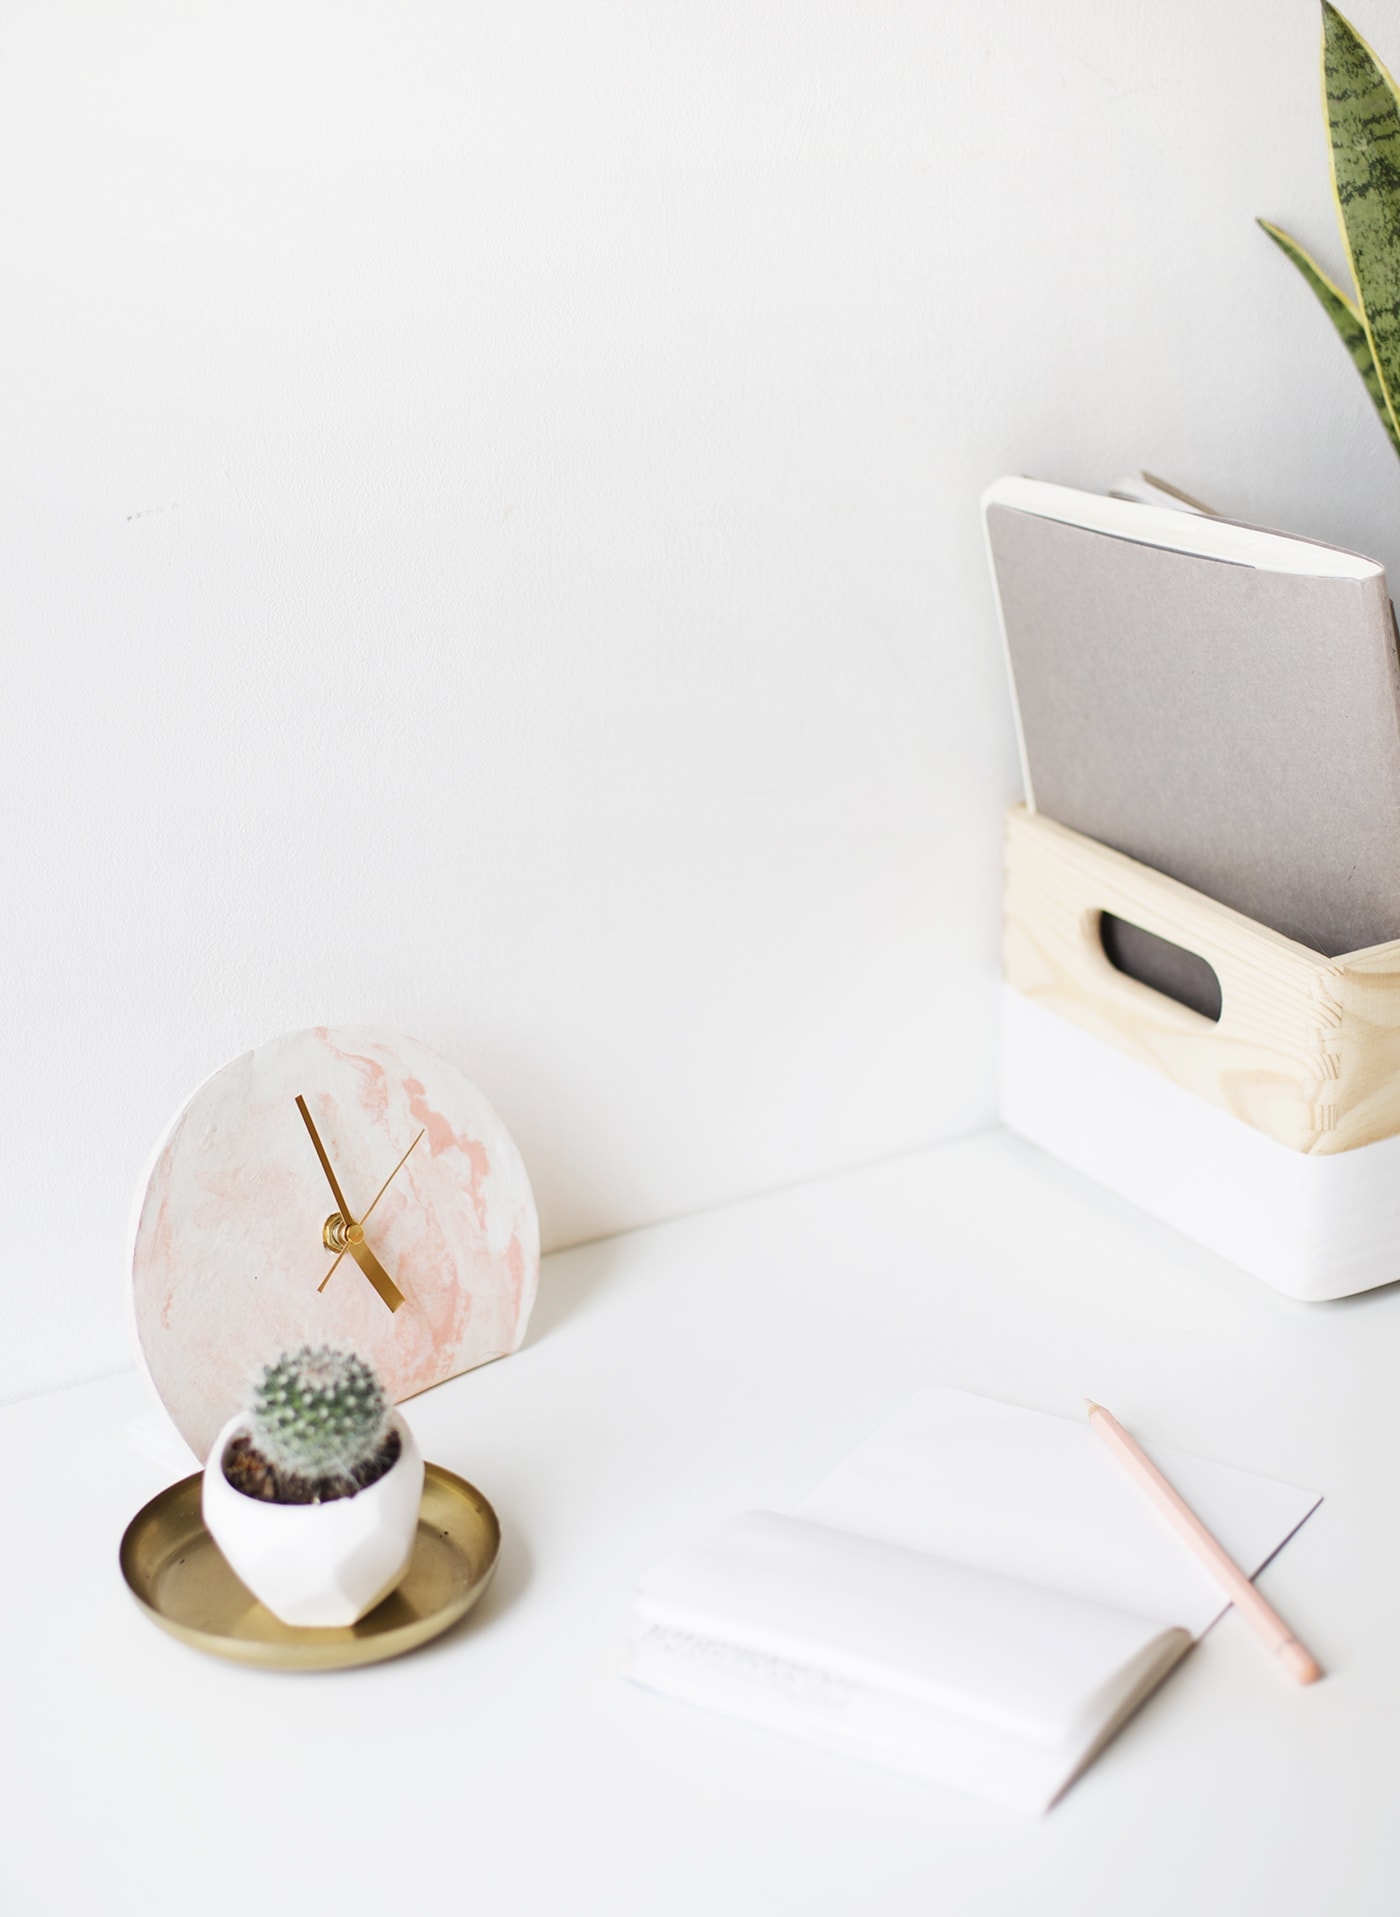
You can of course try out different shapes, different colour combinations or even different coloured hands. Whatever suits your space really! I probably don’t say it enough but please do tag me if you make any of my DIY projects and share them on social media. There’s little I love more than seeing you put my tutorials to good use and so often they look even better than my version!
You might also like


Meet The Lovely Drawer

Hi, I’m Teri and welcome to my own creative corner of the internet. I blog about interiors, DIY projects, design inspiration and my general life so stick around have a read and say hi.
In the shop
 Quick ViewSelect options
Chicory
£20.00 – £25.00
 Quick ViewSelect options
Personalised Cuddly Bunny
£30.00 – £35.00
Work with Me
The Lovely Drawer is an award winning blog with a loyal audience that has grown over the years. I love working with brands small and large on exciting collaborations that can bring products alive in my own signature aesthetic.