

A Pocket Full
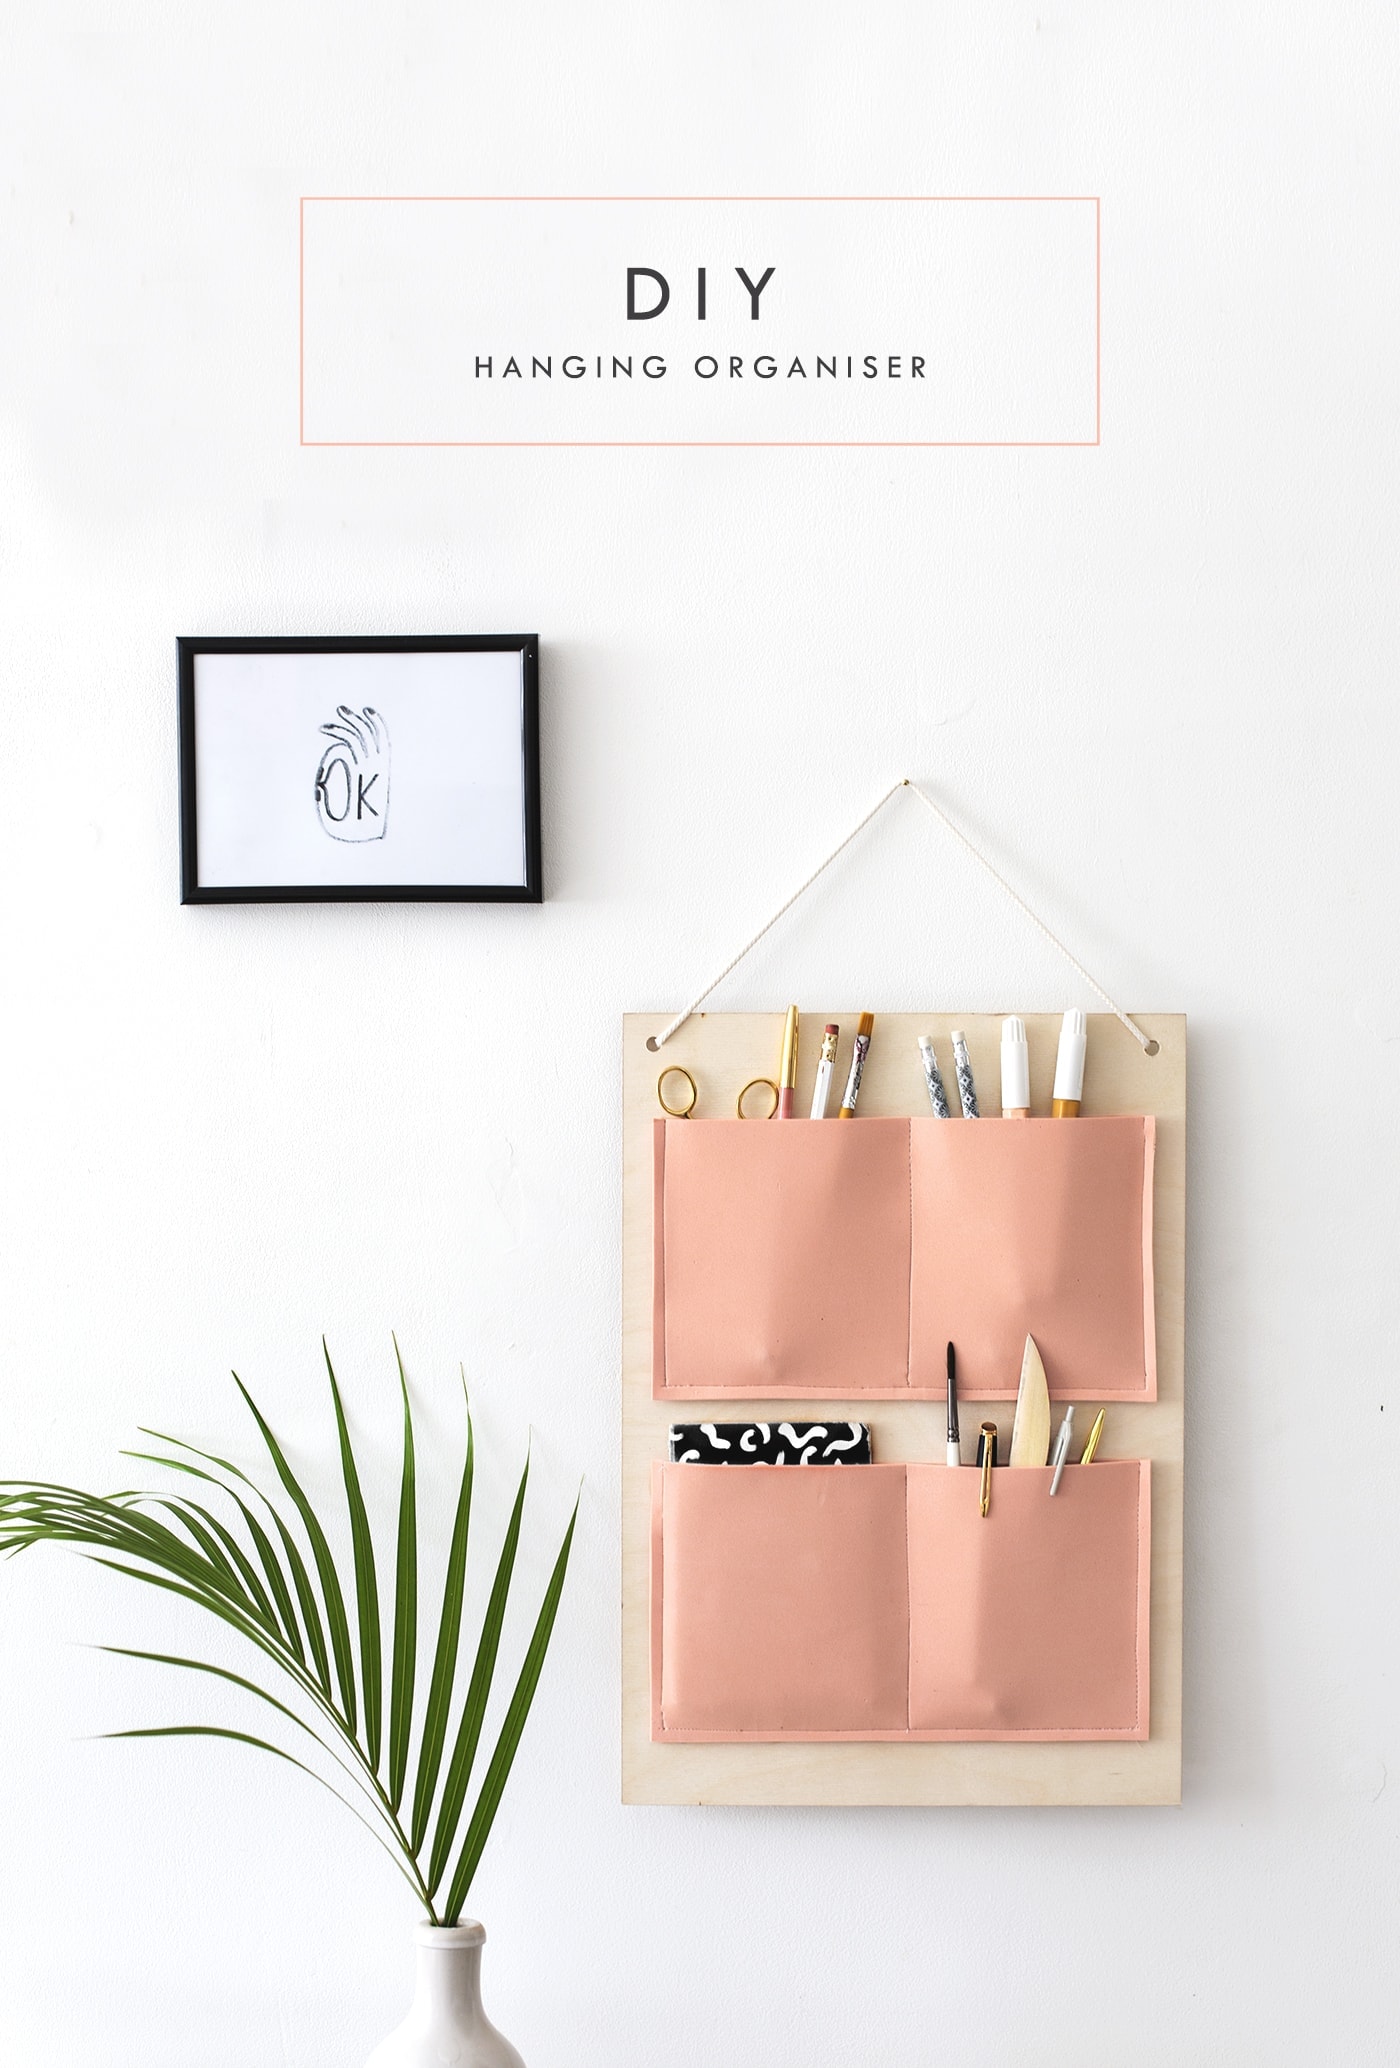
I’ve said it before and it’s true, I really do love organisation DIY projects. Maybe it’s because life feels so hectic most of the time that any small ways I can help curb the crazy is very welcome. This project can help you organise any part of your home really but my initial thoughts were for my art supplies. They’re always in need of a tidy, especially when they’re also always increasing! Just to throw another idea out there, you could also use it for mail. Perhaps one pocket for ‘keepers’, one for ‘unread’ and one for ‘action’. I could go on but I won’t bore you.
I always say it but this tutorial is very simple to follow…but warning: one stage does involve a power tool eek! Just drilling two simple holes though so don’t panic. I used plywood as my base as I managed to find this lovely light one online, and so continues my love affair with light wood. I won’t apologise, not yet anyway.
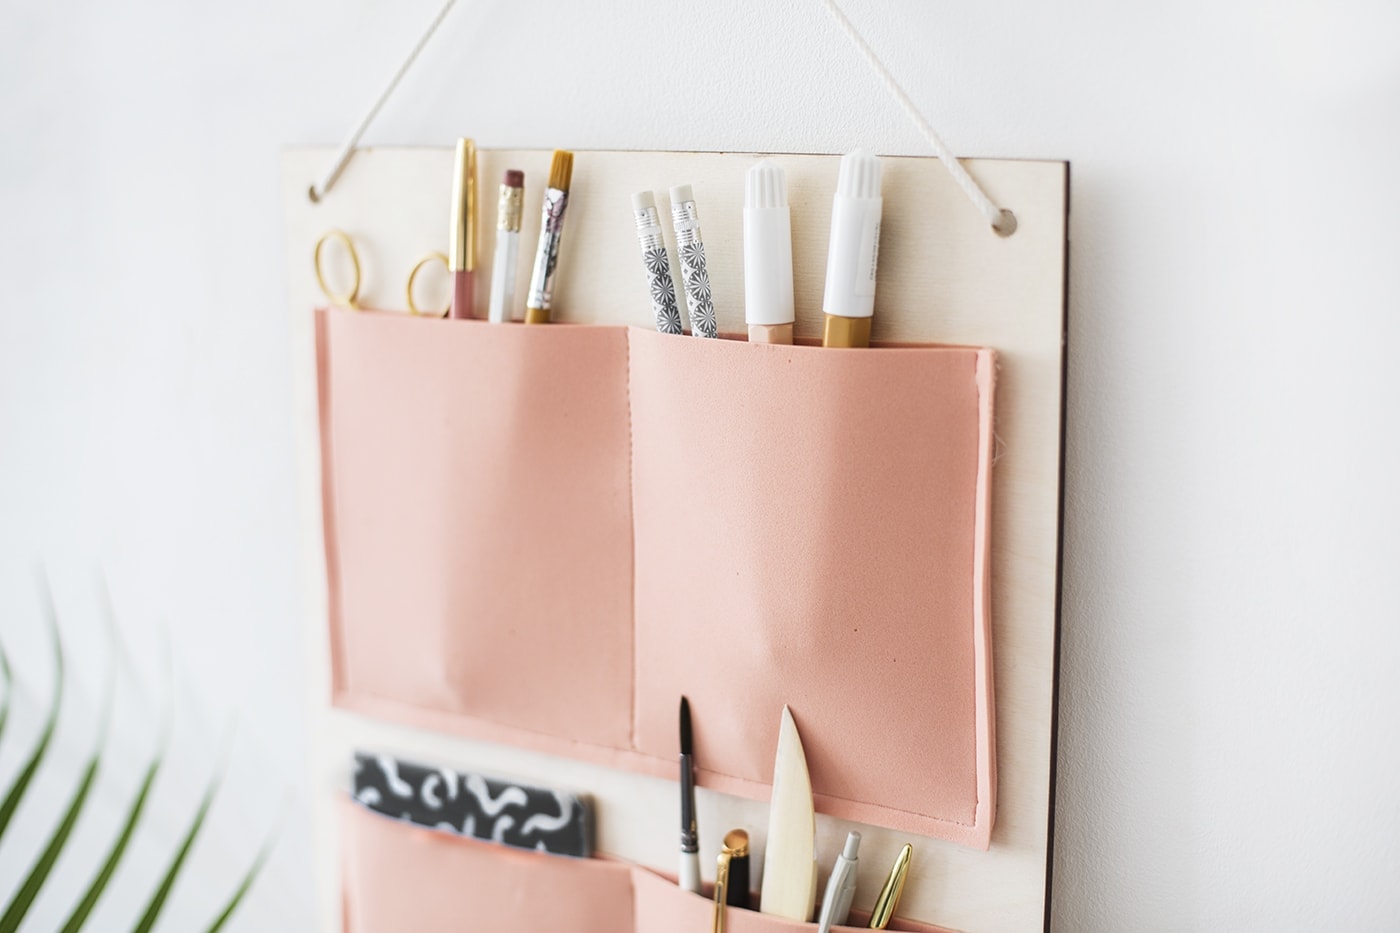
I used this fun salmon coloured foam I found in a local fabric shop as I fell in love with the shade and had an overwhelming urge to stroke it (don’t judge me, it’s so smooth) but you could also use a nice leather or leatherette, which may even make sewing a bit easier. Anything fairly robust will work.

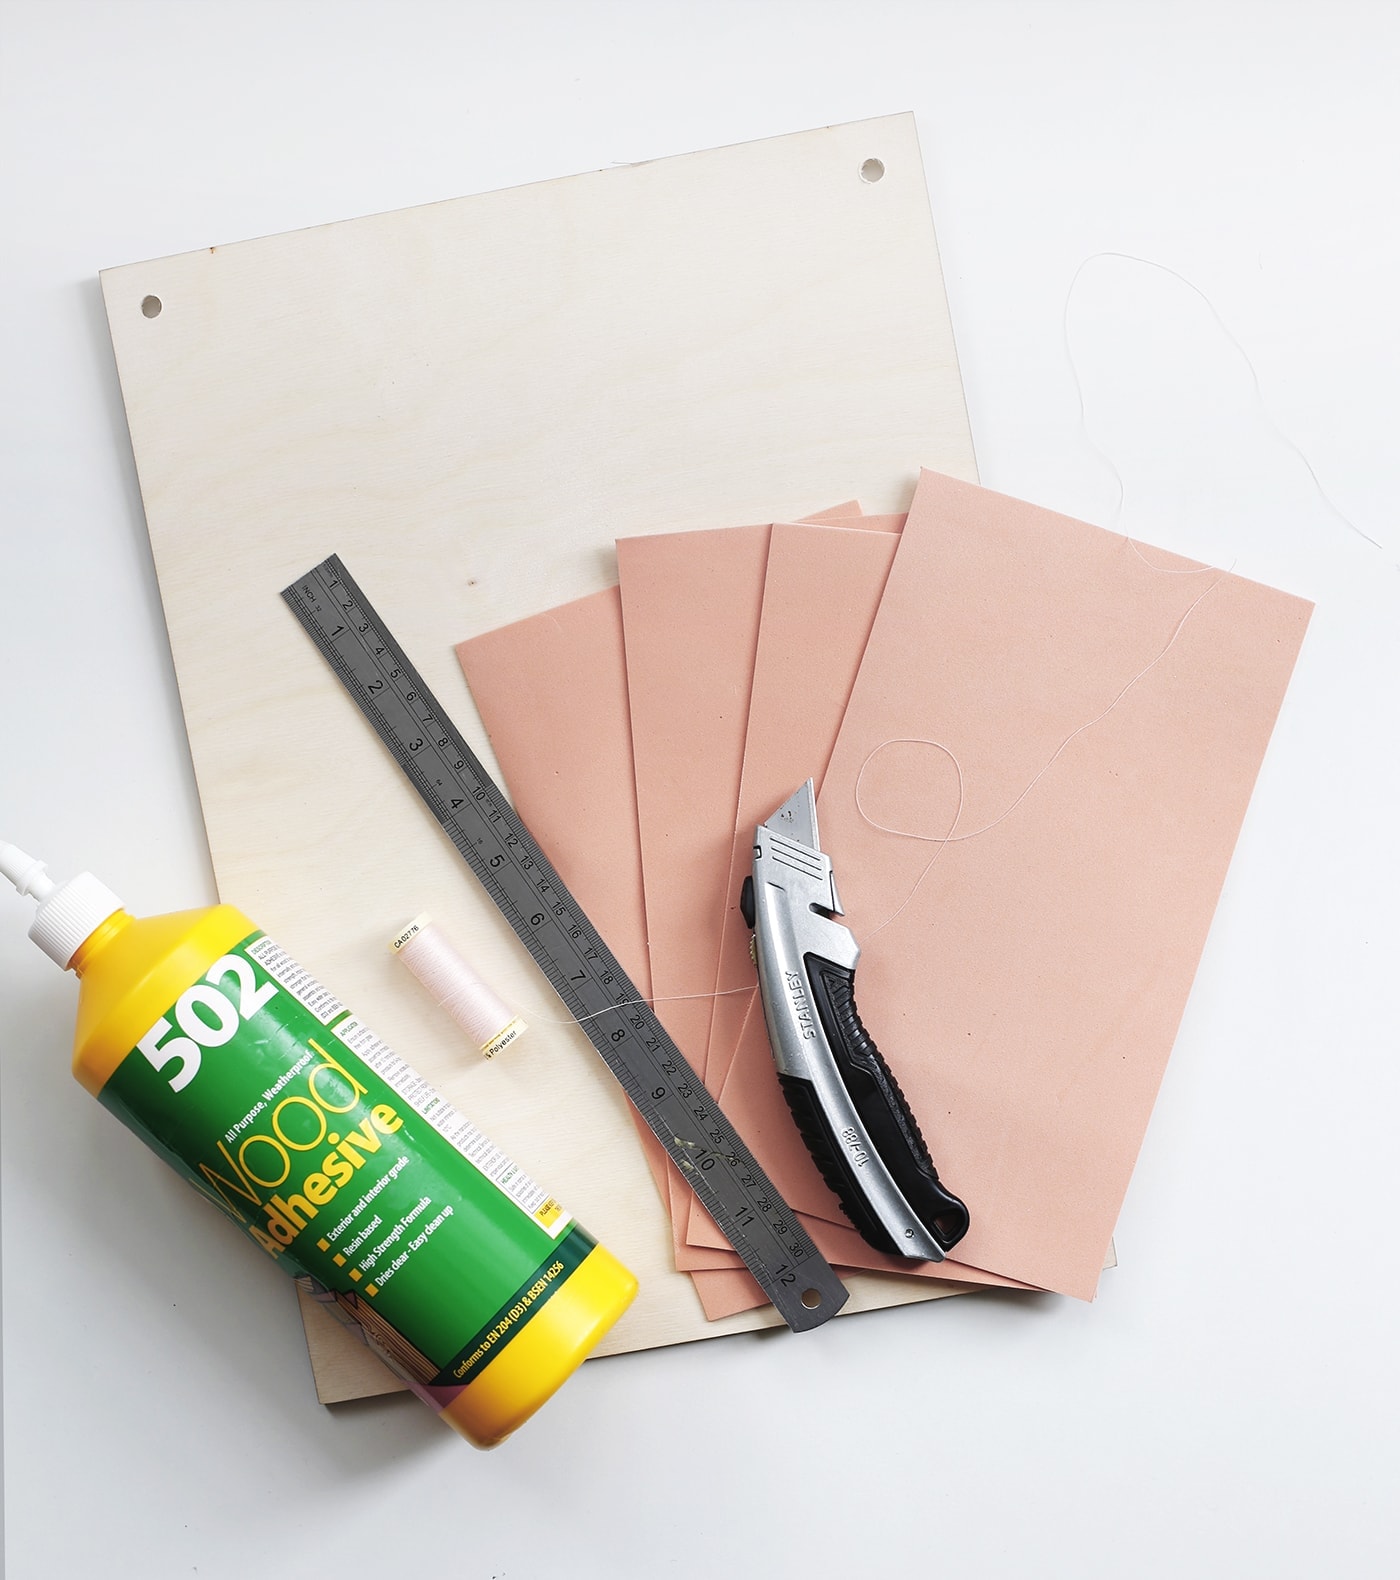
Materials:
- A3 Plywood sheet ( I used 6mm)
- Power Drill
- Paddle drill bit (must fit your rope through)
- Coloured foam or leather (4 x 26cm x 15cm sections)
- Machine thread in corresponding colour
- Ruler
- Pencil
- Wood glue
- Stanley knife
- White rope length
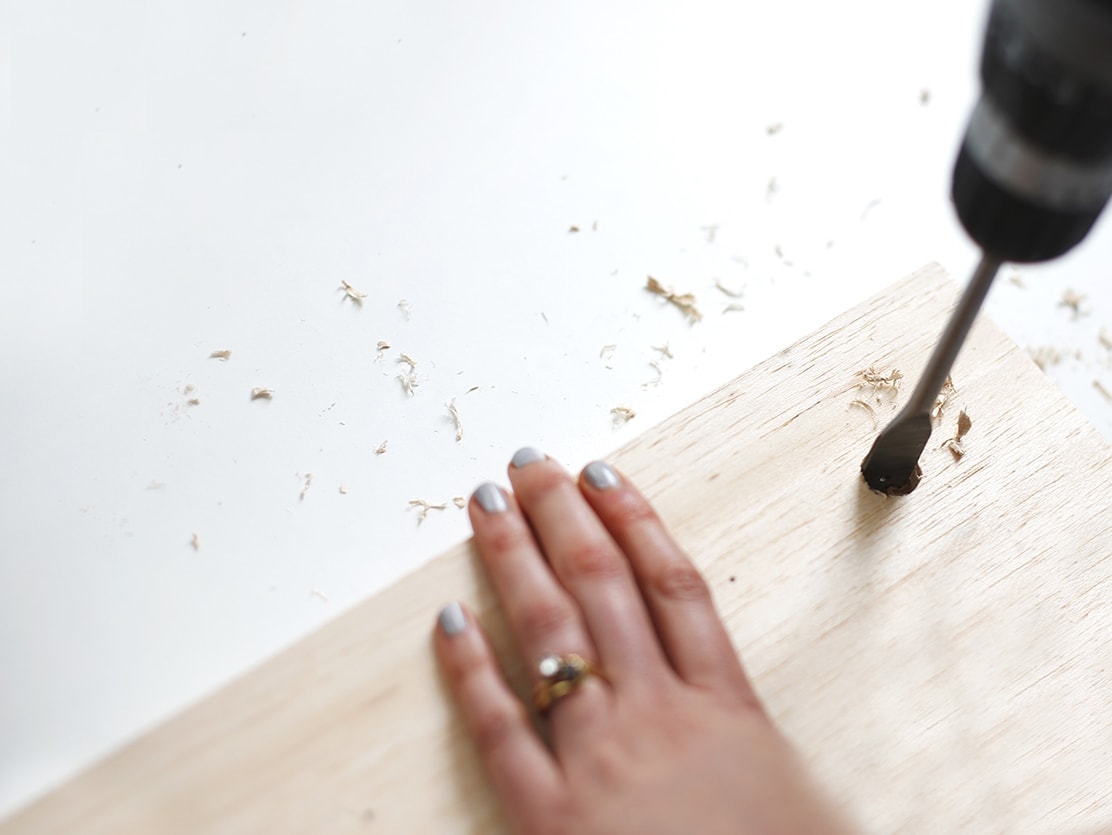
Start by measuring in evenly from either side with your ruler and make a mark with your pencil which will pinpoint where to drill the hanging holes. I measured in 3cm to give you some idea. Then use your paddle bit on your drill, lining up the point with the pencil marking. Put some spare wood underneath to protect the surface below and drill right through.
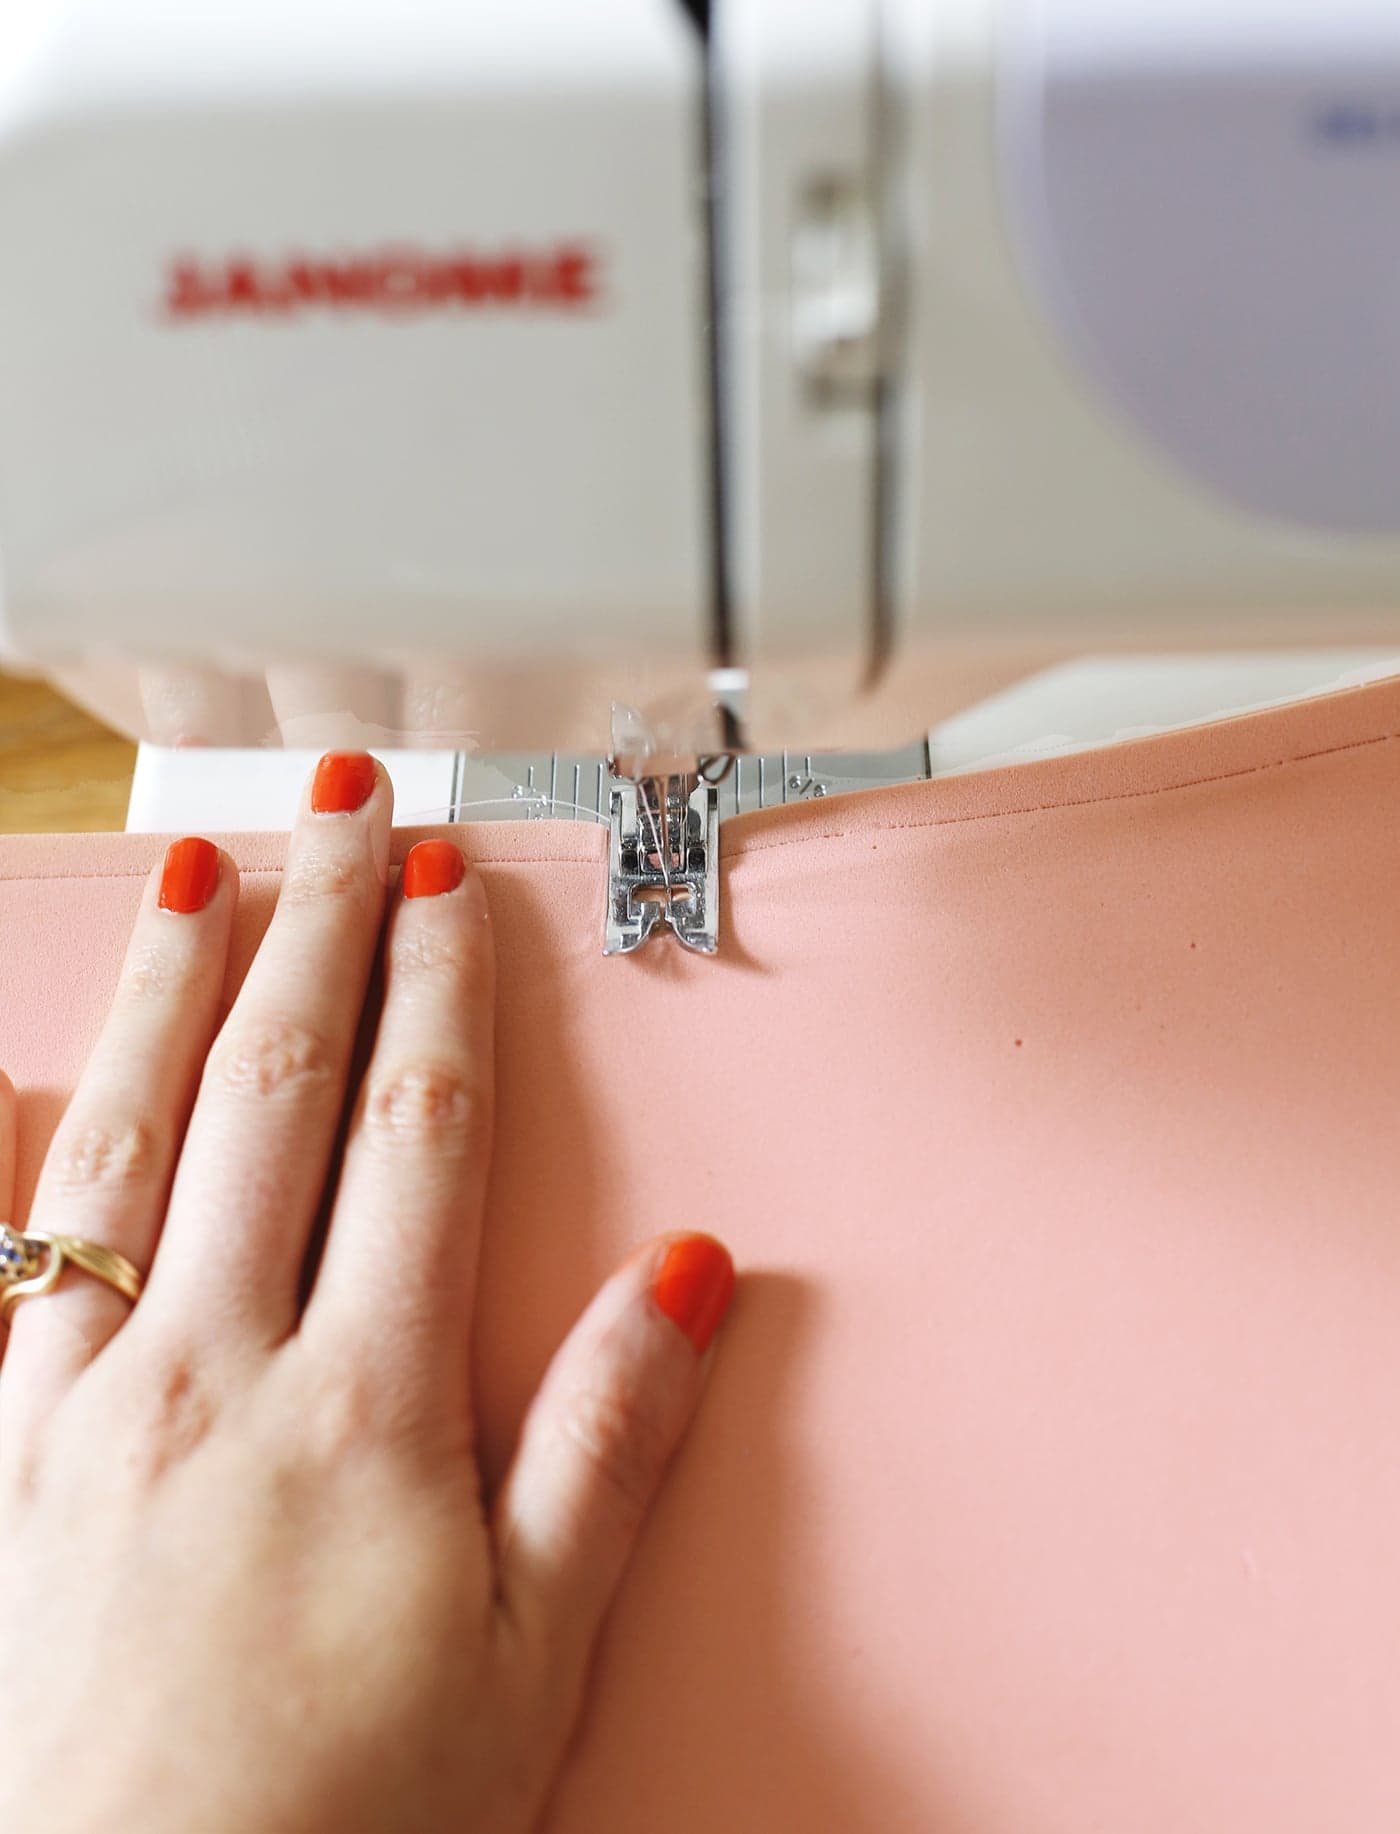
Thread your machine with the matching thread and select a long, straight stitch. Line the foam/leather pockets up so that there are two pairs. Pinning them together will leave marks so if you want them to stay aligned then just use some tape. Stitch around the outside, roughly a centimetre in from the edge, finishing off at either end. Do the same with both pairs to create two pockets. Then measure halfway and make a tiny pencil mark at the top and bottom and stitch between these points with another straight stitch. Try going from bottom to top to limit any puckers in the fabric.
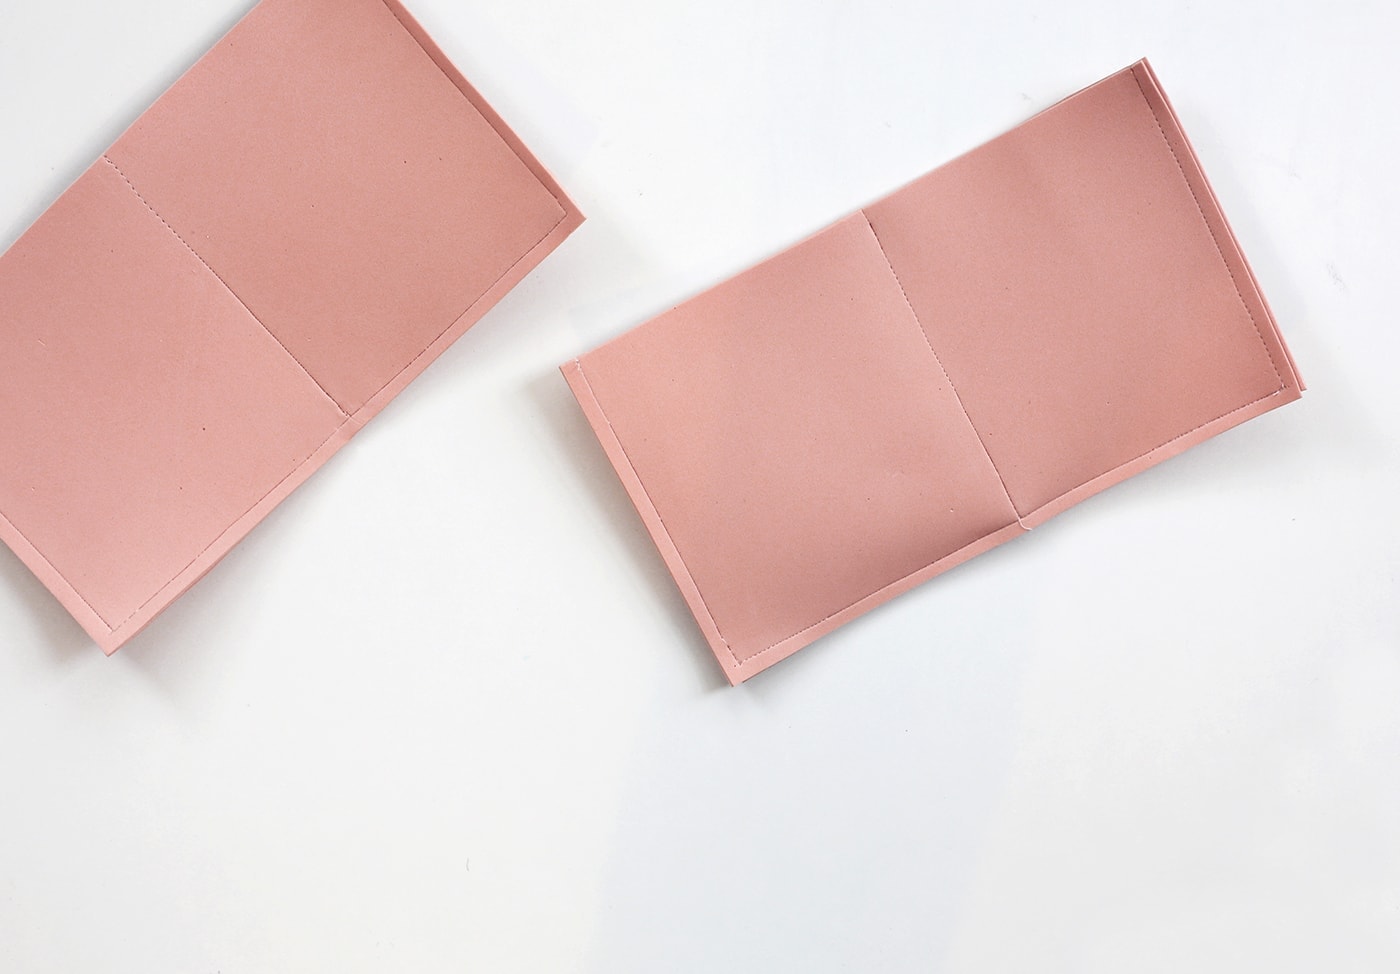
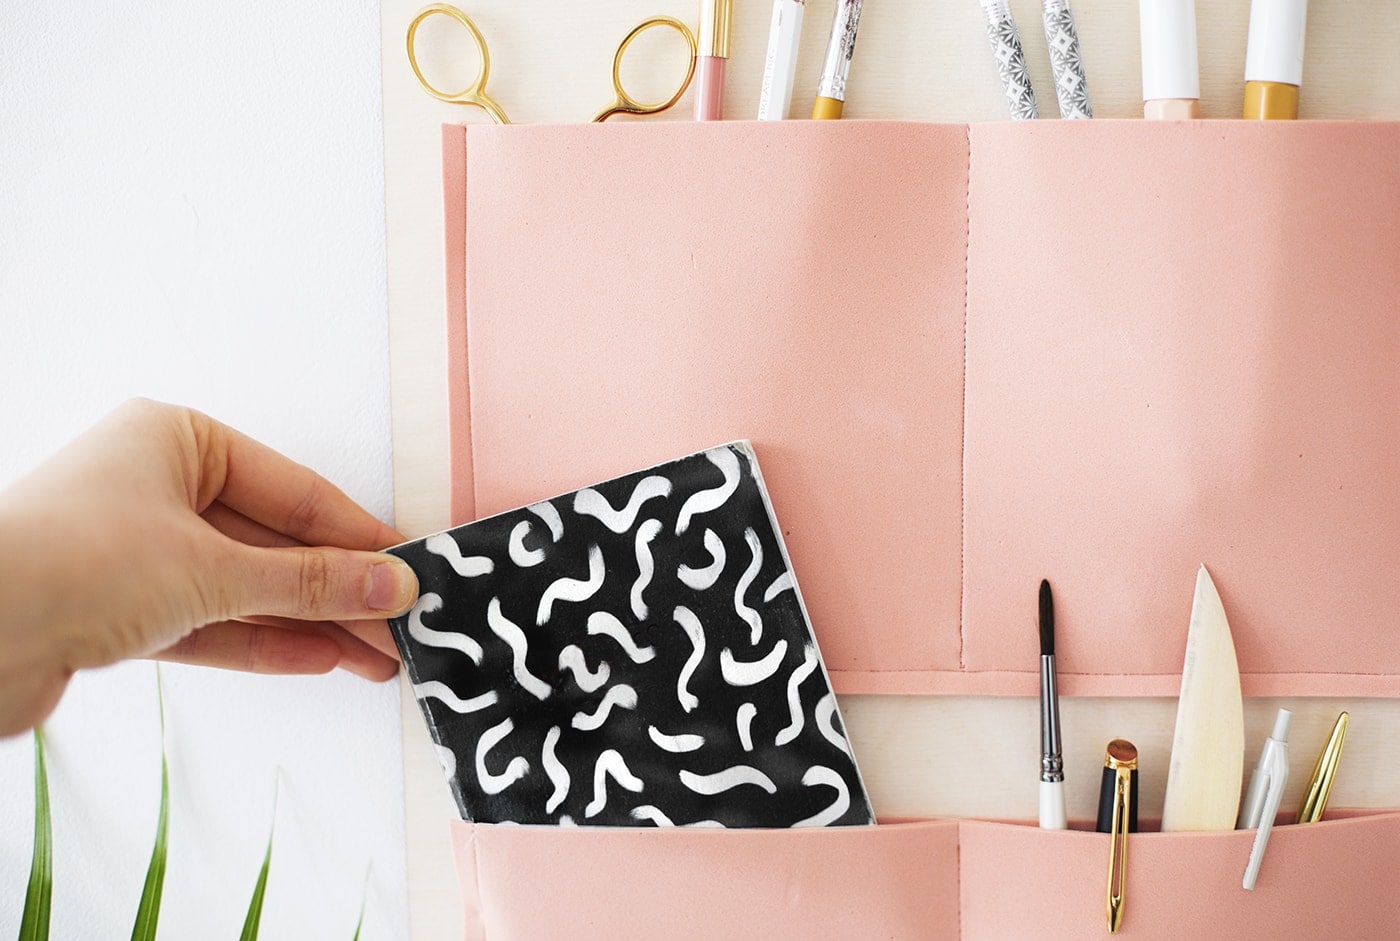
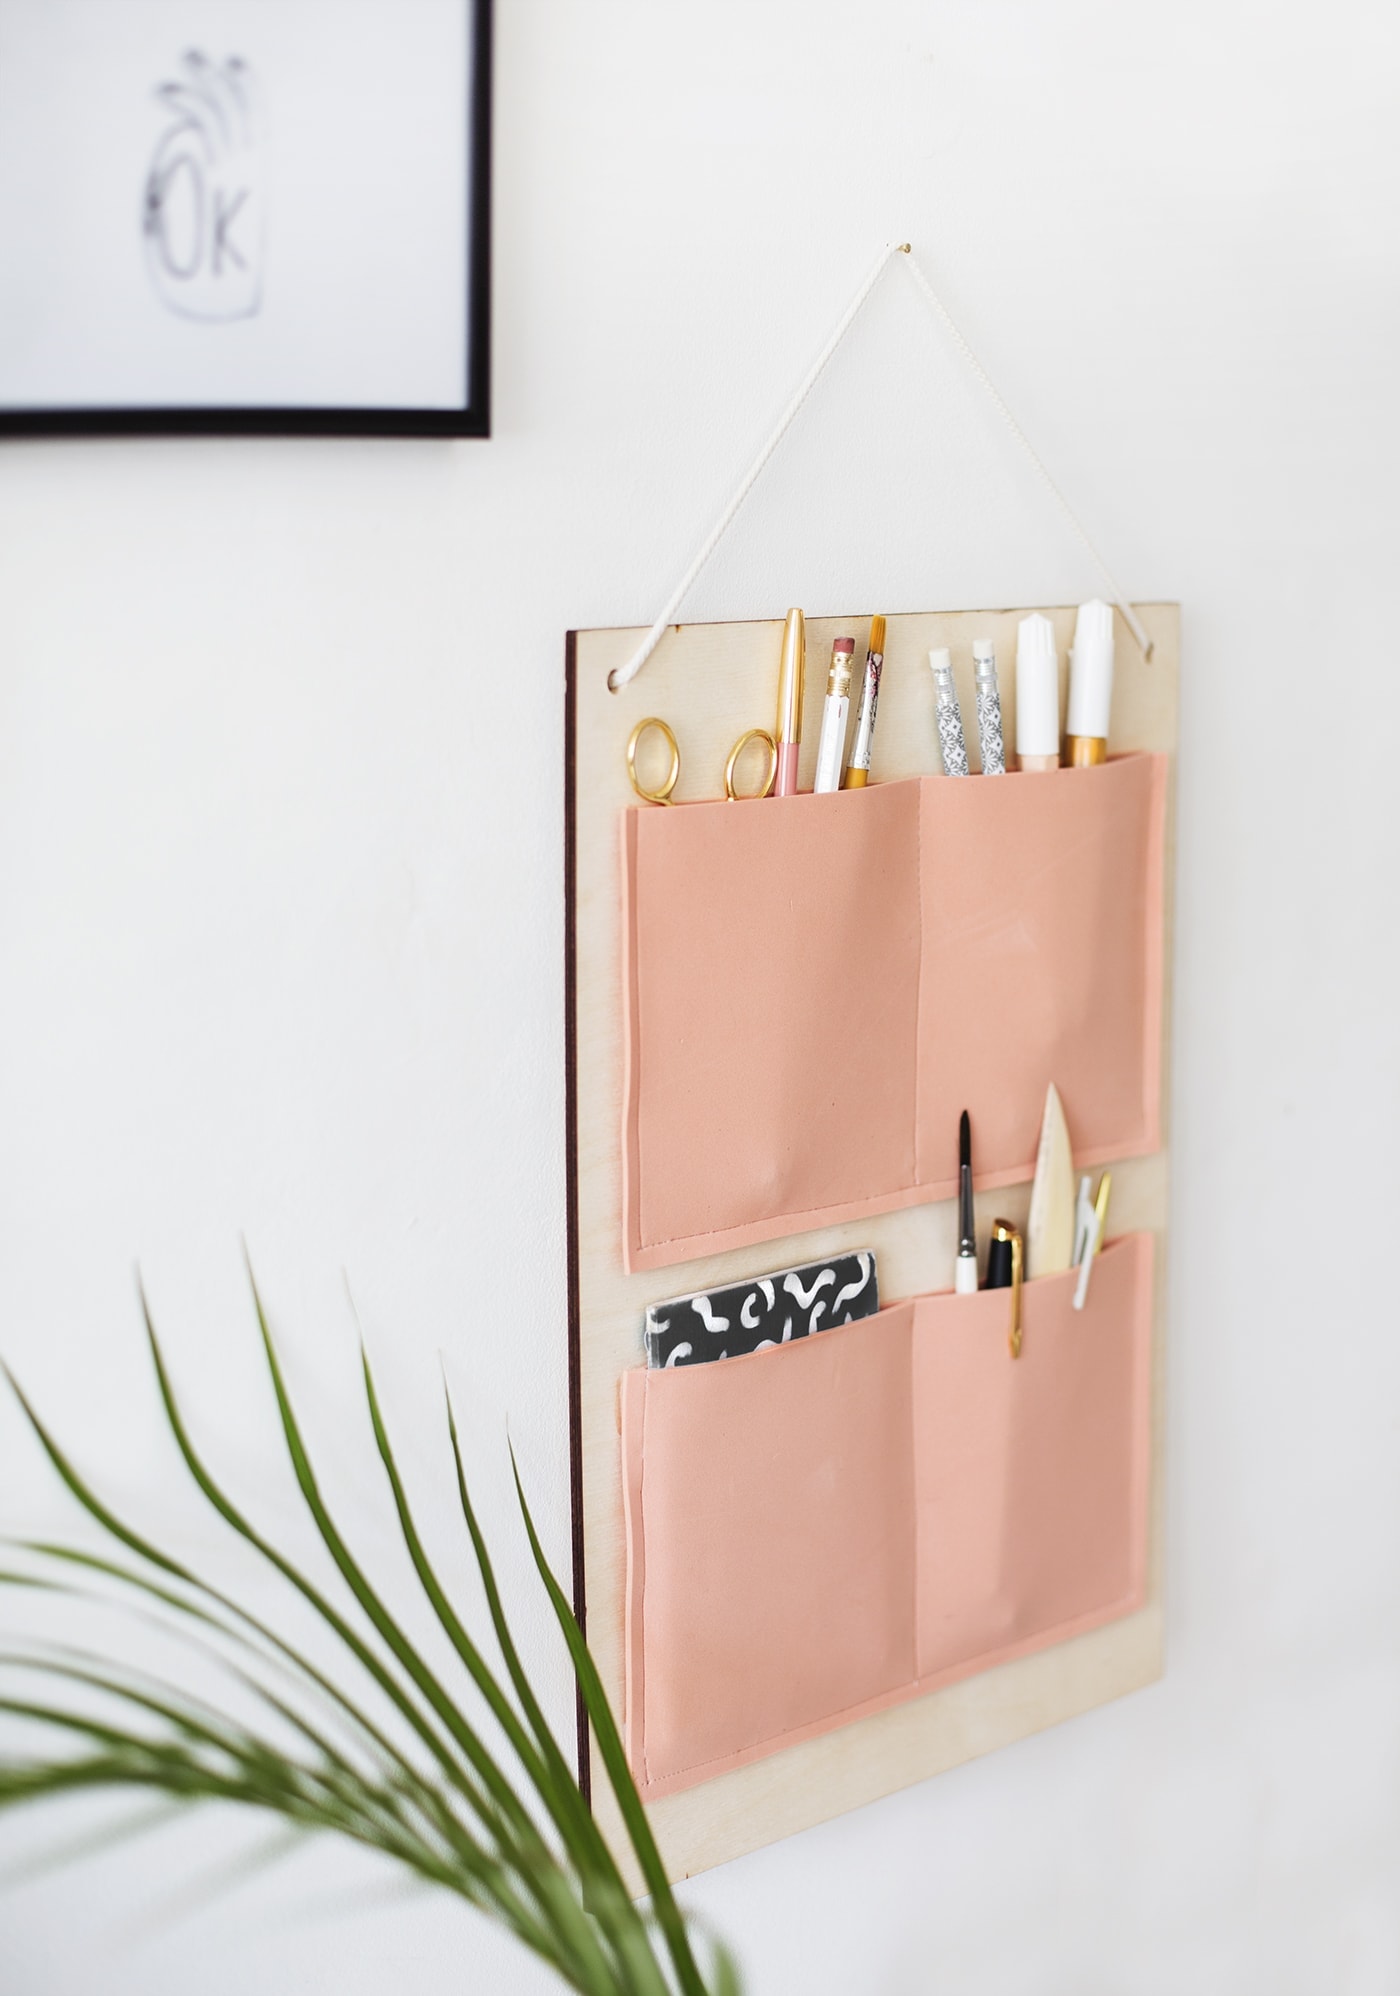
When you’re done you should have two rectangular pockets with a dividing stitch in the middle to create four pockets all together.
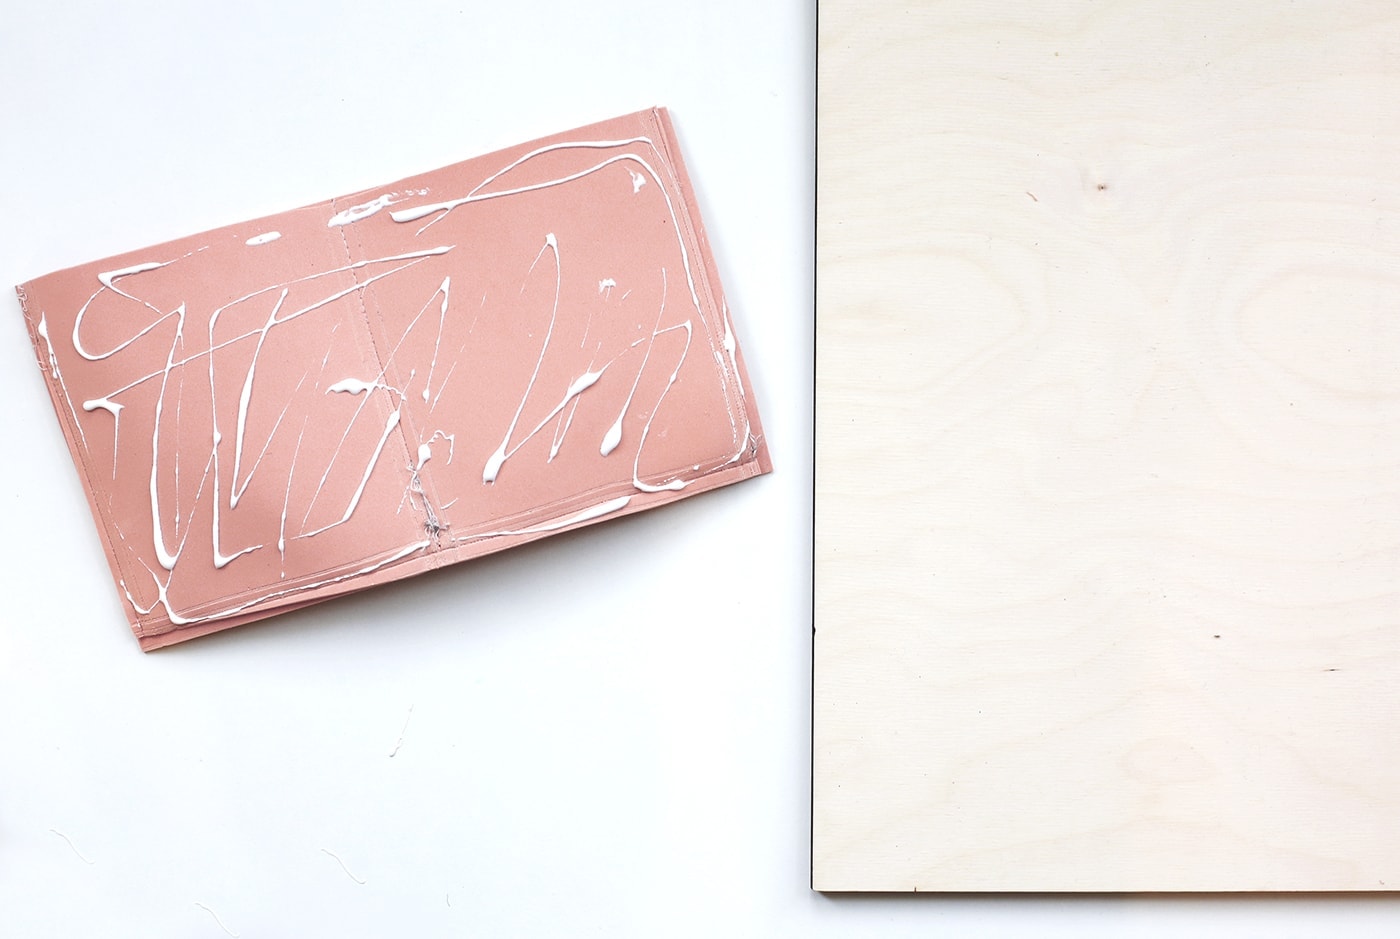
Cover the back of these pockets with the wood glue and then transfer these pockets onto the plywood, lining them up so one sits above the other with even spacing either side. Press down firmly and lay something heavy over the top while it dries. This will make sure it dries flat.
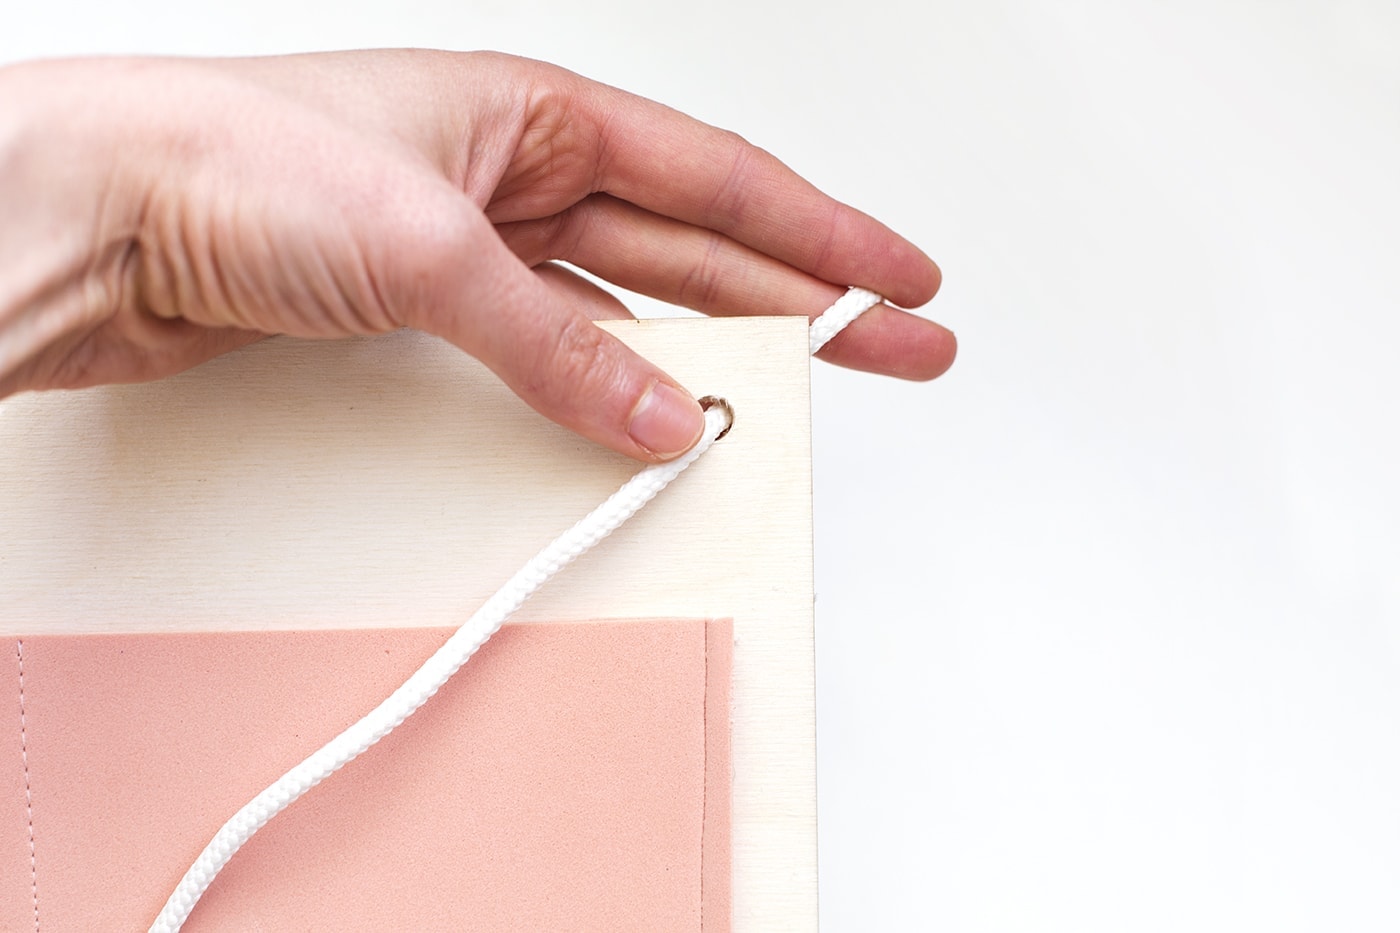
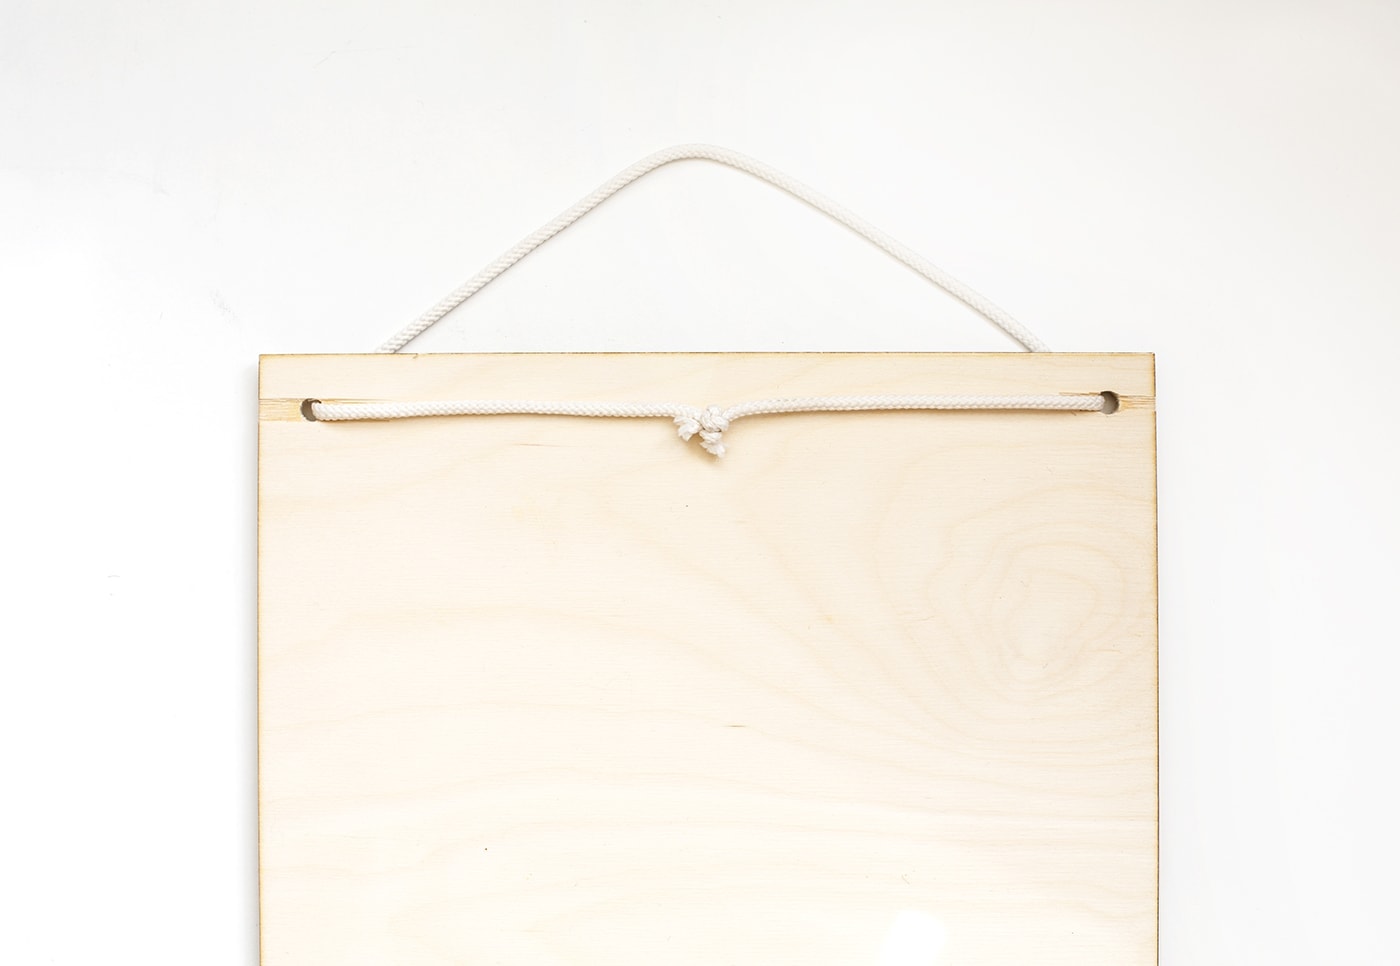
Thread the rope through the holes from front to back and tie a tight double knot on the wrong side as you see below.
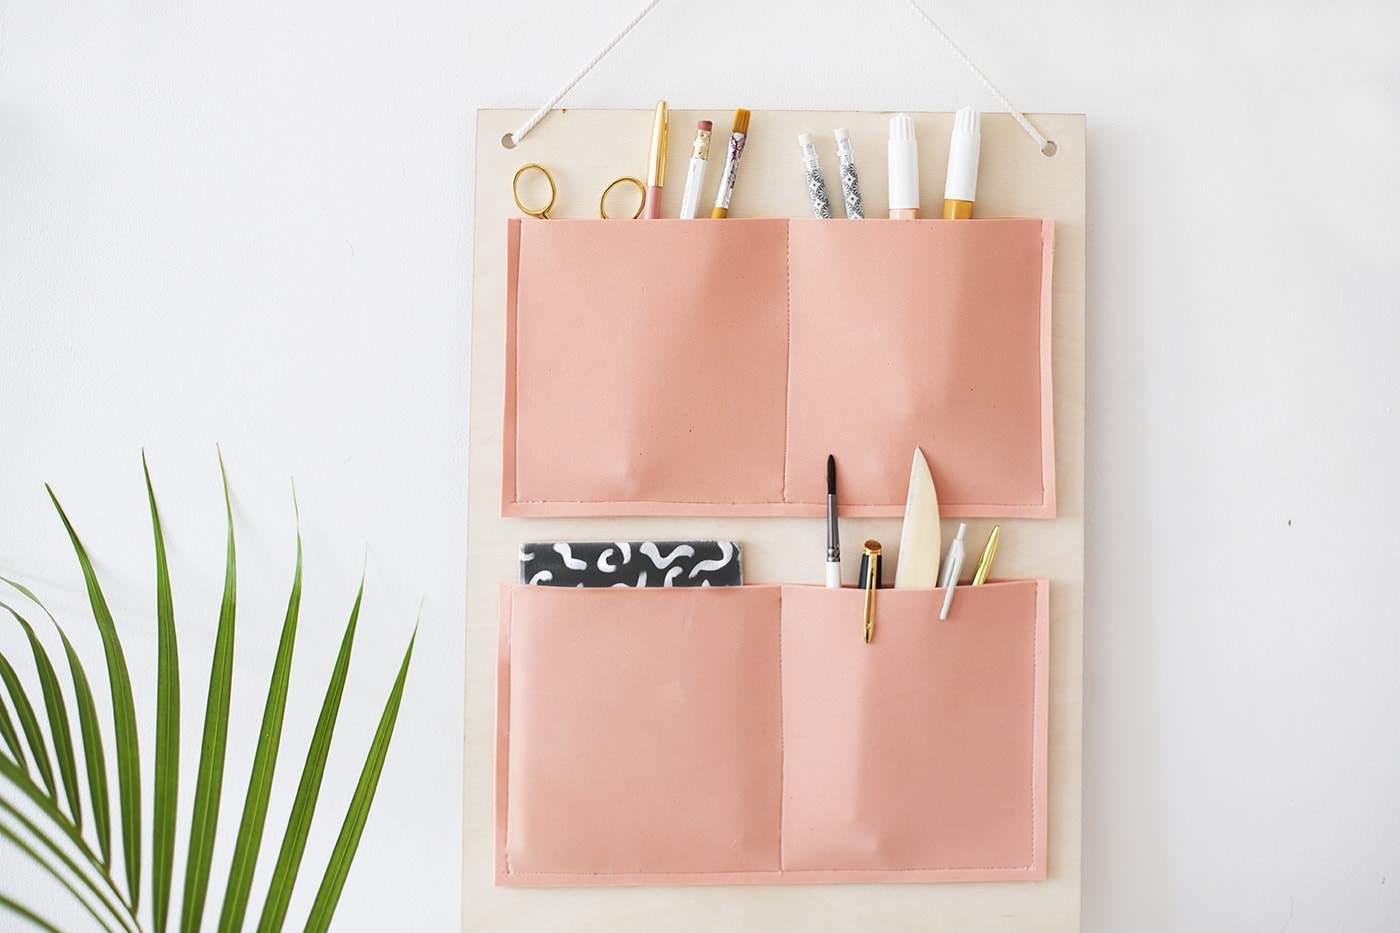
So have a go and maybe get some of your supplies off your desk and onto the wall, making room for other important things…like plants or work snacks. Very important I’m sure you’ll agree.
You might also like


Meet The Lovely Drawer

Hi, I’m Teri and welcome to my own creative corner of the internet. I blog about interiors, DIY projects, design inspiration and my general life so stick around have a read and say hi.
In the shop
 Quick ViewSelect options
Orchard Days
£20.00 – £25.00
 Quick ViewSelect options
Terrace 1
£20.00 – £25.00
Work with Me
The Lovely Drawer is an award winning blog with a loyal audience that has grown over the years. I love working with brands small and large on exciting collaborations that can bring products alive in my own signature aesthetic.