

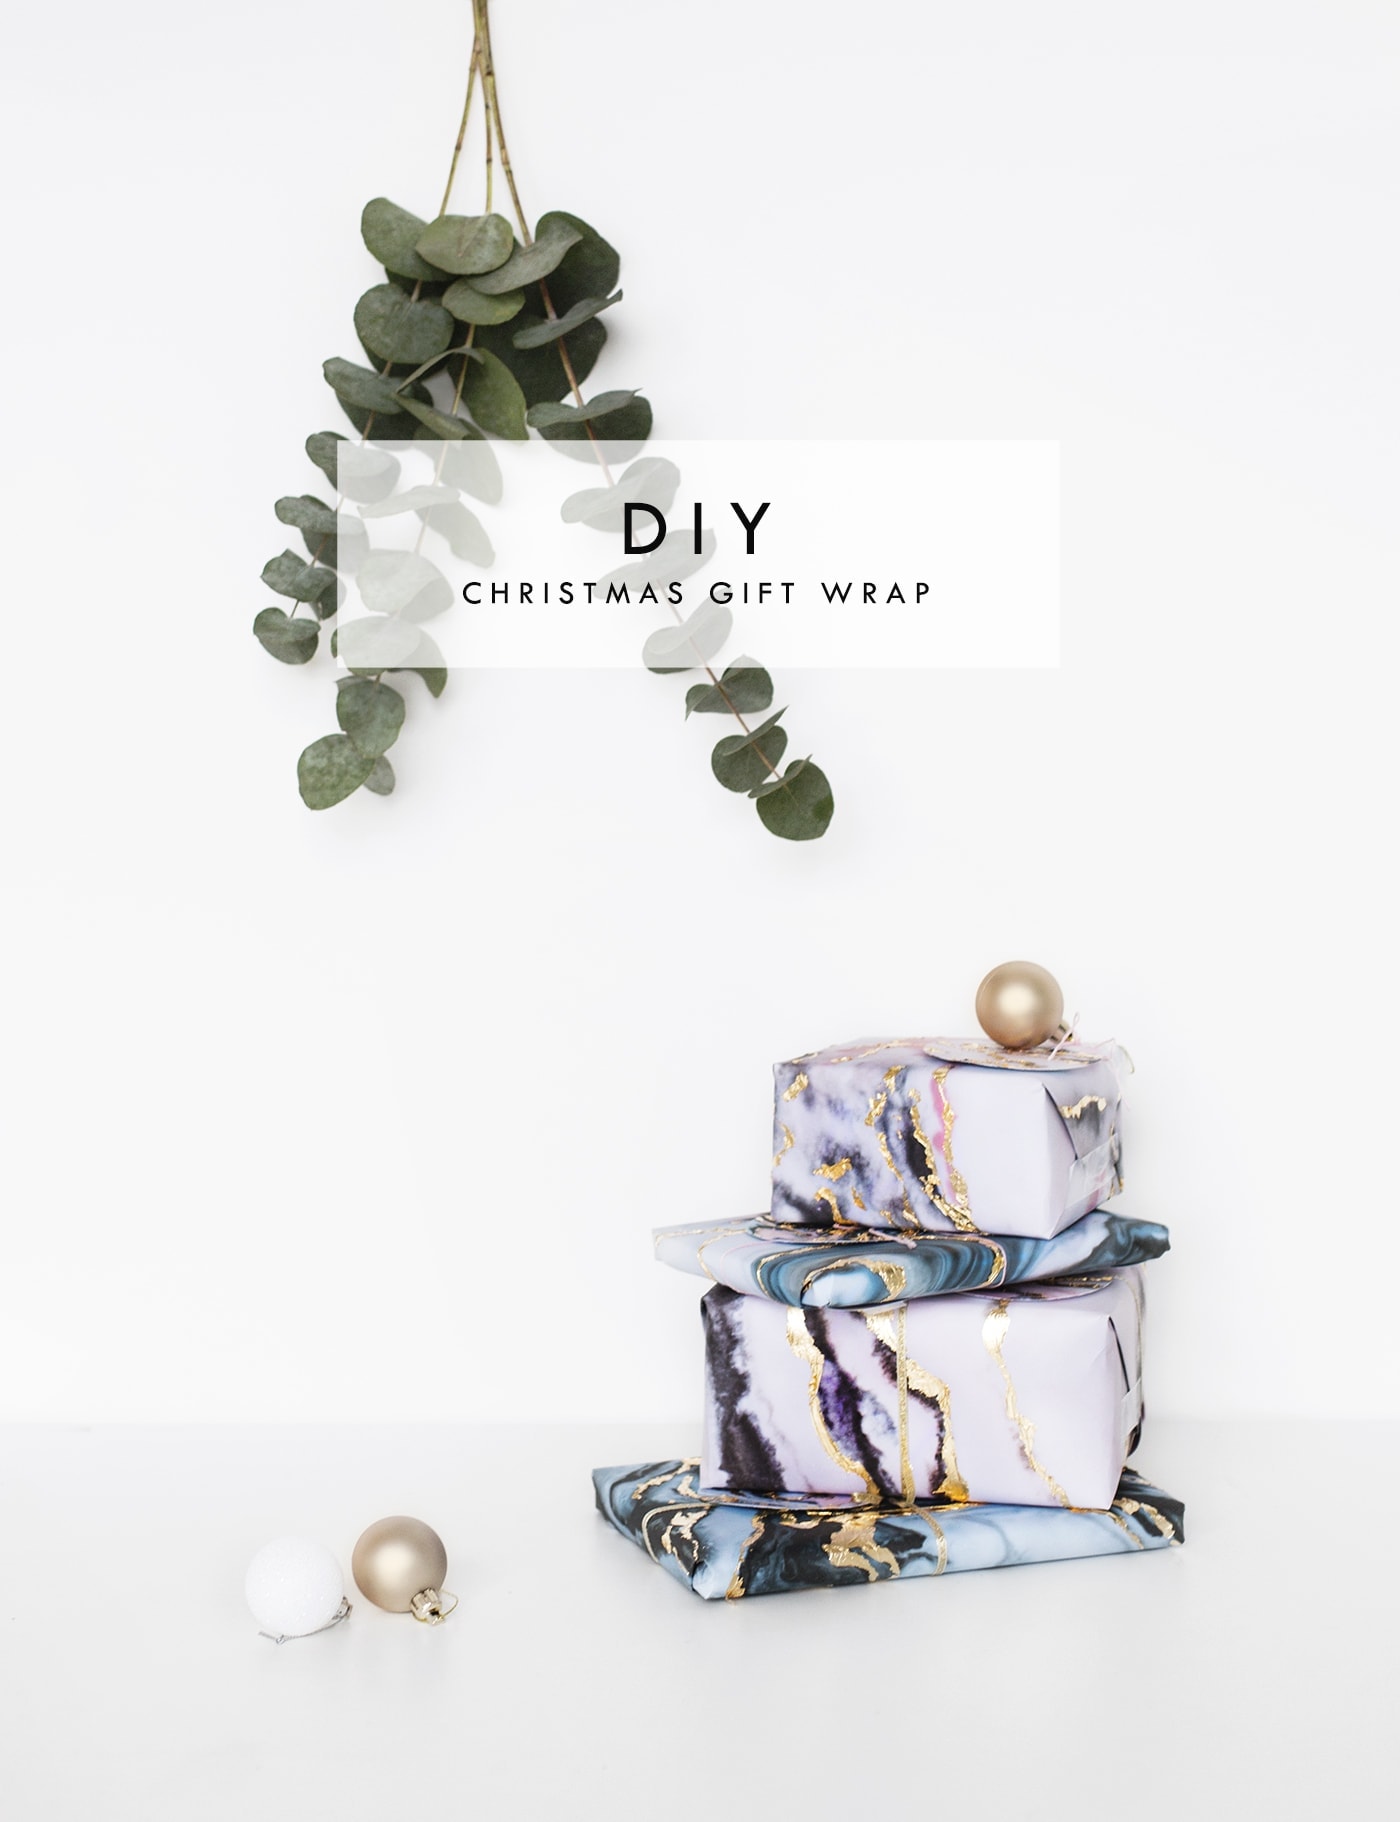
Creative Gift Wrapping with Scotch Tape
Gift wrapping can either be an delicate art or a case of crumpling paper until it fits and slamming on some tape for good measure. When you’re organised and have time it’s a beautiful thing, an activity you can do perched in front of Elf or Love Actually, feeling all together jolly. Unfortunately I can only remember a handful of times it’s looked like that for me and only one of them since being married. The first year we were married we made all our gifts and I decided, the crafty cat I am, to make all the wrapping paper and gift tags. We had a great time watching said films and sipping mulled wine as we went, all at our leisure with plenty of time to spare. Unfortunately the last few years haven’t looked so blissful. It’s involved frantically wrapping at midnight the day before heading home….and by ‘we’ I really mean Nick as he’s reticent to trust the accuracy of my folding. I sit and watch open mouthed and more than a little impatient as he measures out box nets to get the snuggest fit. Only he could turn wrapping into maths! As you can tell I don’t enjoy that flustered wrapping experience at all.
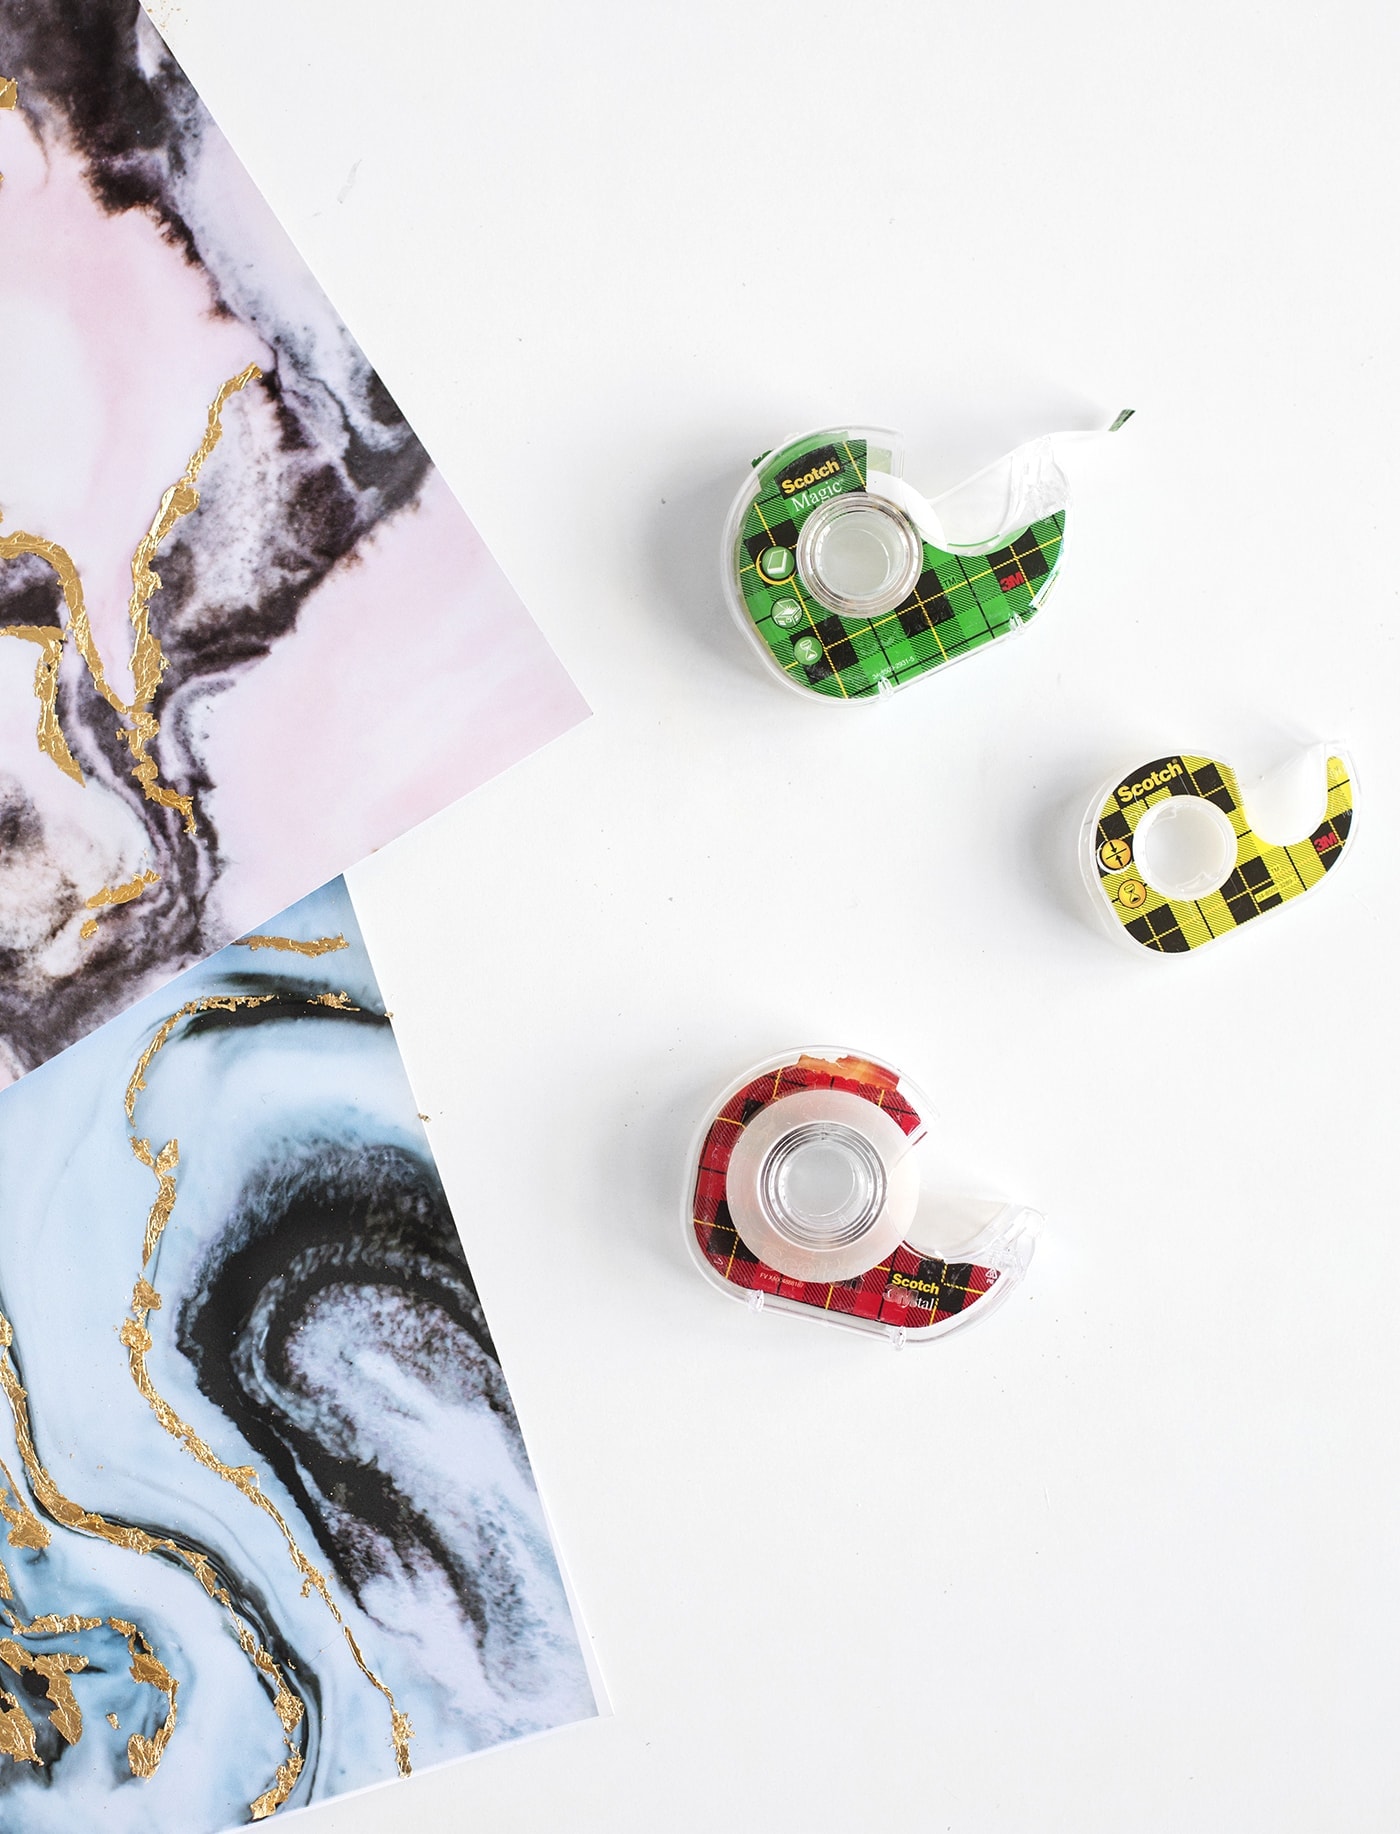
It doesn’t have to be that way people (she says mainly to herself)! With a little help from Scotch and their large selection of supplies and a little DIY idea to boot, I’m ready and armed with what I need. Do you ever think about the tape you use? Perhaps you’ve only noticed what a big difference it makes when you’ve picked up some non-brand in a hurry and realised it doesn’t actually do it’s job for more than a few minutes? So many tapes don’t seem to work in harmony with textured gift wrap, especially not anything involving dreaded glitter! It’s a case of waking up on Christmas morning and all your presents are unwillingly unwrapped in a weird, slow paced reveal, lead by that tape that refuses to do it’s job. Scotch have a variety of tapes for different uses so you can be assured they actually do the job they’re meant to and to keep things jolly they’ve all been given elf characters for Christmas. Whether it’s multipurpose tape for wrapping odd shapes, crystal shine, invisible tape that seamlessly blends in with your wrap, strong double sided or decorative tape to jazz up your gift giving there’s something for every one.
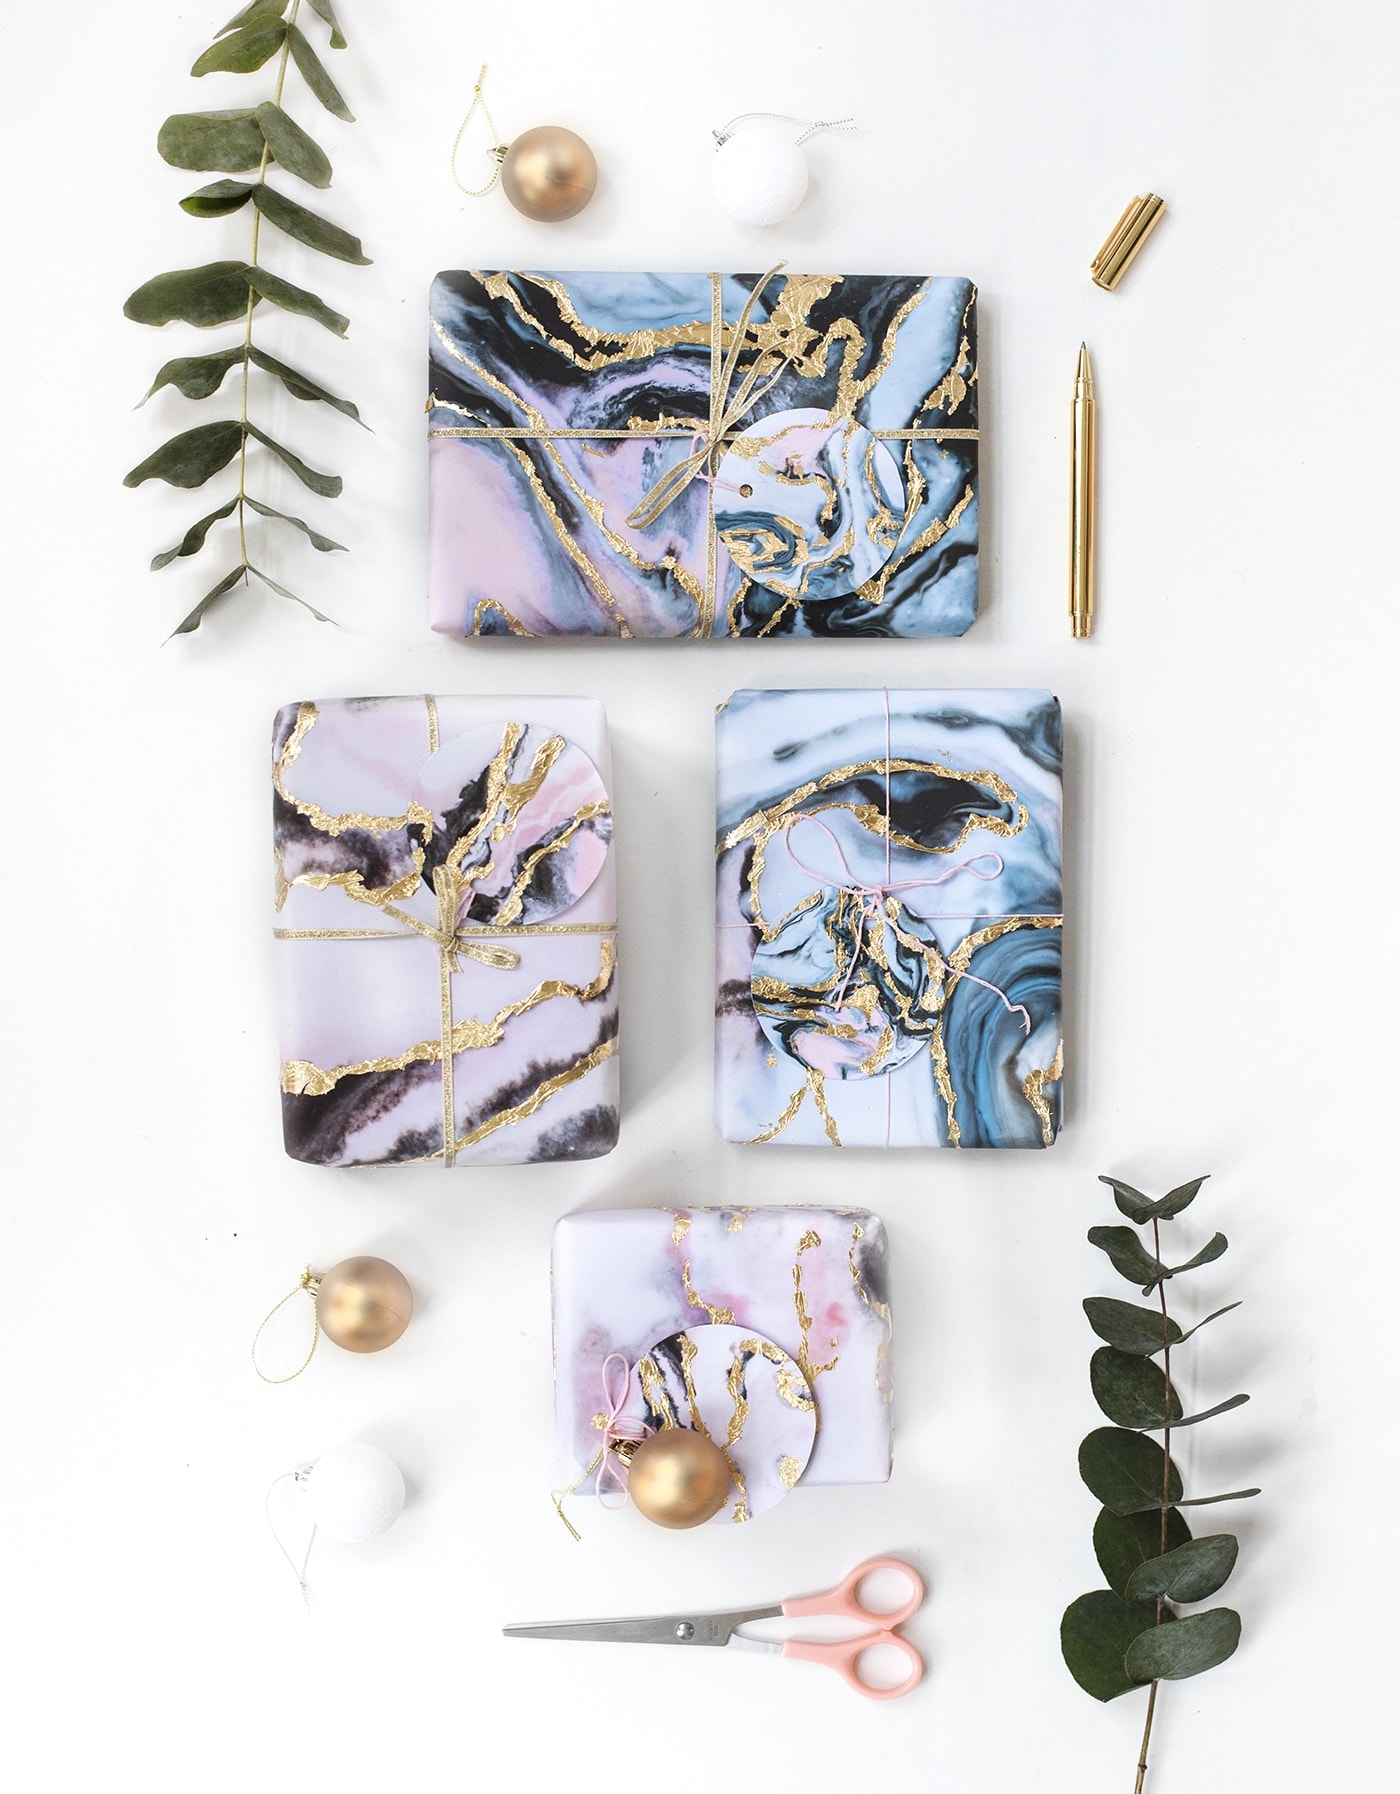
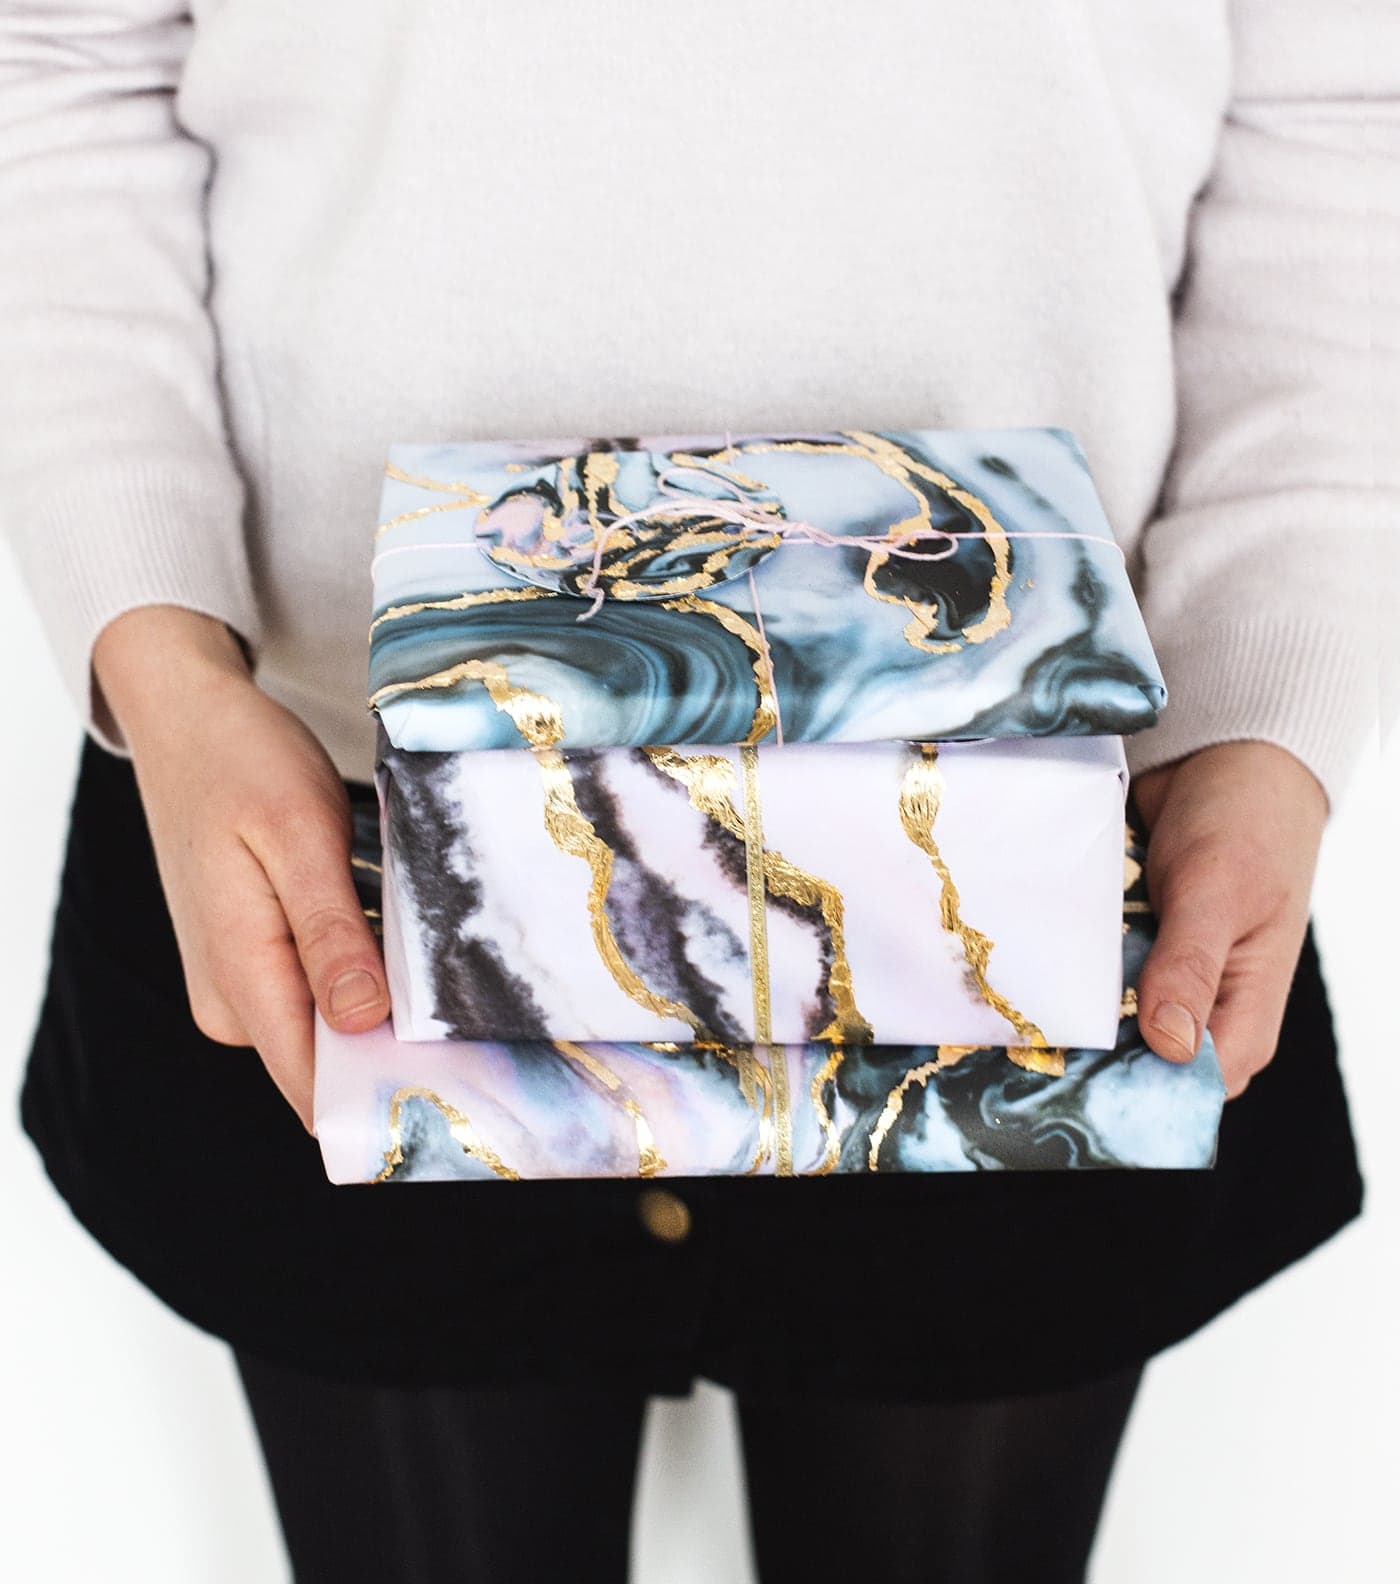
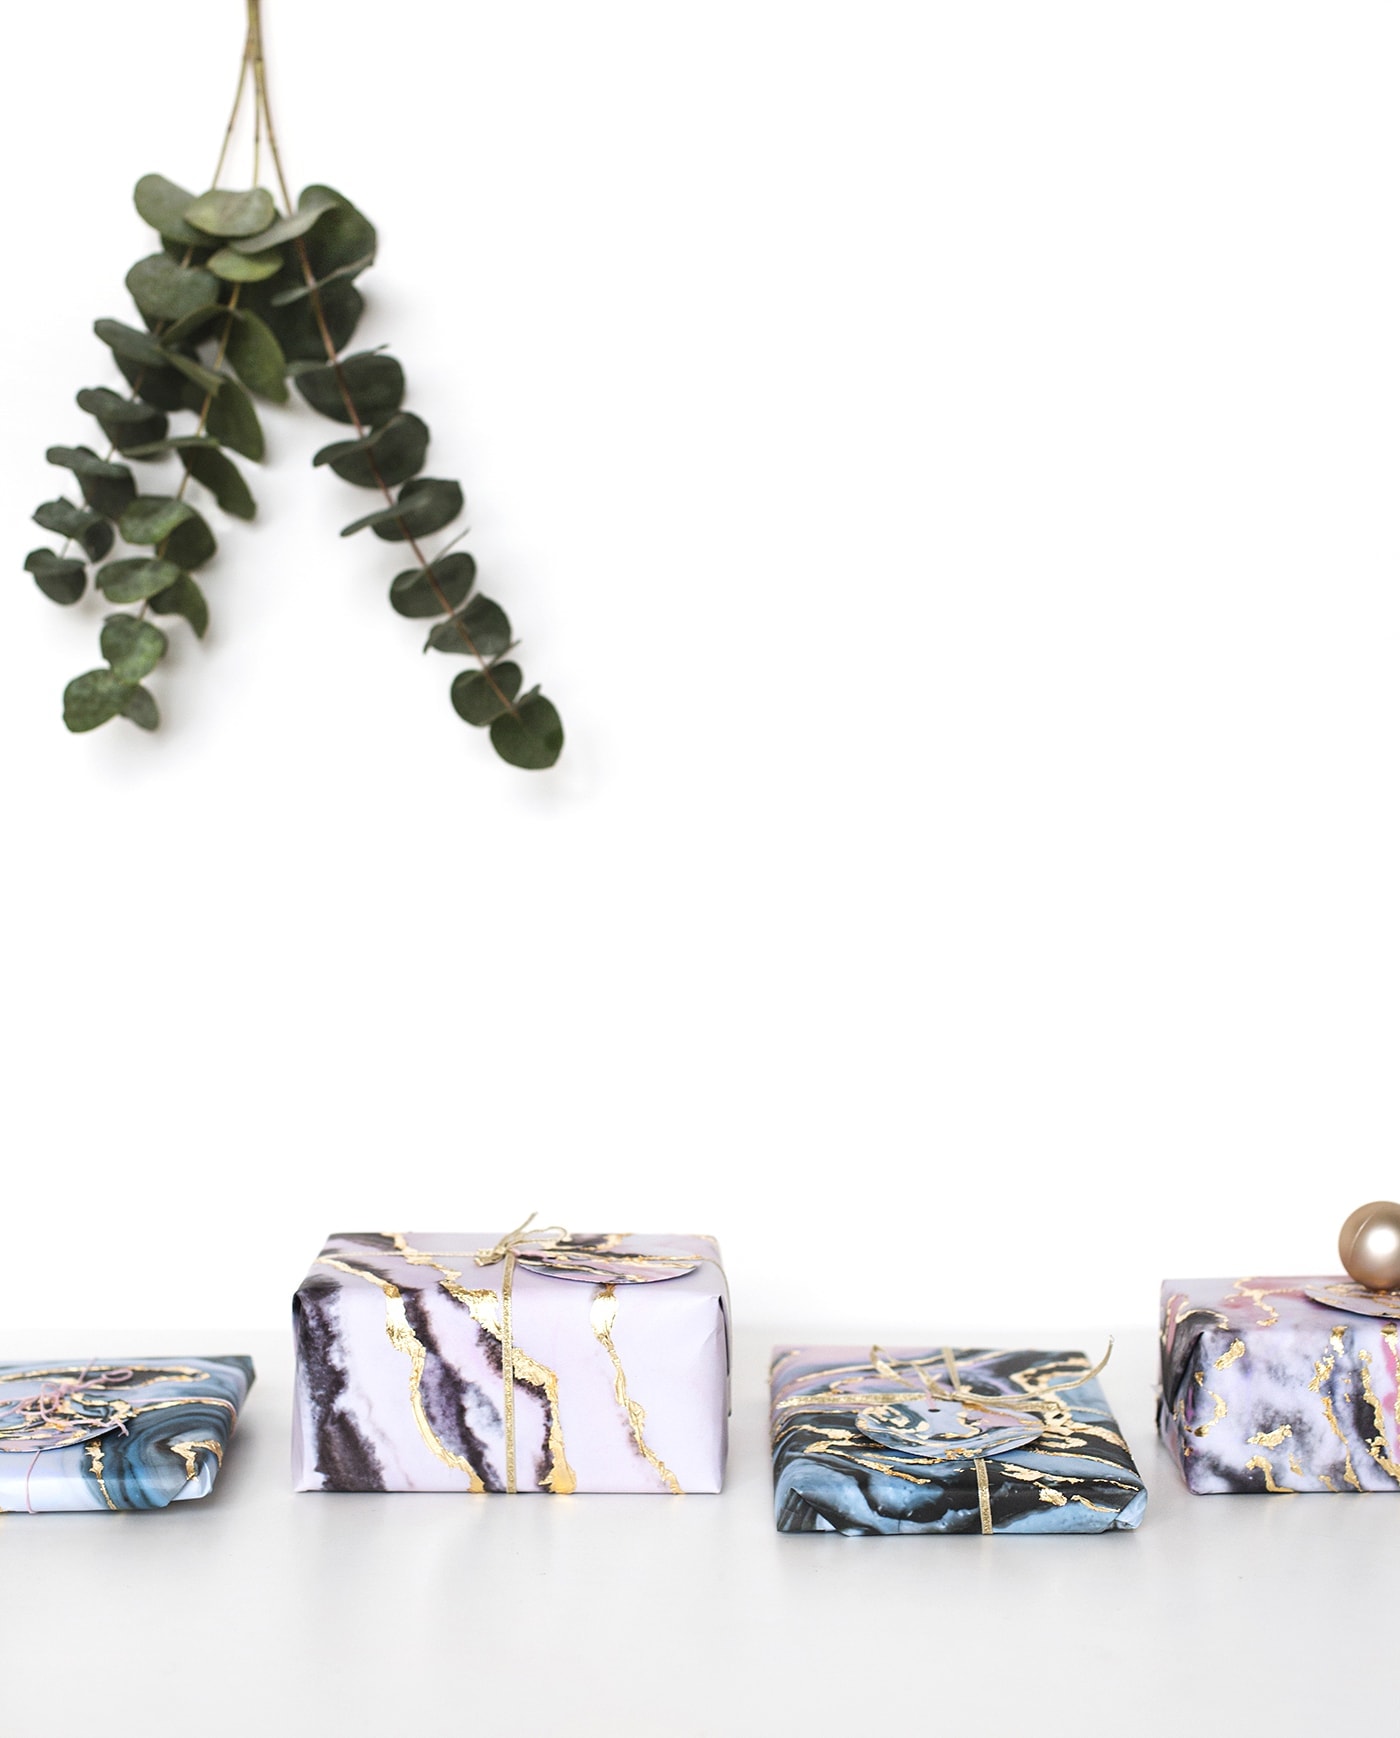
I chose to use their Magic Tape as it’s strong and able to stick the gold leaf with no problem and it’s frosted finish means it blends in with the pattern of the paper. Perfect if you ask me. But first we need to make the gift wrap itself! Marbling is a such a pretty technique but I certainly can’t deal with the thought of hand marbling huge sheets of paper in endless quantities at this time of year. To keep things easy and breezy I found these very reasonable downloadable versions in such pretty colours that will save you time and even save you money on the materials you’d have to buy to achieve that marbling effect. Once downloaded you can use to your hearts content, large or small scale. I printed out some large A3 versions for the main wrapping sheets and some smaller ones for gift tags. Let me show you how to give them some Christmas pizazz.
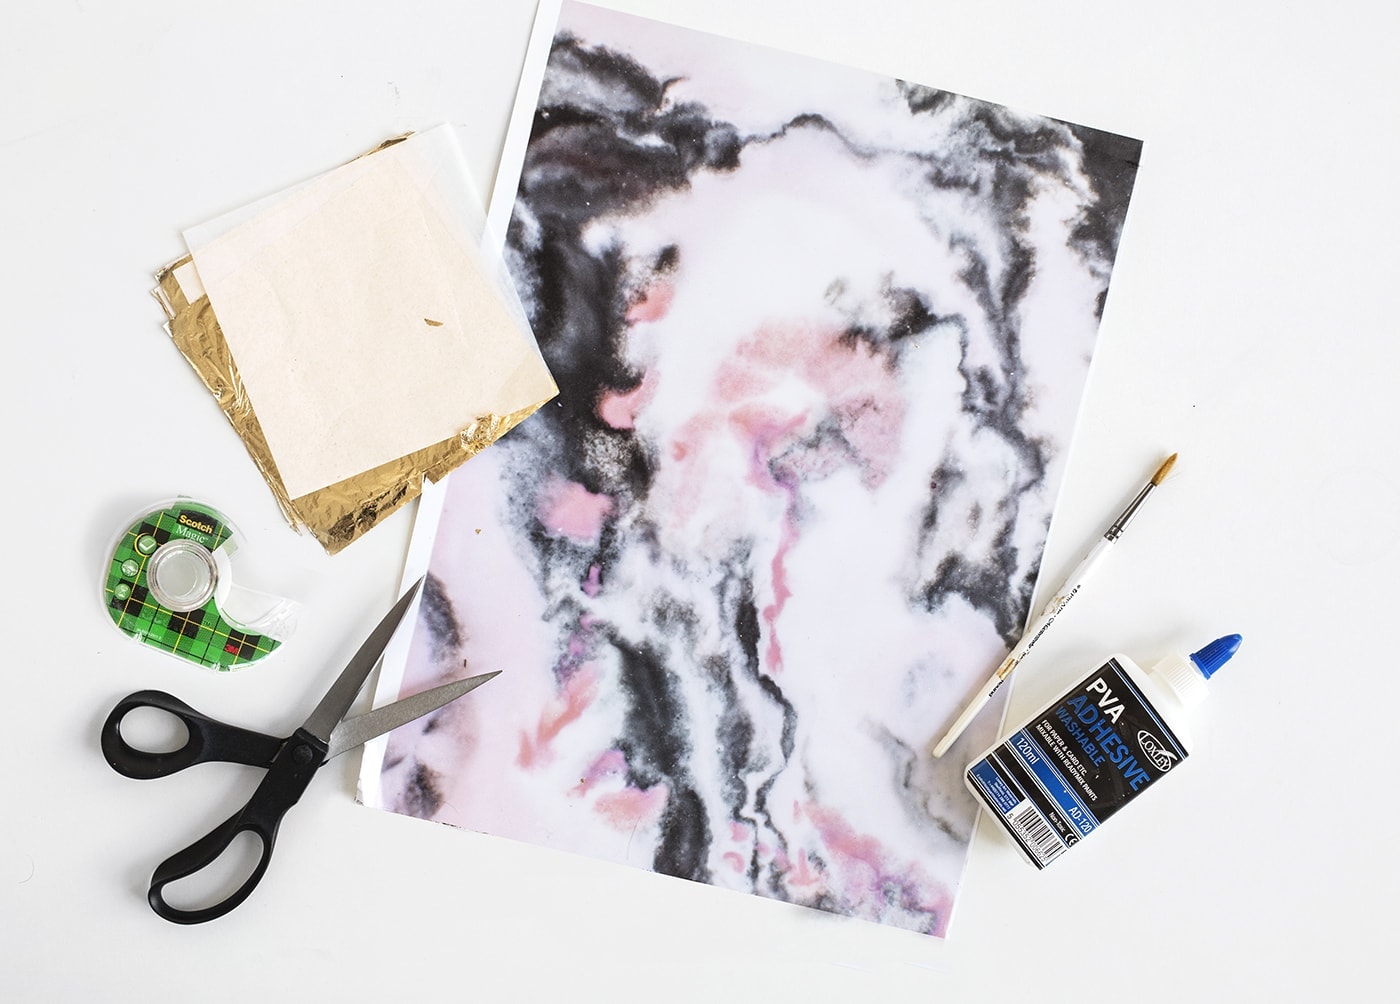
You’ll need
- Marble ink textures download
- Printer
- Decent quality paper no thicker than 200gsm
- White card
- Gold leaf sheets
- PVA glue / modpodge
- Paintbrush
- Scissors
- Hole punch
- Gold ribbon
- Scotch Magic Tape
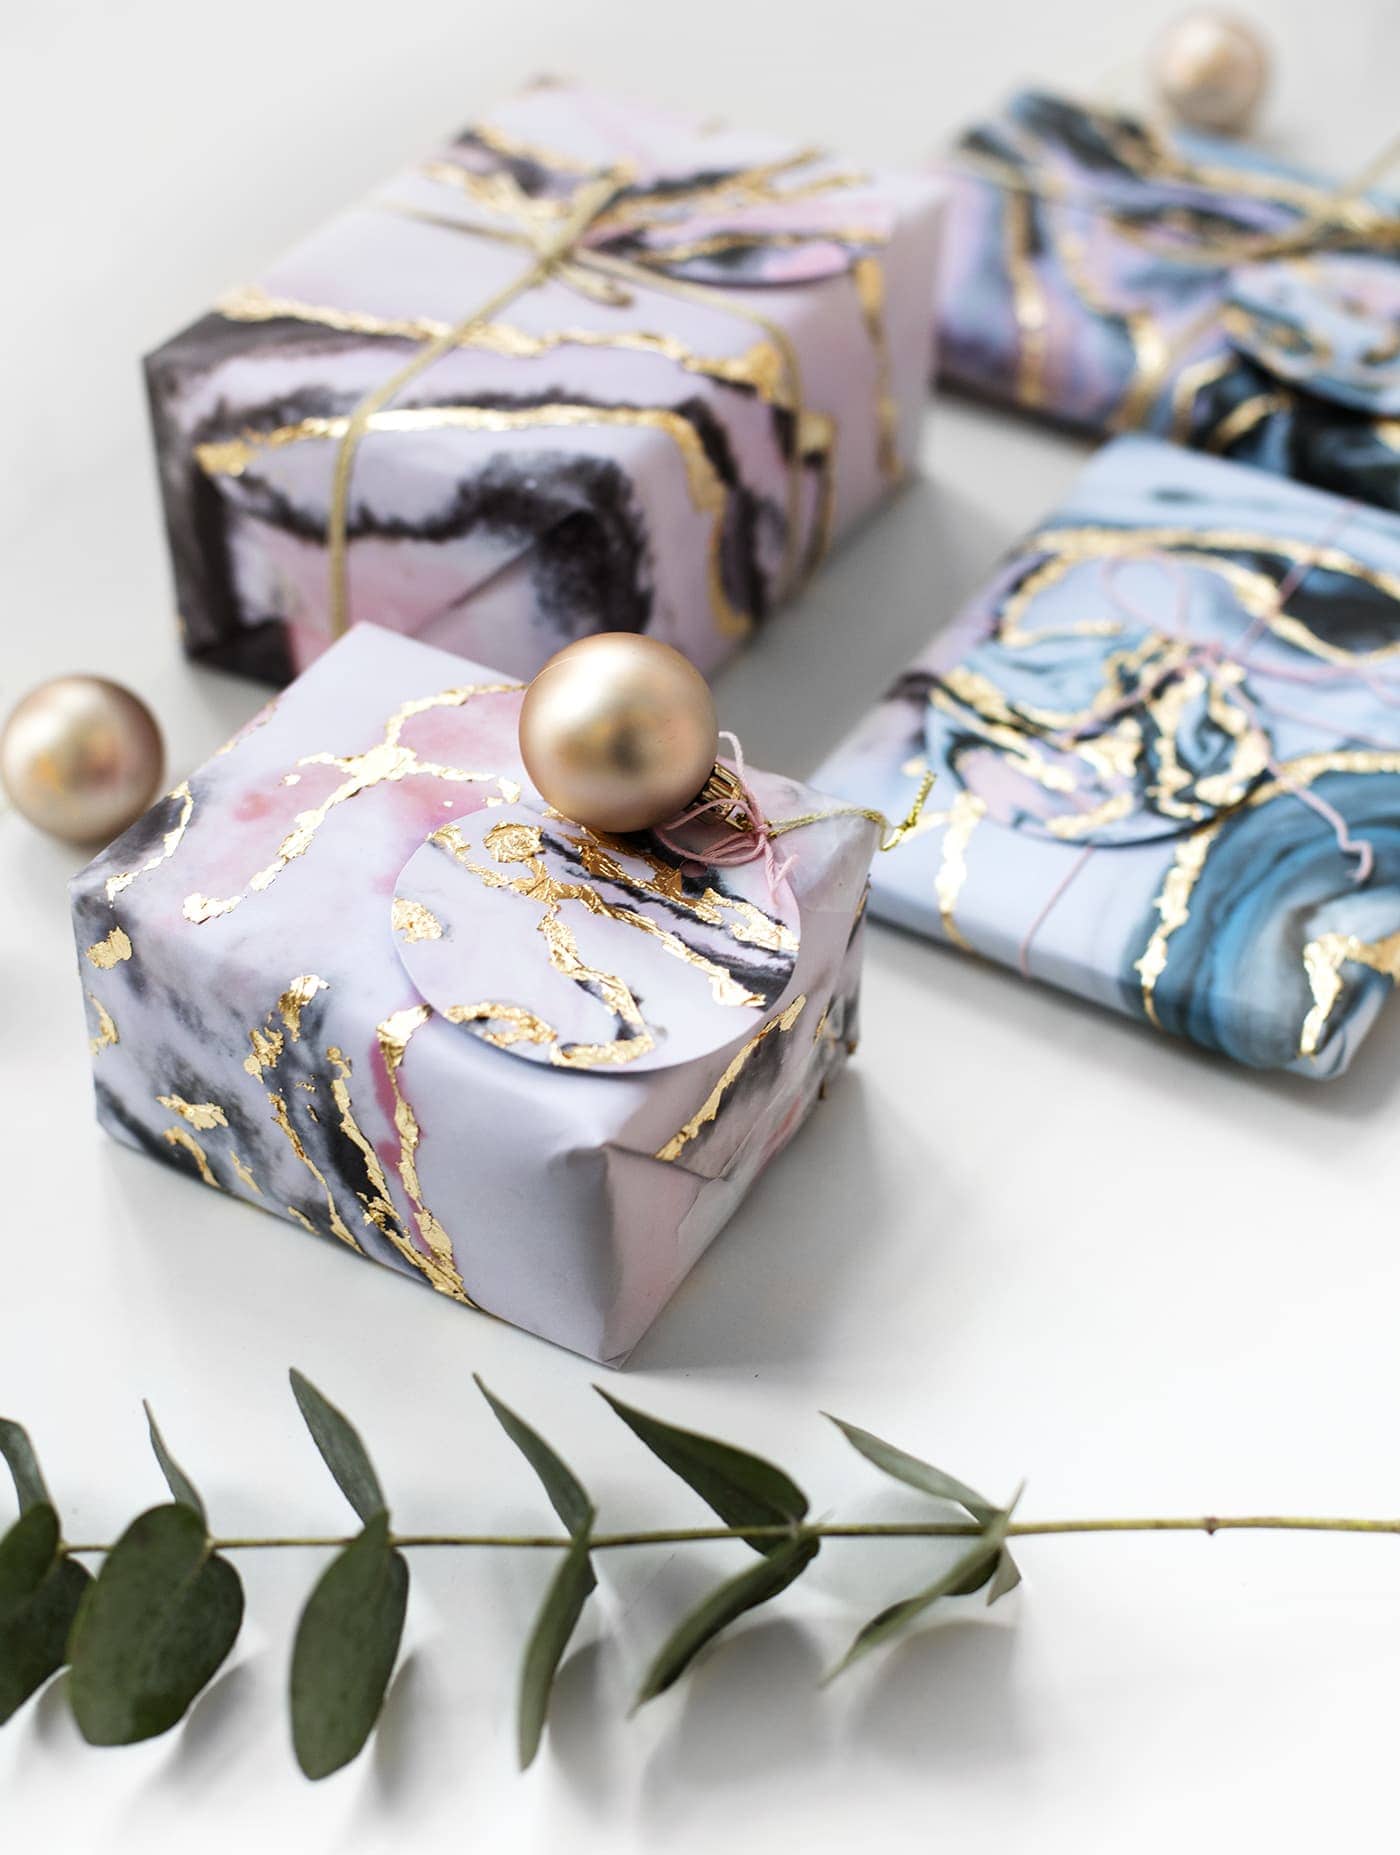
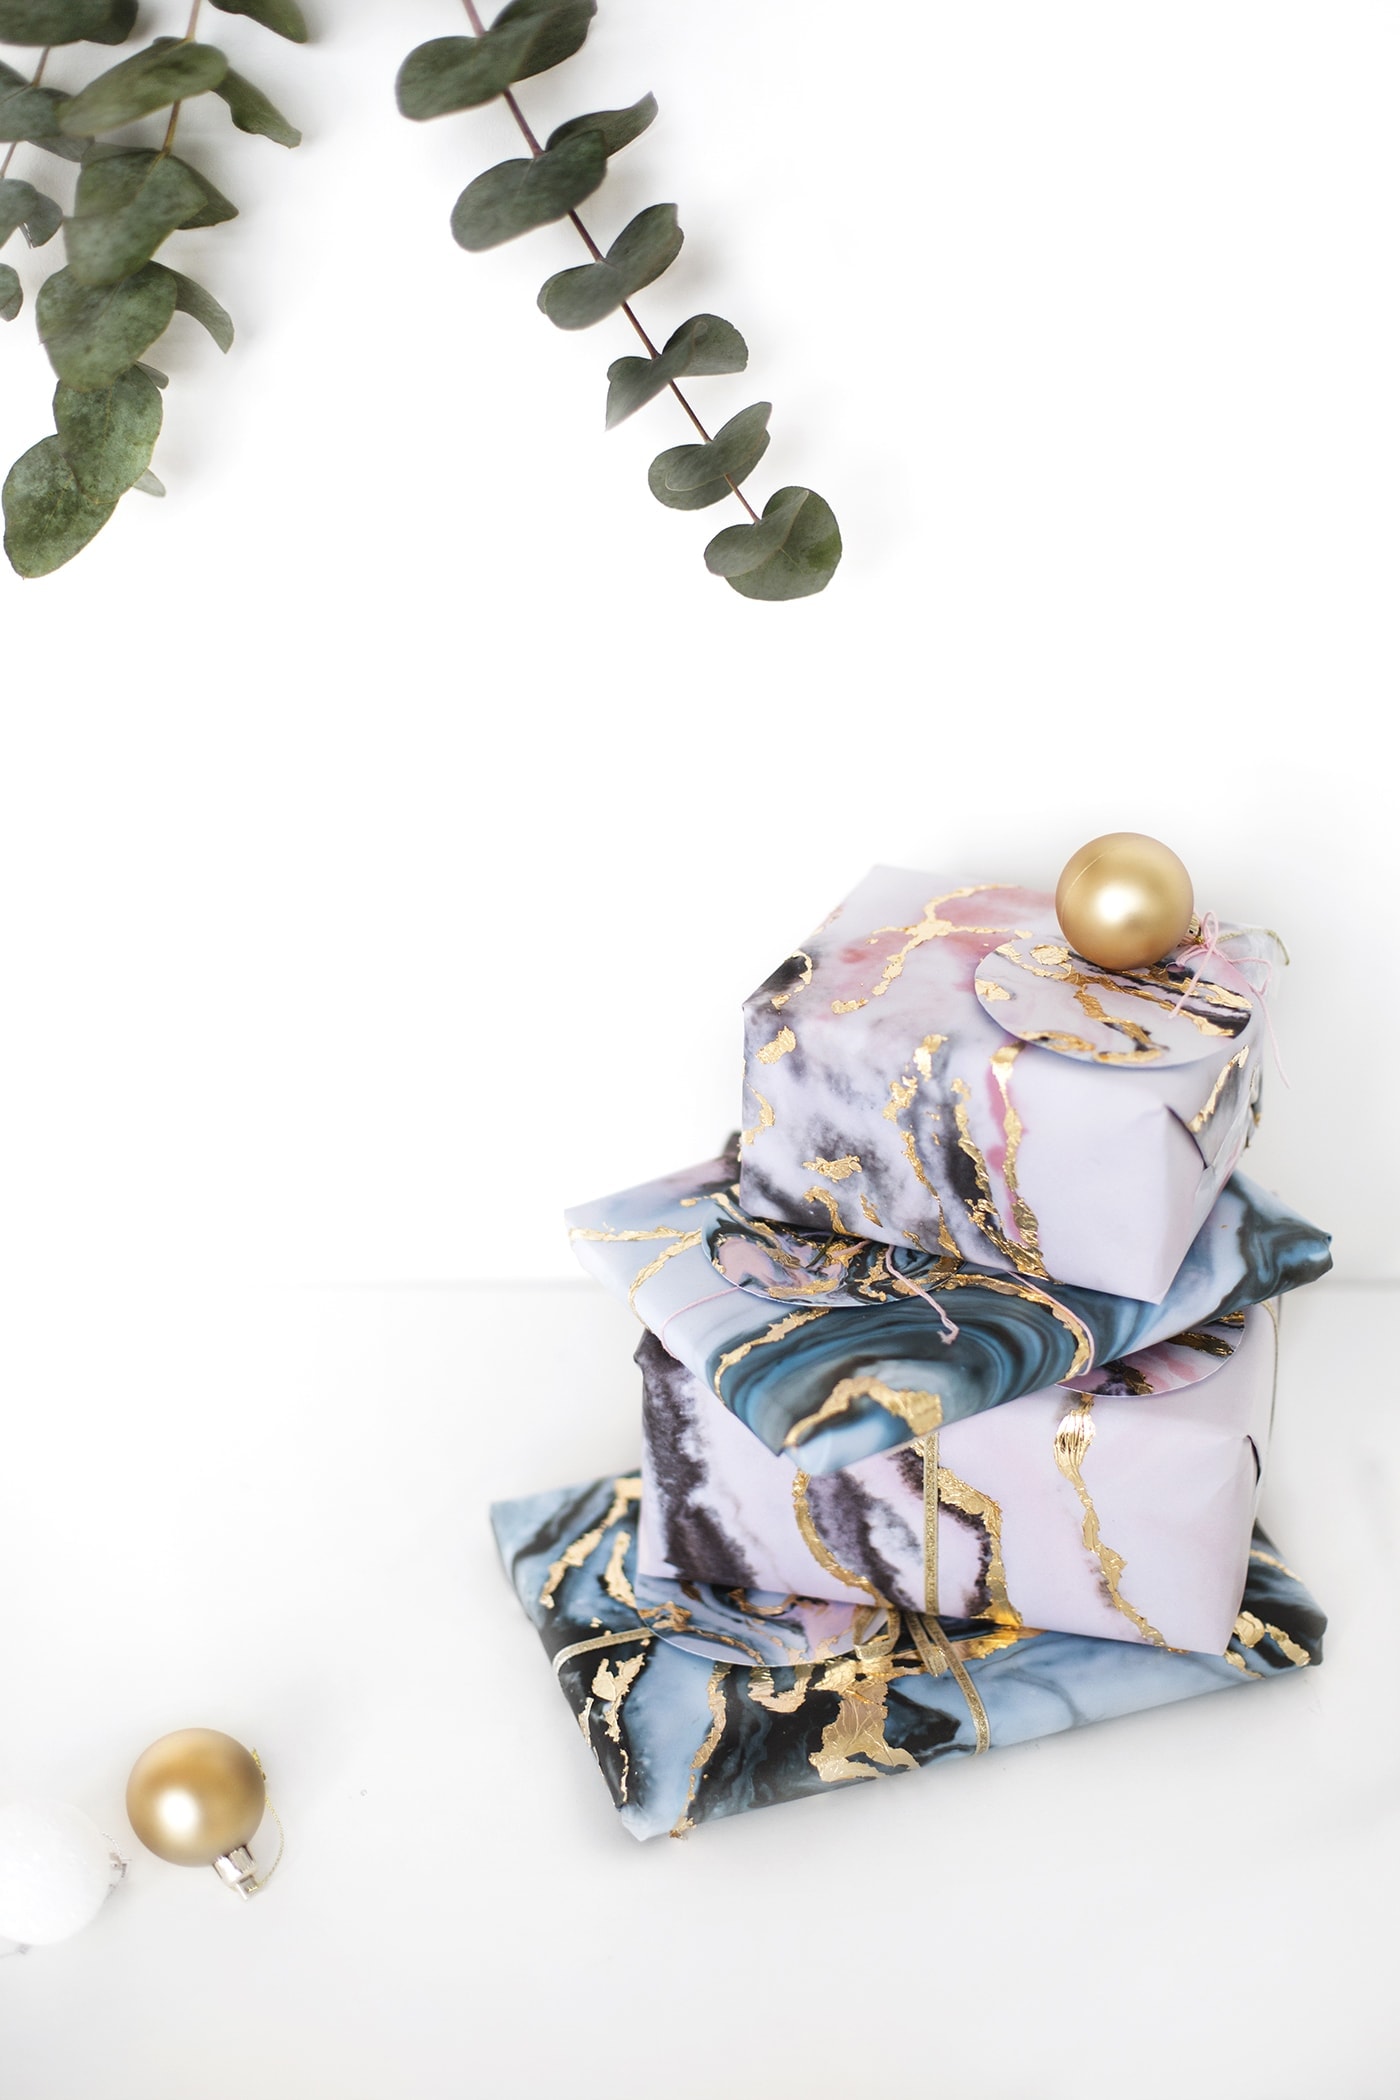
- Baubles or foliage for added decoration
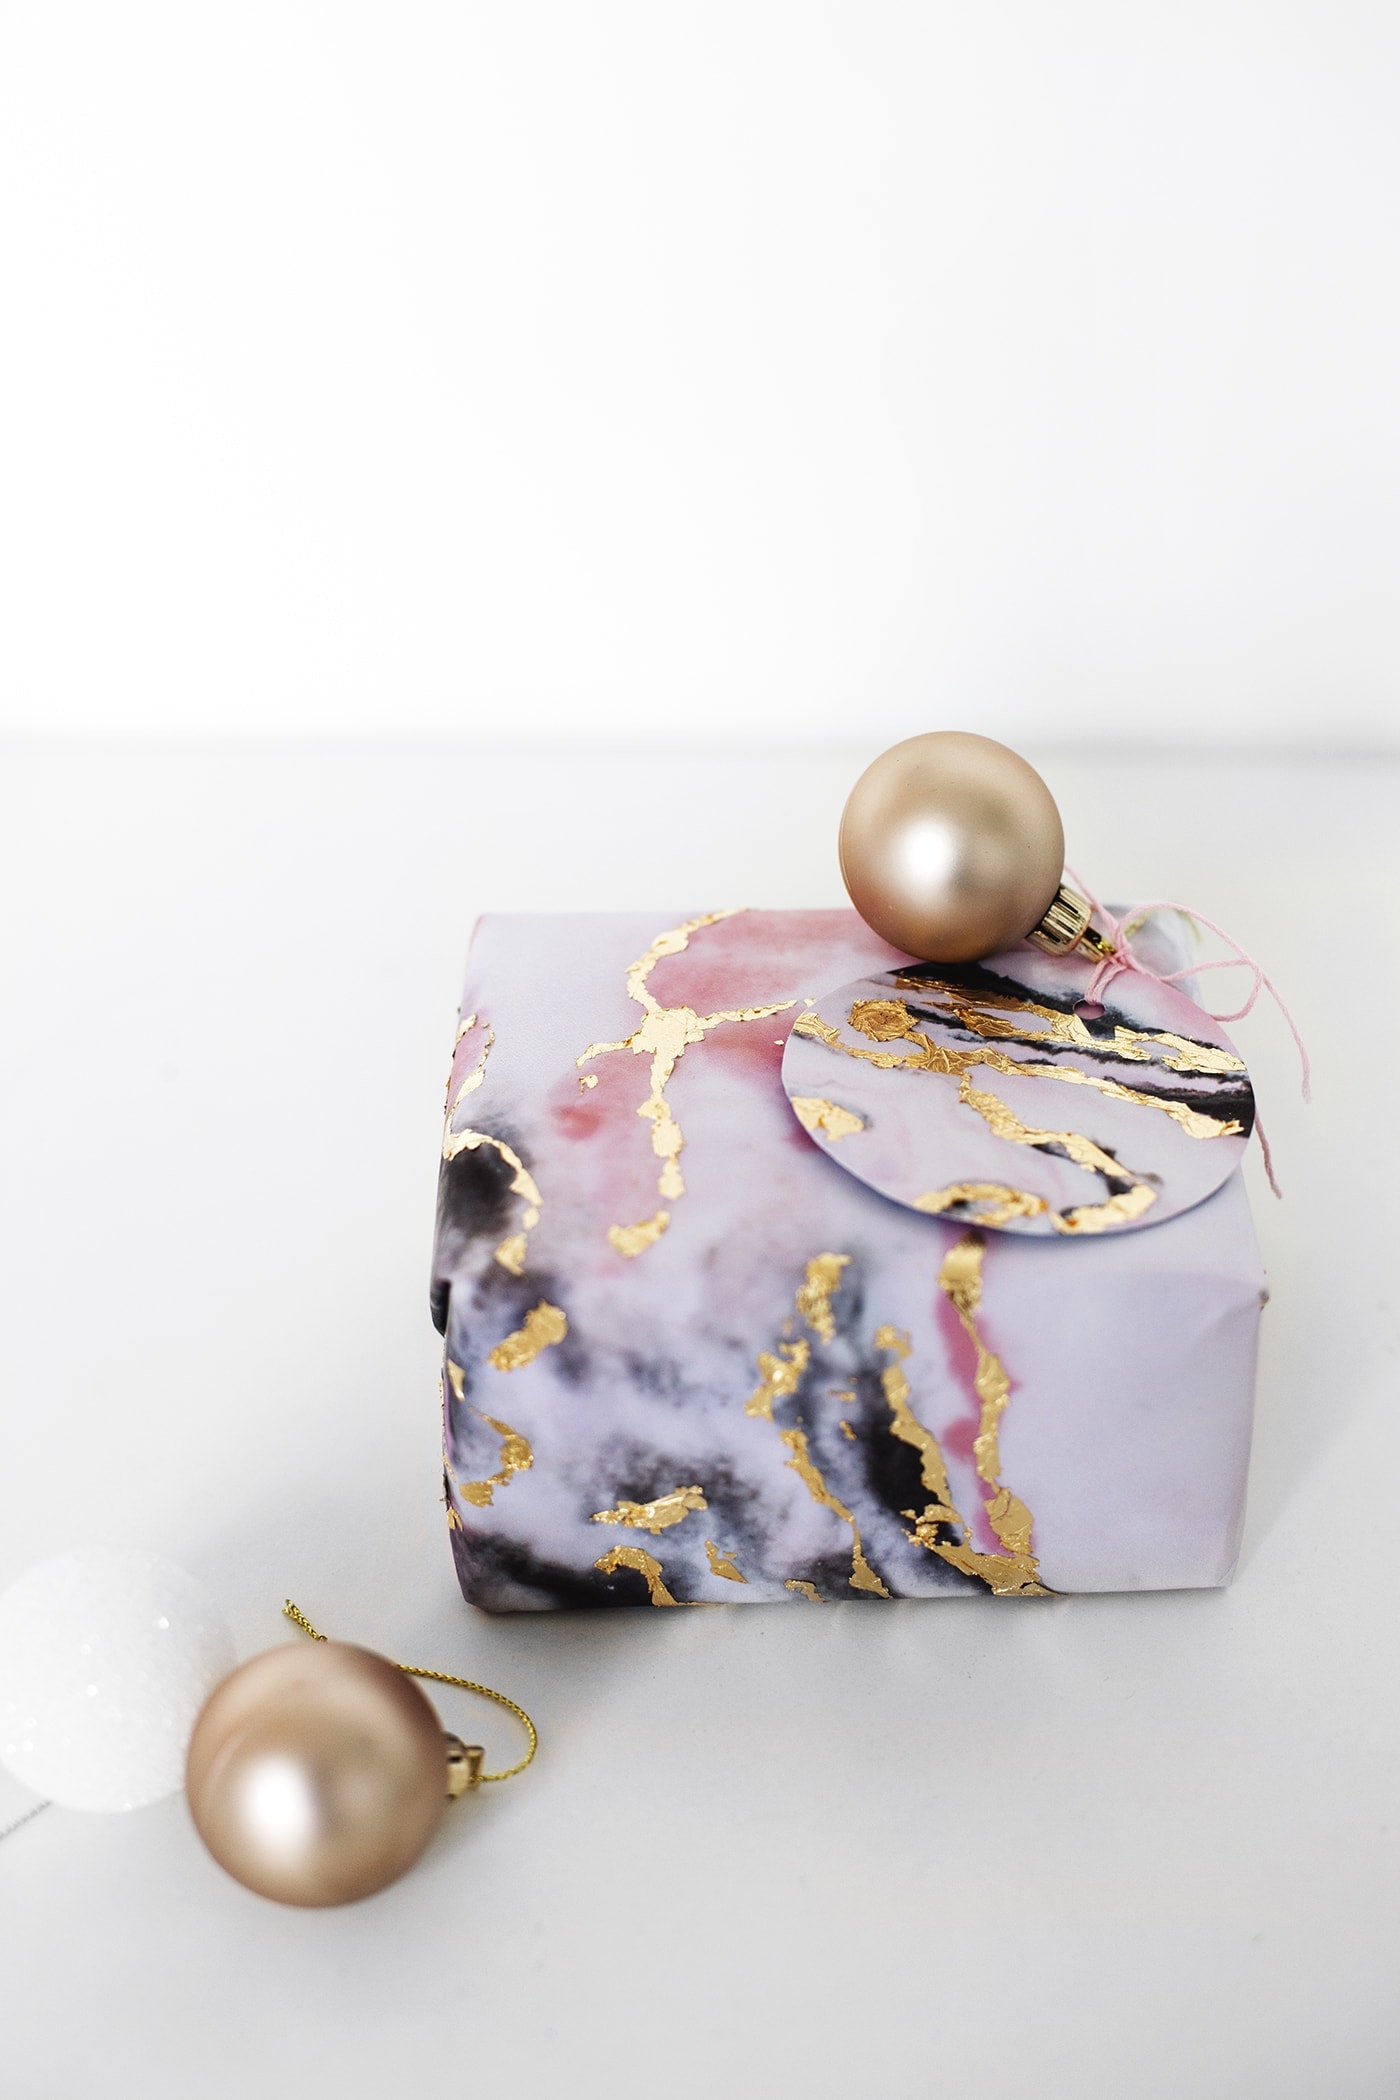
Start by printing out the pretty marble patterns. Use the paper for the wrap itself and the card for the gift tags. Alternatively you can use paper for the tags too and mount them onto some coloured card using strips of the Scotch Double Sided Tape to make them sturdier. I cut my tags into circles but you could opt for any shape you like.
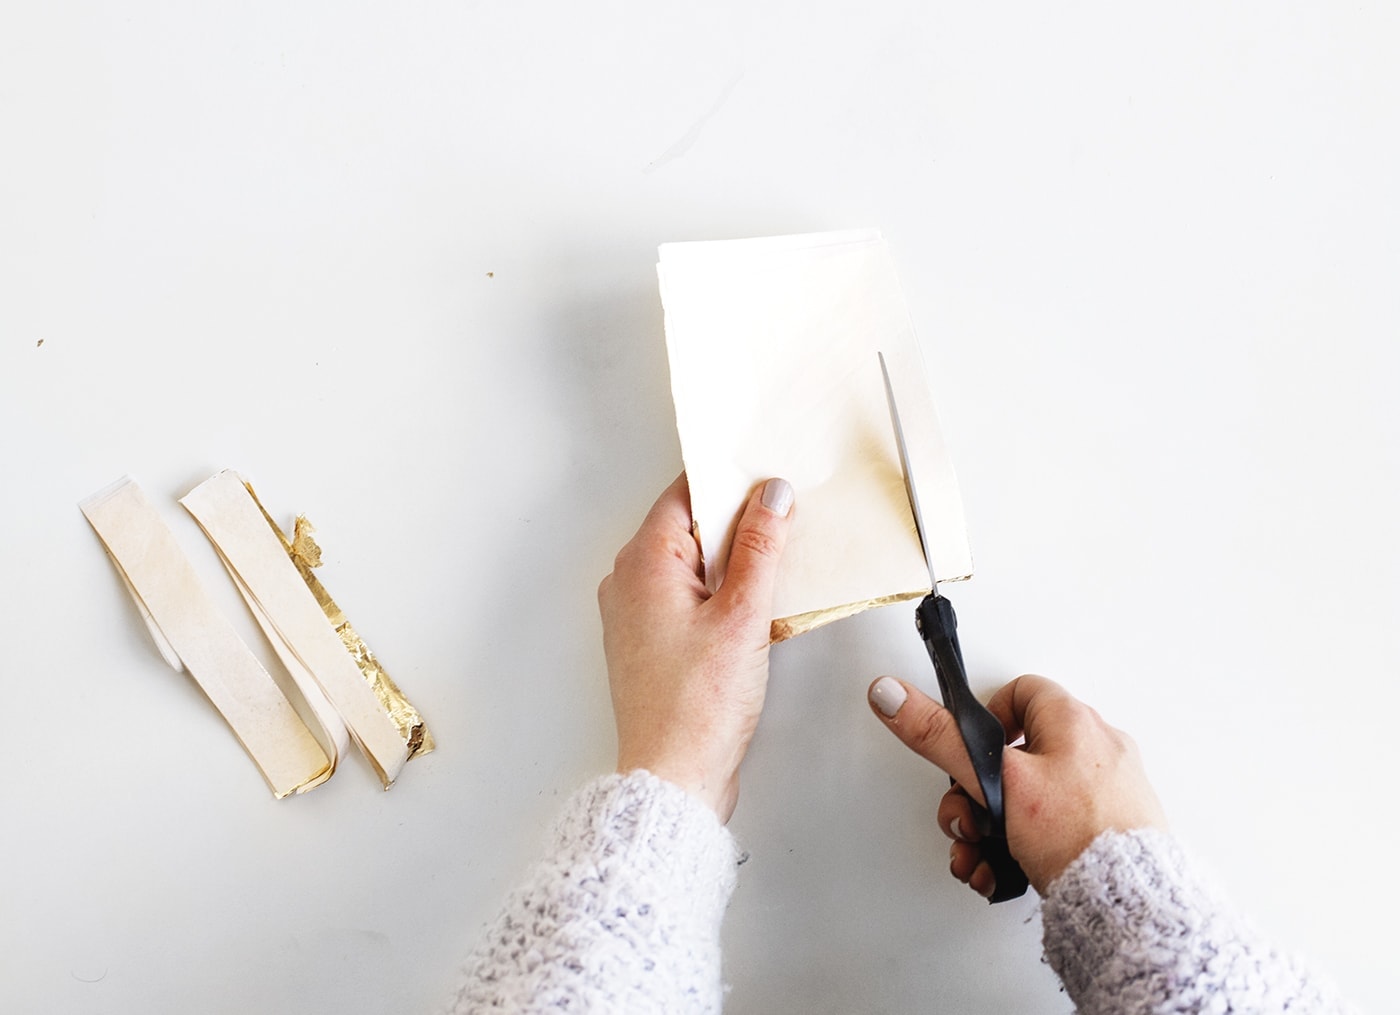
In preparation, cut the gold leaf into strips so it’s easier to apply and you don’t end up wasting lots of it in the process. Make sure you do this with the backing paper still on otherwise it’s a nightmare to cut!
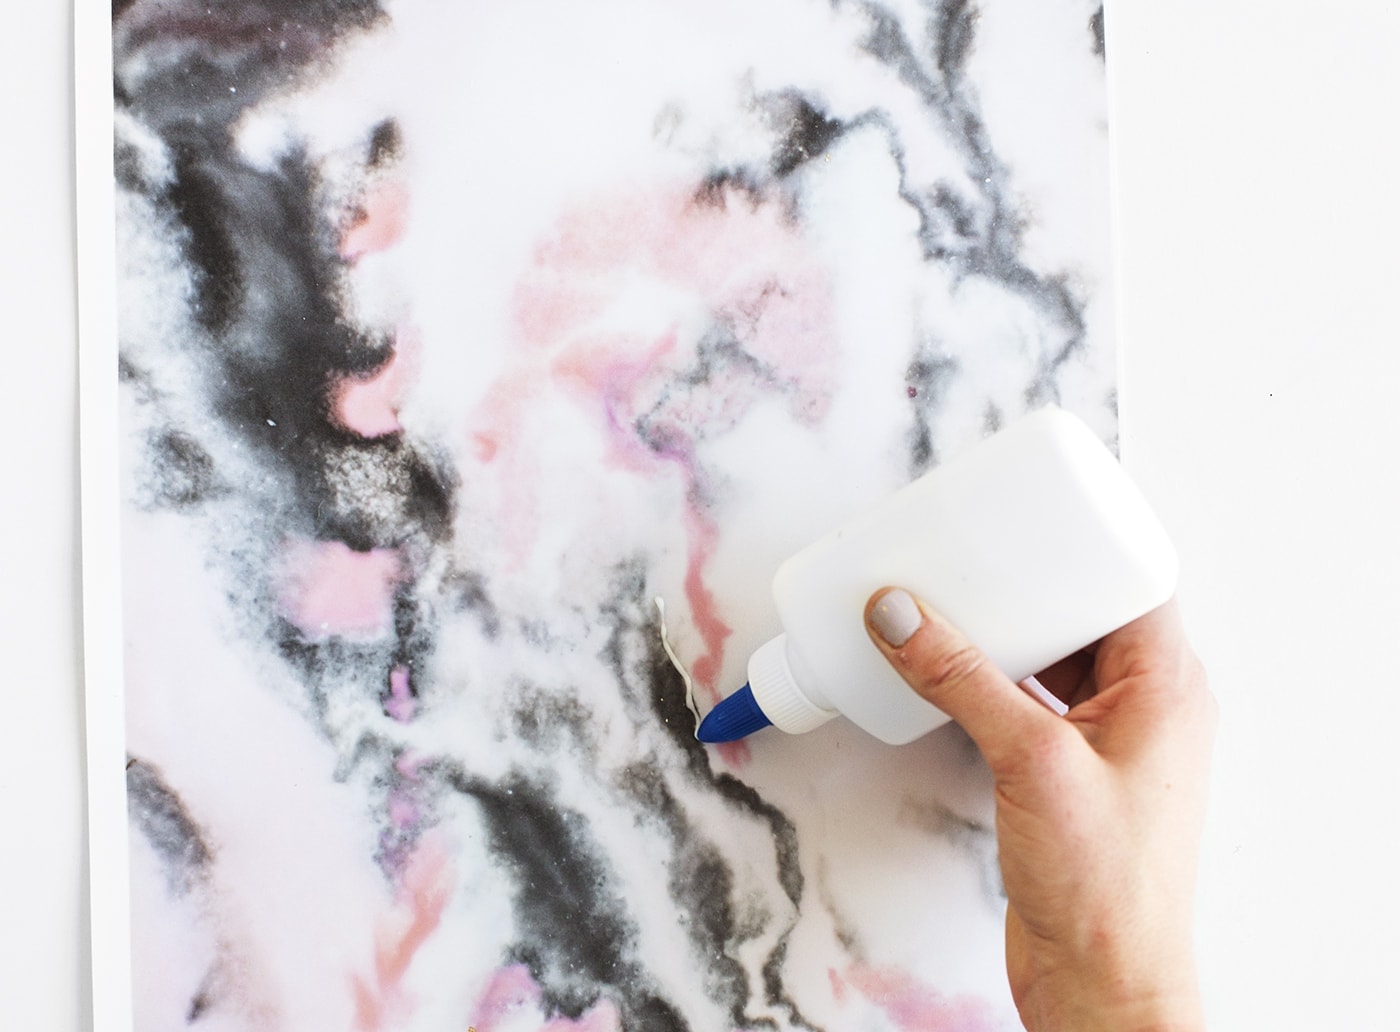
Now apply glue either with a paintbrush or if your glue has a fine nozzle you can use that. You want to roughly trace the existing lines within the marble pattern, keeping the glue line reasonable thin. Do this across your whole sheet before moving onto the next stage.
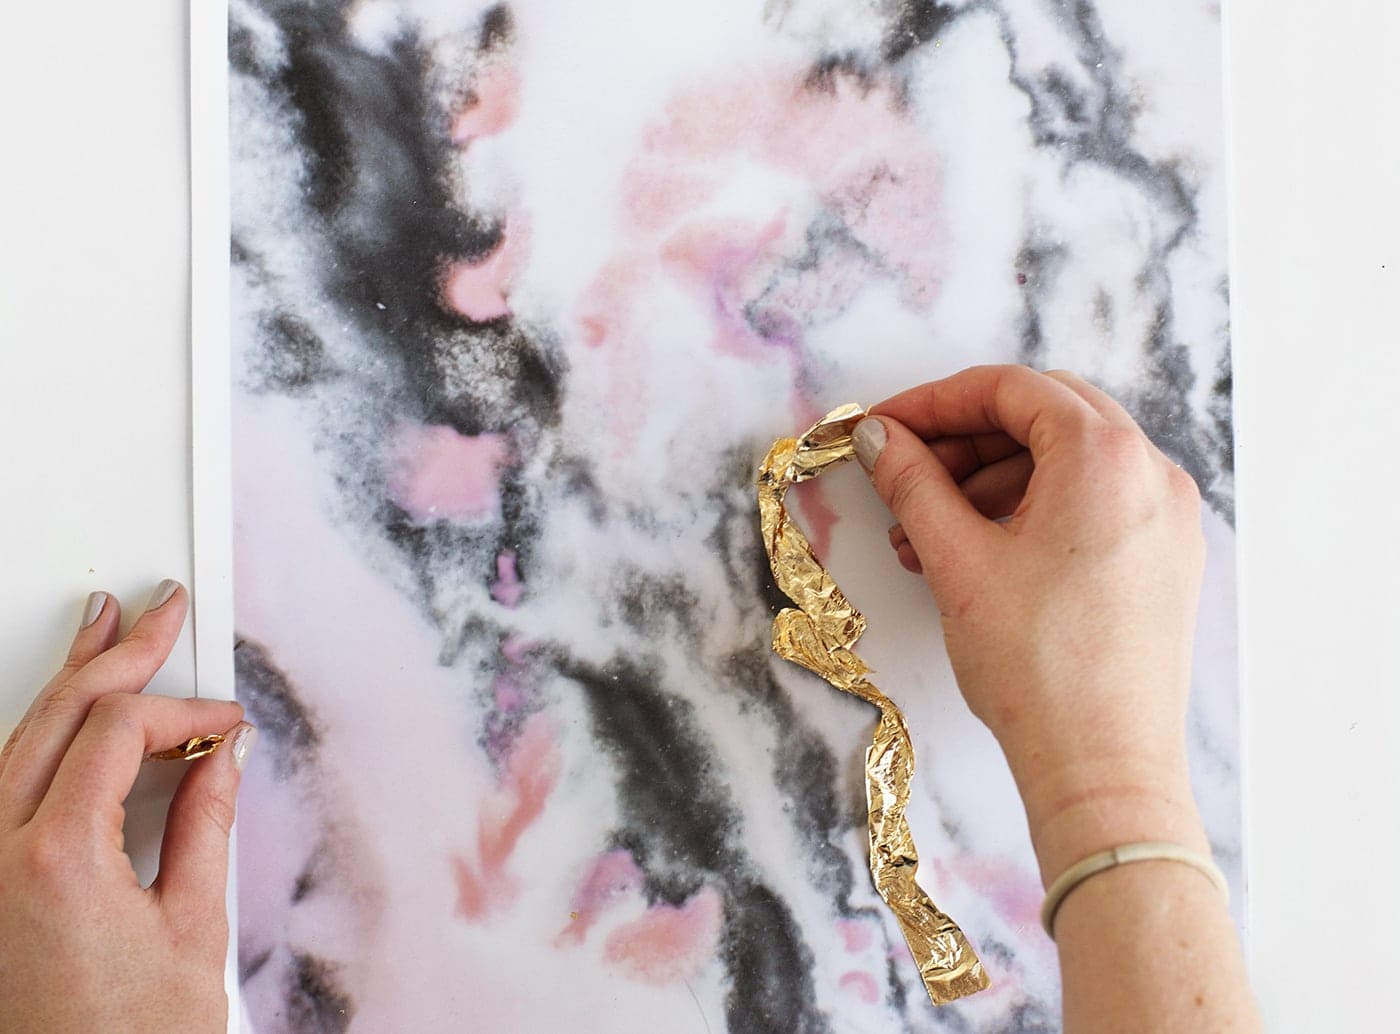
Remove the backing sheet and carefully start laying the strips over the glue. You can bend it slightly and use spare sections to fill in gaps to cover the glue.
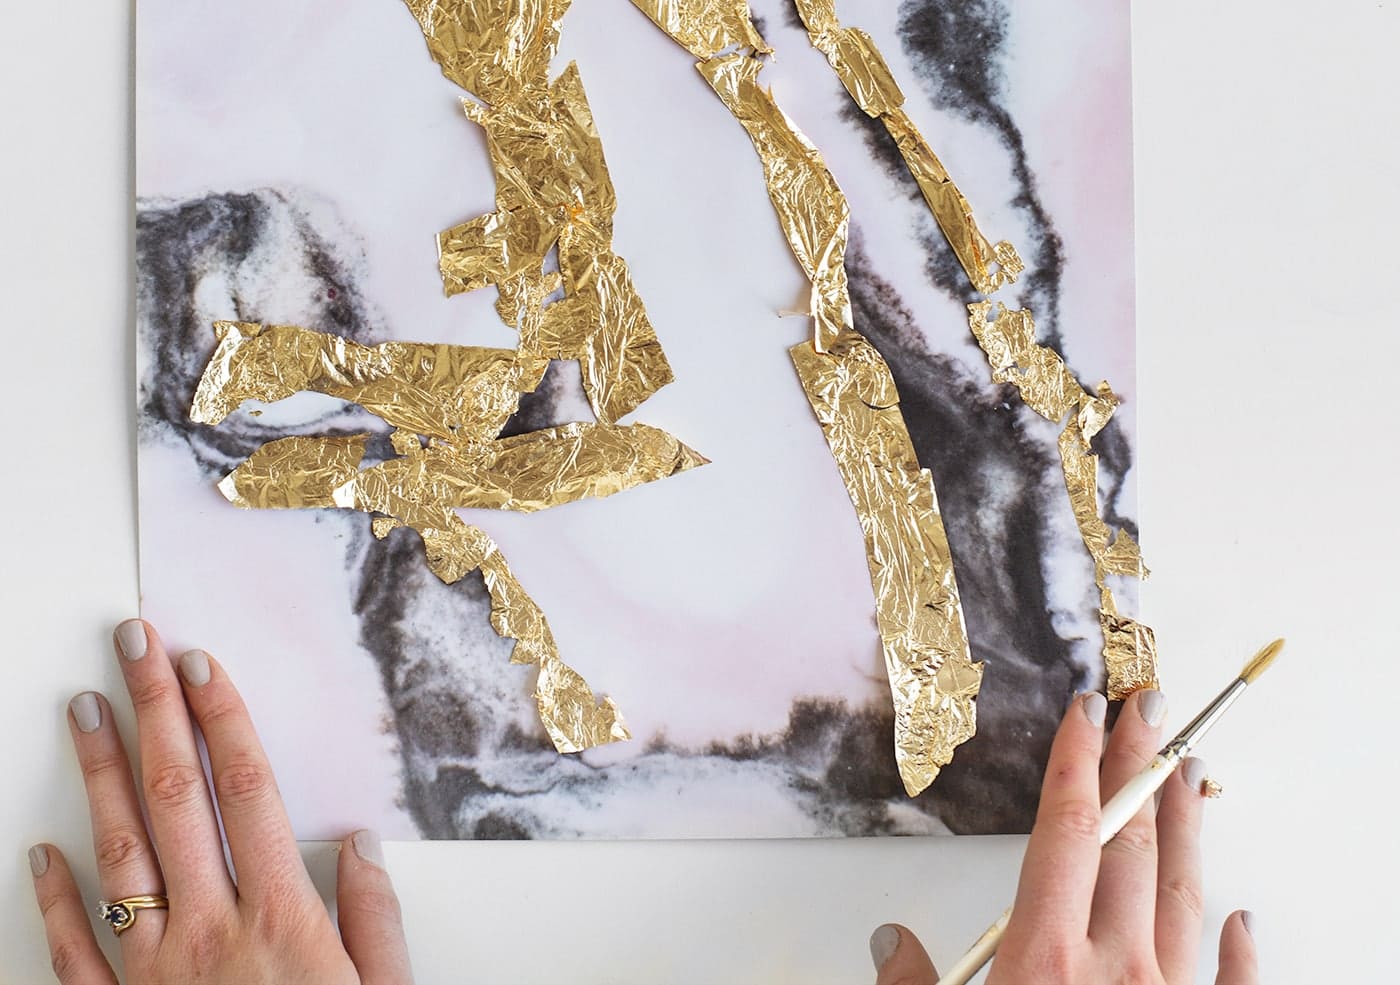
Continue this across the whole of the sheet so that every part of the glue is covered and then leave to dry fully for a few hours. I did this one evening and then just left the next stage until the next day to ensure it was completely dry and save me waiting around for hours.

Now take a dry paintbrush and move it back and forth over the gold foil so that only the glued areas remain. Just a friendly warning that this can make a right mess! I would put some kind of paper down underneath to catch any fly-aways and then roll it up when you’re finish so you can dispose of it easily.
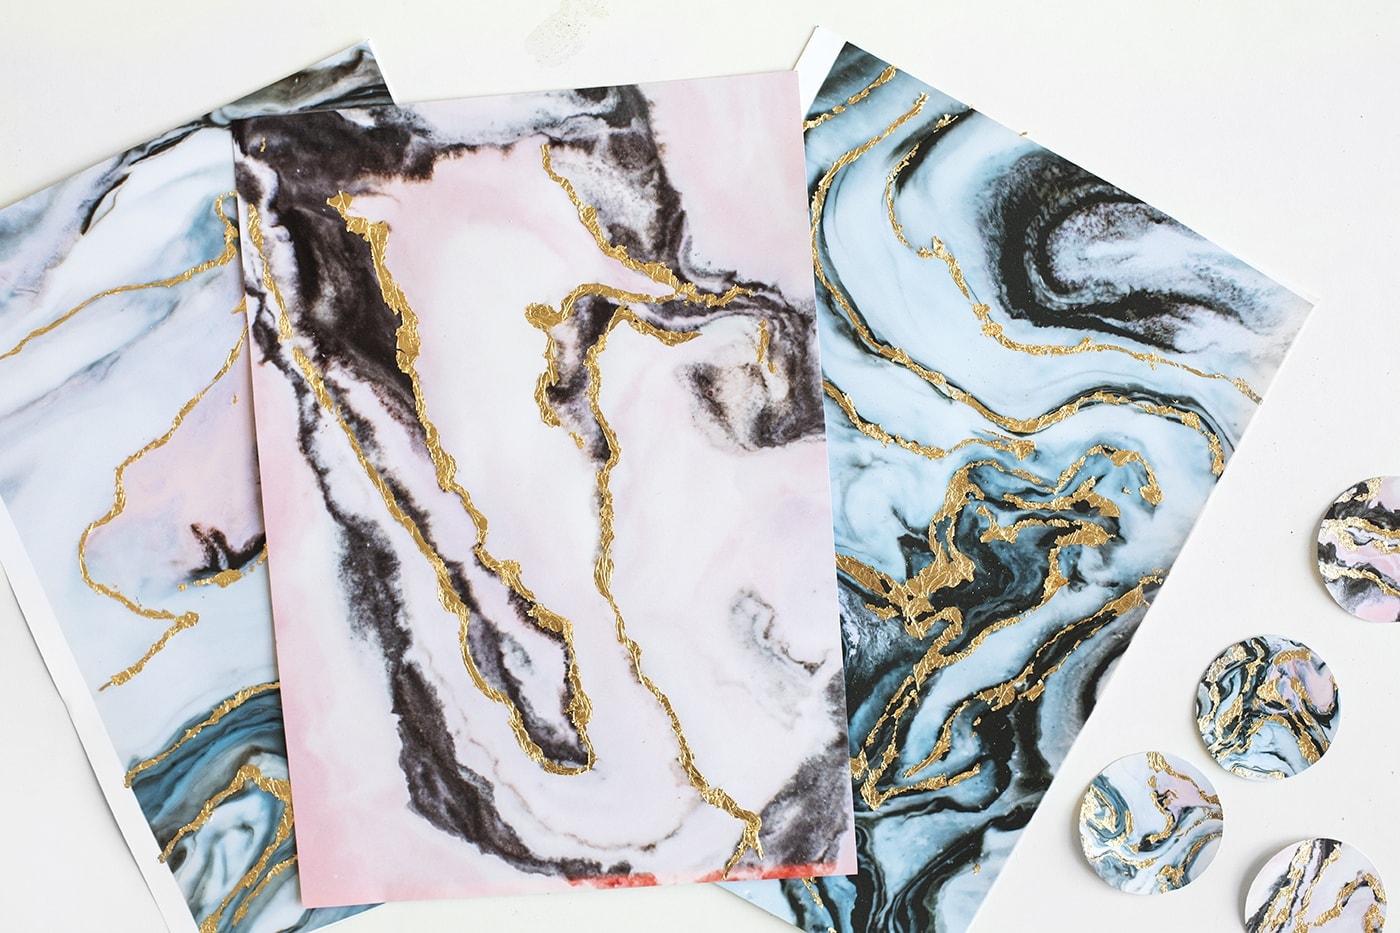
Brush off all the excess gold on all your paper sheets and gift tags until you’re left with the above.
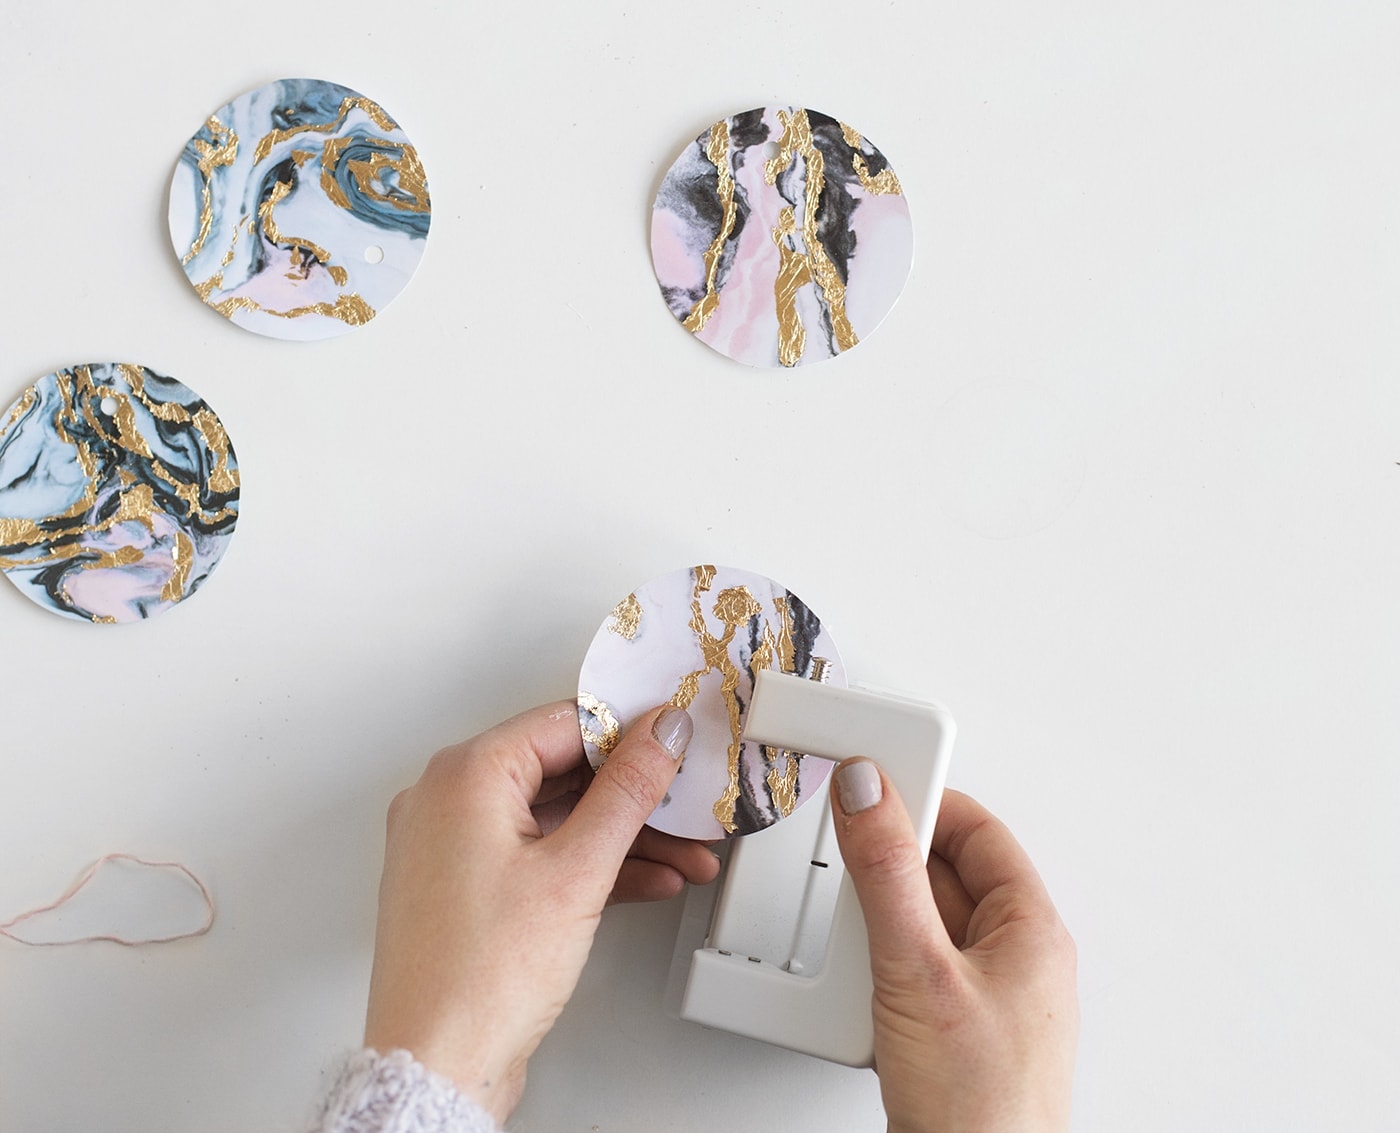
Hole punch the gift tags so there’s a way of adding thread.
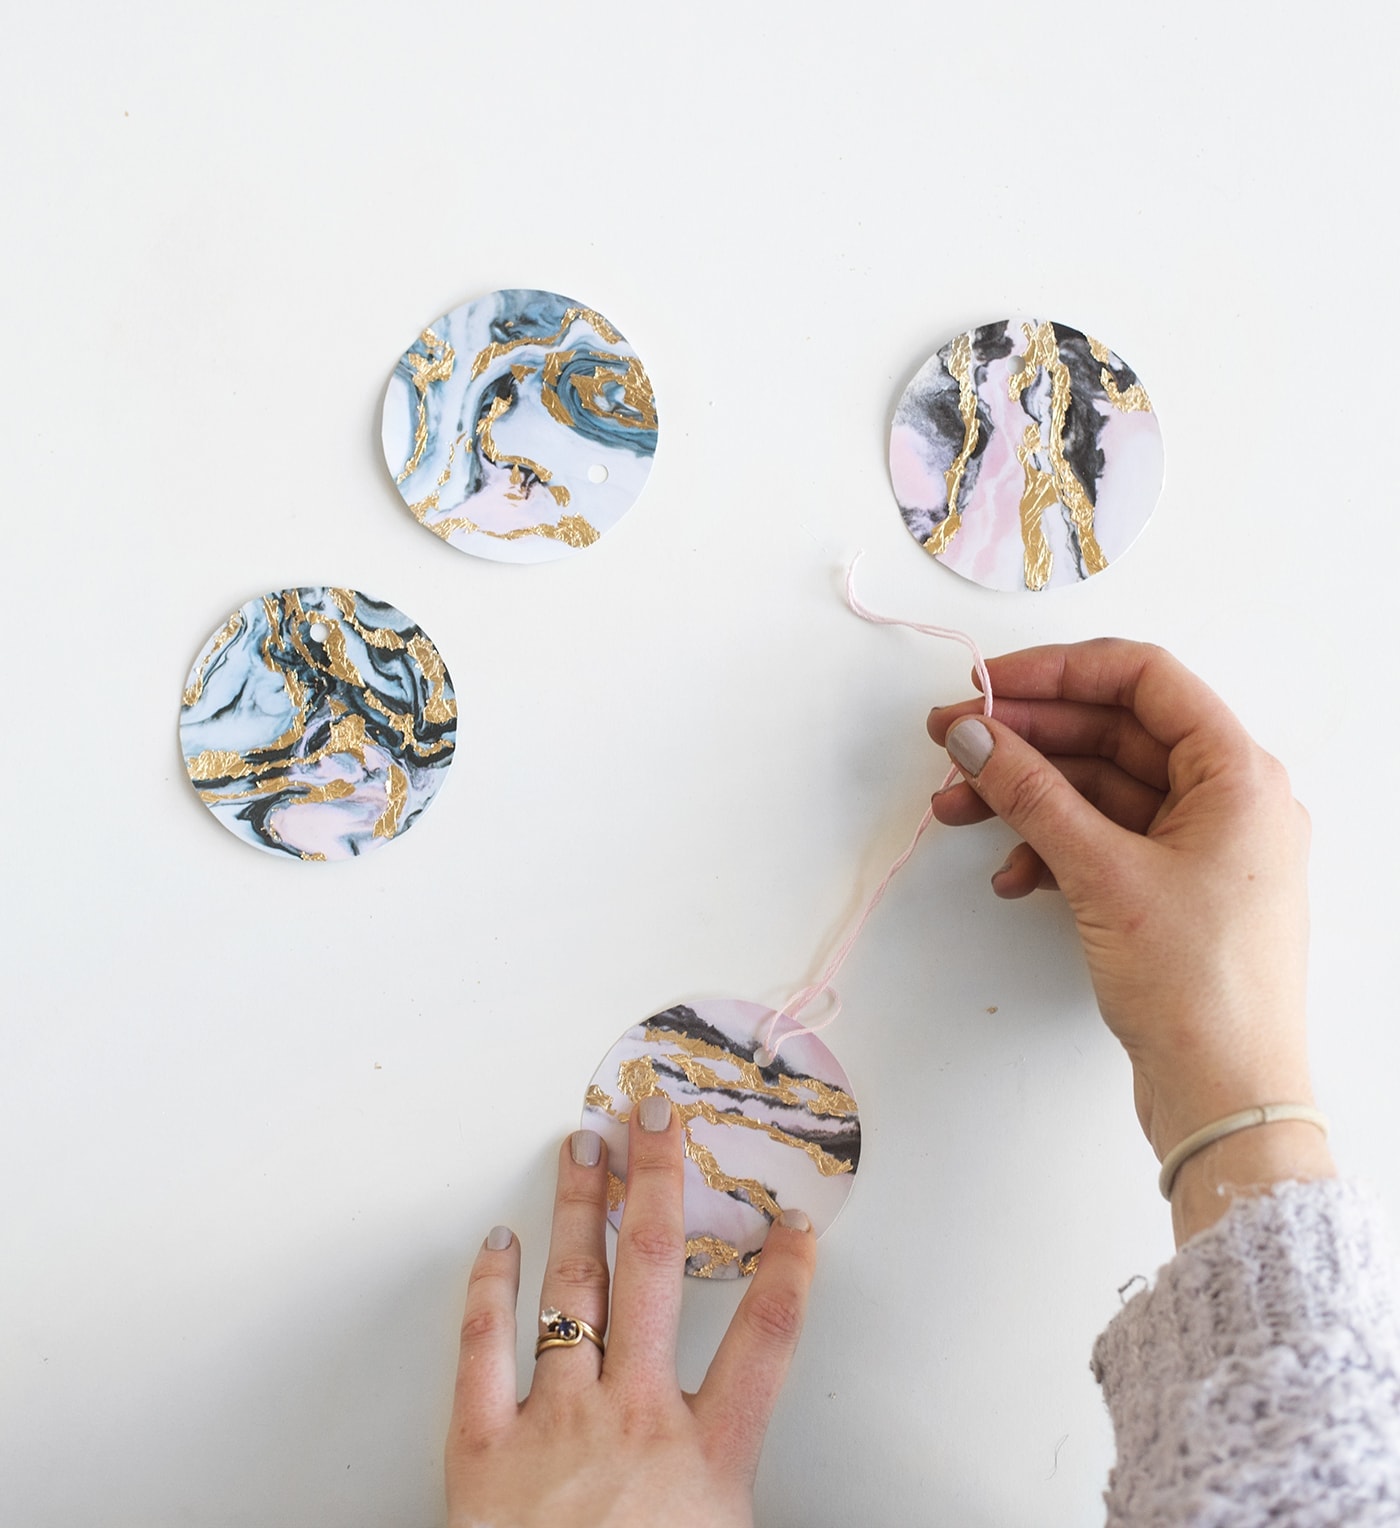
Thread your string, twine or whatever you’re using through each gift tag hole. I did this by folding the length in half and thread the folded end through the hole. Pull this through and and loop over the string / twine on the other side. Pull tight.
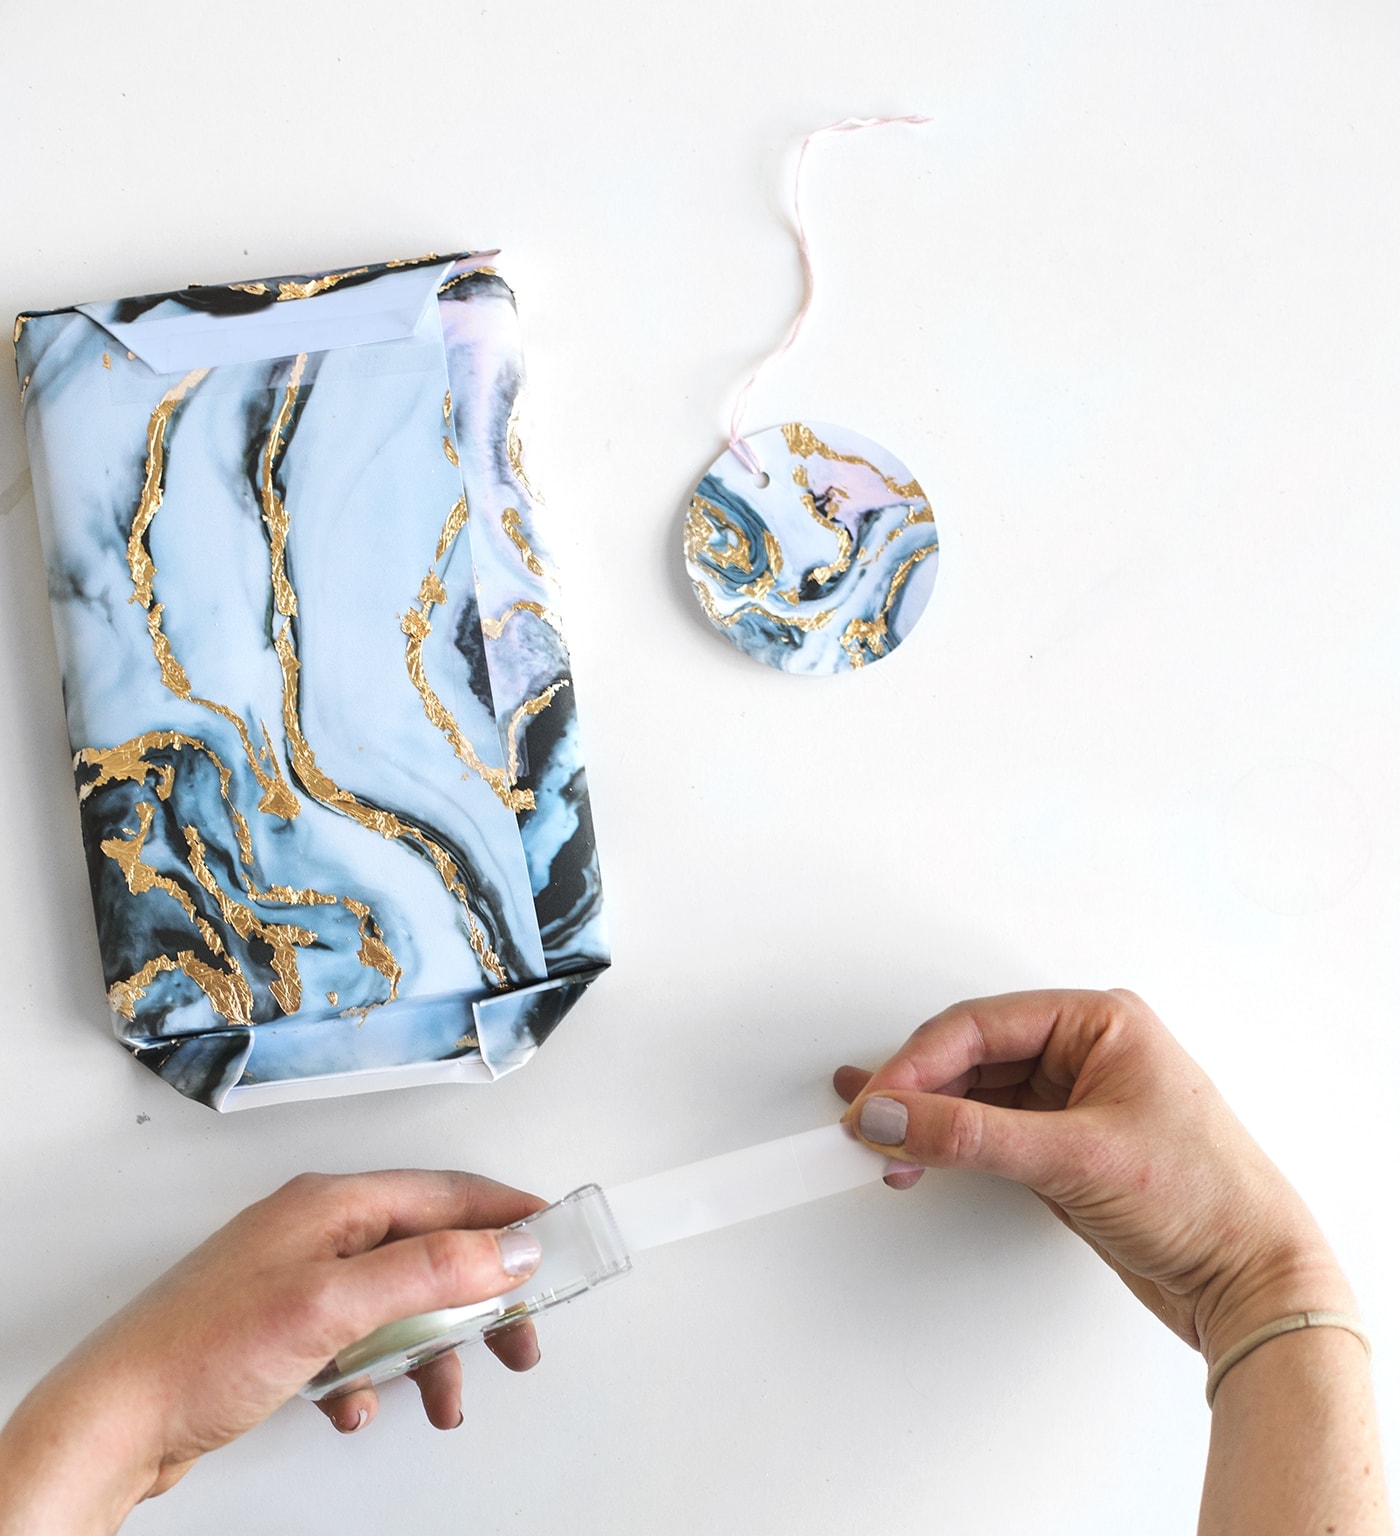
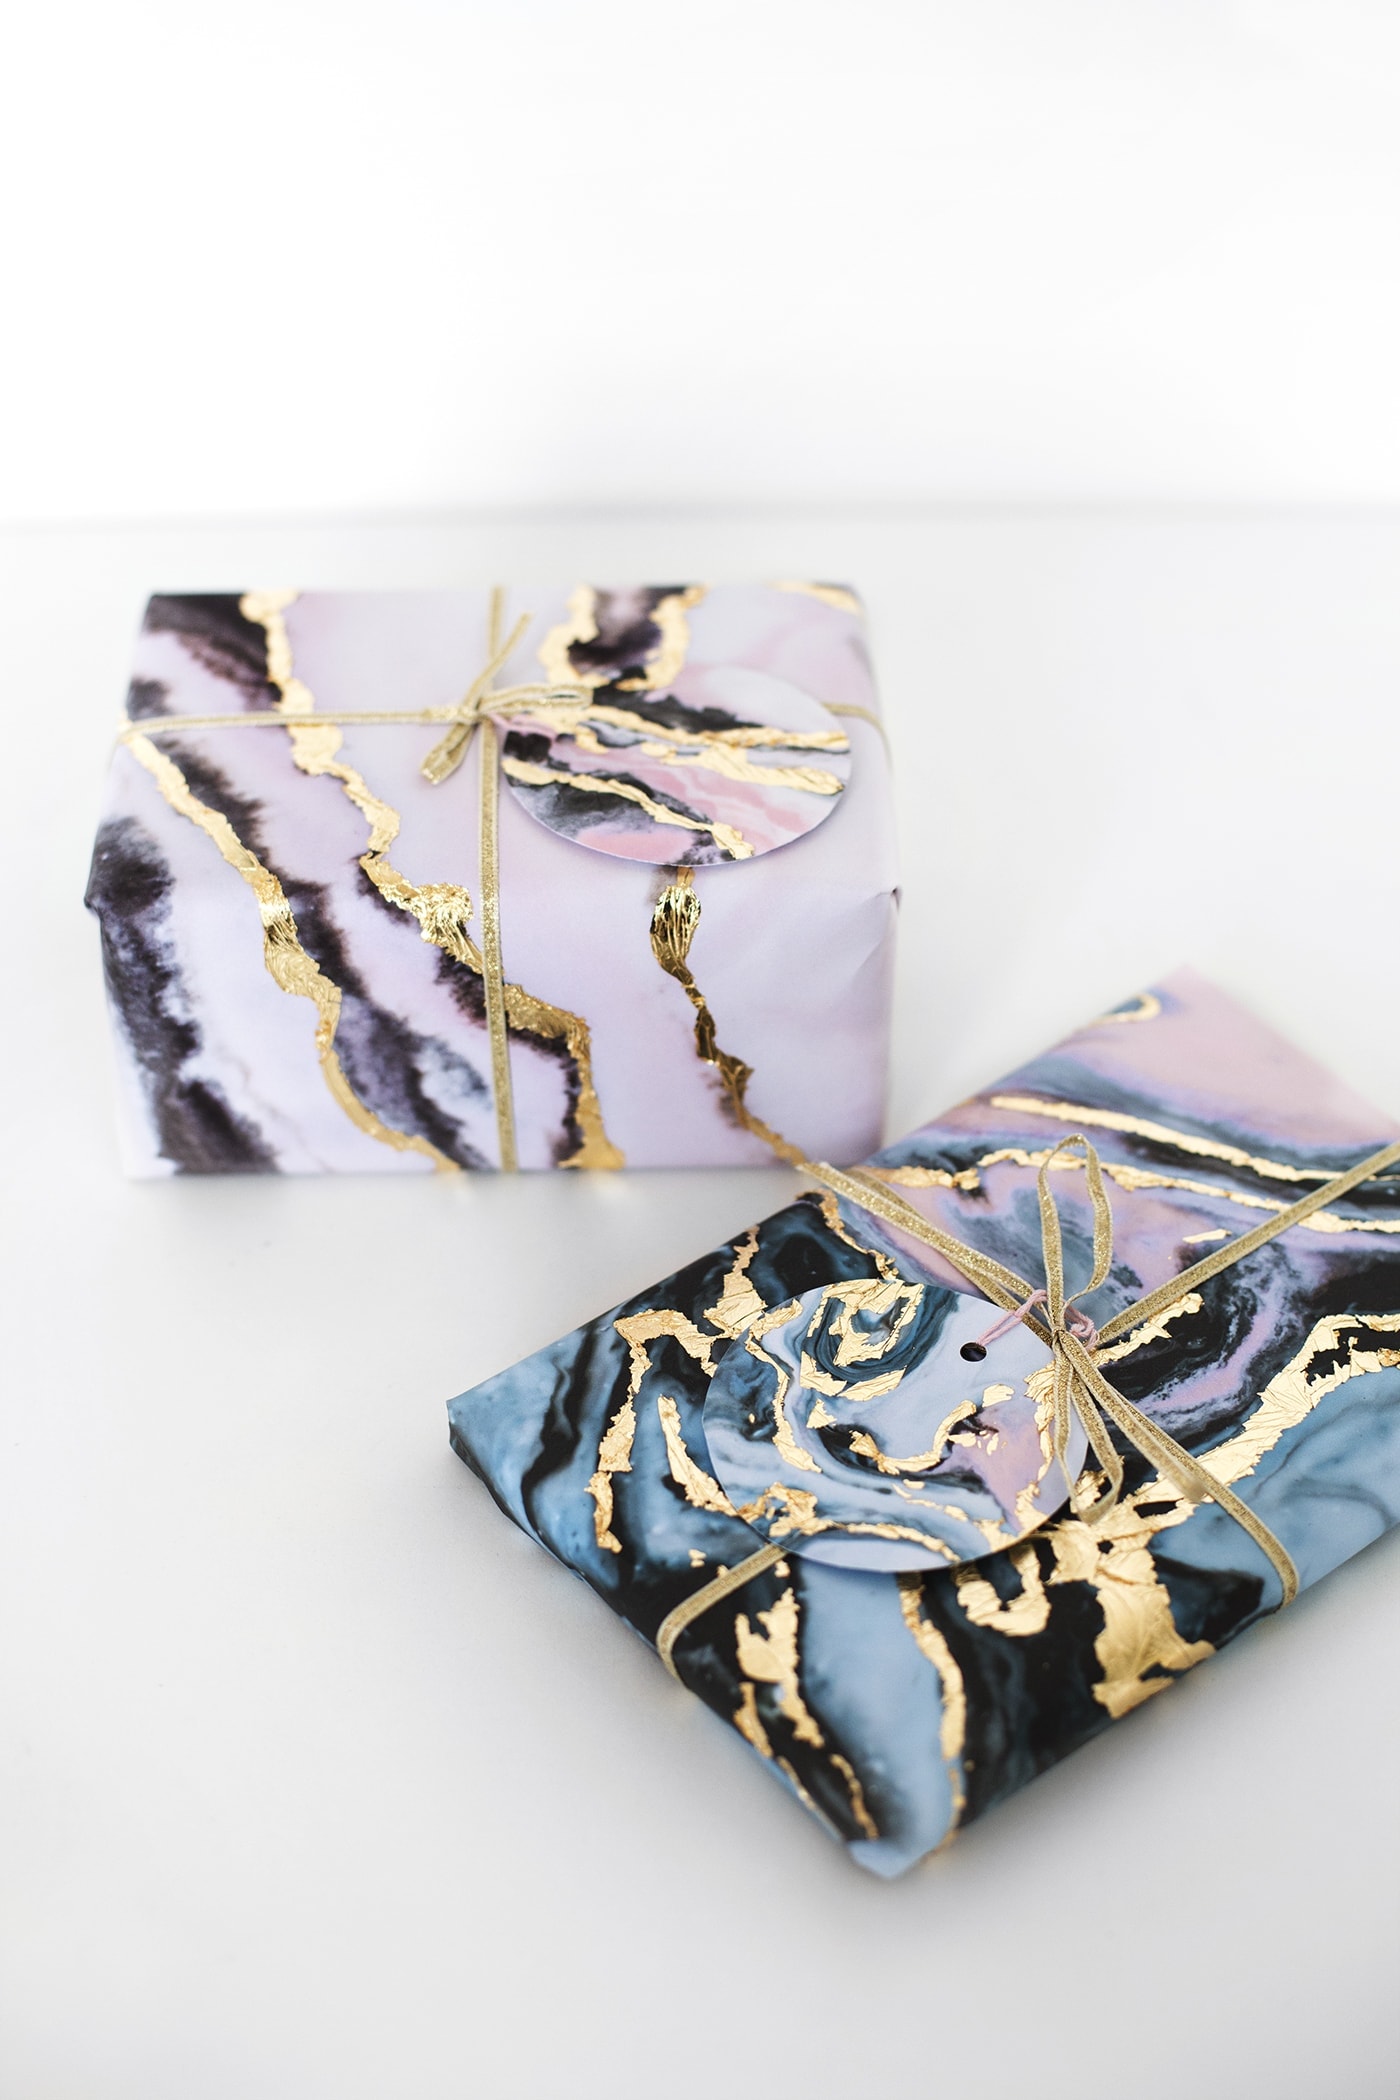
Hooray, it’s time to get wrapping! Put on that Christmas movie, light a festive smelling candle and whip out the Scotch Magic Tape. This is designed specifically designed for wrapping gifts and the matt finish will blend almost seamlessly into the pattern of your paper. This tape is also surprisingly strong which means no surprise ‘popping open’ moments. Other tapes wouldn’t take so well to the gold leaf texture but this one has no issues.
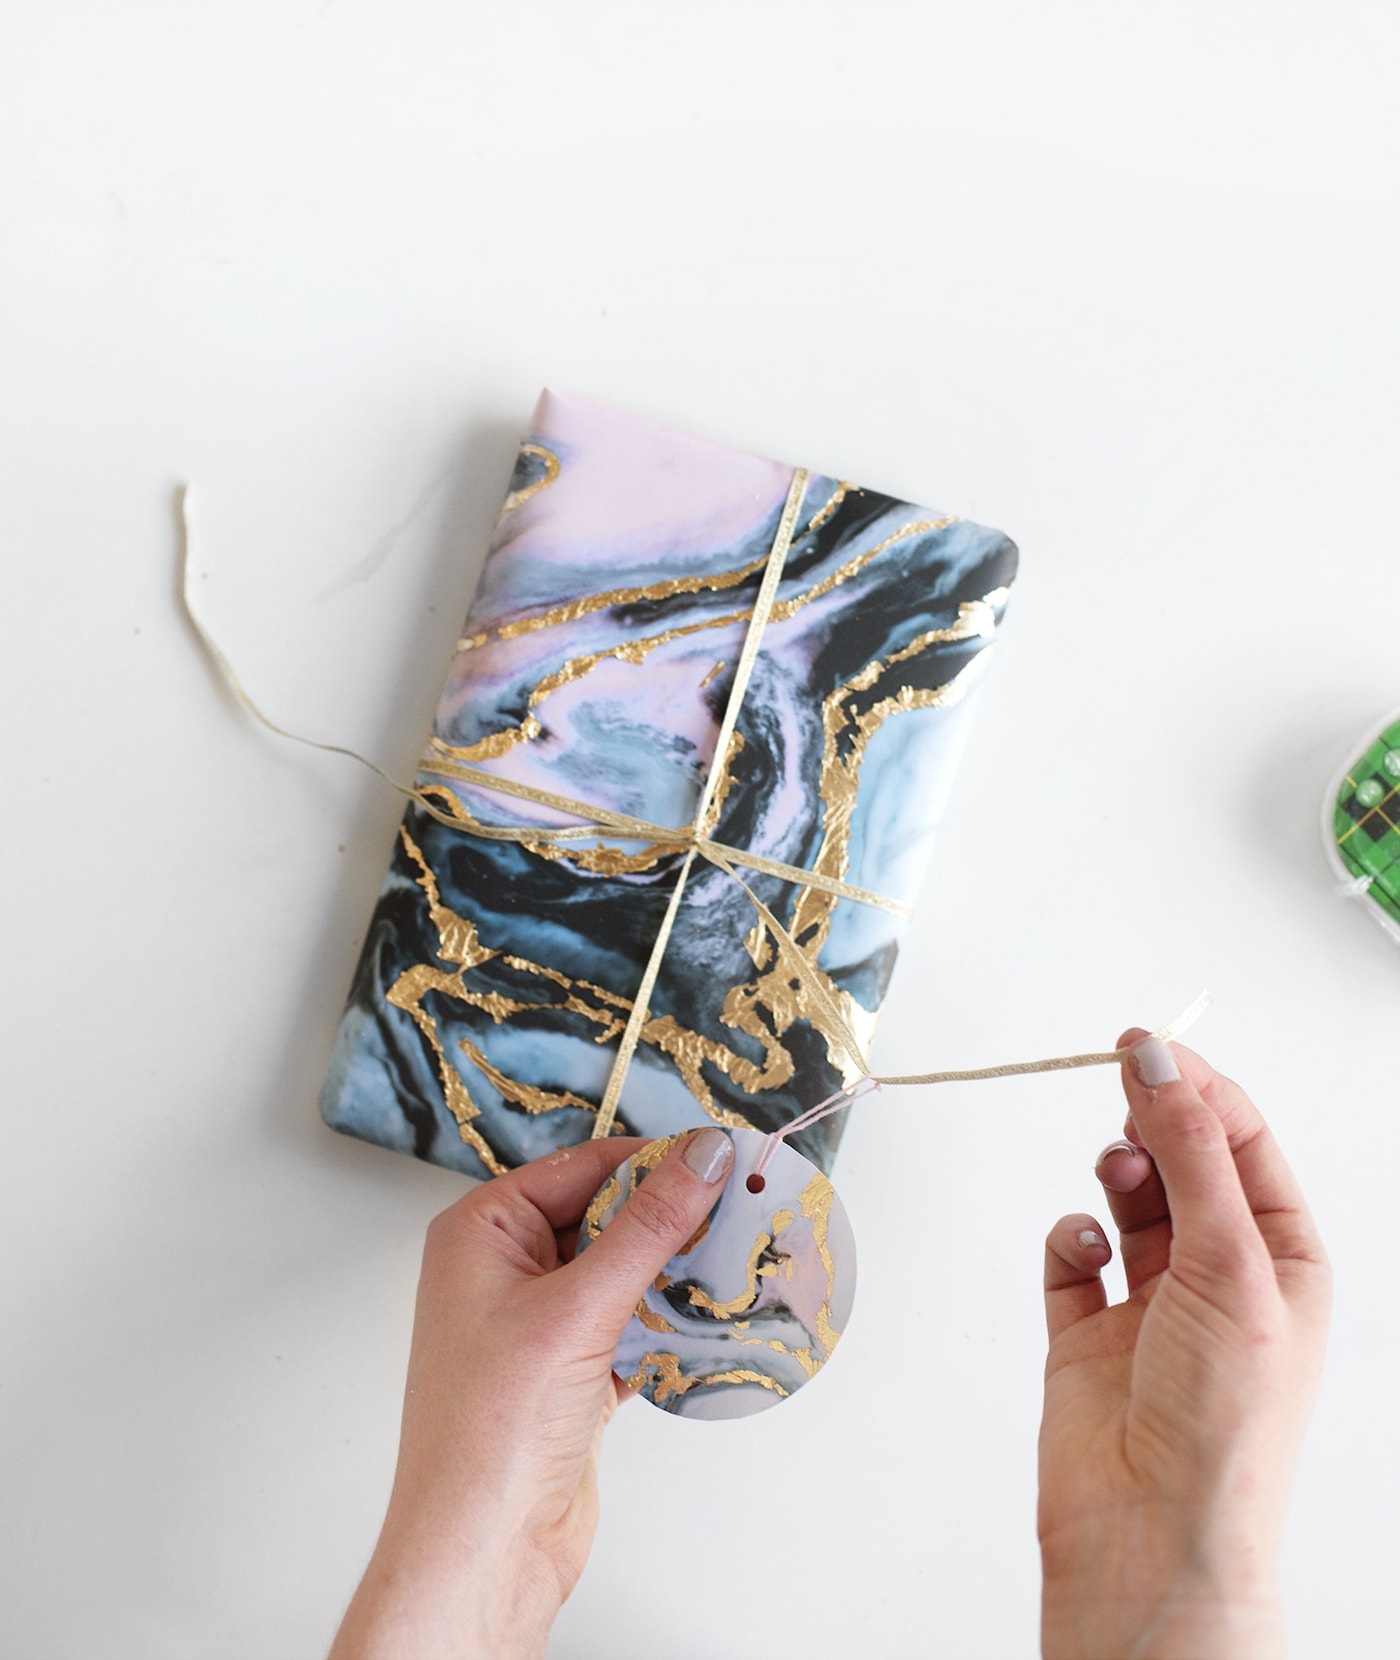
Tie your ribbon round the gift, starting from the front, crossing at the back and then back to the front to tight a double knot. Thread your gift tag onto one ribbon strand.
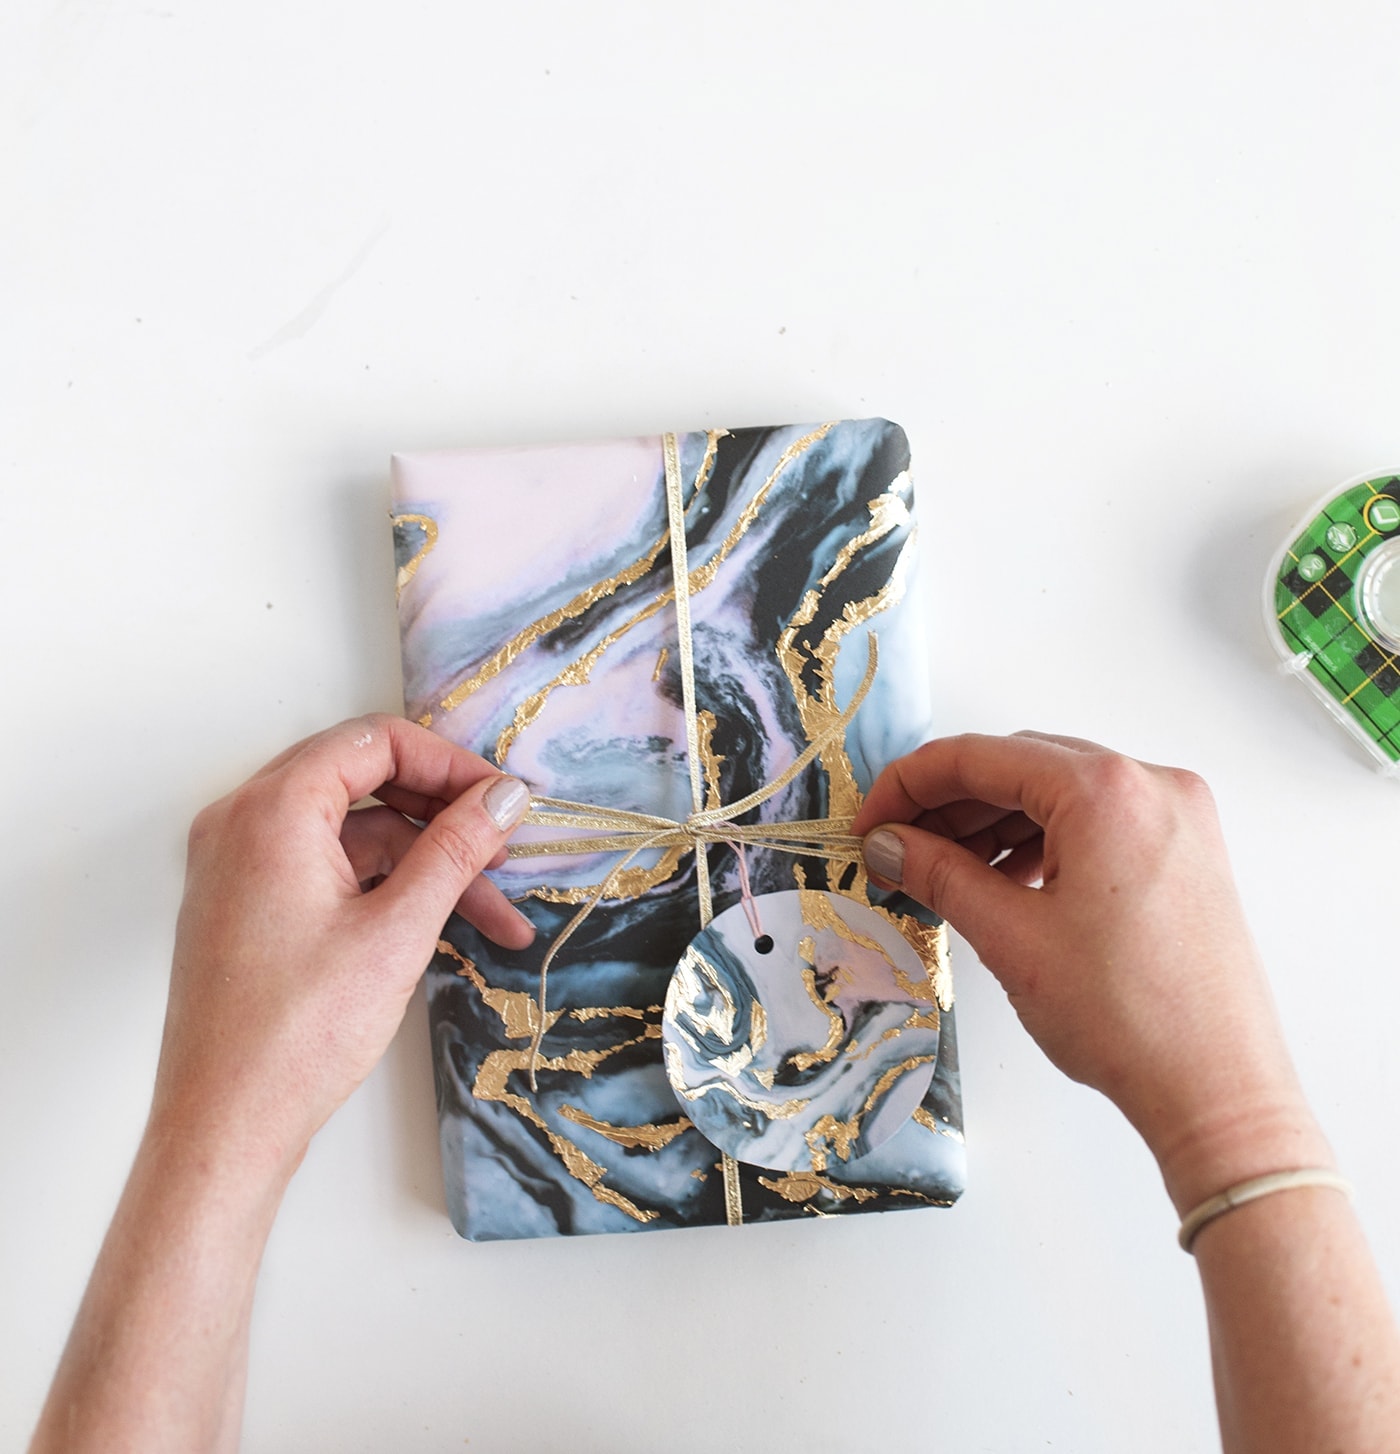
Tie the ribbon in a pretty bow to finish off the parcel and you’re ready to give, stylishly!
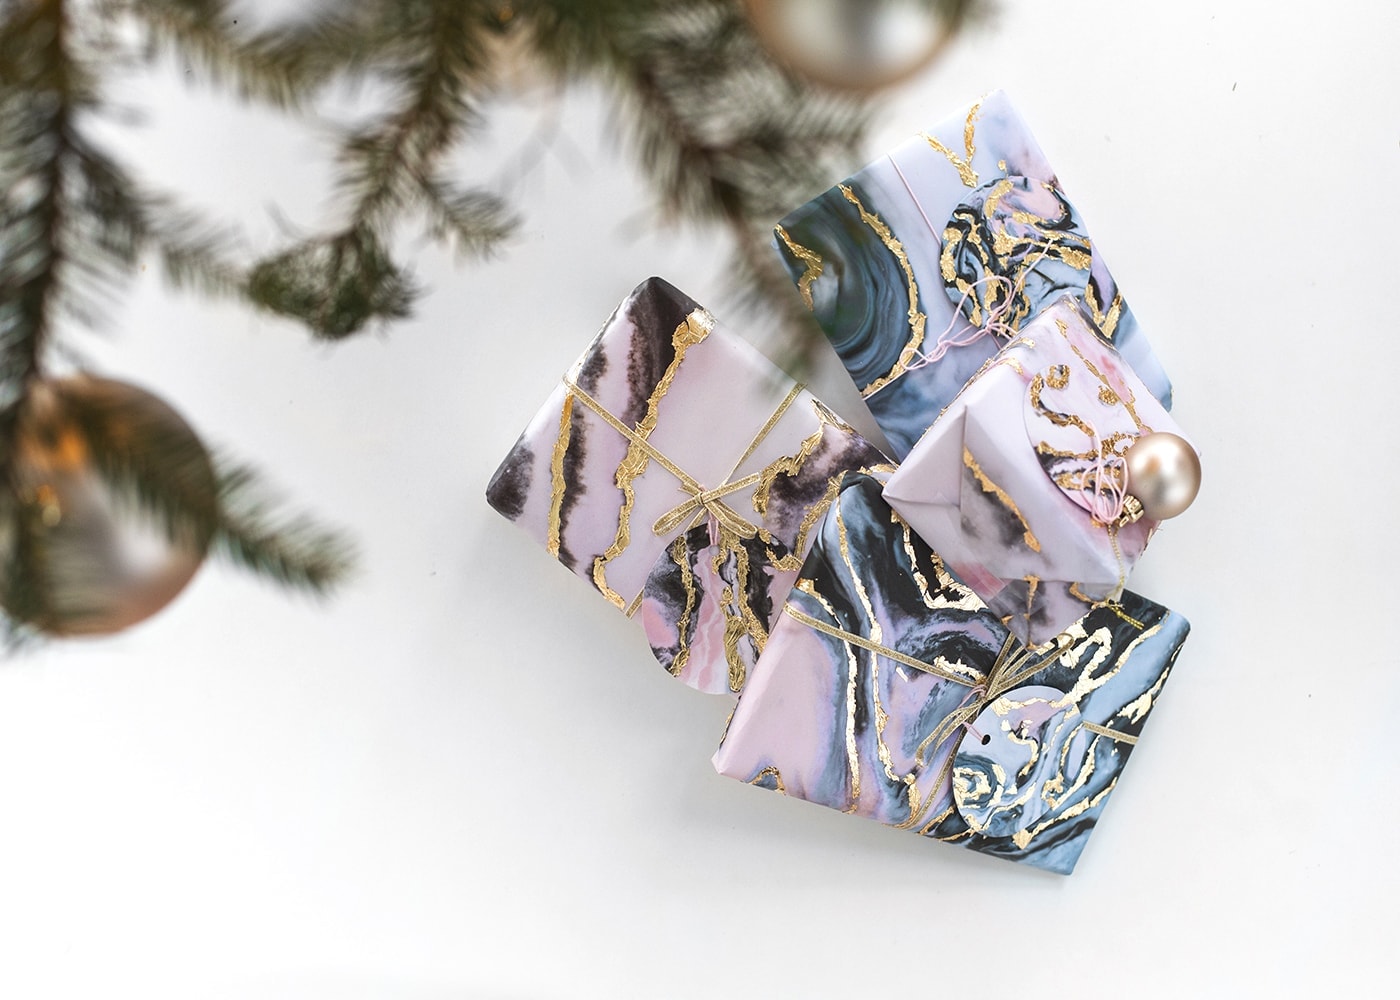
And there you have it. I love this alternative idea for Christmas gift giving. The design is not overtly festive as after all I’m never much of a fan or the traditional red and green affair. Having said that the gold gives it that special Christmas shine and no one else will have this wrap so go ahead and give it a try. I’m hoping that we might learn from our ‘hot mess’ selves from previous years and be able to make our gift wrapping a much more pleasant activity!
This post was written in collaboration with Scotch, helping revolutionise my wrapping experience
You might also like


Meet The Lovely Drawer

Hi, I’m Teri and welcome to my own creative corner of the internet. I blog about interiors, DIY projects, design inspiration and my general life so stick around have a read and say hi.
In the shop
 Quick ViewSelect options
Chicory
£20.00 – £25.00
 Quick ViewSelect options
Terrace 1
£20.00 – £25.00
Work with Me
The Lovely Drawer is an award winning blog with a loyal audience that has grown over the years. I love working with brands small and large on exciting collaborations that can bring products alive in my own signature aesthetic.