

DIY New Year’s Eve Table


What are you up to for New Years Eve this year? You might be trying to put that out of your mind having just recovered from all the Christmas celebrations but if you’re planning a little get together then I’ve thought up a few simple ideas to make your evening that little bit special but without lots of work. I don’t know about you but I love low key dinners for New Year’s Eve. Good friends, good food and good conversation, around one table.
Unfortunately I managed to break yet another SD camera card and subsequently lost all the steps I had photographed so my explanations will have to do. Story of my life!
I’ve gone a bit crazy with gold leaf because it looks party-perfect and why not add some decadence if it’s straightforward and I’ve even got a free printable menu card for you too!


 Materials
- Card
- Free menu and goals card download
- Pen preferable in a gold/yellow colour (I used a tombow pen)
- Fine paintbrush
- Medium brush
- Gold leaf sheets
- Scissors
- Large dry brush
- PVA glue
- Candlesticks

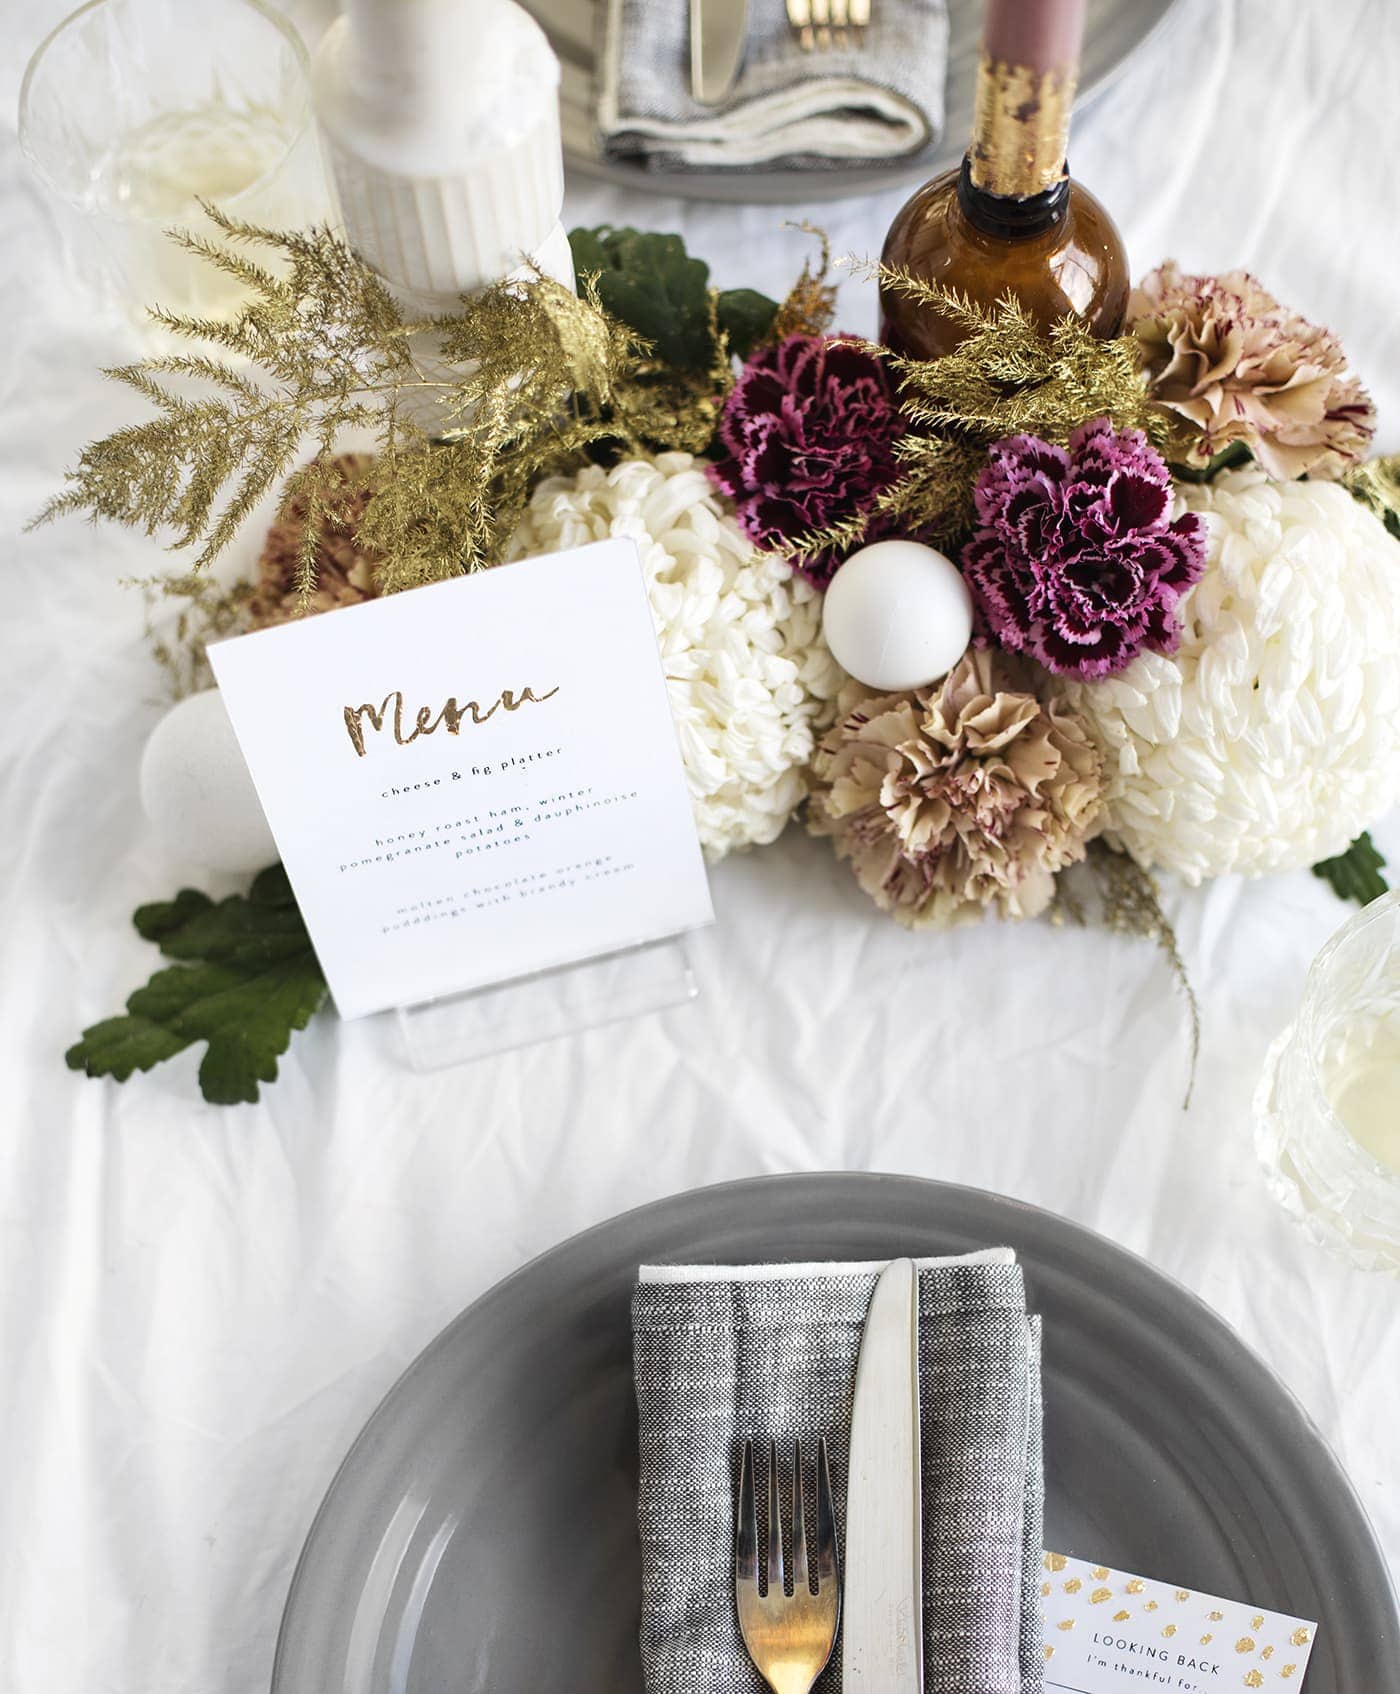
Menu card
- Start by using the download and add in your menu options on the computer.
- Print them out onto your card and cut out.
- Use your fine brush to carefully trace around the letters adding in the thick and thin parts. Be generous with the glue to make sure the gold leaf will adhere.
- Press the gold leaf on top and leave to dry for a good few hours. You can lend a helping hand with a hairdryer.
- Then use the dry brush to get rid of the extra.
Place cards
- Cut out squares of the card and write each name on them: have a little practise before and try not to make the lettering too thin.
- Once again trace the lettering and fill in with the glue and your fine brush.
- Press the gold leaf gently on top and leave to dry fully
- Brush the excess off with the dry brush.
Goals cards
- Download and print the goal cards and cut them out.
- Use the same process but apply dabs of glue. Once again be generous.
- Lay the gold leaf over the top and leave to dry.
- Brush off excess with a dry brush
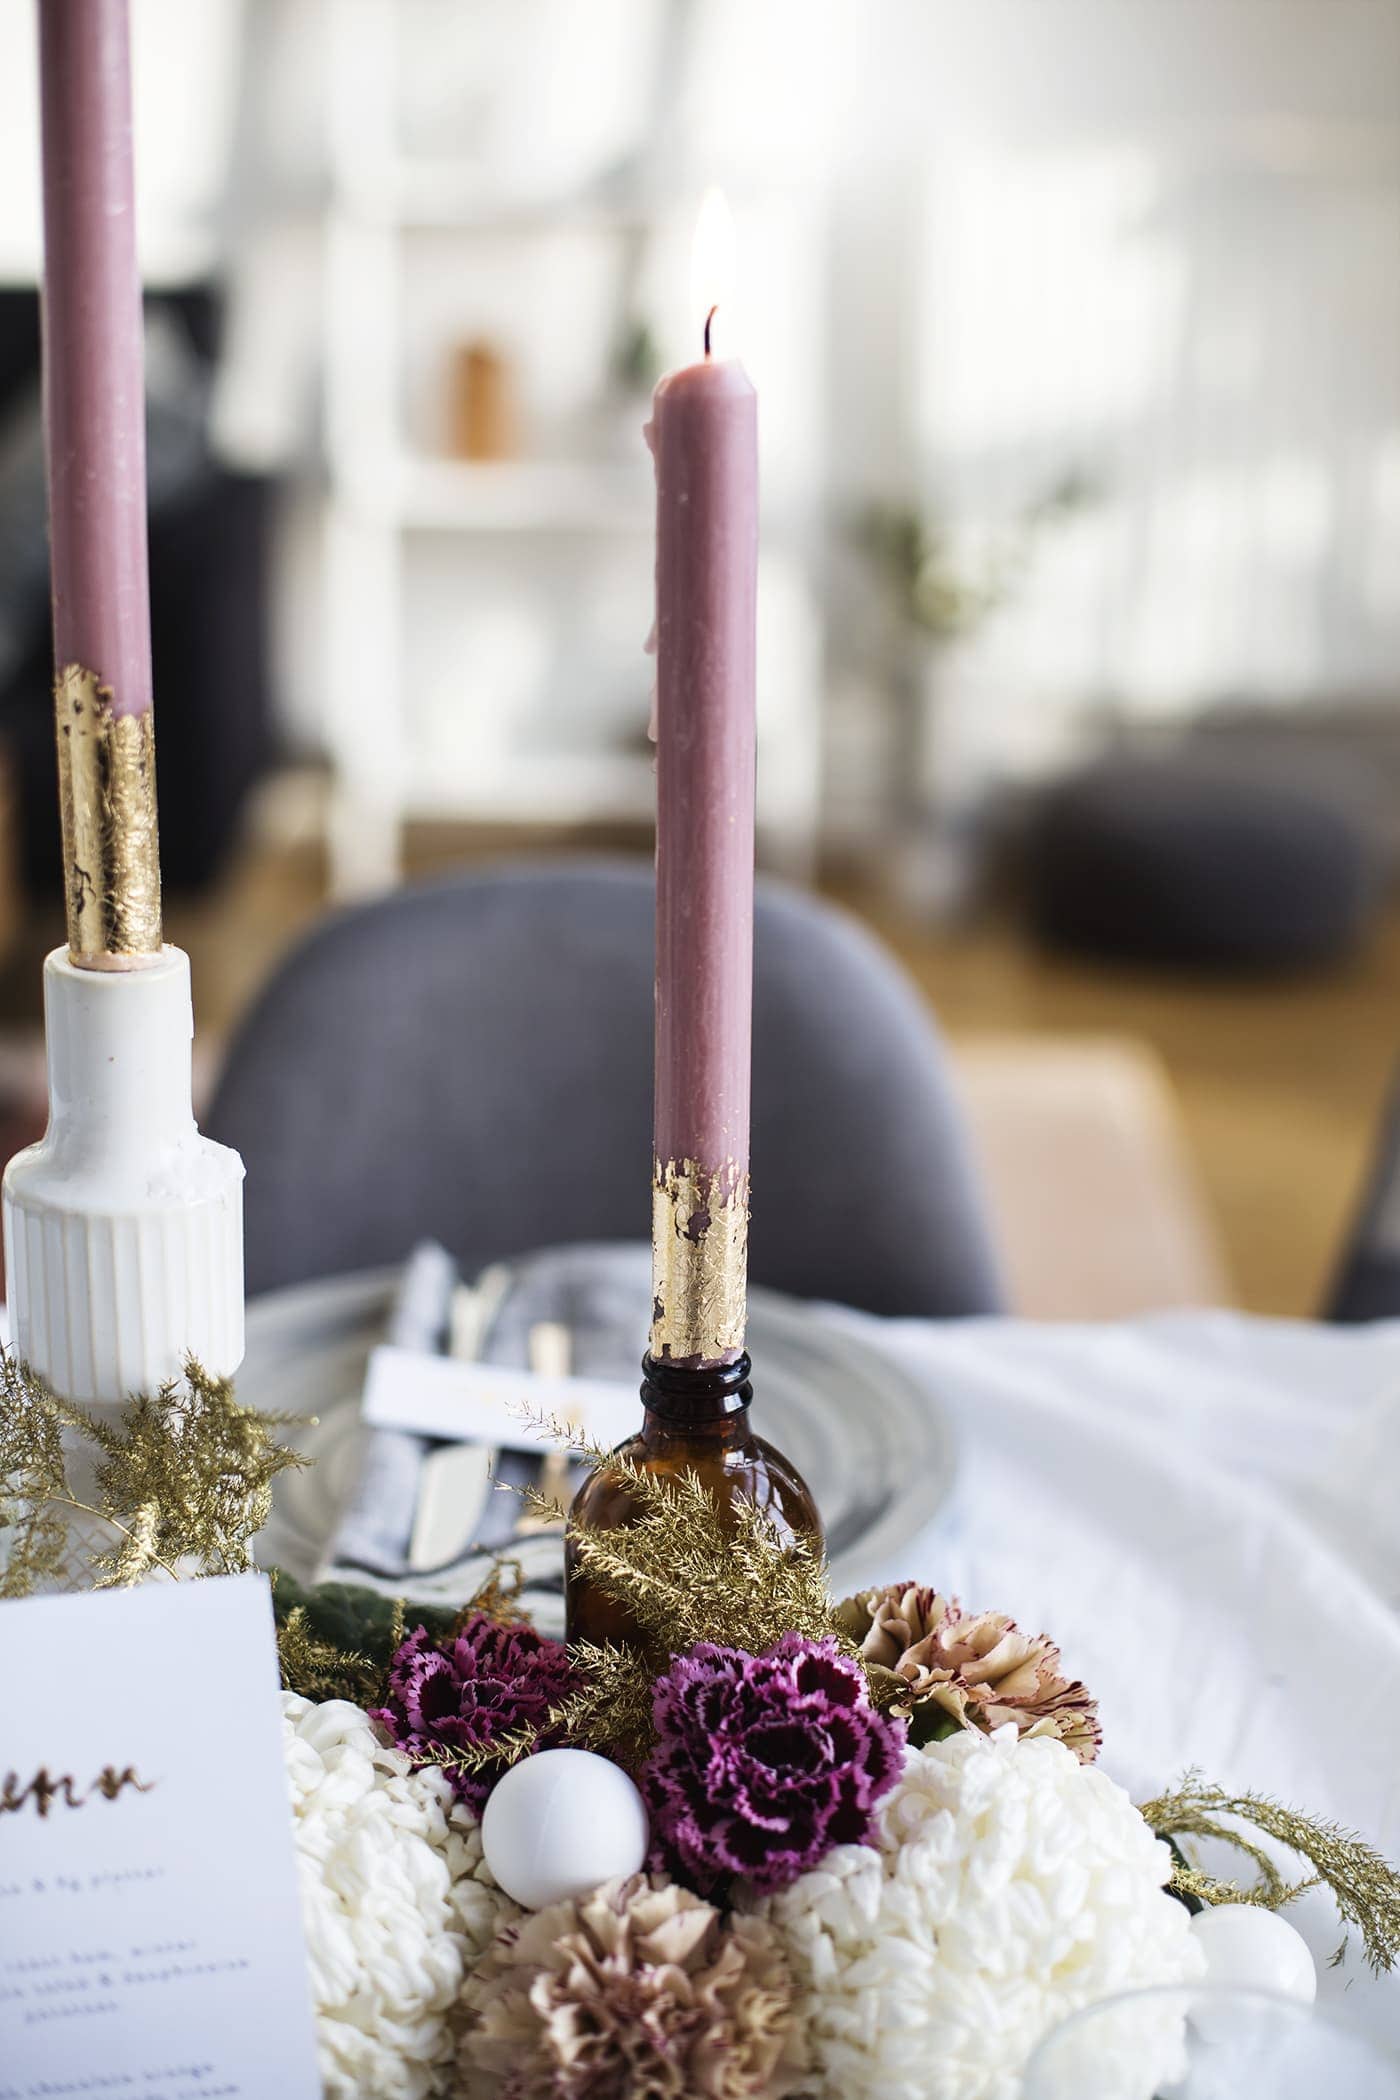
Gold dipped candles
- Apply the glue with a medium sized brush to the bottom of the candles with rough brush strokes.
- Layer the gold leaf over the top and press down and wait to dry fully.
- Once again get rid of the excess with the dry brush…easy!

To style your table top, create a focal point at the centre. I got hold of some full blooms and gold foliage along with some left over white baubles. Cut the stems off the flowers, right up to the heads. Add your gold dipped candles into some candle holders and start to pile the flower heads around the base, adding height and nestle in the baubles. This is so easy but adds a sprinkle if drama to the celebration table.
Lay out the place cards and your goal cards. Each guest can share the things they’re thankful for in the last year and what they hope for in the year to come. We love taking a moment to take stock of the year that’s been and the year we’re moving into so have pens at the ready.
You might also like


Meet The Lovely Drawer

Hi, I’m Teri and welcome to my own creative corner of the internet. I blog about interiors, DIY projects, design inspiration and my general life so stick around have a read and say hi.
In the shop

 Quick ViewSelect options
Personalised Cuddly Bunny
£30.00 – £35.00
 Quick ViewSelect options
Orchard Days
£20.00 – £25.00
Work with Me
The Lovely Drawer is an award winning blog with a loyal audience that has grown over the years. I love working with brands small and large on exciting collaborations that can bring products alive in my own signature aesthetic.