

Give Your Plant A Throne
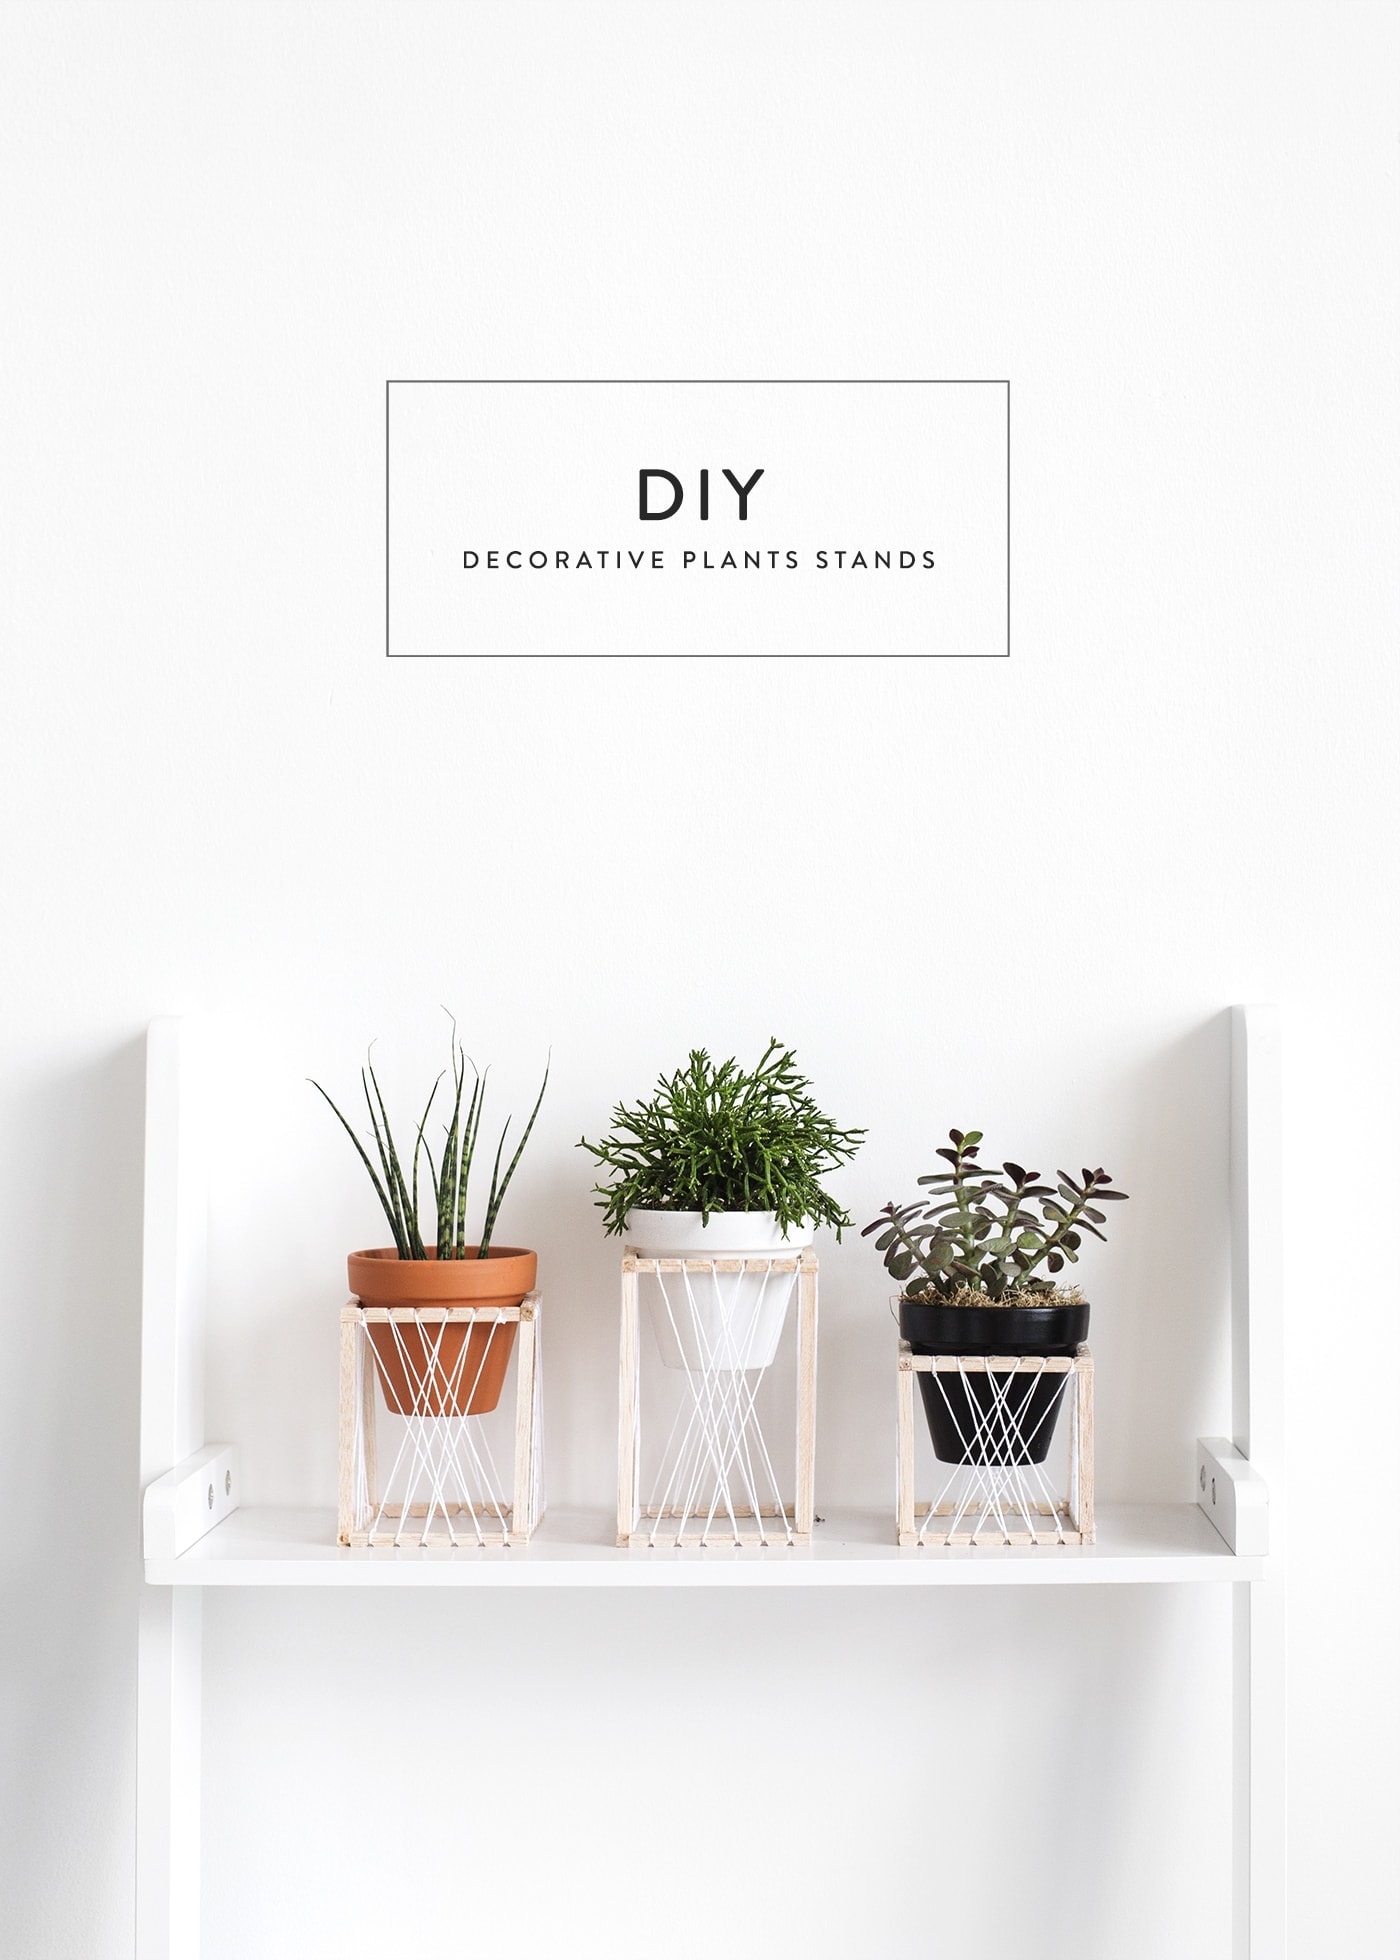
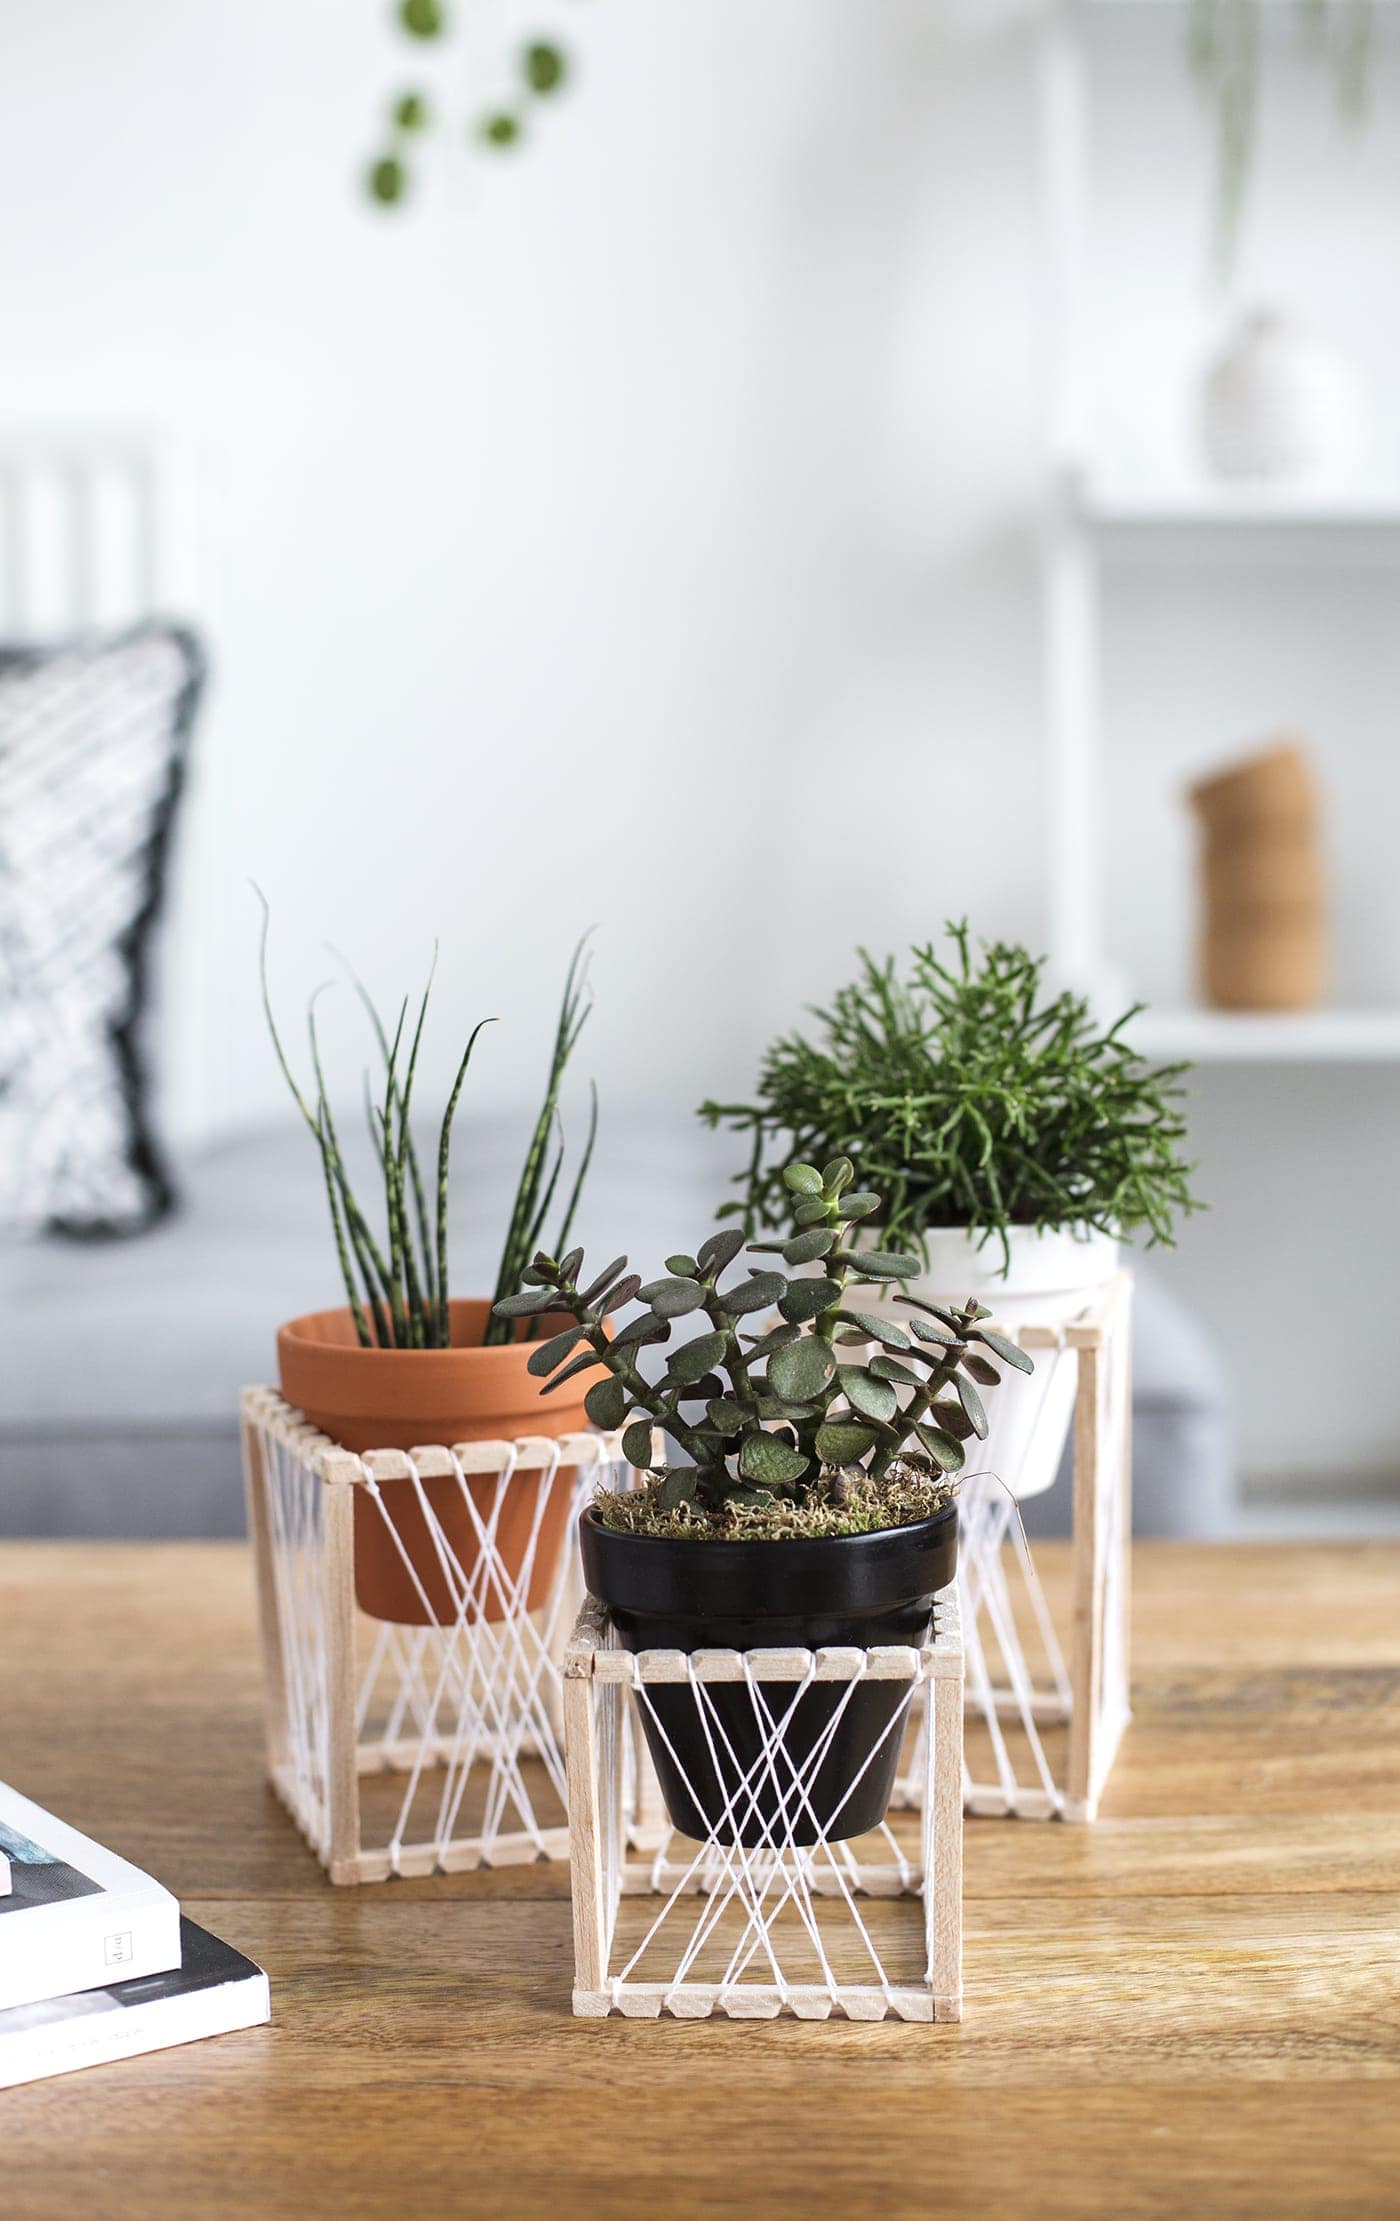
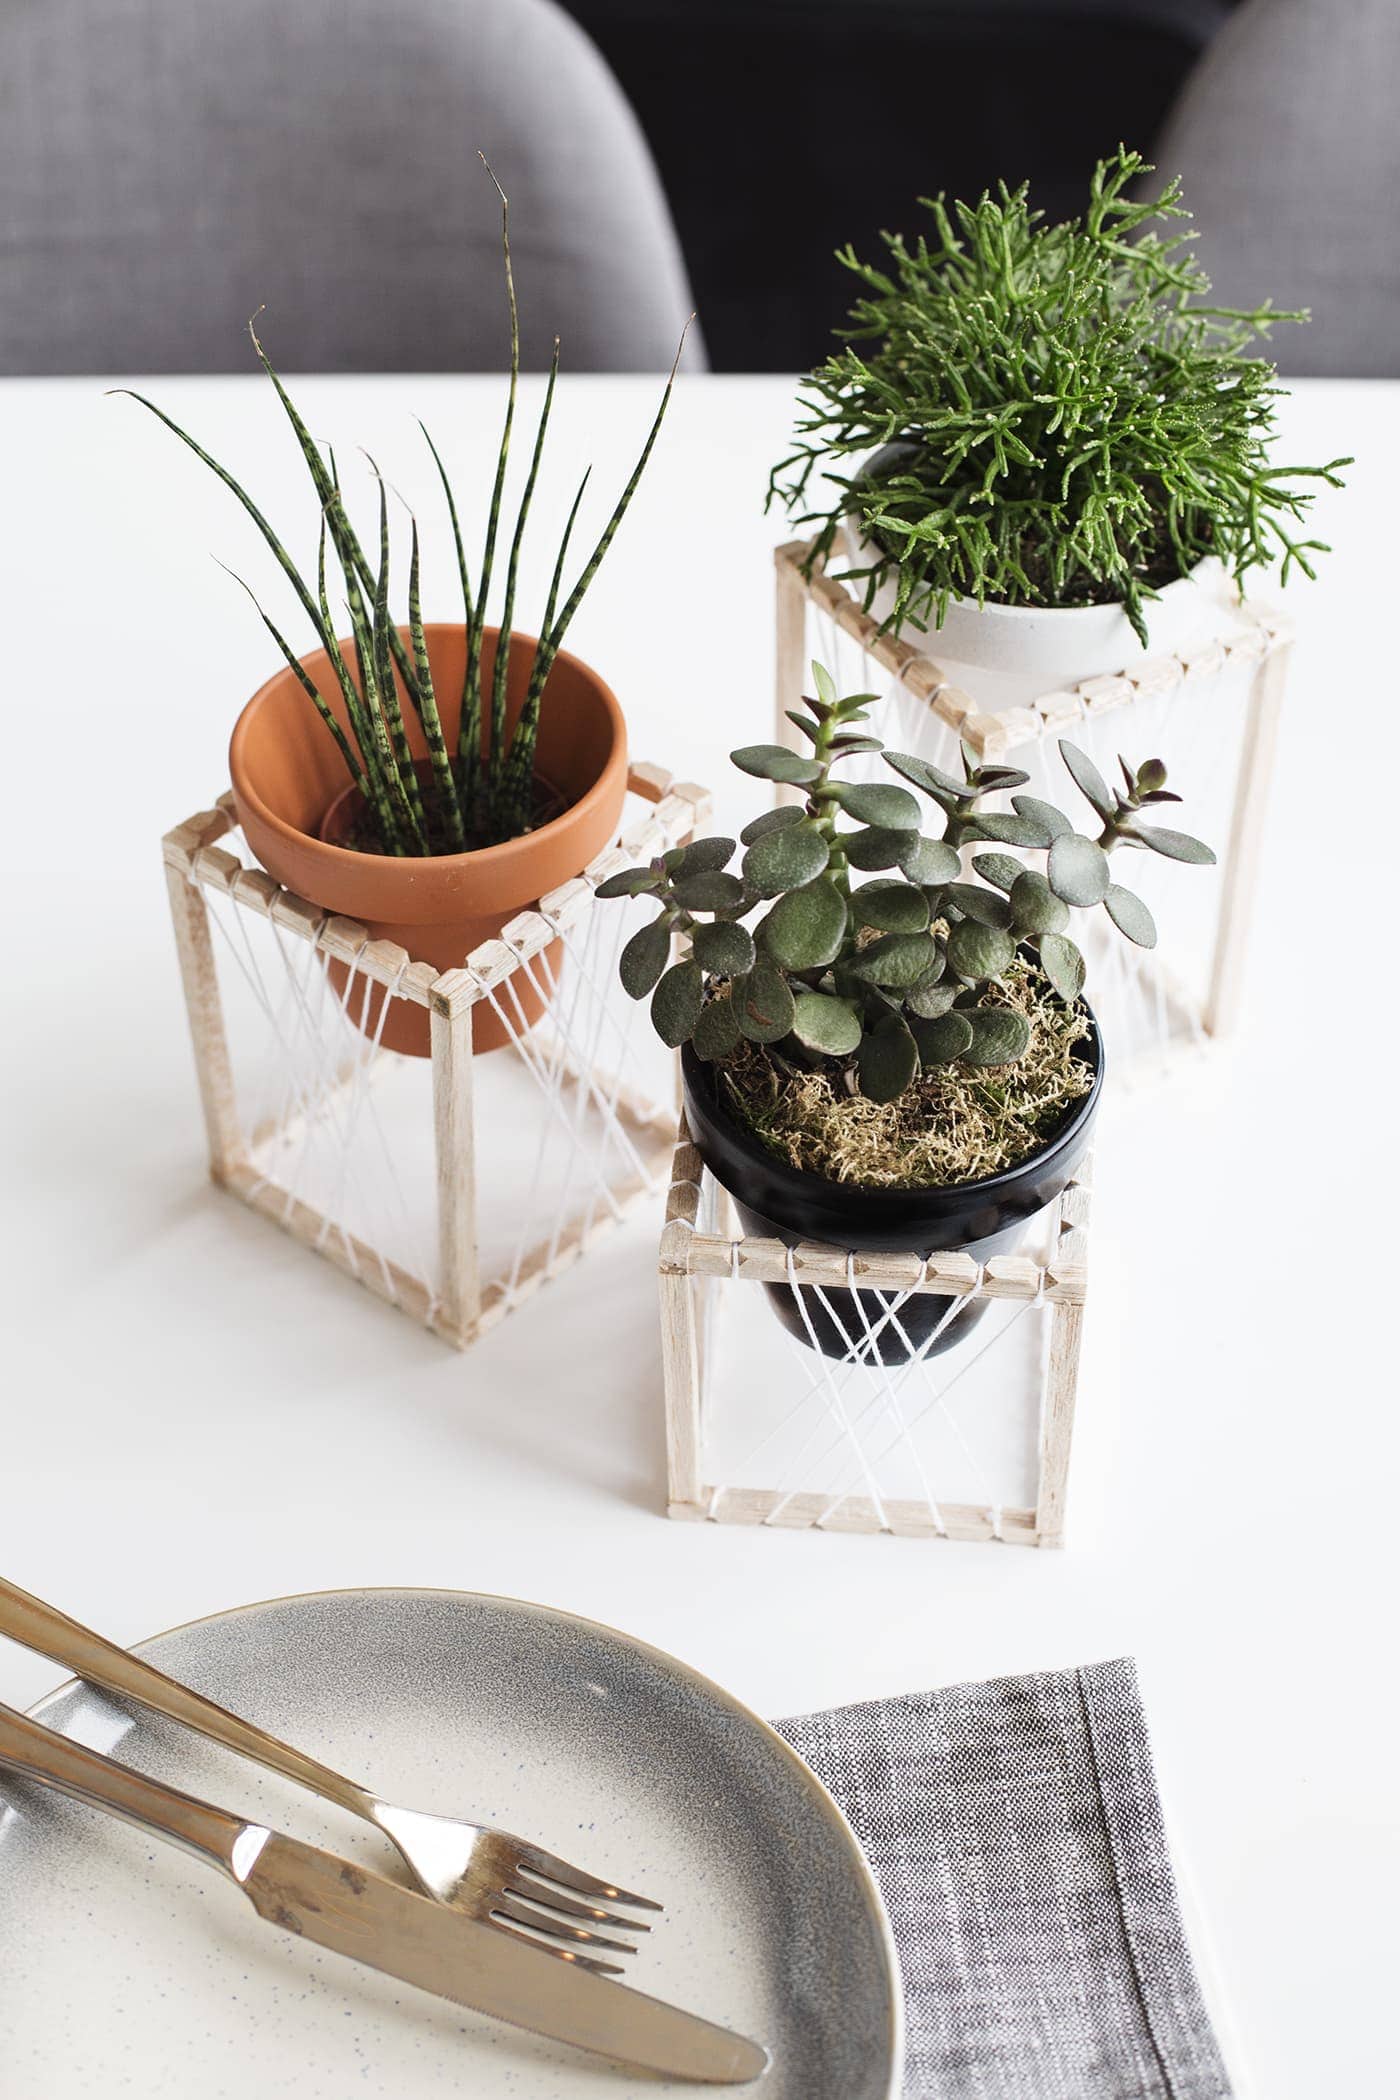
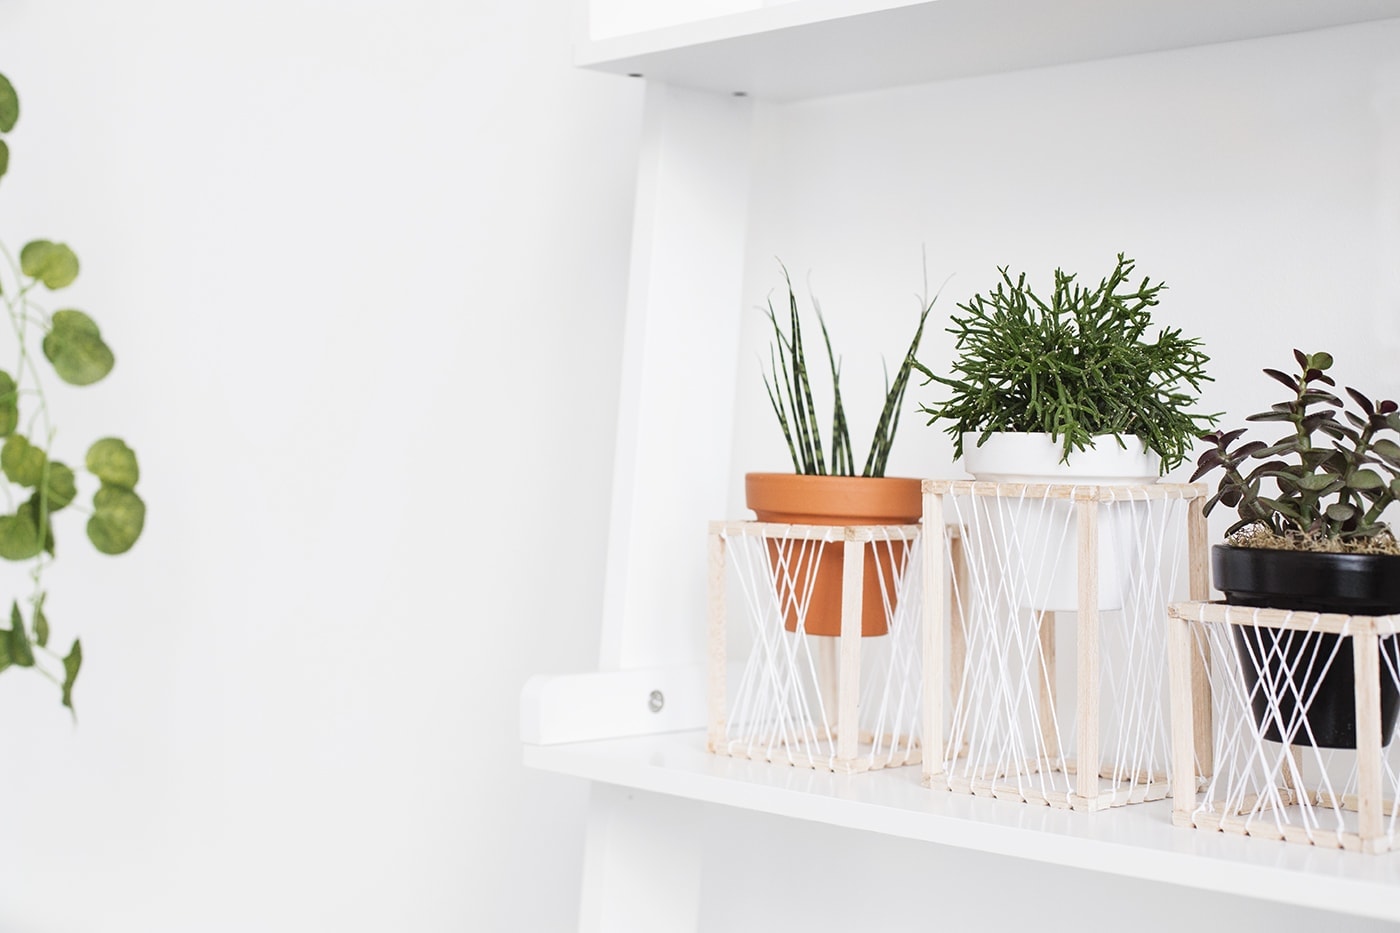
I’m on a bit of a DIY roll of late and finally lots of those ideas that have been sat on the proverbial shelf, gathering dust have made it out to see the light of day! You may not believe me but I could probably dream up plant holder projects and nothing else for the rest of my life. I feel like there are endless pretty ways to display plants, whether real or artificial. It’s likely you’ll have heard me mention that I’m a total plant killer, in fact I feel like a good amount of my insta stories relate back to my ever increasing plant graveyard. This trio photographed are some of the few left in our home that are real! We’ll see how long they last but at least they get to enjoy life in these pretty homes in the meantime.
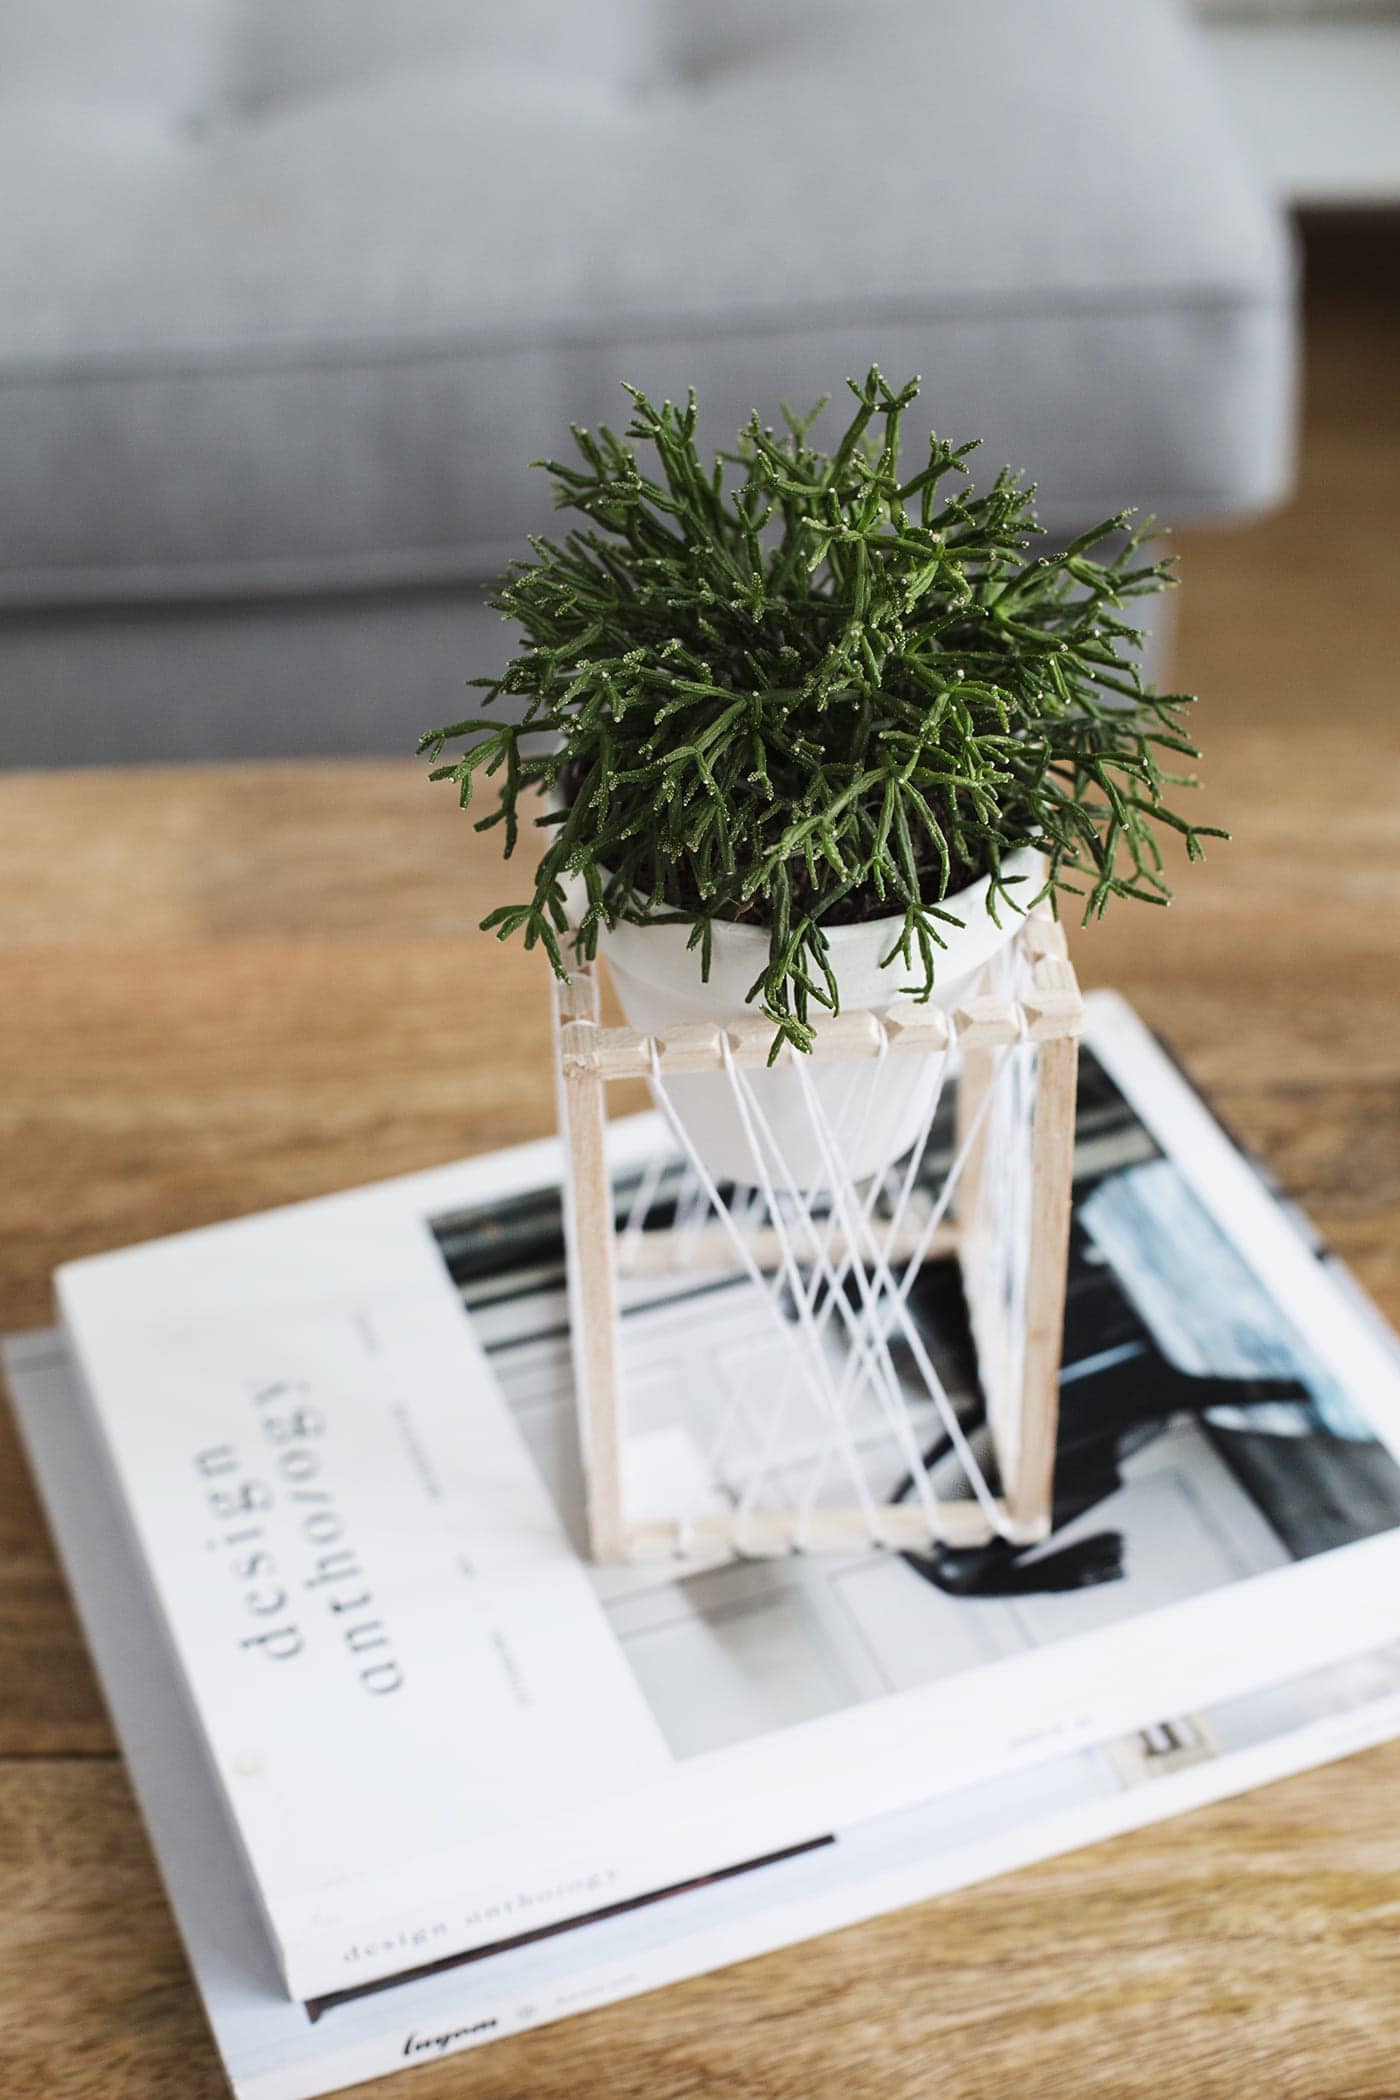
Balsa wood is such a versatile material, particularly as it’s such a soft wood, so easy to cut and manipulate and yet piece it together to form a structure and it’s actually surprisingly sturdy. I love these plant stands, that can be made in varying heights to up your house plant game. They work well on shelves or even as centre pieces and add a slightly ‘boho’ vibe with these dream catcher style thread patterns. If you want to learn how to make them then keep on reading.

Materials:
- Balsa wood strips ( mine were 3mm thick )
- Stanley knife
- Pencil
- Ruler
- Scissors
- Embroidery thread
- Plant pots (it helps to choose pots with a lip around the top so that this can rest on the top of the frame & keep it in place)
- Spray paint in the colours of your choice
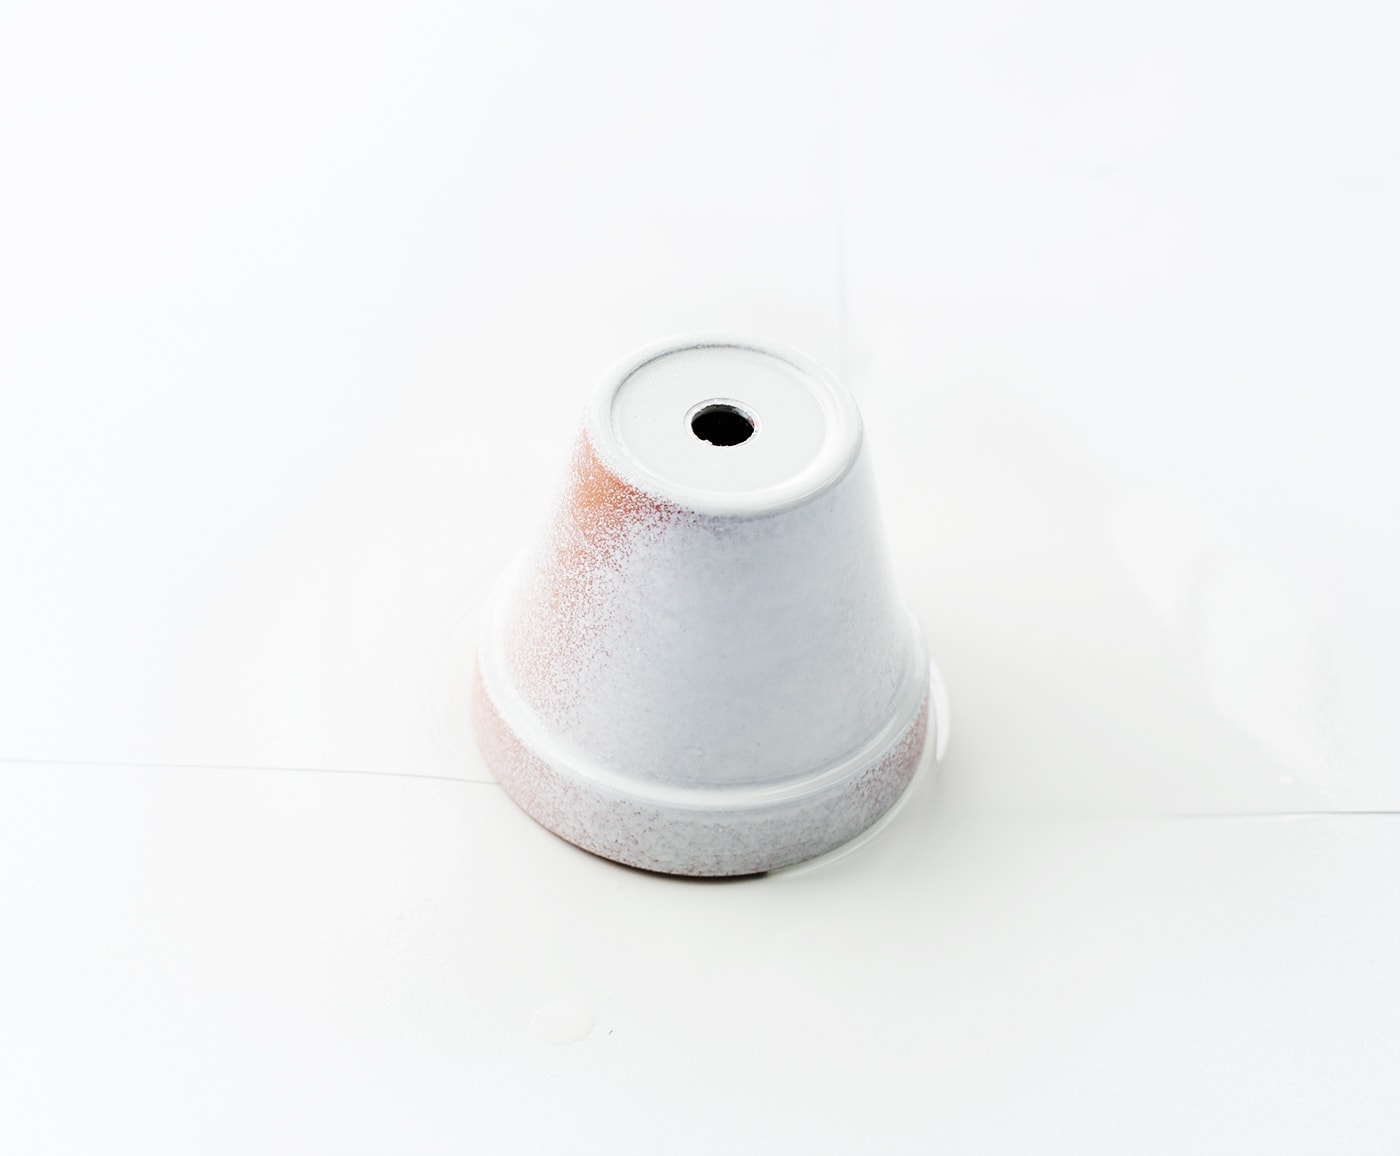 Measure around the under rim of the pot make a note to make sure the pot sits in the frame. Spray pots in layers and wait for each layer to dry to avoid dripping. Leave to dry. Make sure you do this in a well ventilated area.
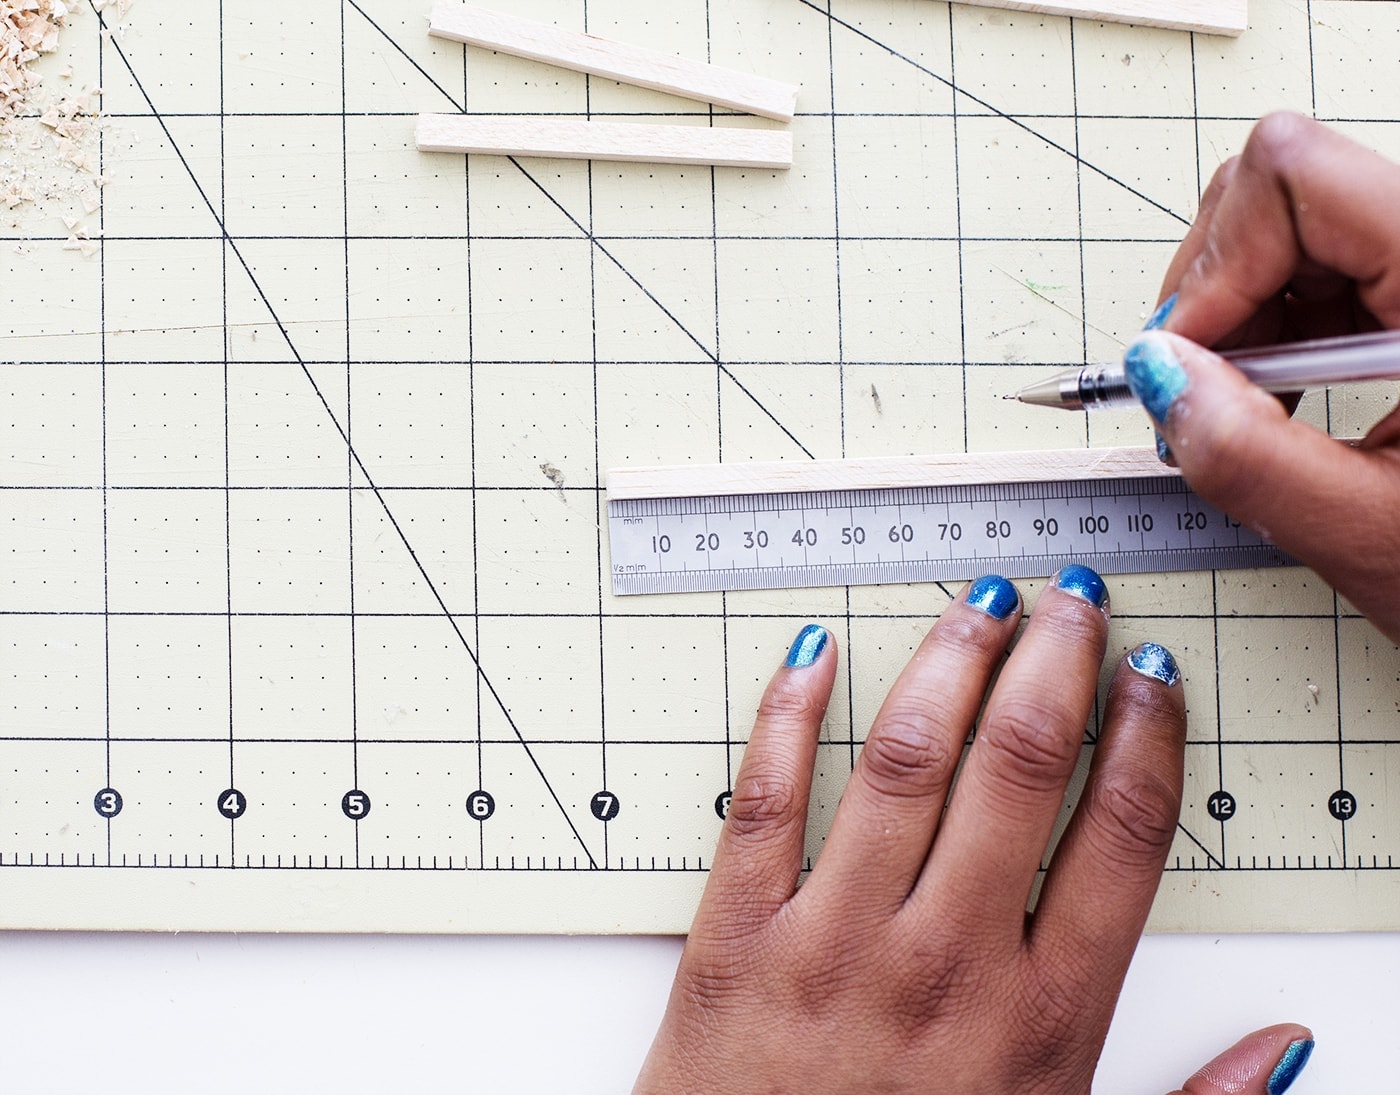 Each frame will need 8 pieces of wood that match the measurements for pot diameter. These will be used to make the top and base of the frame. You will also need 4 pieces of wood cut to whatever height you would like the overall holder to be. Make sure you cut them smooth and flat so that the whole thing doesn’t lead.
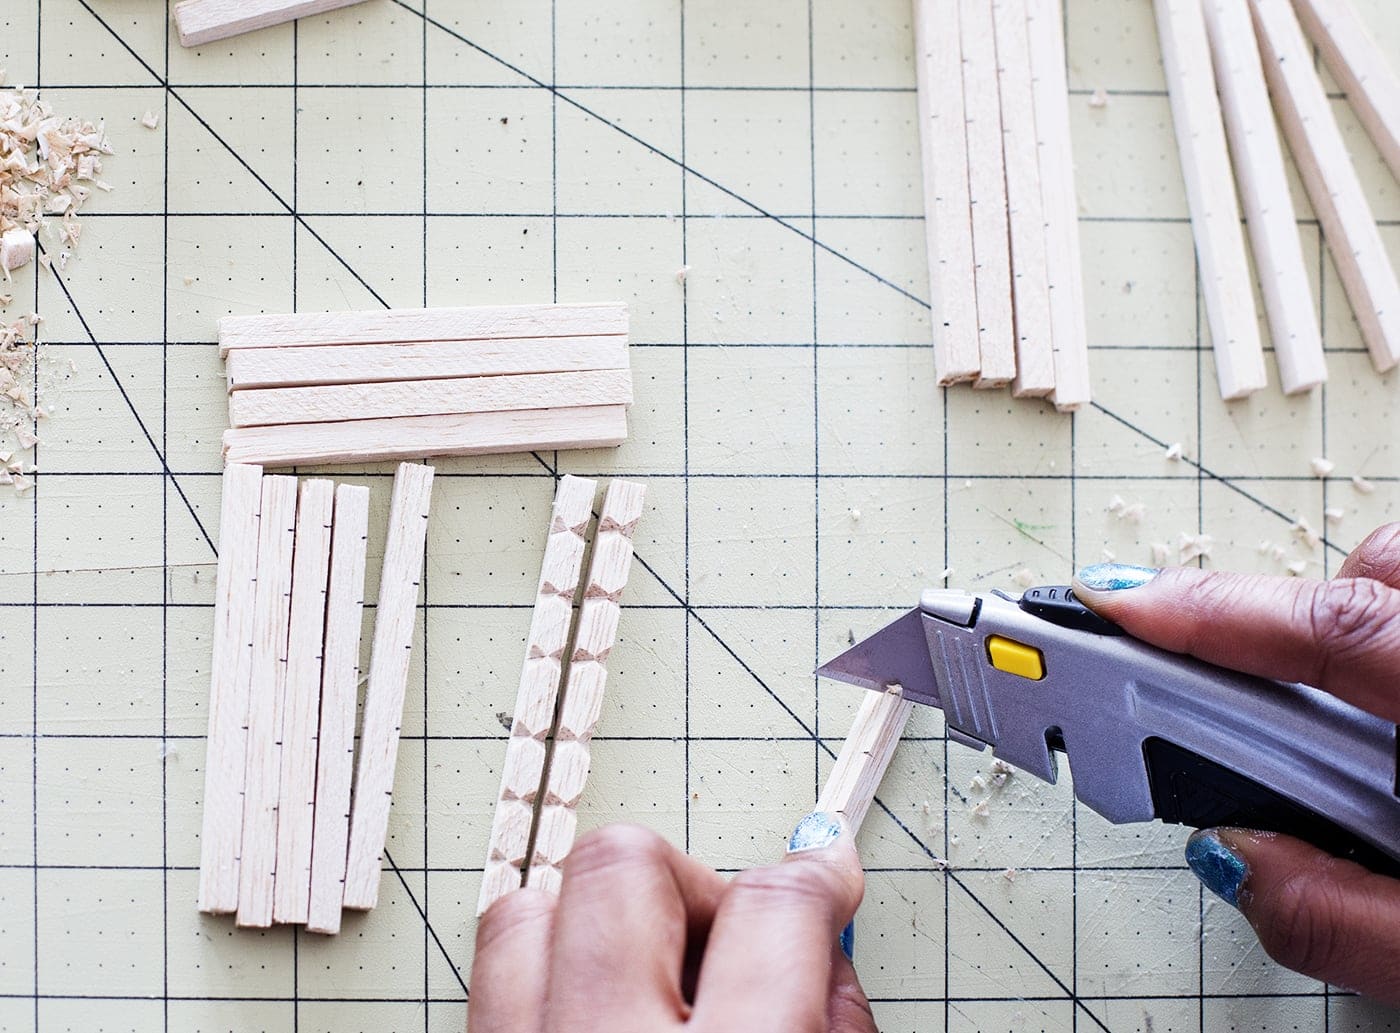
Measure six points along the eight pieces of wood that will make up the top and bottom. Mark them with a pencil and the chip away with the scalpel to create an indent to thread each piece of string through.
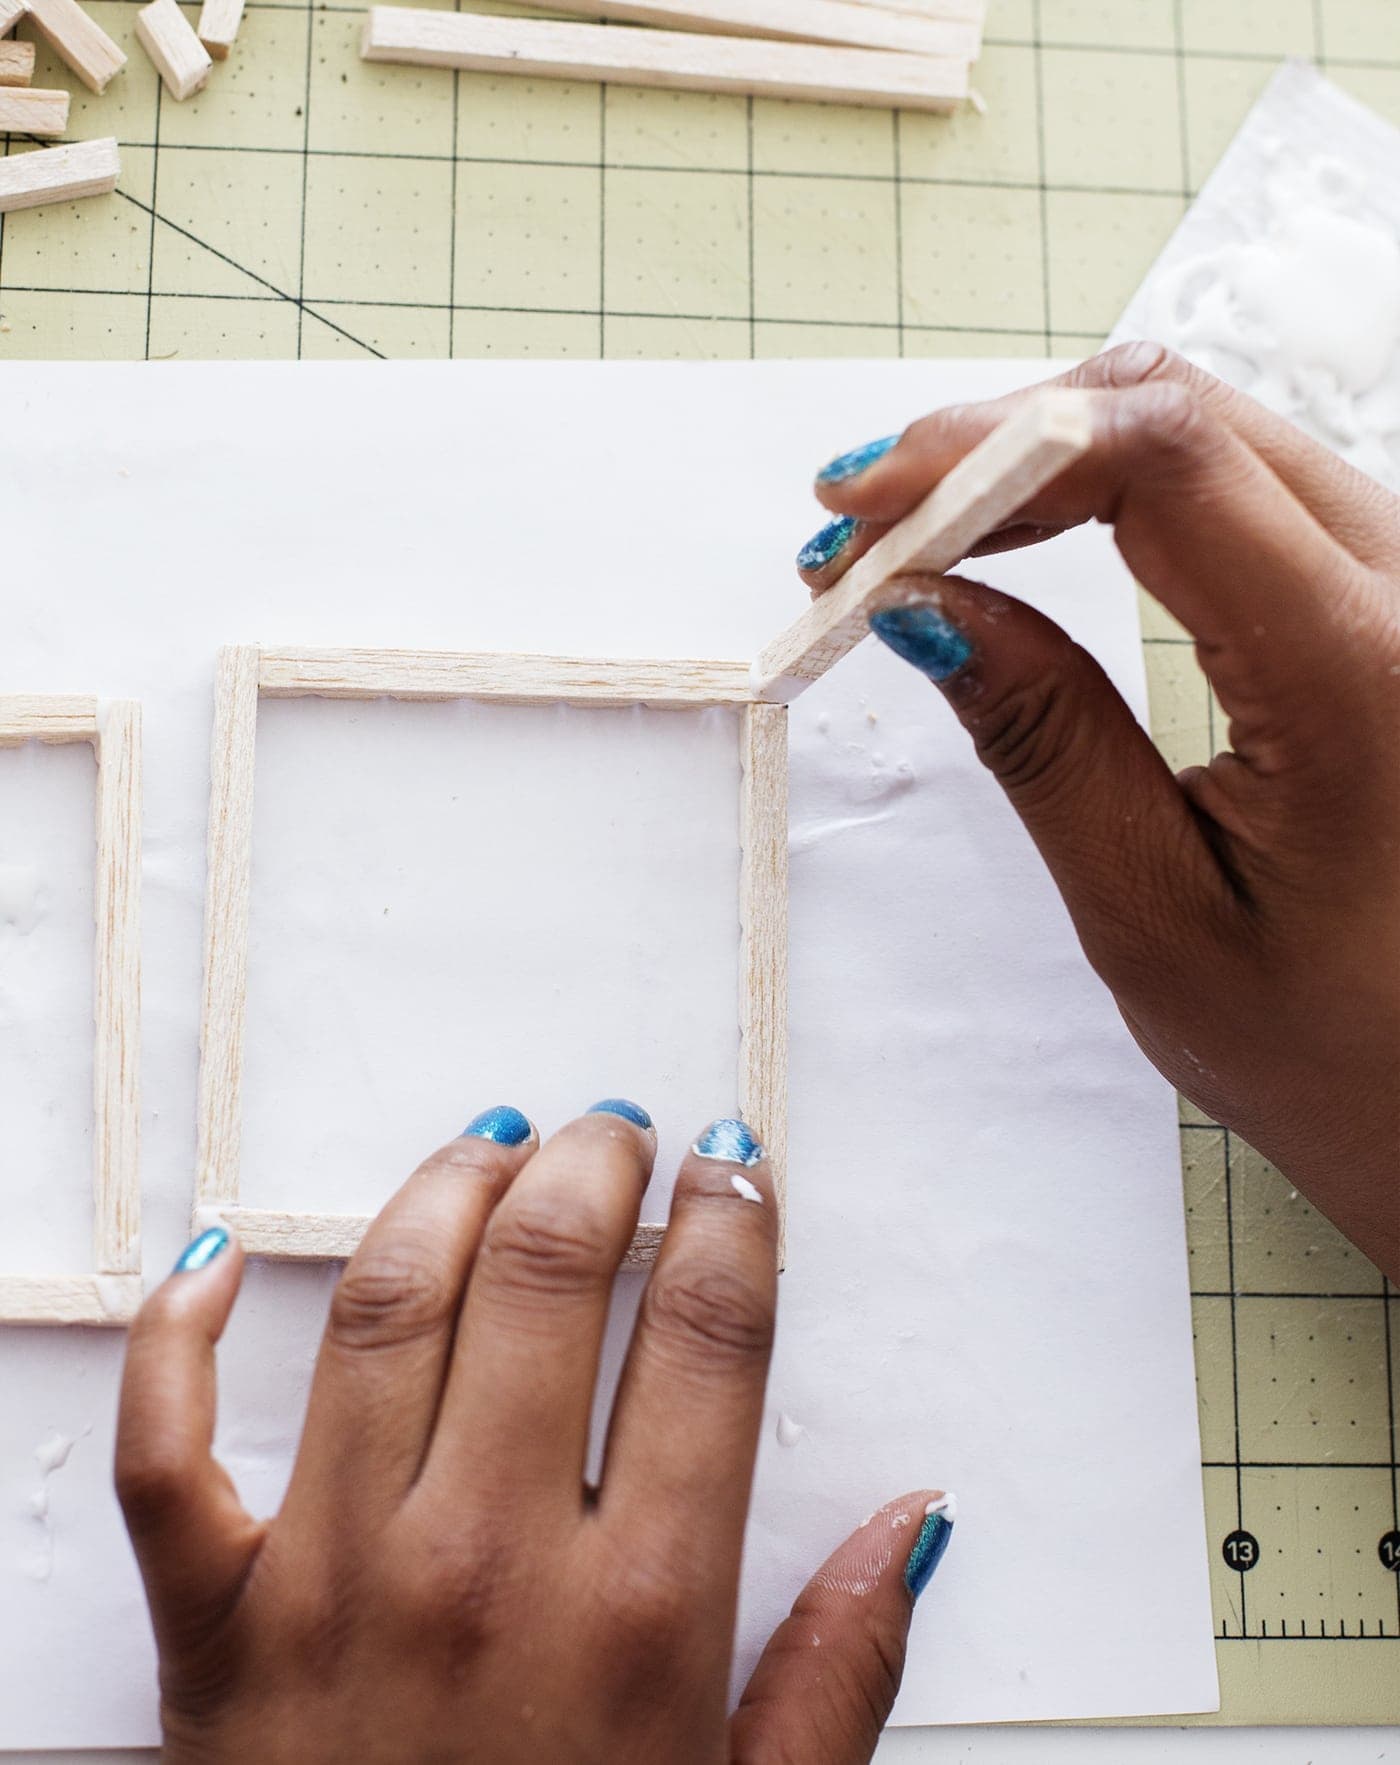 Then you can build your frame. It’s best to build the top and base separately then place the dried top piece onto the 4 height pieces.
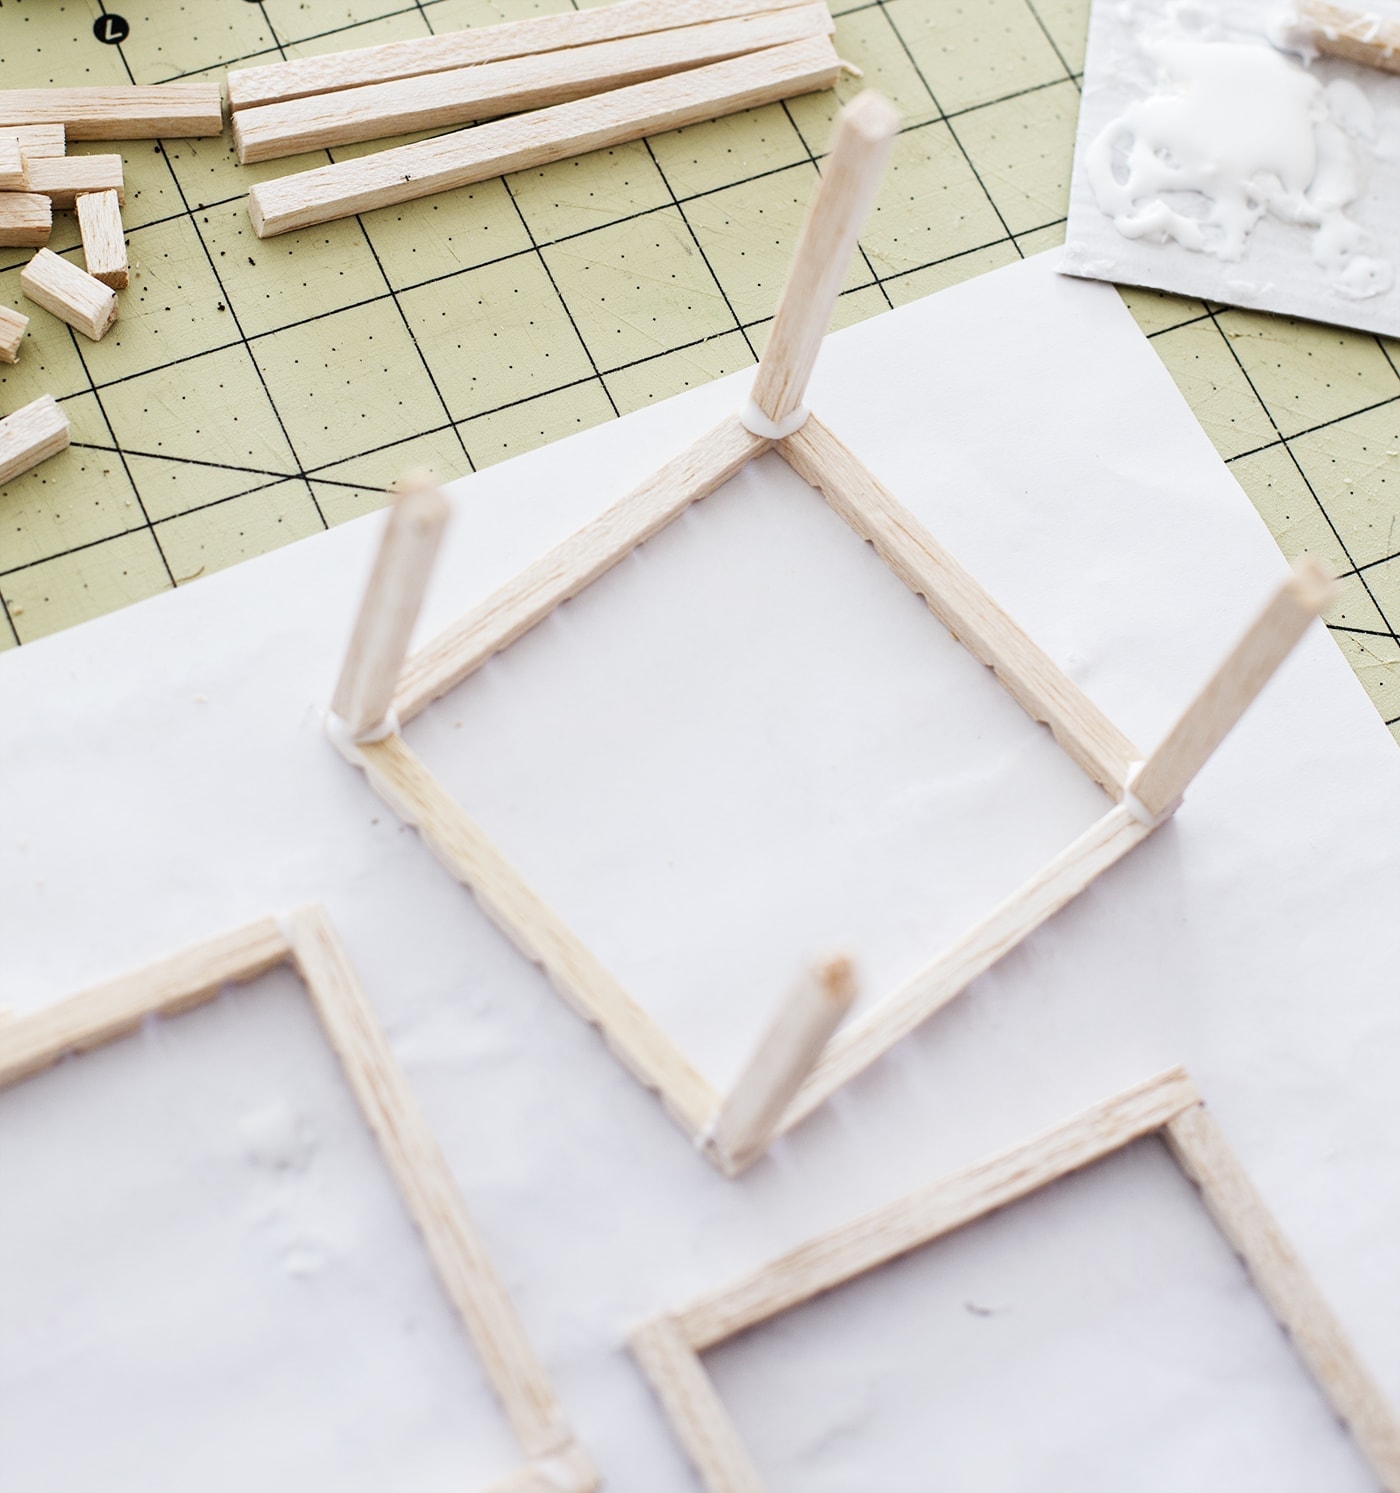 Leave the height pieces to dry a little bit before you place the top on. This will stop them from leaning or falling over from the weight of the top piece.
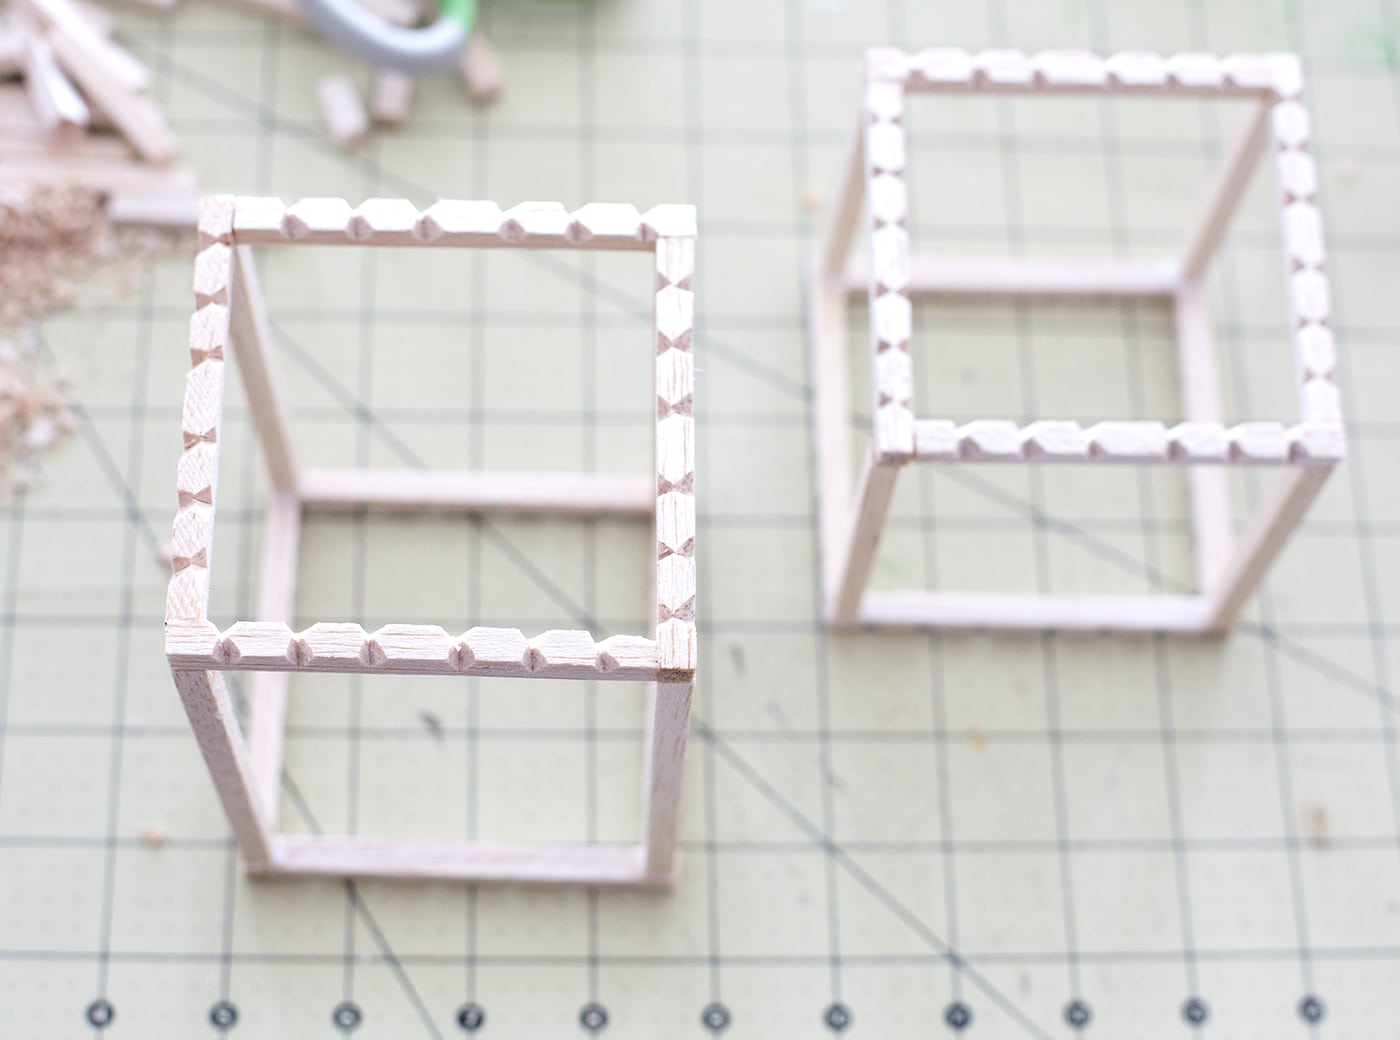 Once you’ve put it all together again, leave it to dry ensuring at this point that everything is straight. This will stop the frame from collapsing when the pot is placed in.
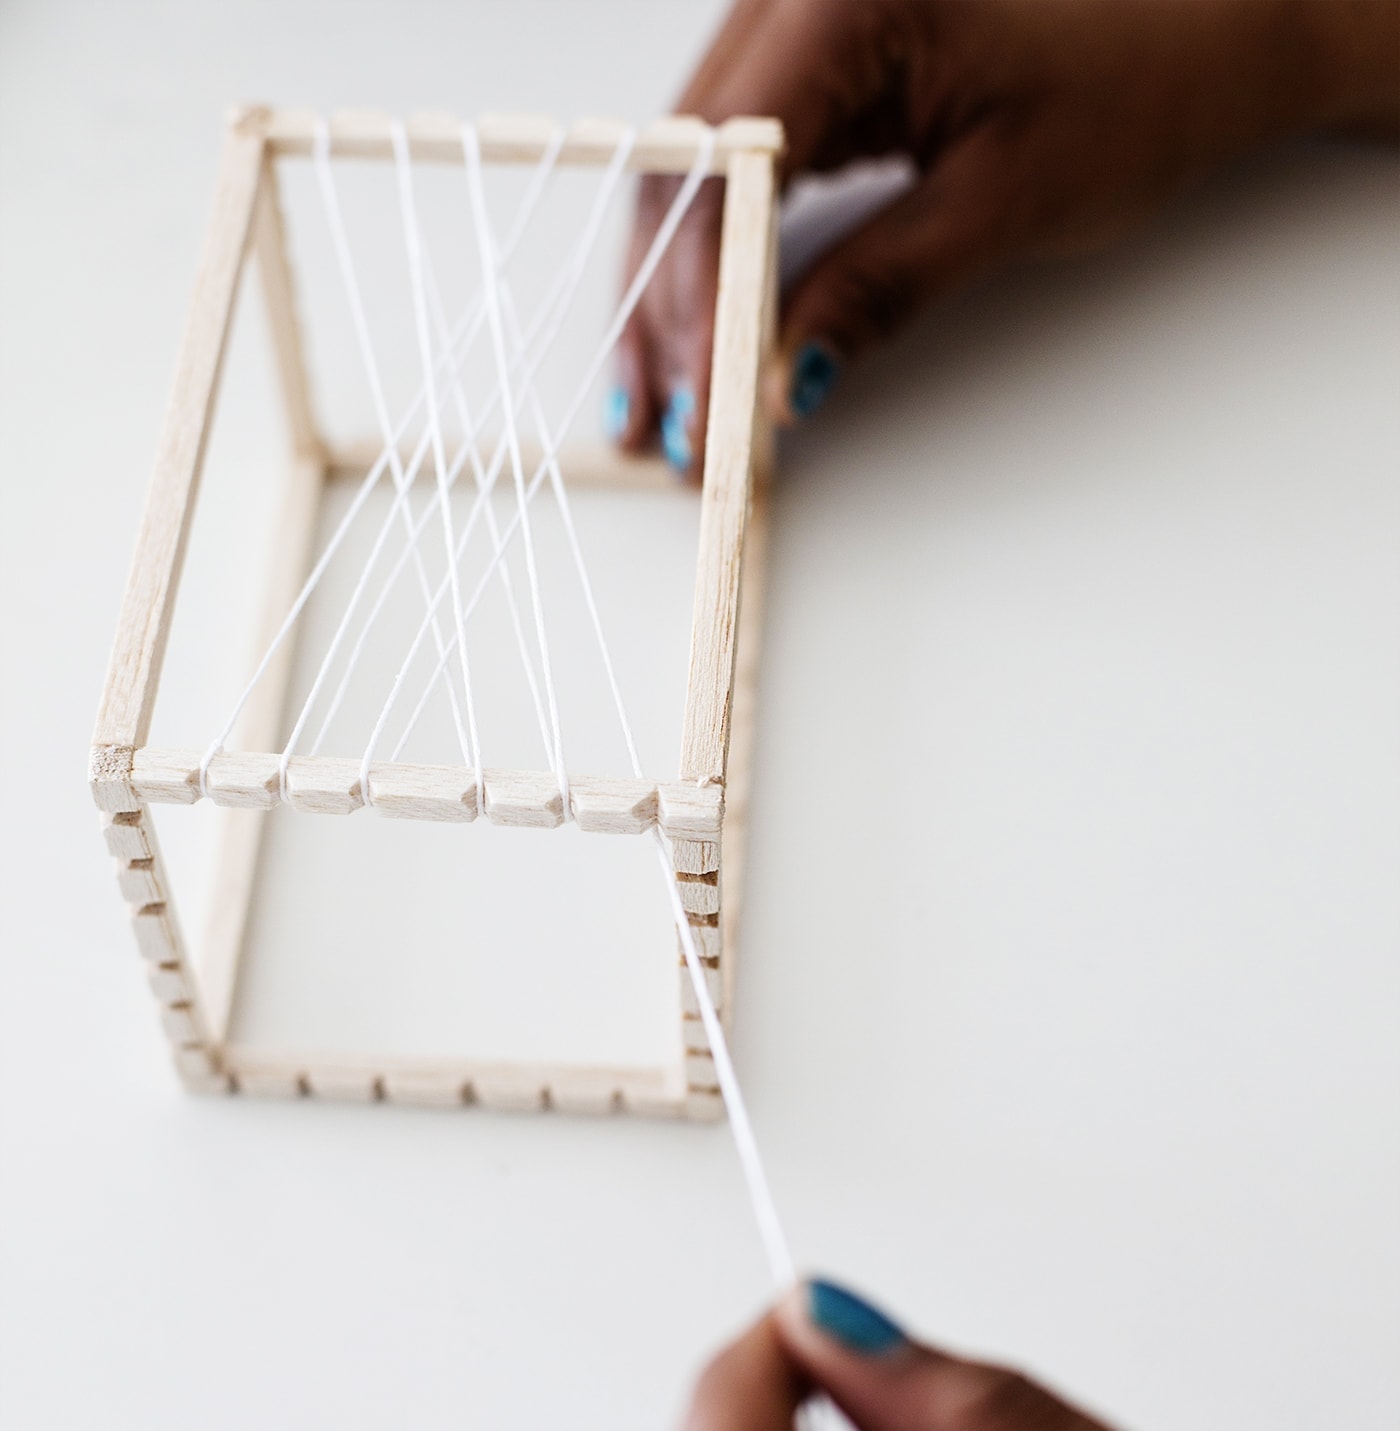 When your frame is dry you can thread your pattern into the indents, taking each strand on the diagonal to create a diamond effect. Now sit your plat pot in the top of the frame and stand back an admire it’s beauty!

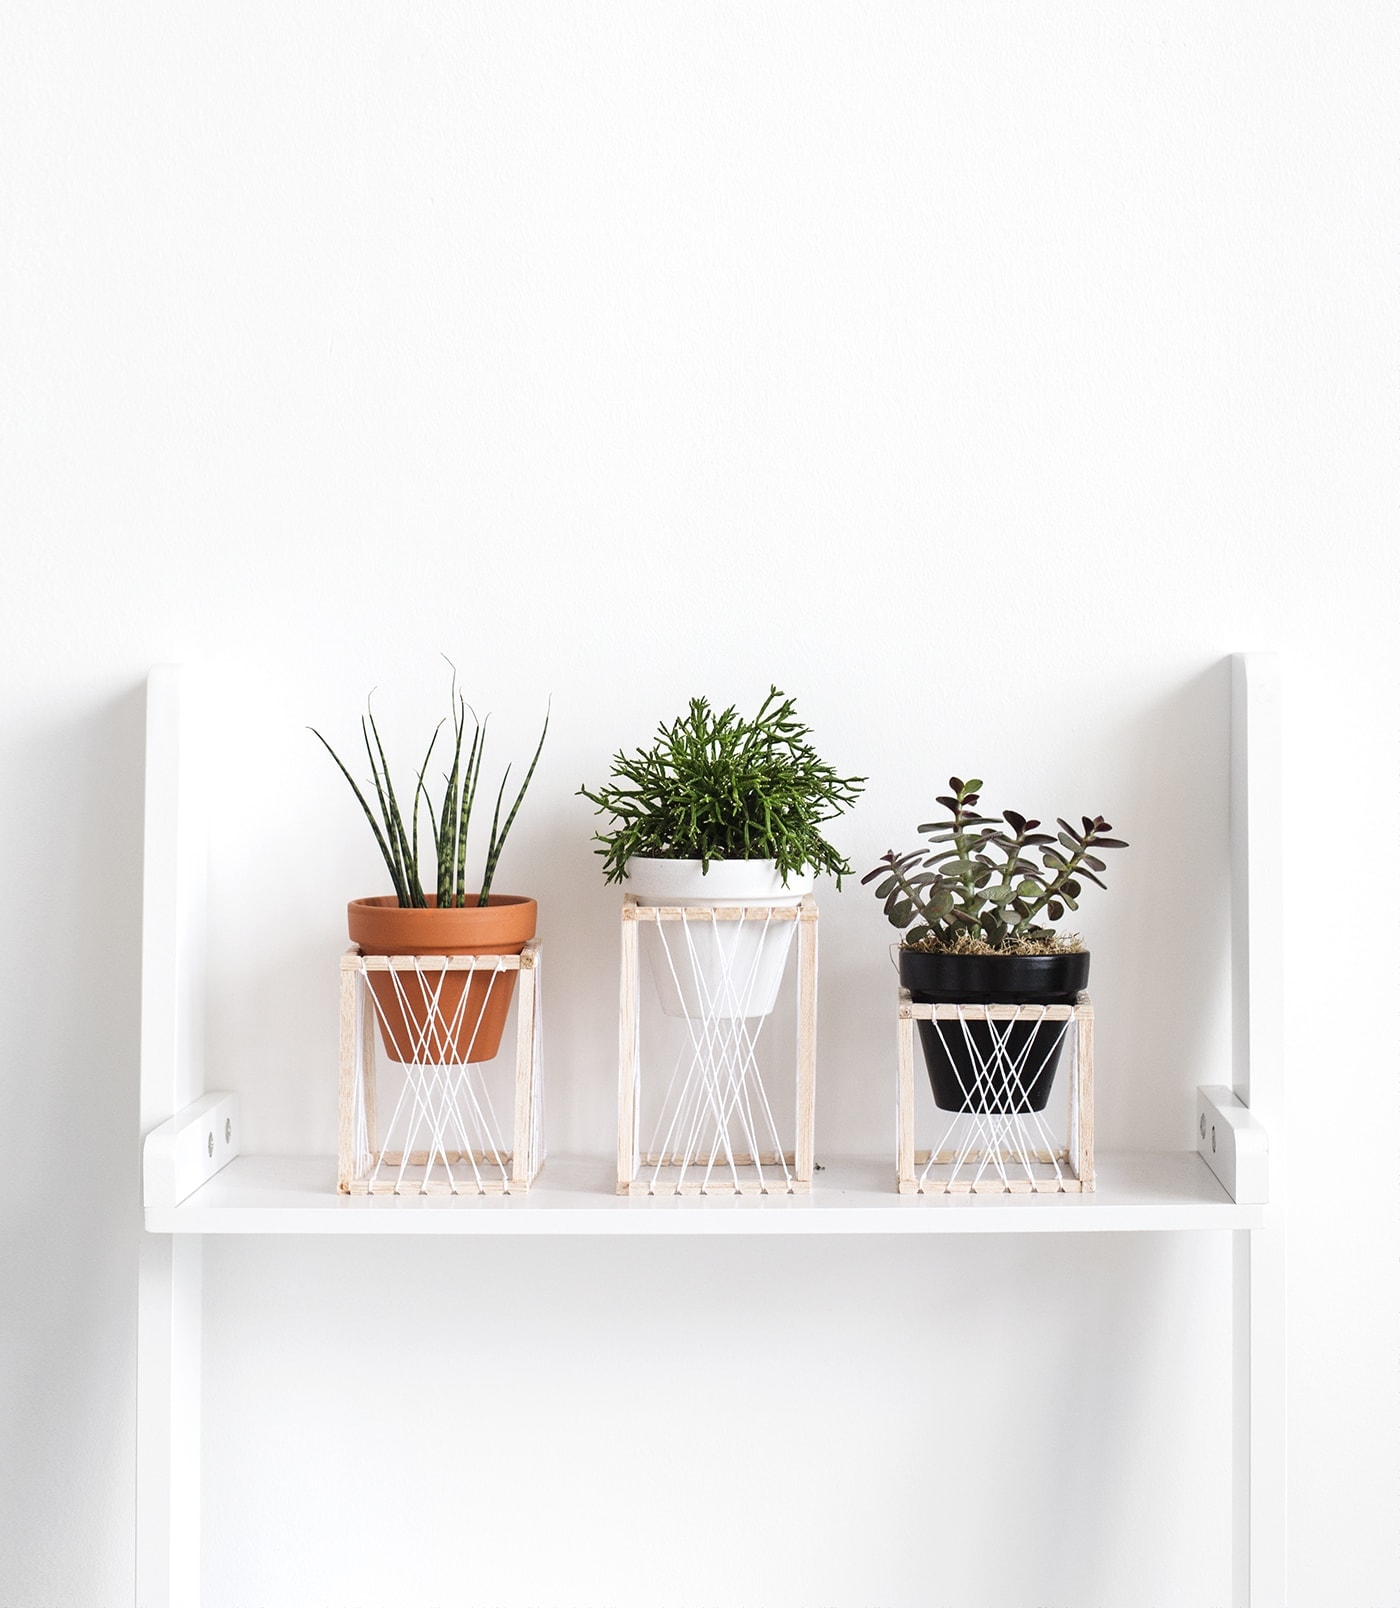
These look particularly striking clustered together in different heights and would also be a great way to show off your trailing plants too. This one’s definitely worth a try and makes wood work look like a total breeze!
You might also like


Meet The Lovely Drawer

Hi, I’m Teri and welcome to my own creative corner of the internet. I blog about interiors, DIY projects, design inspiration and my general life so stick around have a read and say hi.
In the shop

 Quick ViewSelect options
Personalised Cuddly Bunny
£30.00 – £35.00
 Quick ViewSelect options
Terrace 1
£20.00 – £25.00
Work with Me
The Lovely Drawer is an award winning blog with a loyal audience that has grown over the years. I love working with brands small and large on exciting collaborations that can bring products alive in my own signature aesthetic.