

Just Hanging Out, Looking Stylish
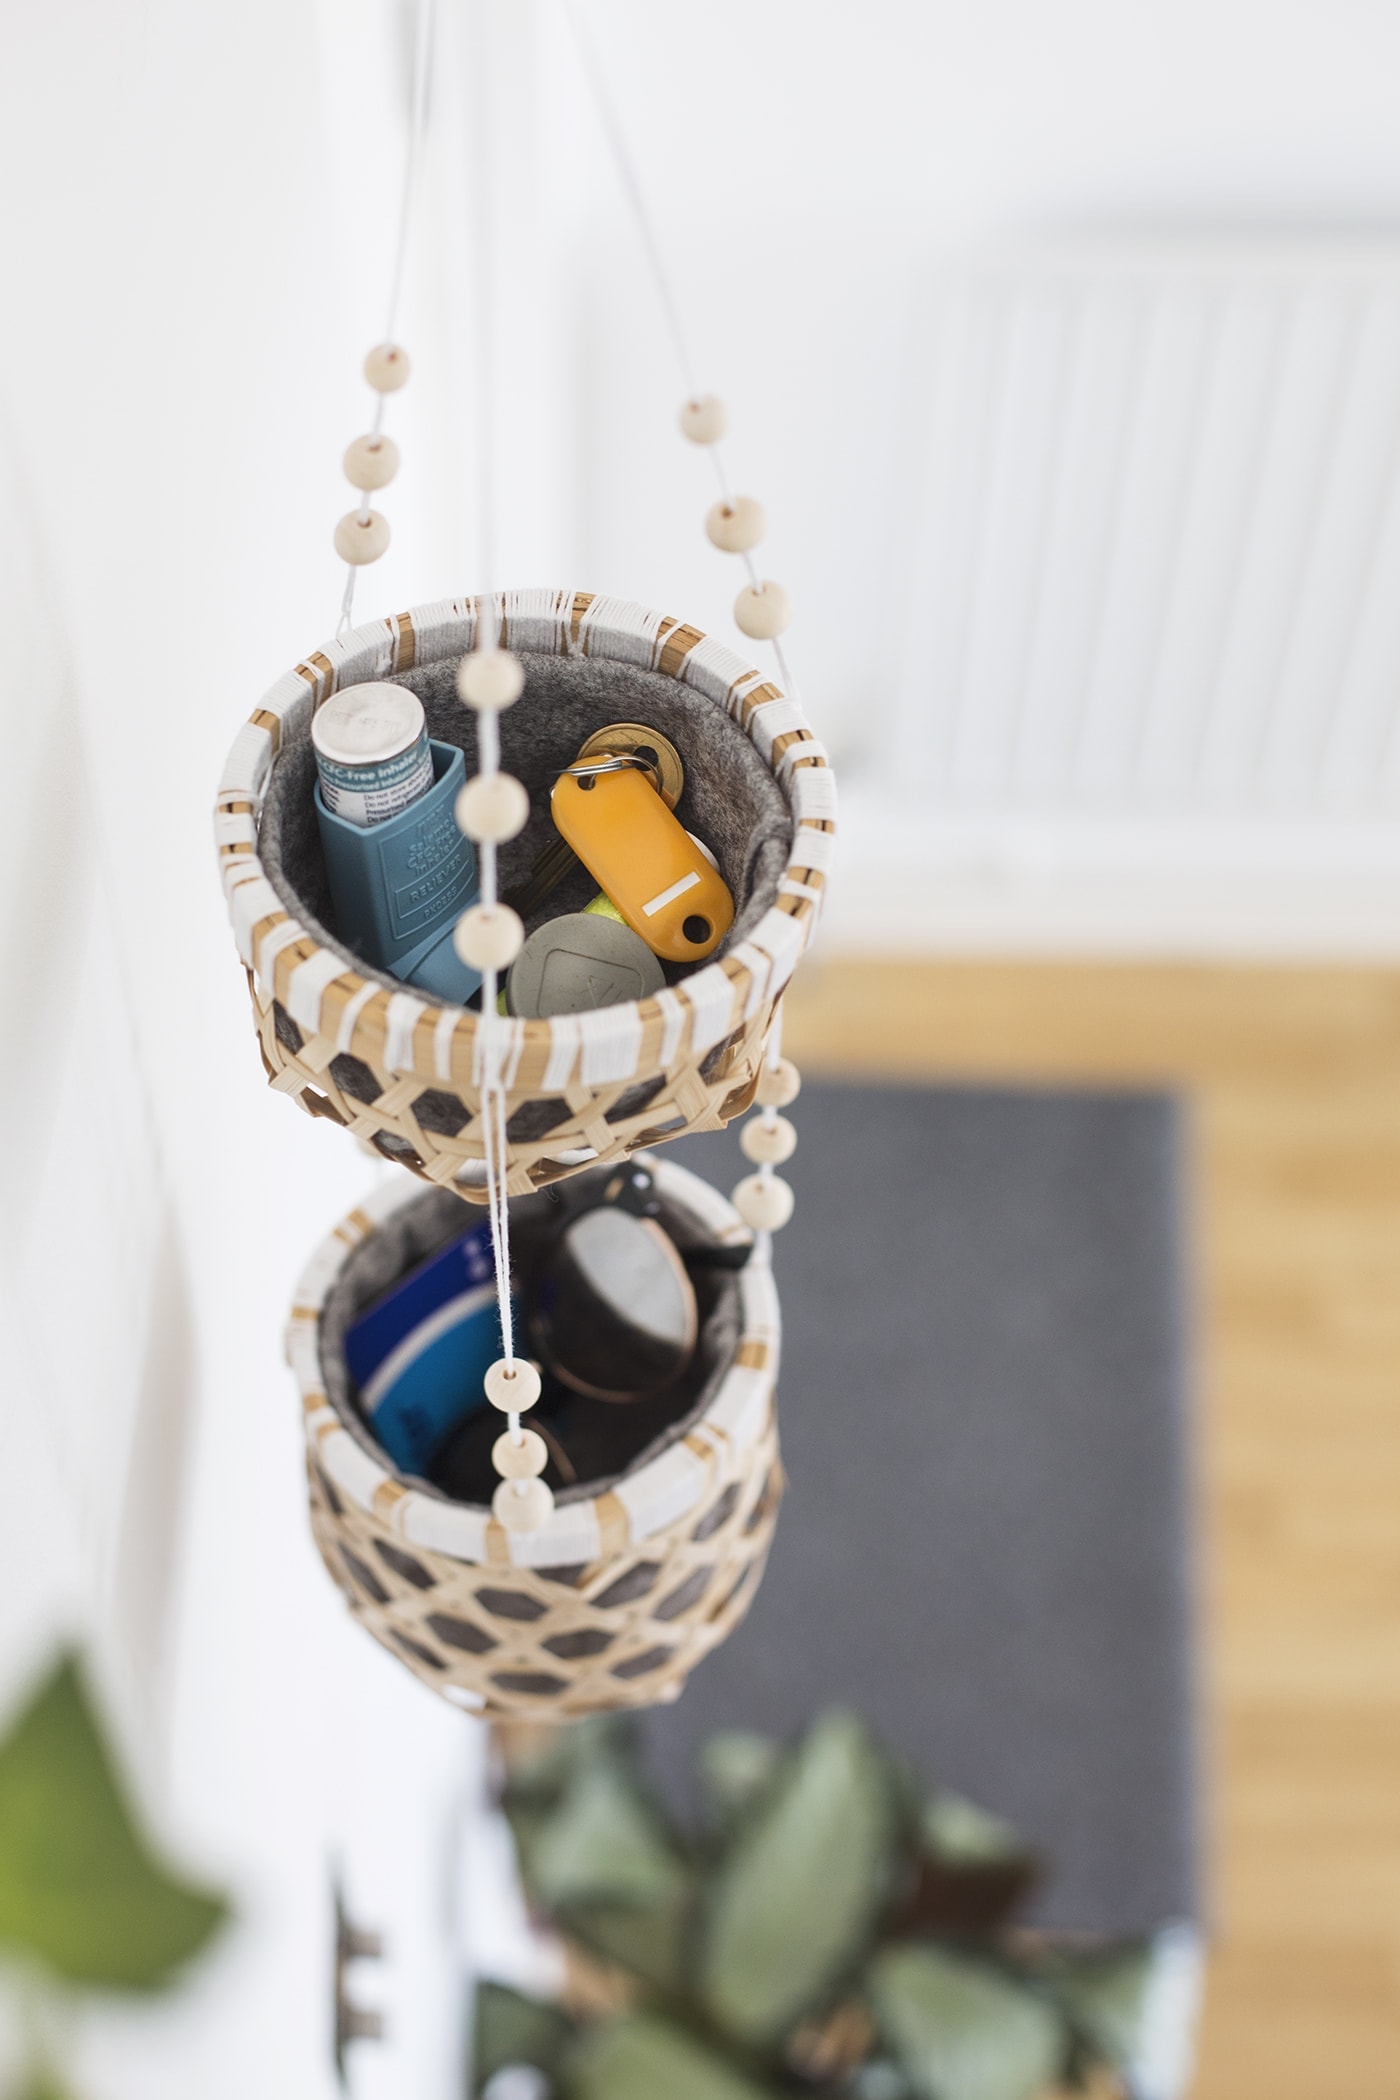
I have a confession…this DIY was invented to resolve a very real bugbear I have at home that’s, been getting on my nerves ever since living with my Husband. I love him very much and he’s actually very neat and tidy for a boy but we both have certain blind spots around the home (I know I frustrate him in other ways) but for me it’s when he dumps certain items. Number one are shoes and I even hear myself saying this and feel fully aware that I’ve turned into my Mum who harped on at me for the very same thing, but it baffles me that there are shoes all around the house when there’s a cupboard with a shelf and a shoe hanger, as well as a separate cupboard with a shoe organiser on offer. I recently went around the house and collected six pairs of shoes to put away! Six pairs! He was very apologetic it has to be said but my main issue has always been what I call the ‘Hey, I’m home’ collection. Nick doesn’t have a proper wallet, instead he has a card holder and a collection of loose coins and receipts, along with his keys and lip balm that spend the day floating around his pockets and end up on our dining room table when he arrives back home. It was the same in our old flat but these things made their bed for the night on the counter instead. I’ve tried fashioning various storage boxes for these zones, announcing that they will be for all of these miscellaneous items only to find them ignored completely, with the ‘Hey, I’m home’ collection comically residing next to said storage box. My favourite quirk is that one of our sided coasters now gets used to store the loose change rather than the box I’d deliberately set aside.
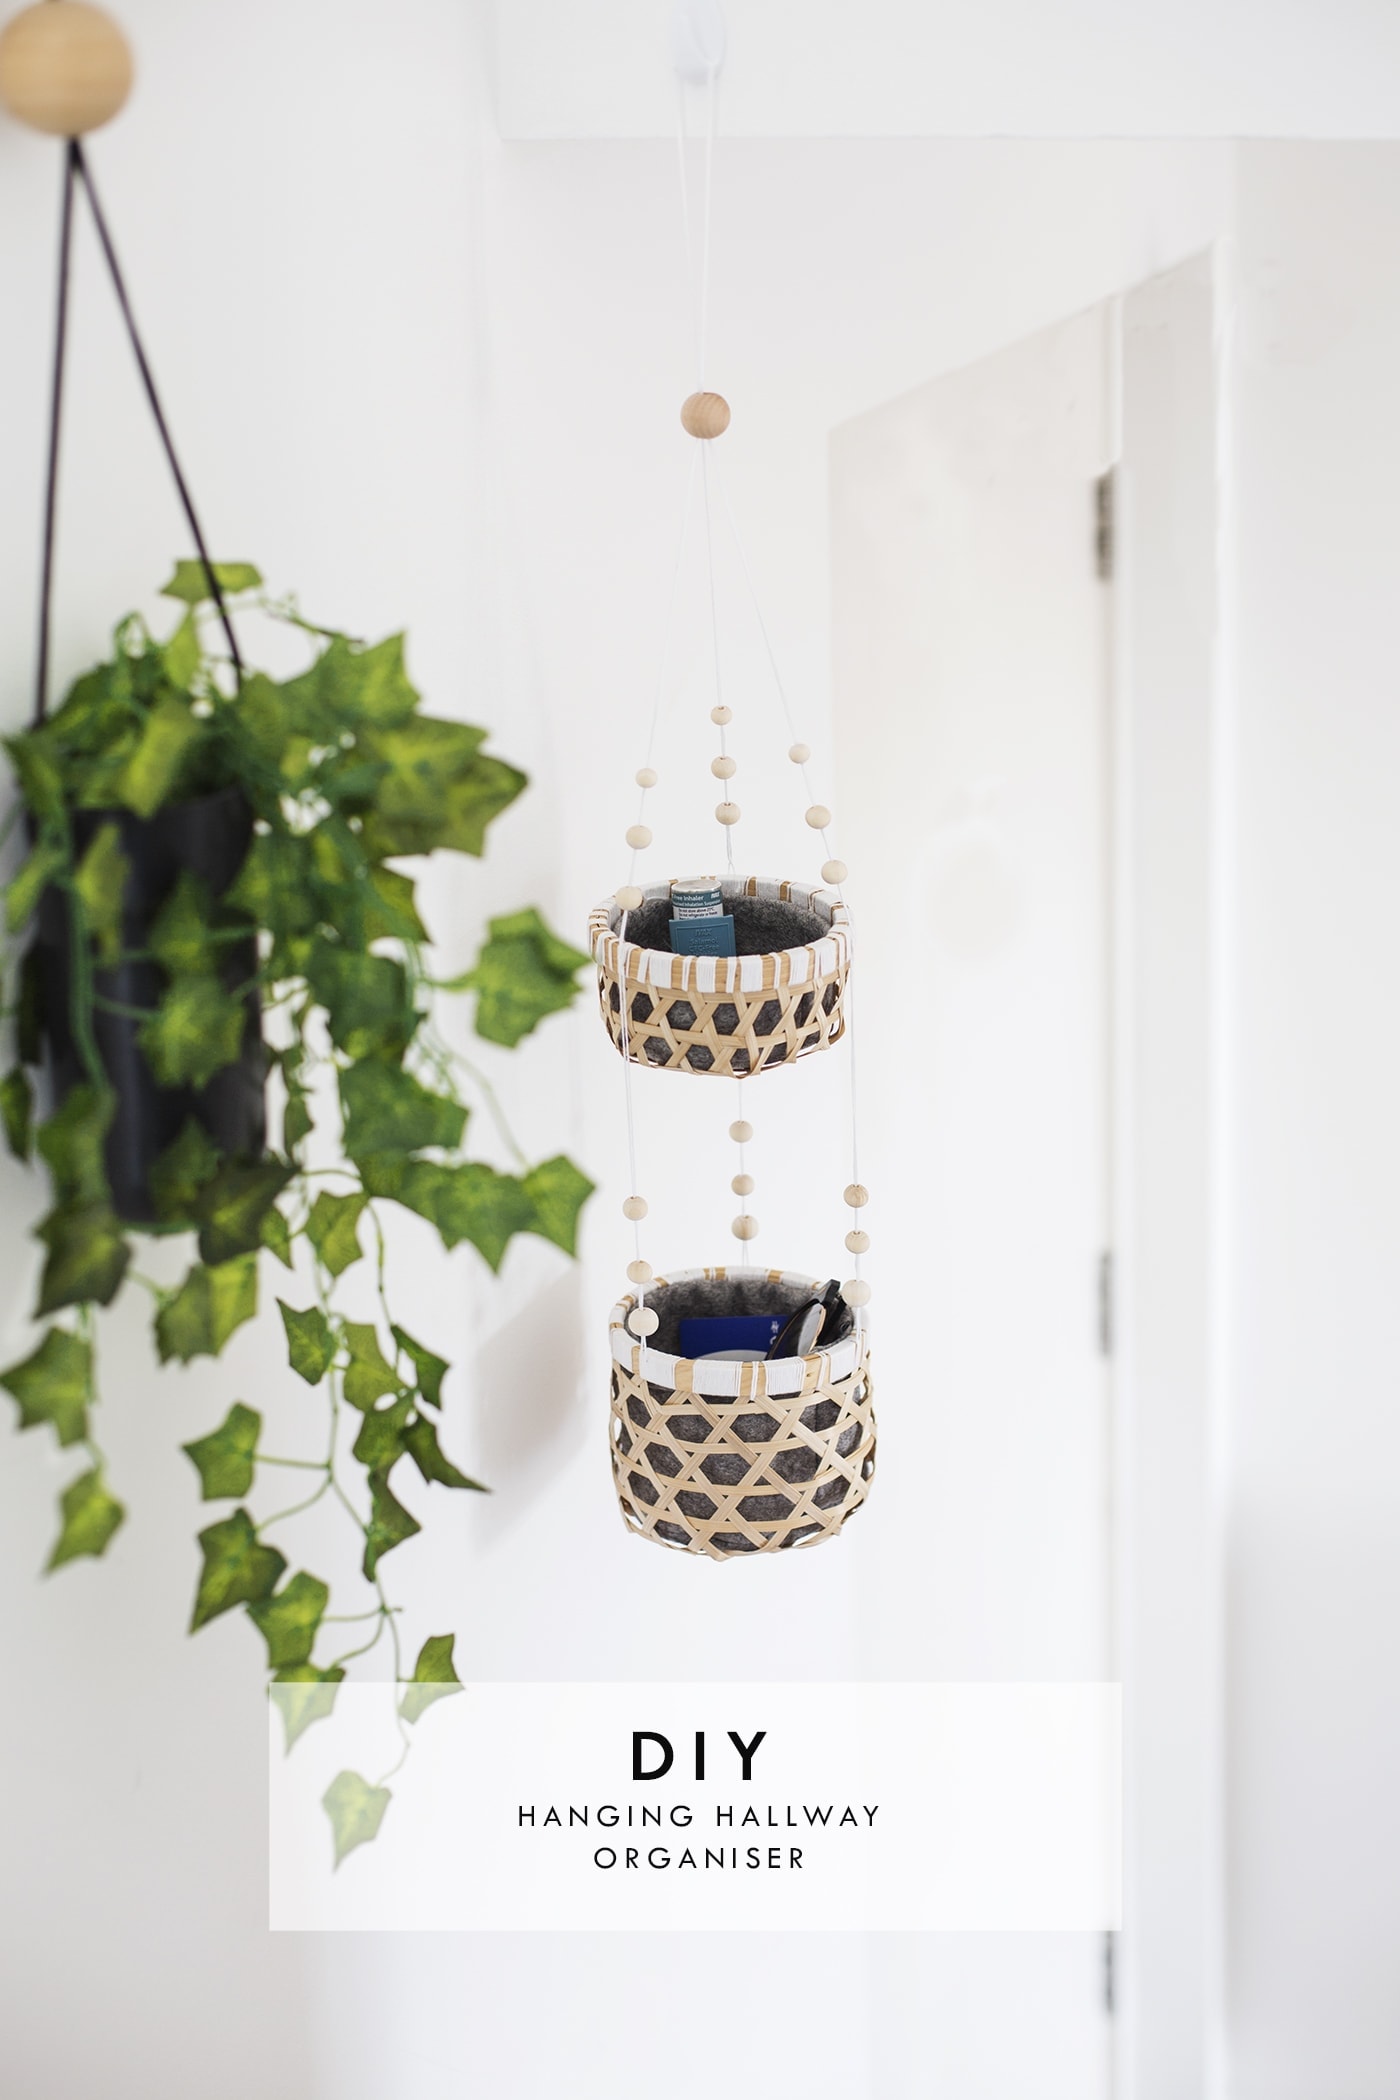
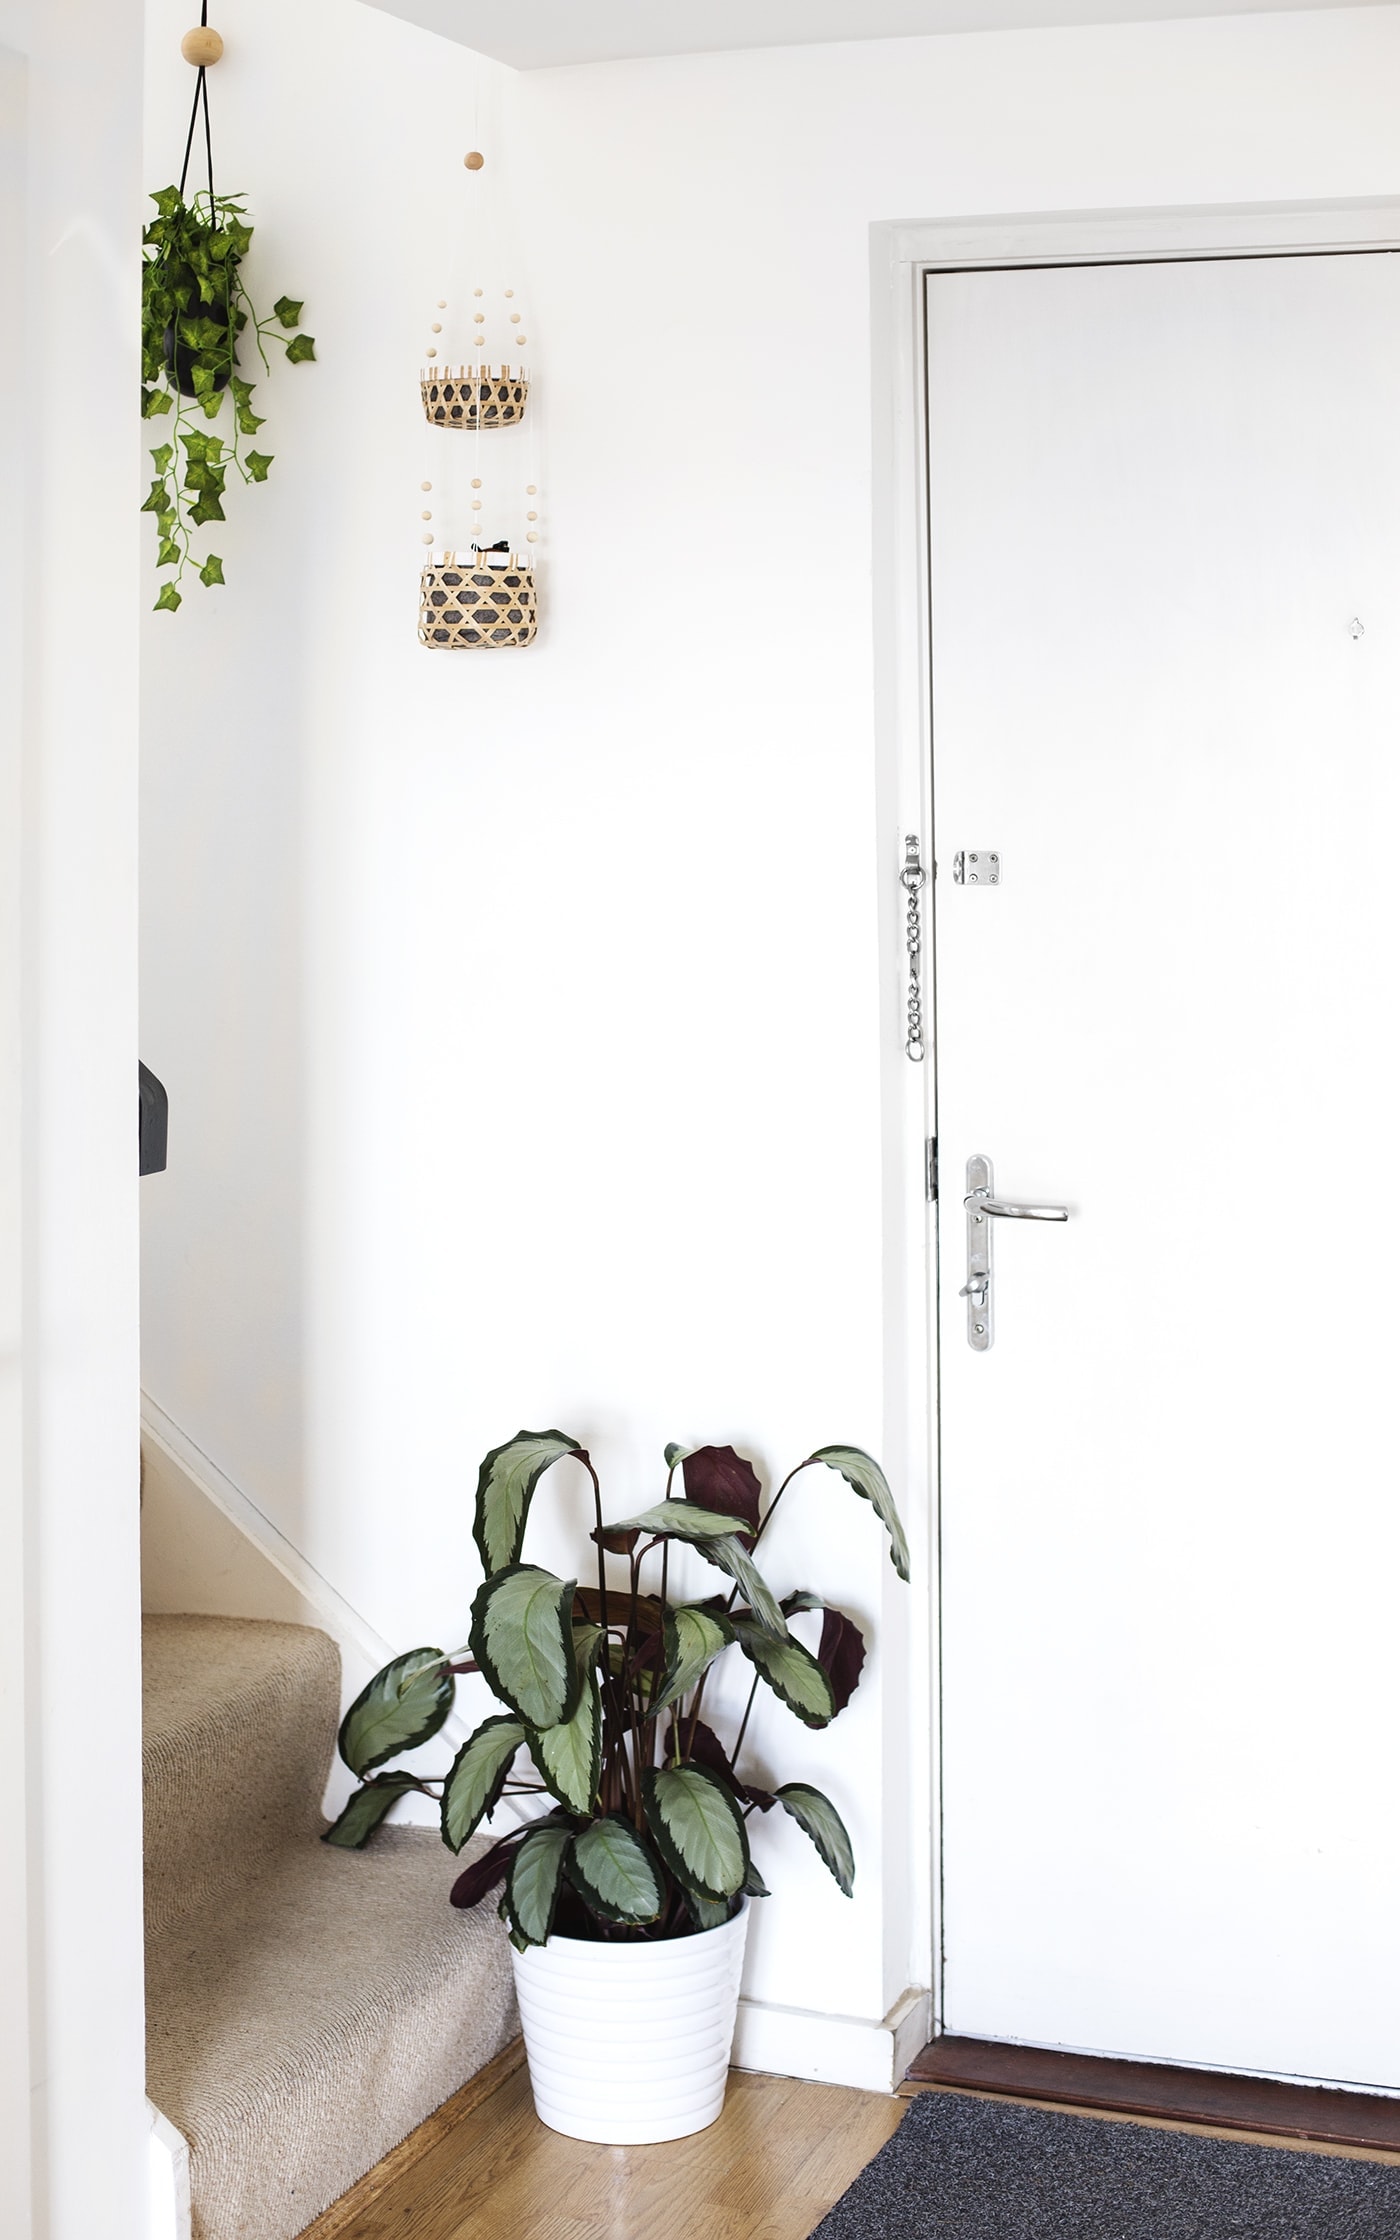
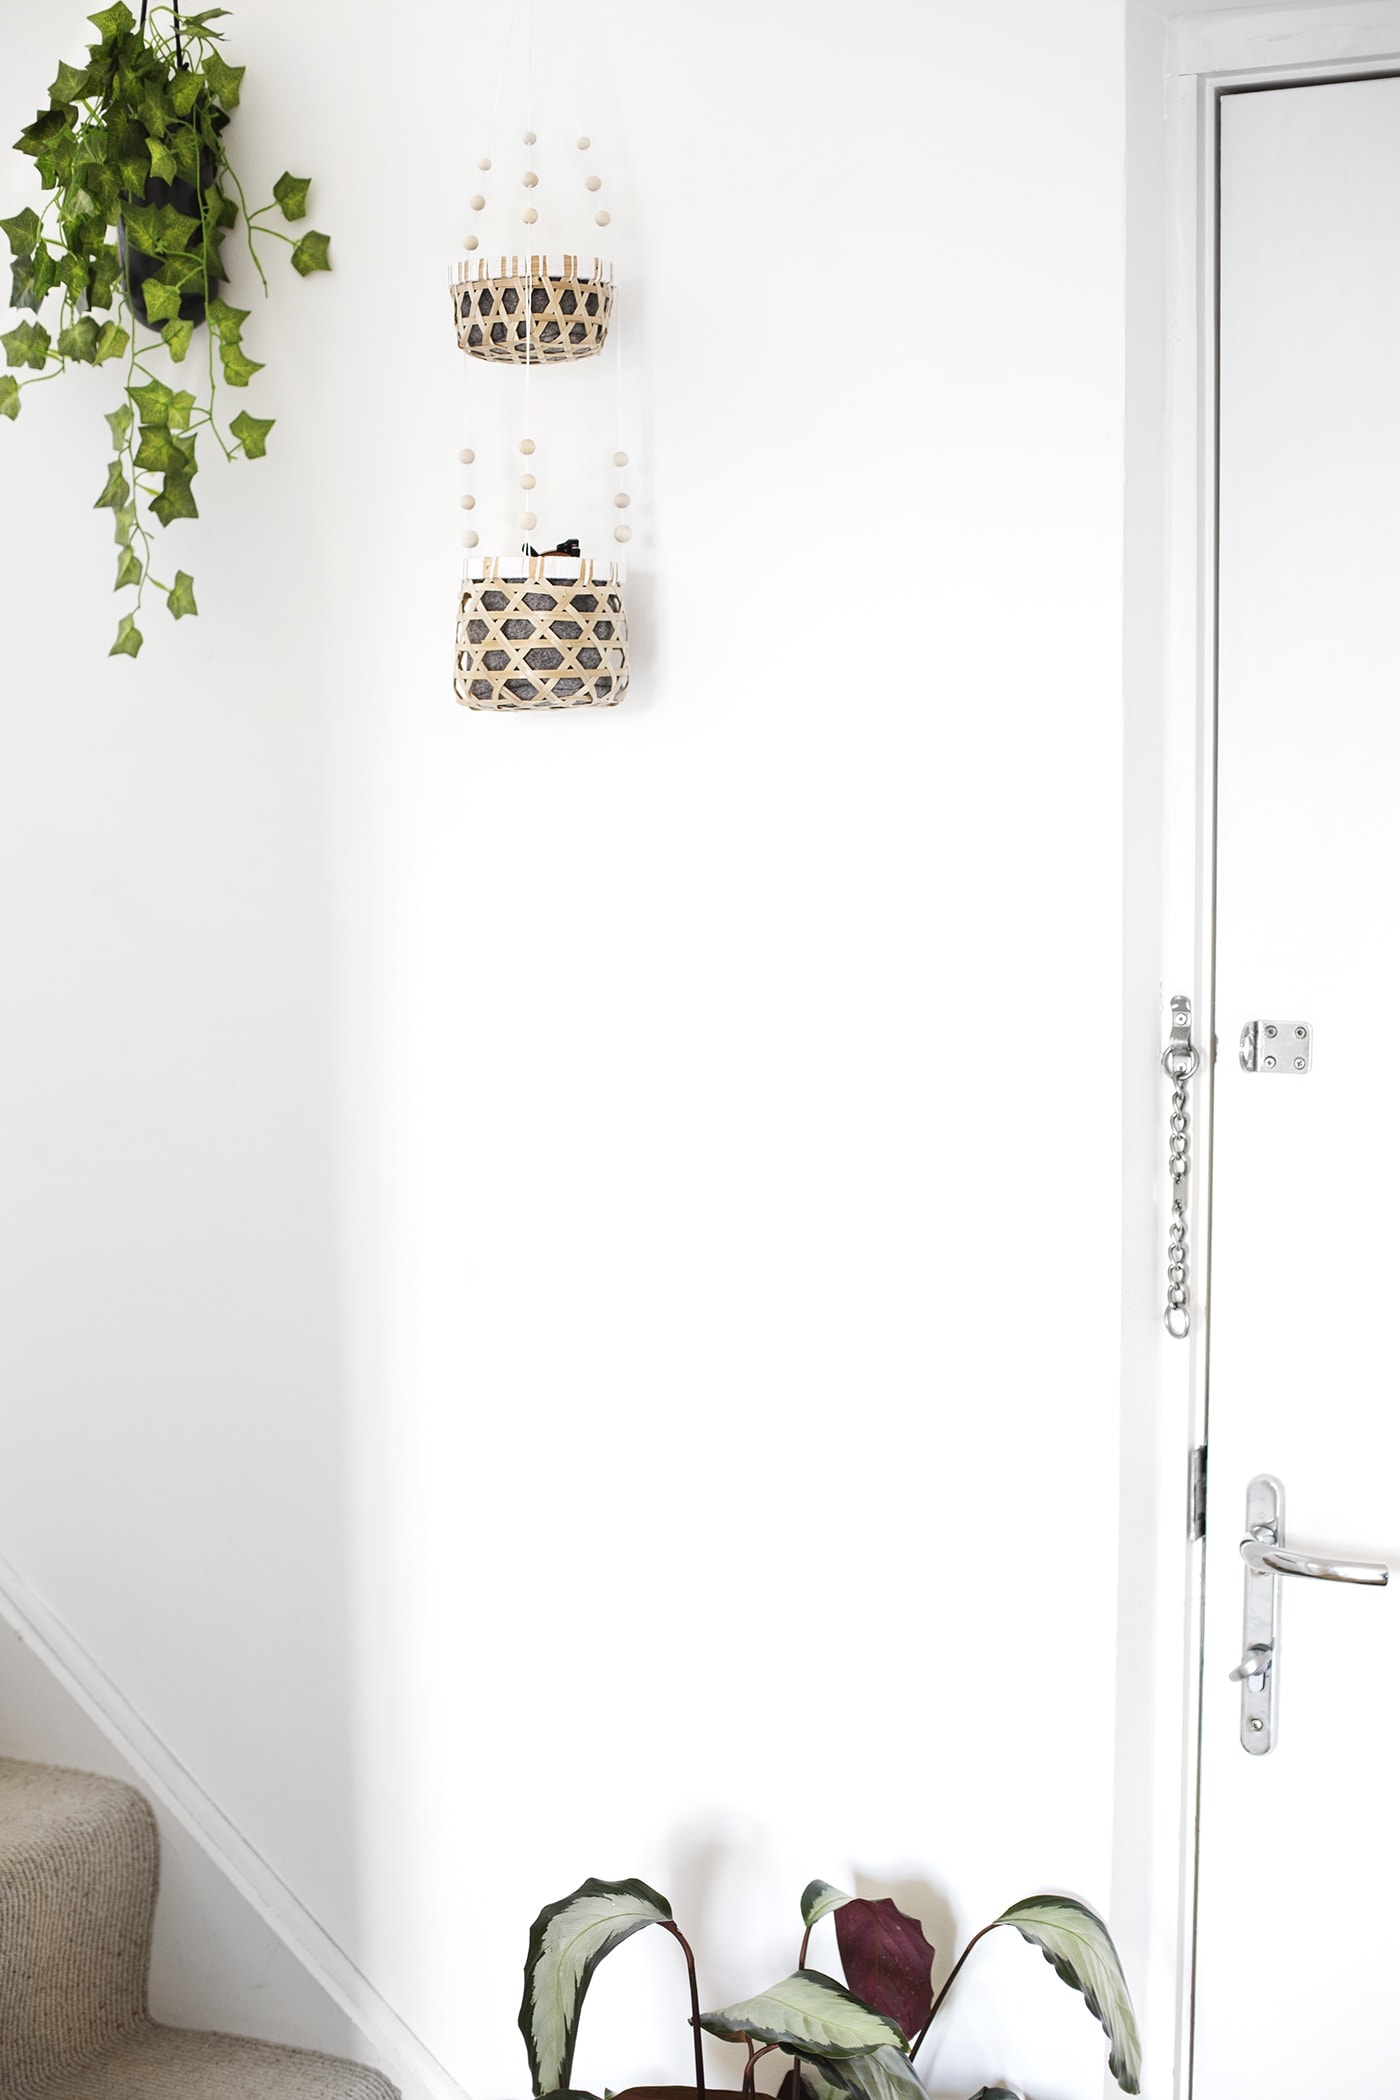
So to avoid constantly having to tidy these things away to have our dinner and the worry of where they might get moved to / lost I came up with a DIY solution. Having found these cute wicker boxes in Tiger a while ago, I bought them and had a brainwave of how I could put them to good use. I came up with this hanging hallway organiser, a little haven to put the ‘Hey, I’m home’ collection as soon as he walks through the door. Plus I can add in some things I should really remember before I leave the house too! Our hallway has been pretty blank for a while so I thought this may also help to spruce it up a little and add some style to the sparse white walls.
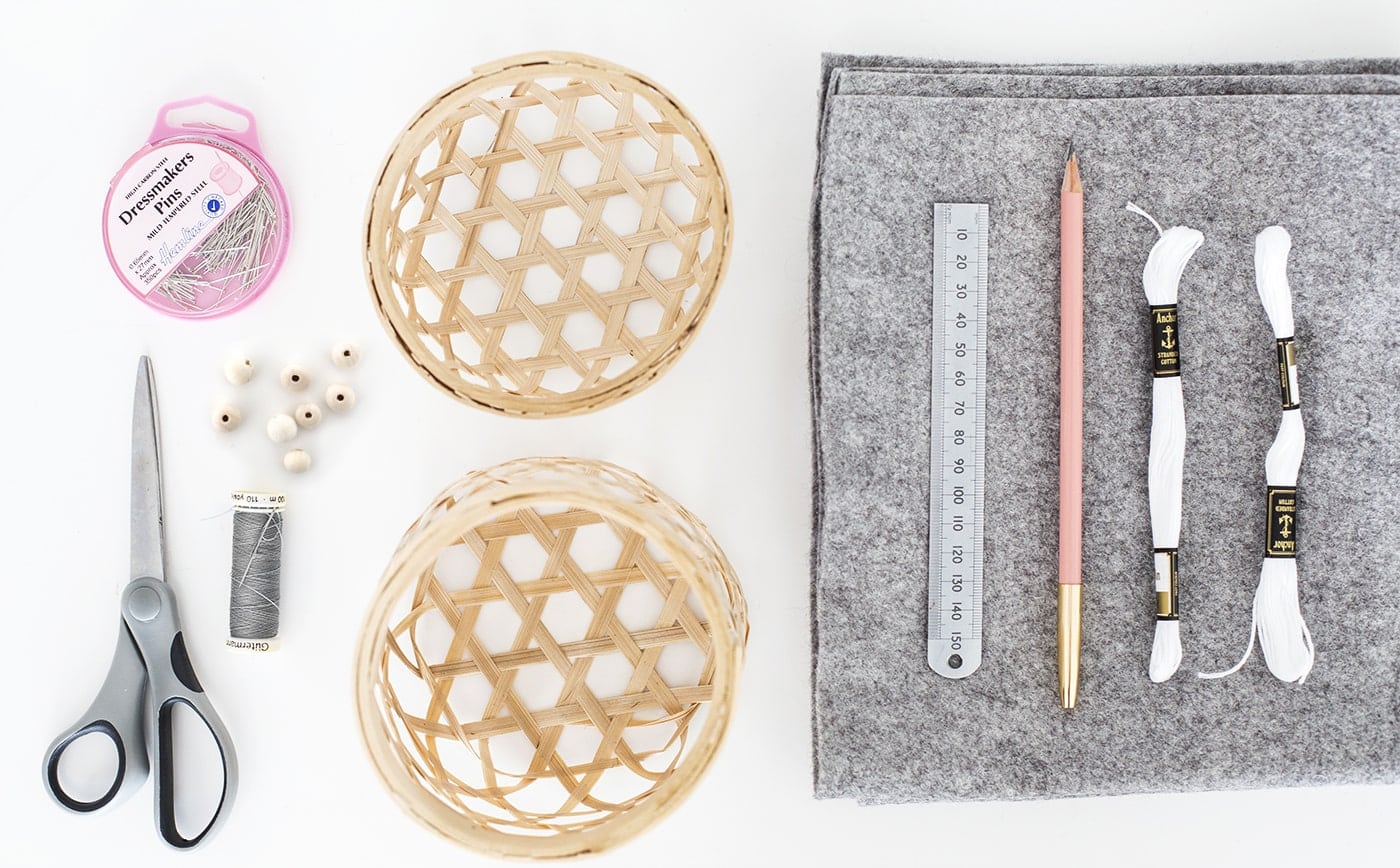
Materials
- Scissors
- Sewing pins
- A Sewing Needle Threader
- Grey thread
- Grey marl felt
- White embroidery thread
- A pencil
- A ruler
- 18 x wooden beads
- 1 x small basket
- 1 x medium basket (both found in Tiger)
- an A4 sheet of paper
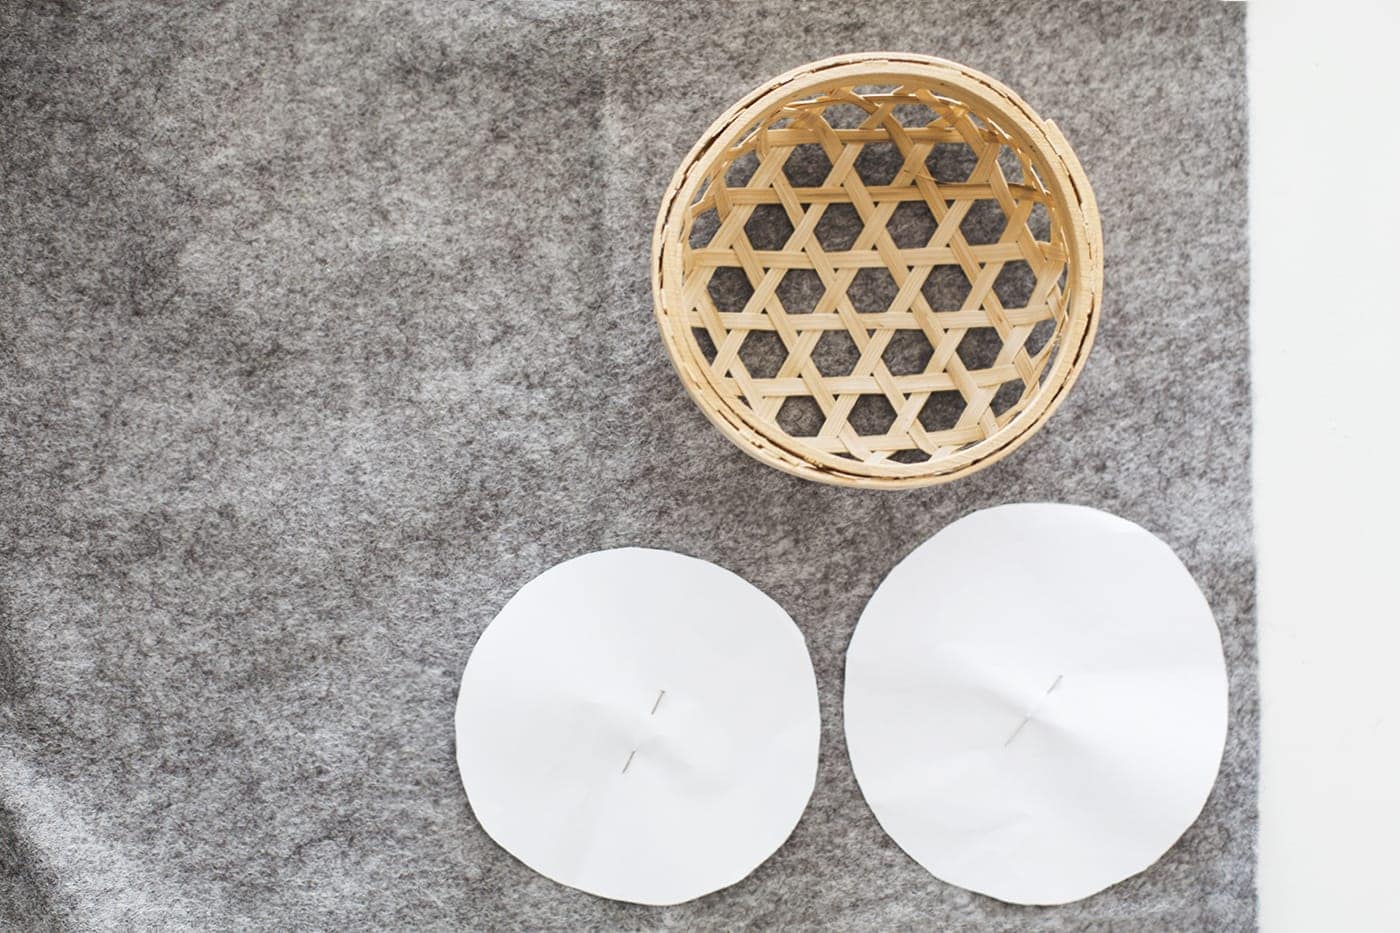
Firstly, you need to cut out the lining of both baskets. Using the A4 paper cut out a rough circle to fit the base of each basket and pin that to the felt. When you have them in place cut the felt out following the template.
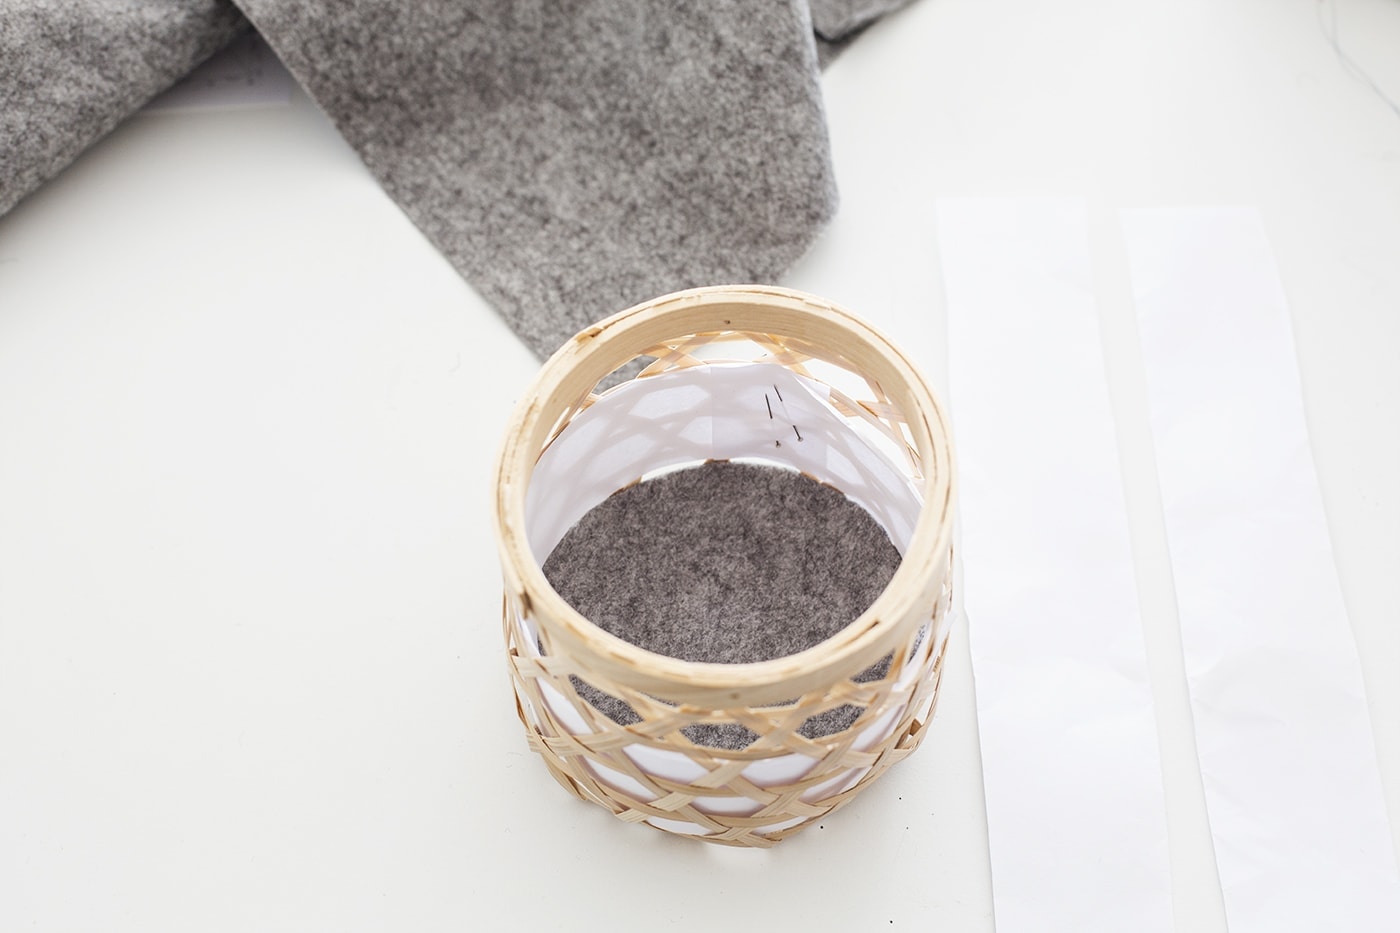
Next, using the same technique with paper, line the edges of the basket to find out the width and length of felt you’ll need to cover the sides.
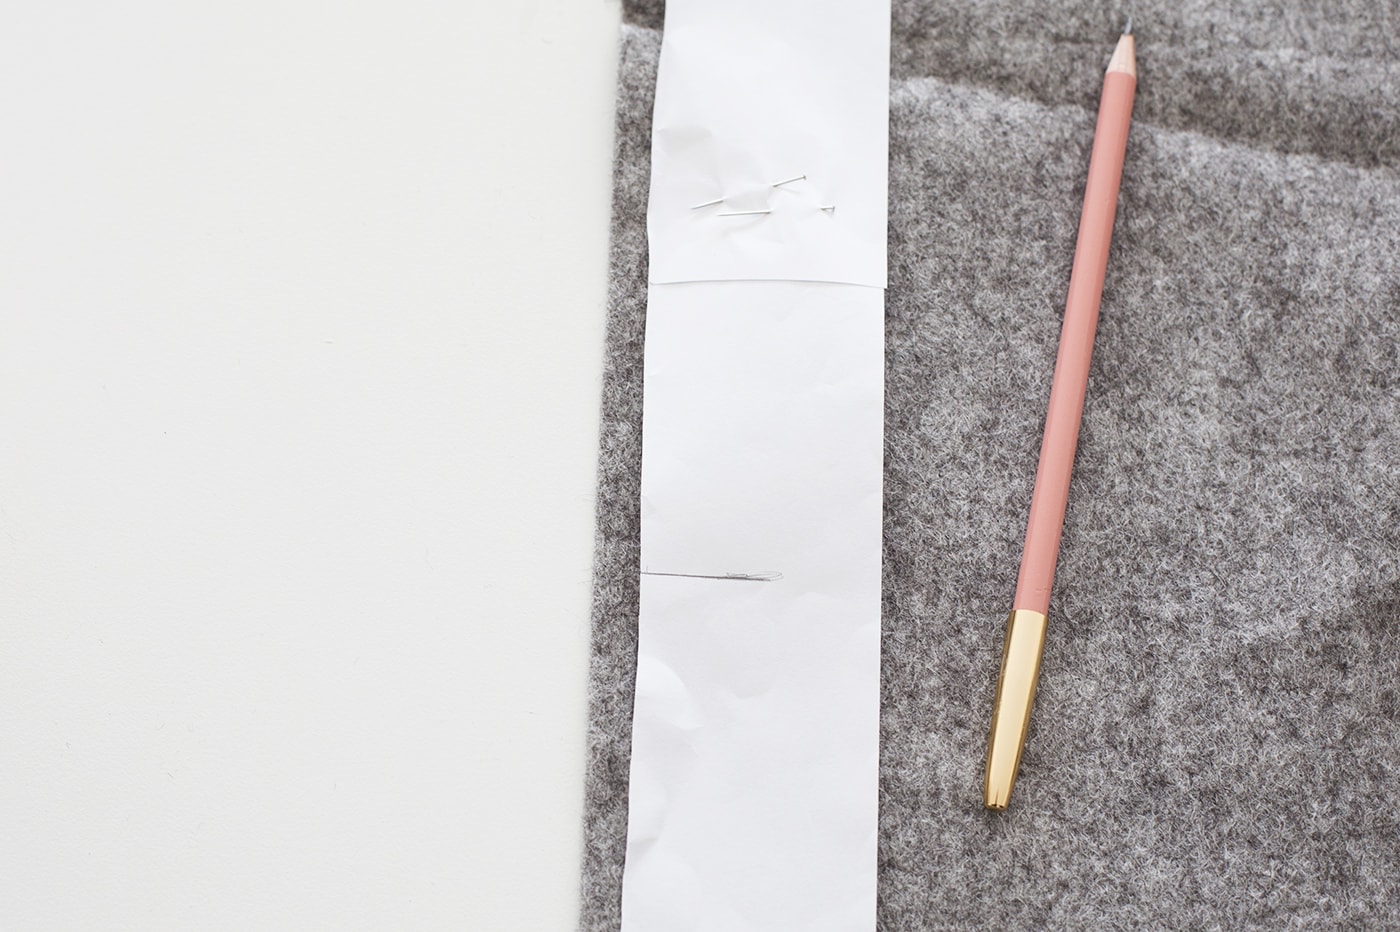
Once you have the measurements you can pin the paper to the felt, use your pencil to draw a line down the felt and then cut it out. I added a little bit extra to the width in order to fold it over onto itself and create a lovely smooth edge after sewing.
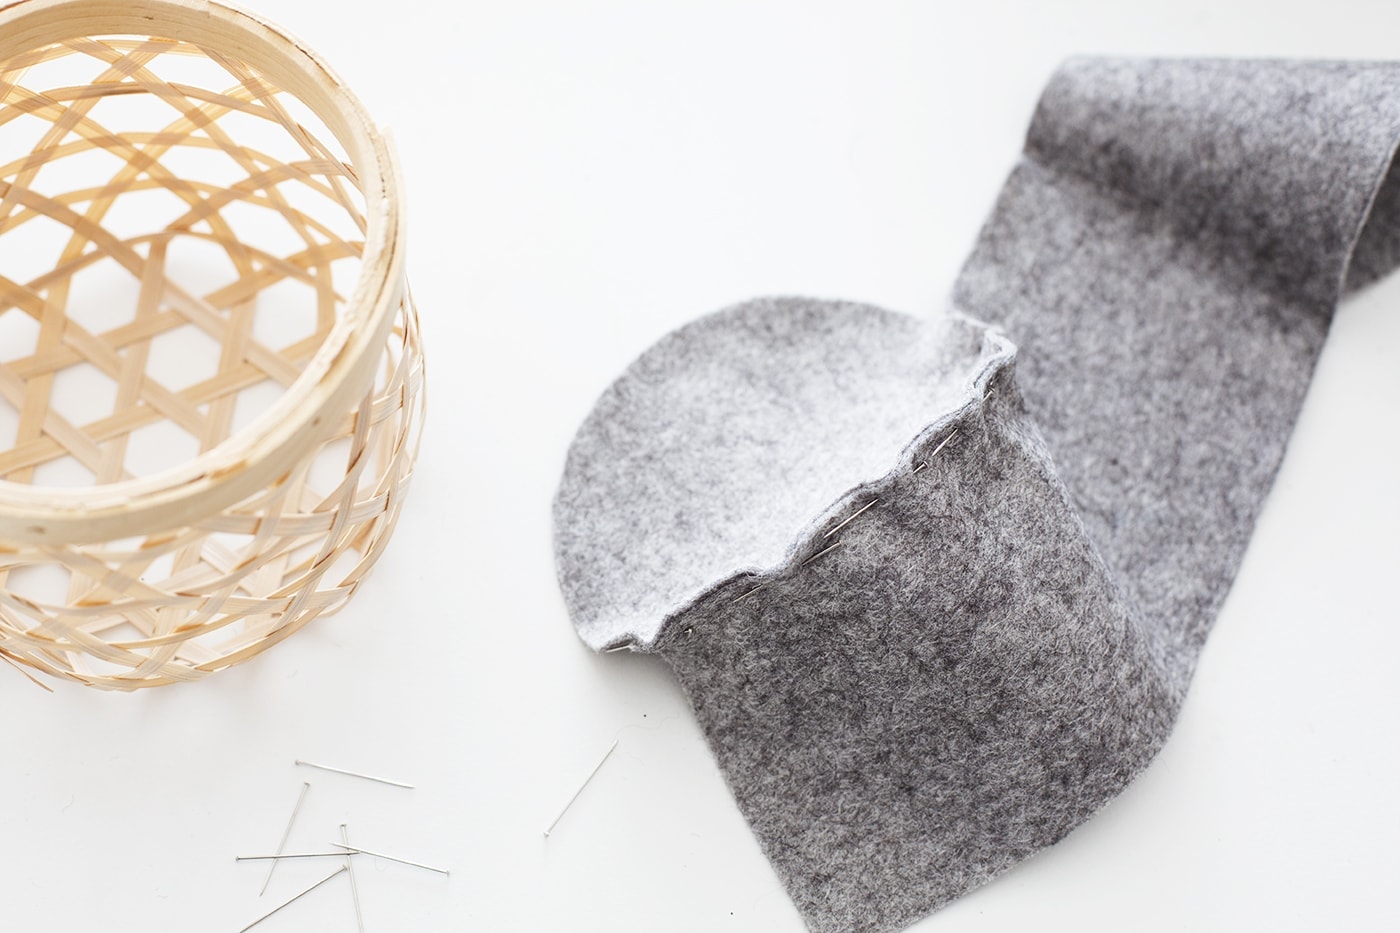
Once you have the measurements you can pin the paper to the felt, use your pencil to draw a line down the felt and then cut it out. I added a little bit extra to the width in order to fold it over onto itself and create a lovely smooth edge after sewing. As the base of the basket is circular you need to be really careful with this stage. Pin the long piece of felt partly around the circular piece of felt. You will need to remove these pins during sewing and make sure that the edges are always lined up to create the right shape. Do this for both baskets.
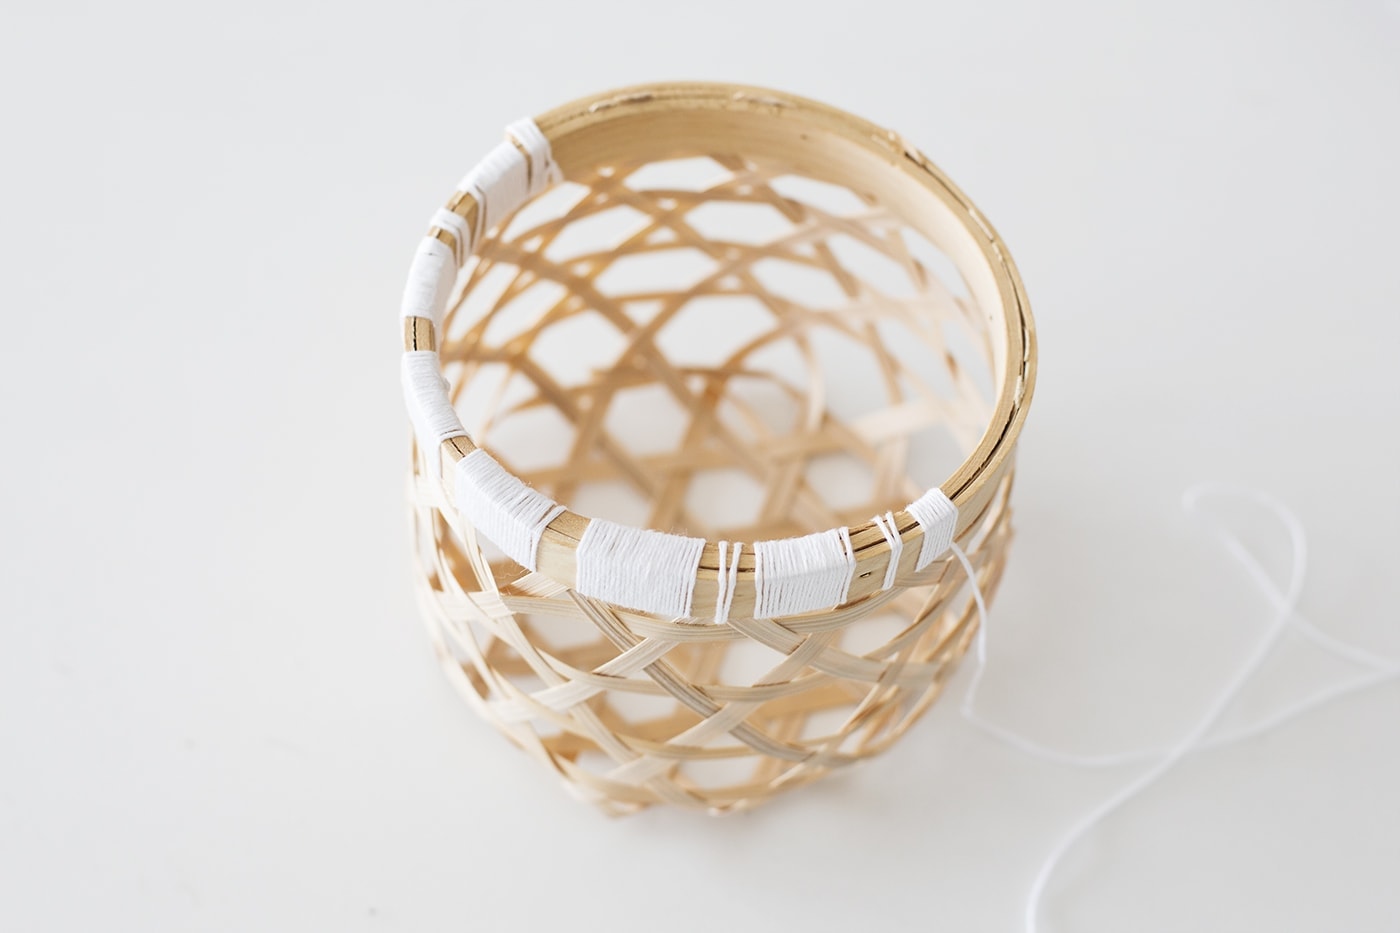
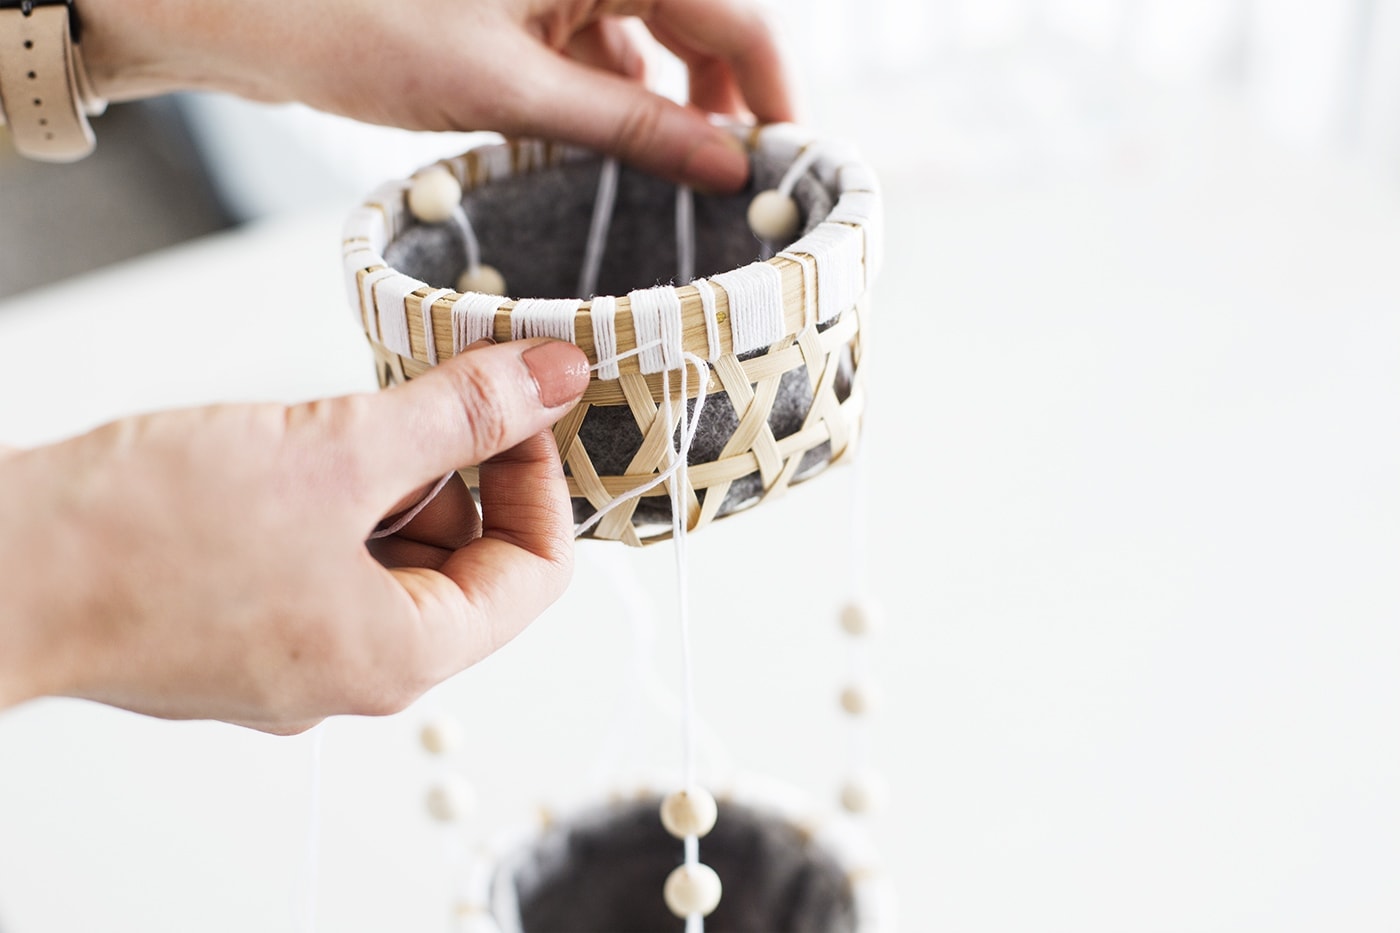
Now take your white embroidery thread and take your time neatly wrapping it around the edges of your baskets. A great tip here is to use a sewing needle threader to pass the embroidery thread through the basket. To stop your thread becoming tangled during this process you can work with small bits of thread and tie them together when you get to the end. Make sure your knot is on the inside of the rim as the lining will cover it nicely.
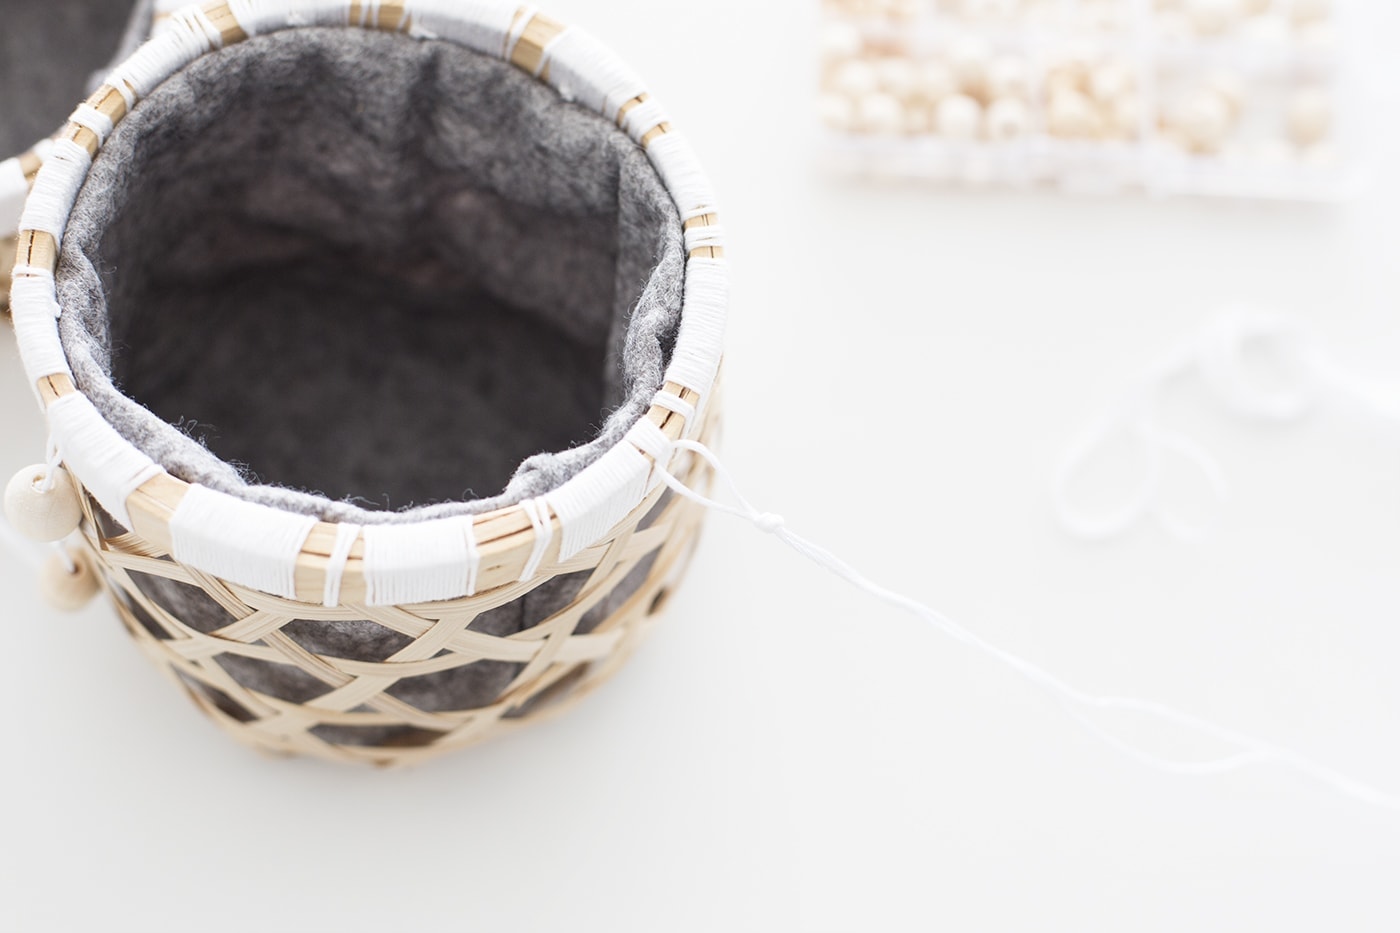
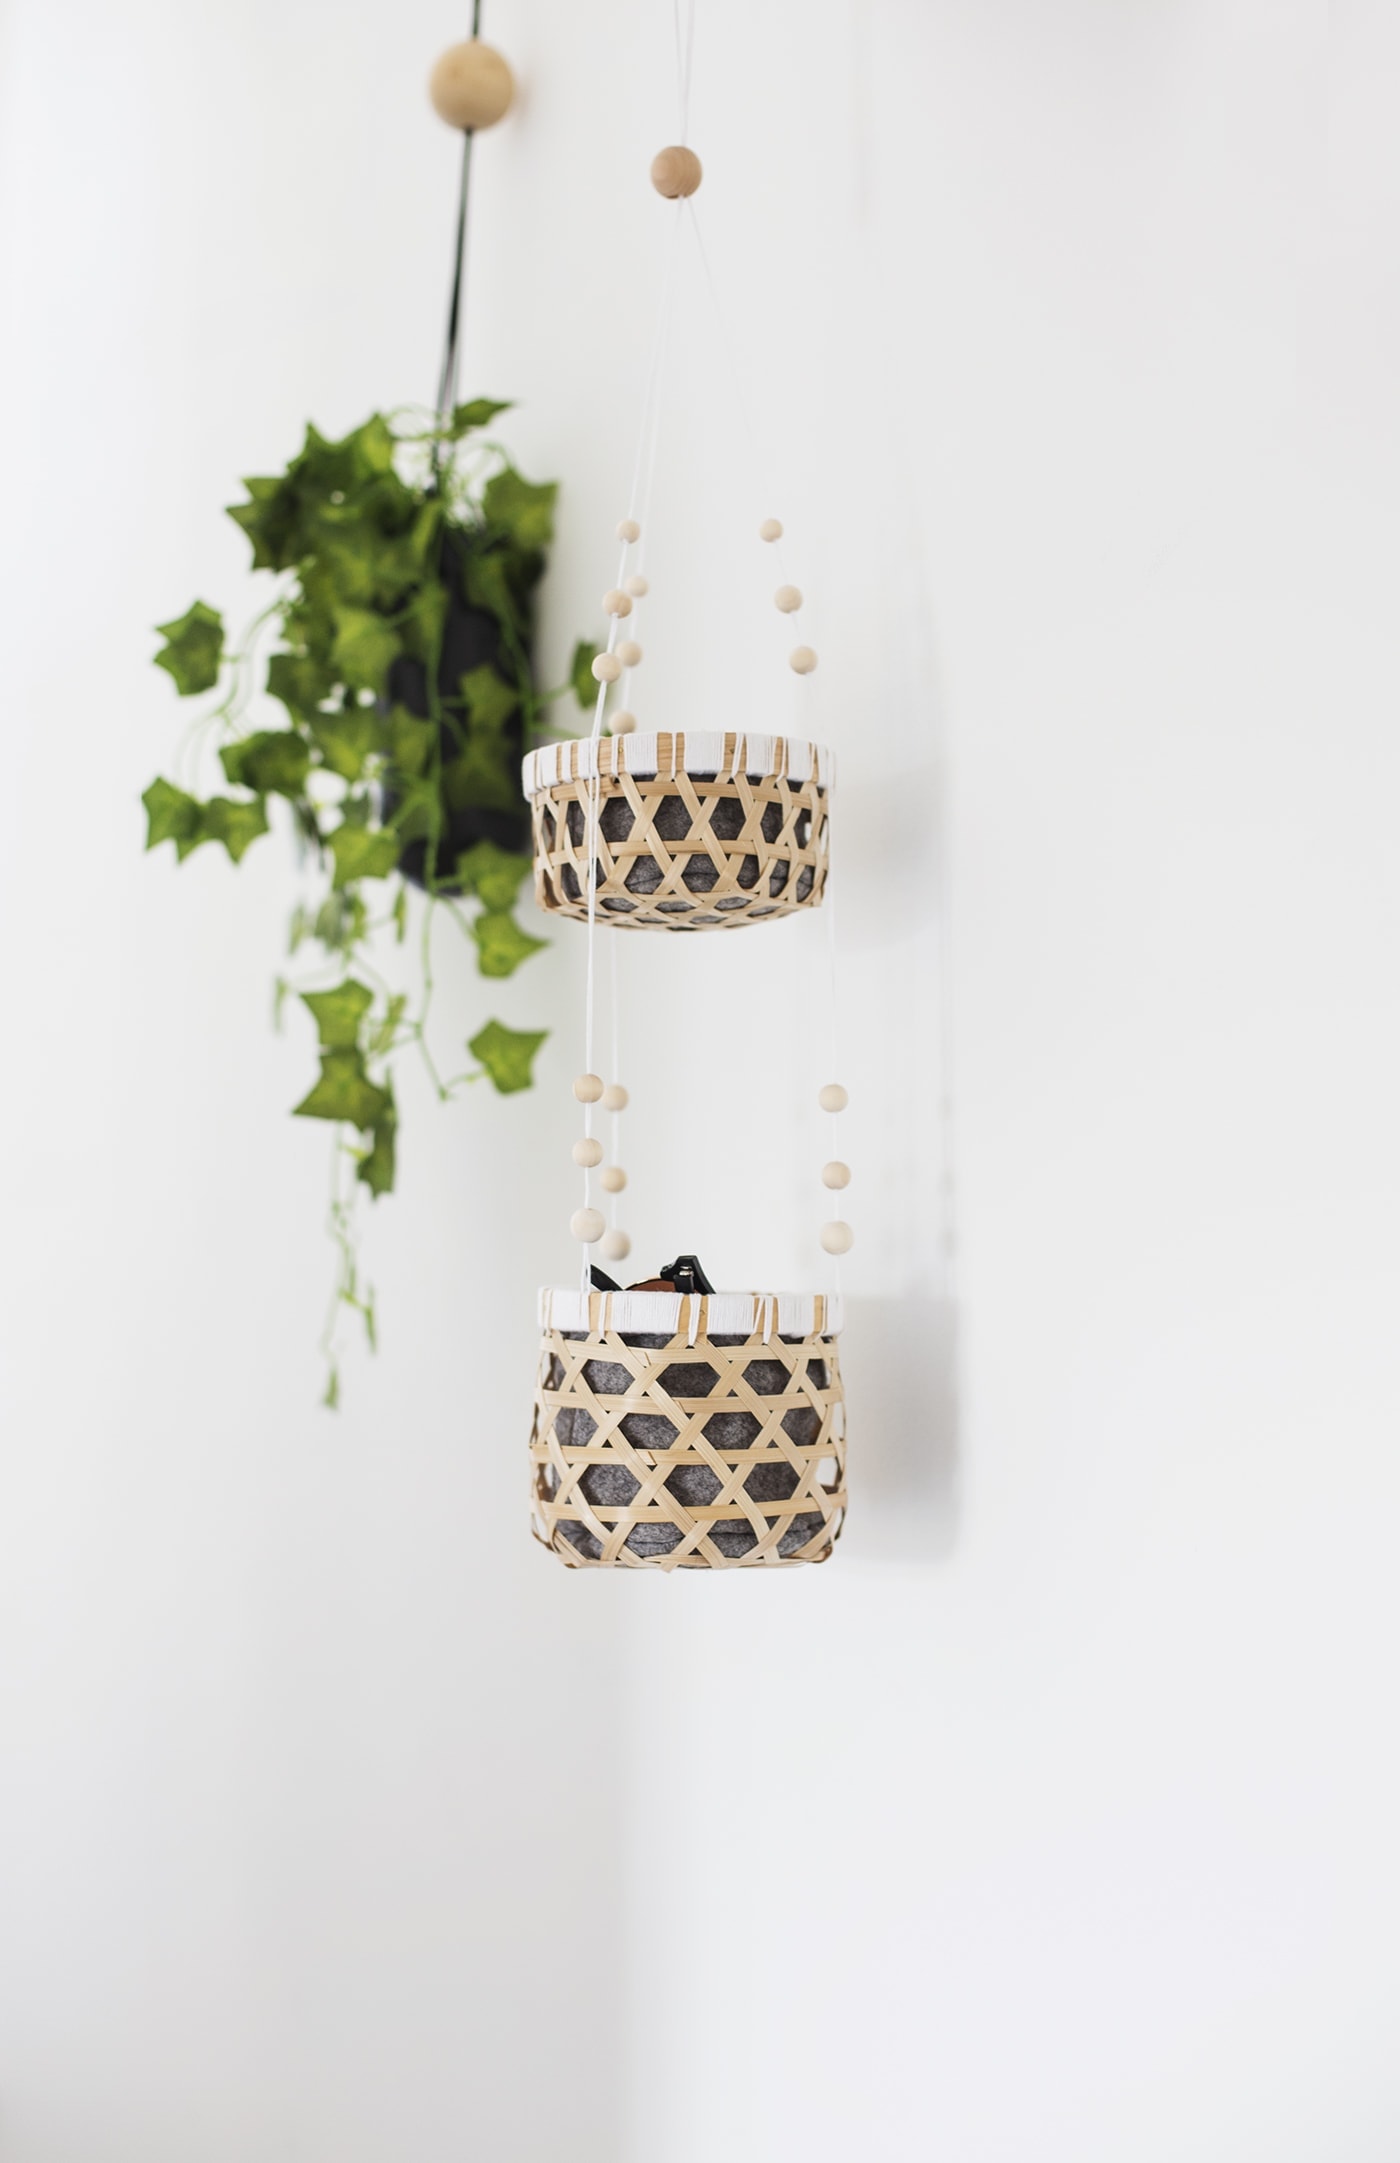
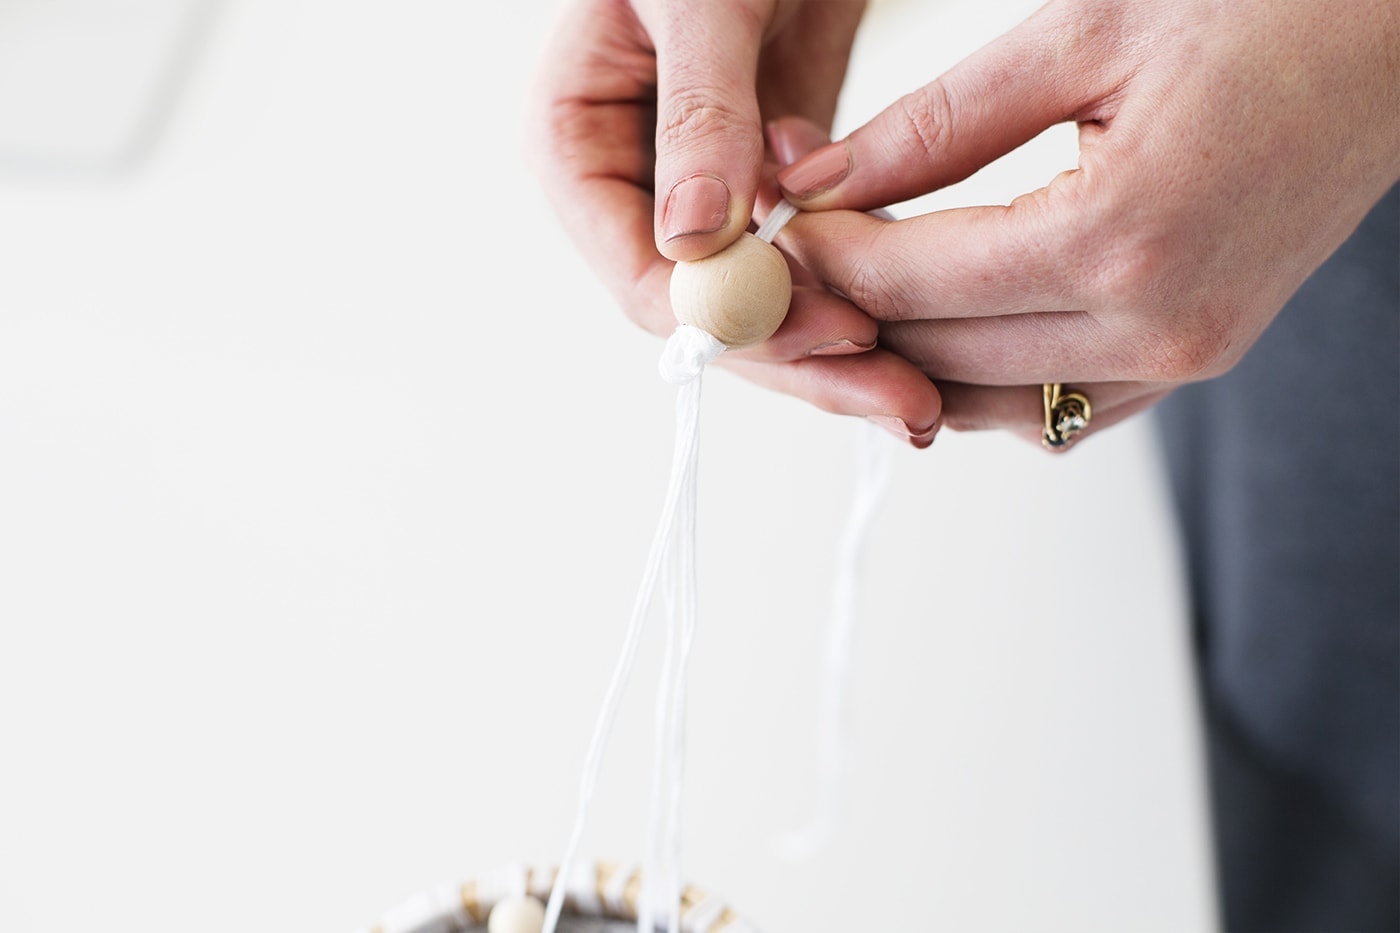
When you’ve completed the threading detail on the rim of both baskets it’s time to start attaching your hanging threads. Measure out 3 even pieces of embroidery thread doubled over to make sure the basket is hung evenly.With your first piece of thread you should loop it through your thread detailing to secure it in place, again this is easier with a sewing needle threader. To add beading decoration, tie a secure knot. If the knot is too small you can always add another knot on top of it to create a thicker platform for the bead to sit on. Add three beads in this way to either string.
When you are attaching the smaller basket with the thread you will need to cross the thread through the detailing and secure with a knot. You can use your sewing needle threader to help you. Then follow step 6 again for the same bead detailing along the thread.
When you’re finished decorating the hanging thread, gather all of the remaining thread at the top of the baskets. Holding them together securely make sure the baskets are hanging evenly and straight then tie a large knot at the top. Knot until the largest bead can slide over and cover the knot without slipping down. Tie the loose threads coming out from the top, leaving a bit of a gap between the bead and the final knot for hanging. Now find a spot to hang this beauty!
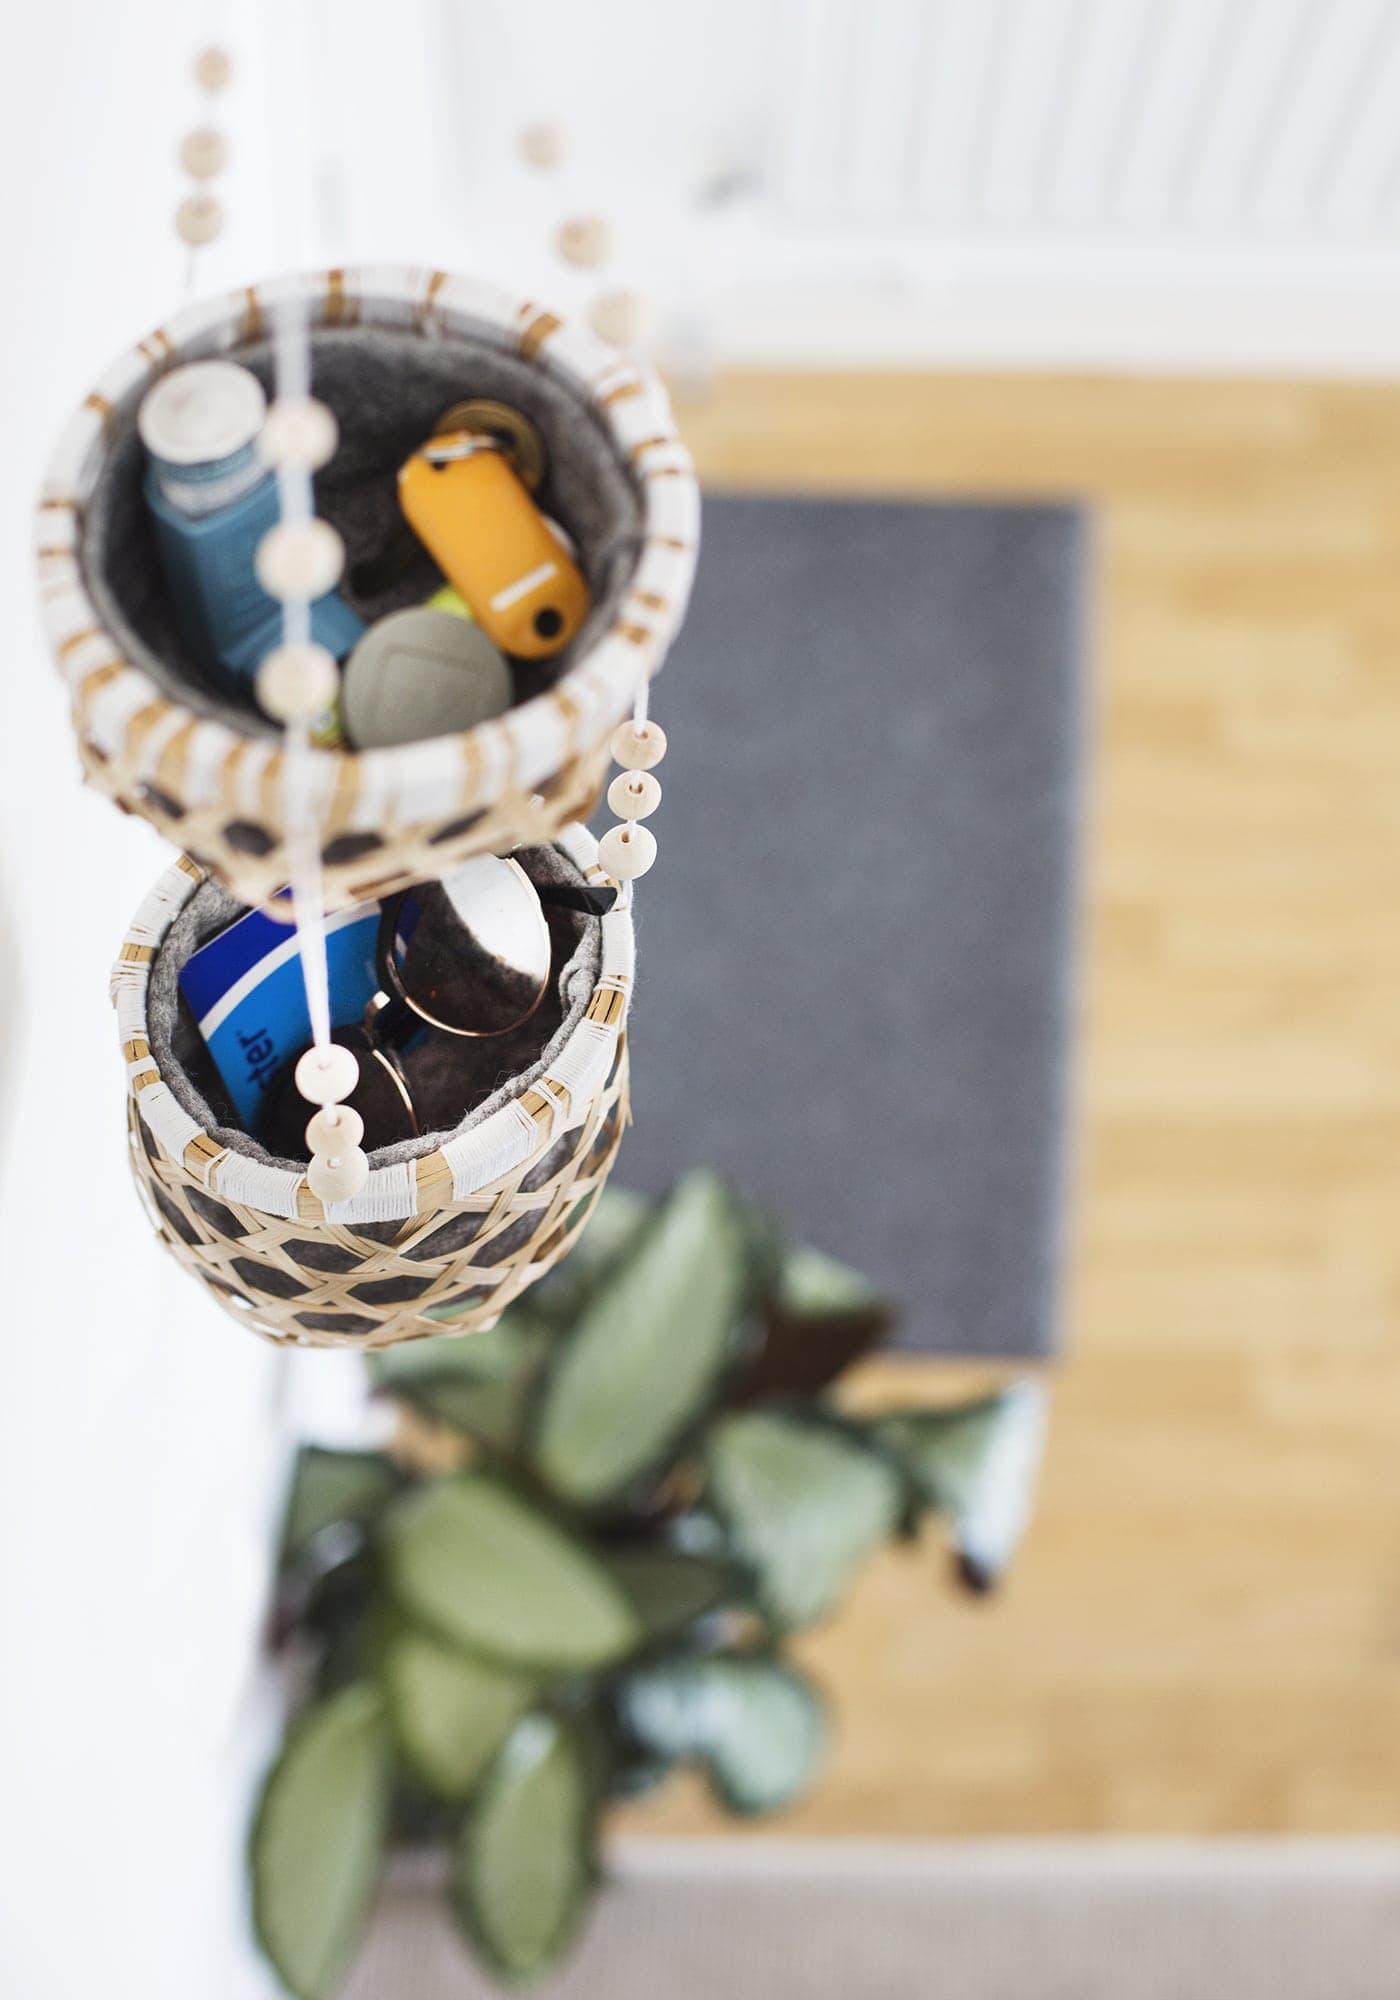
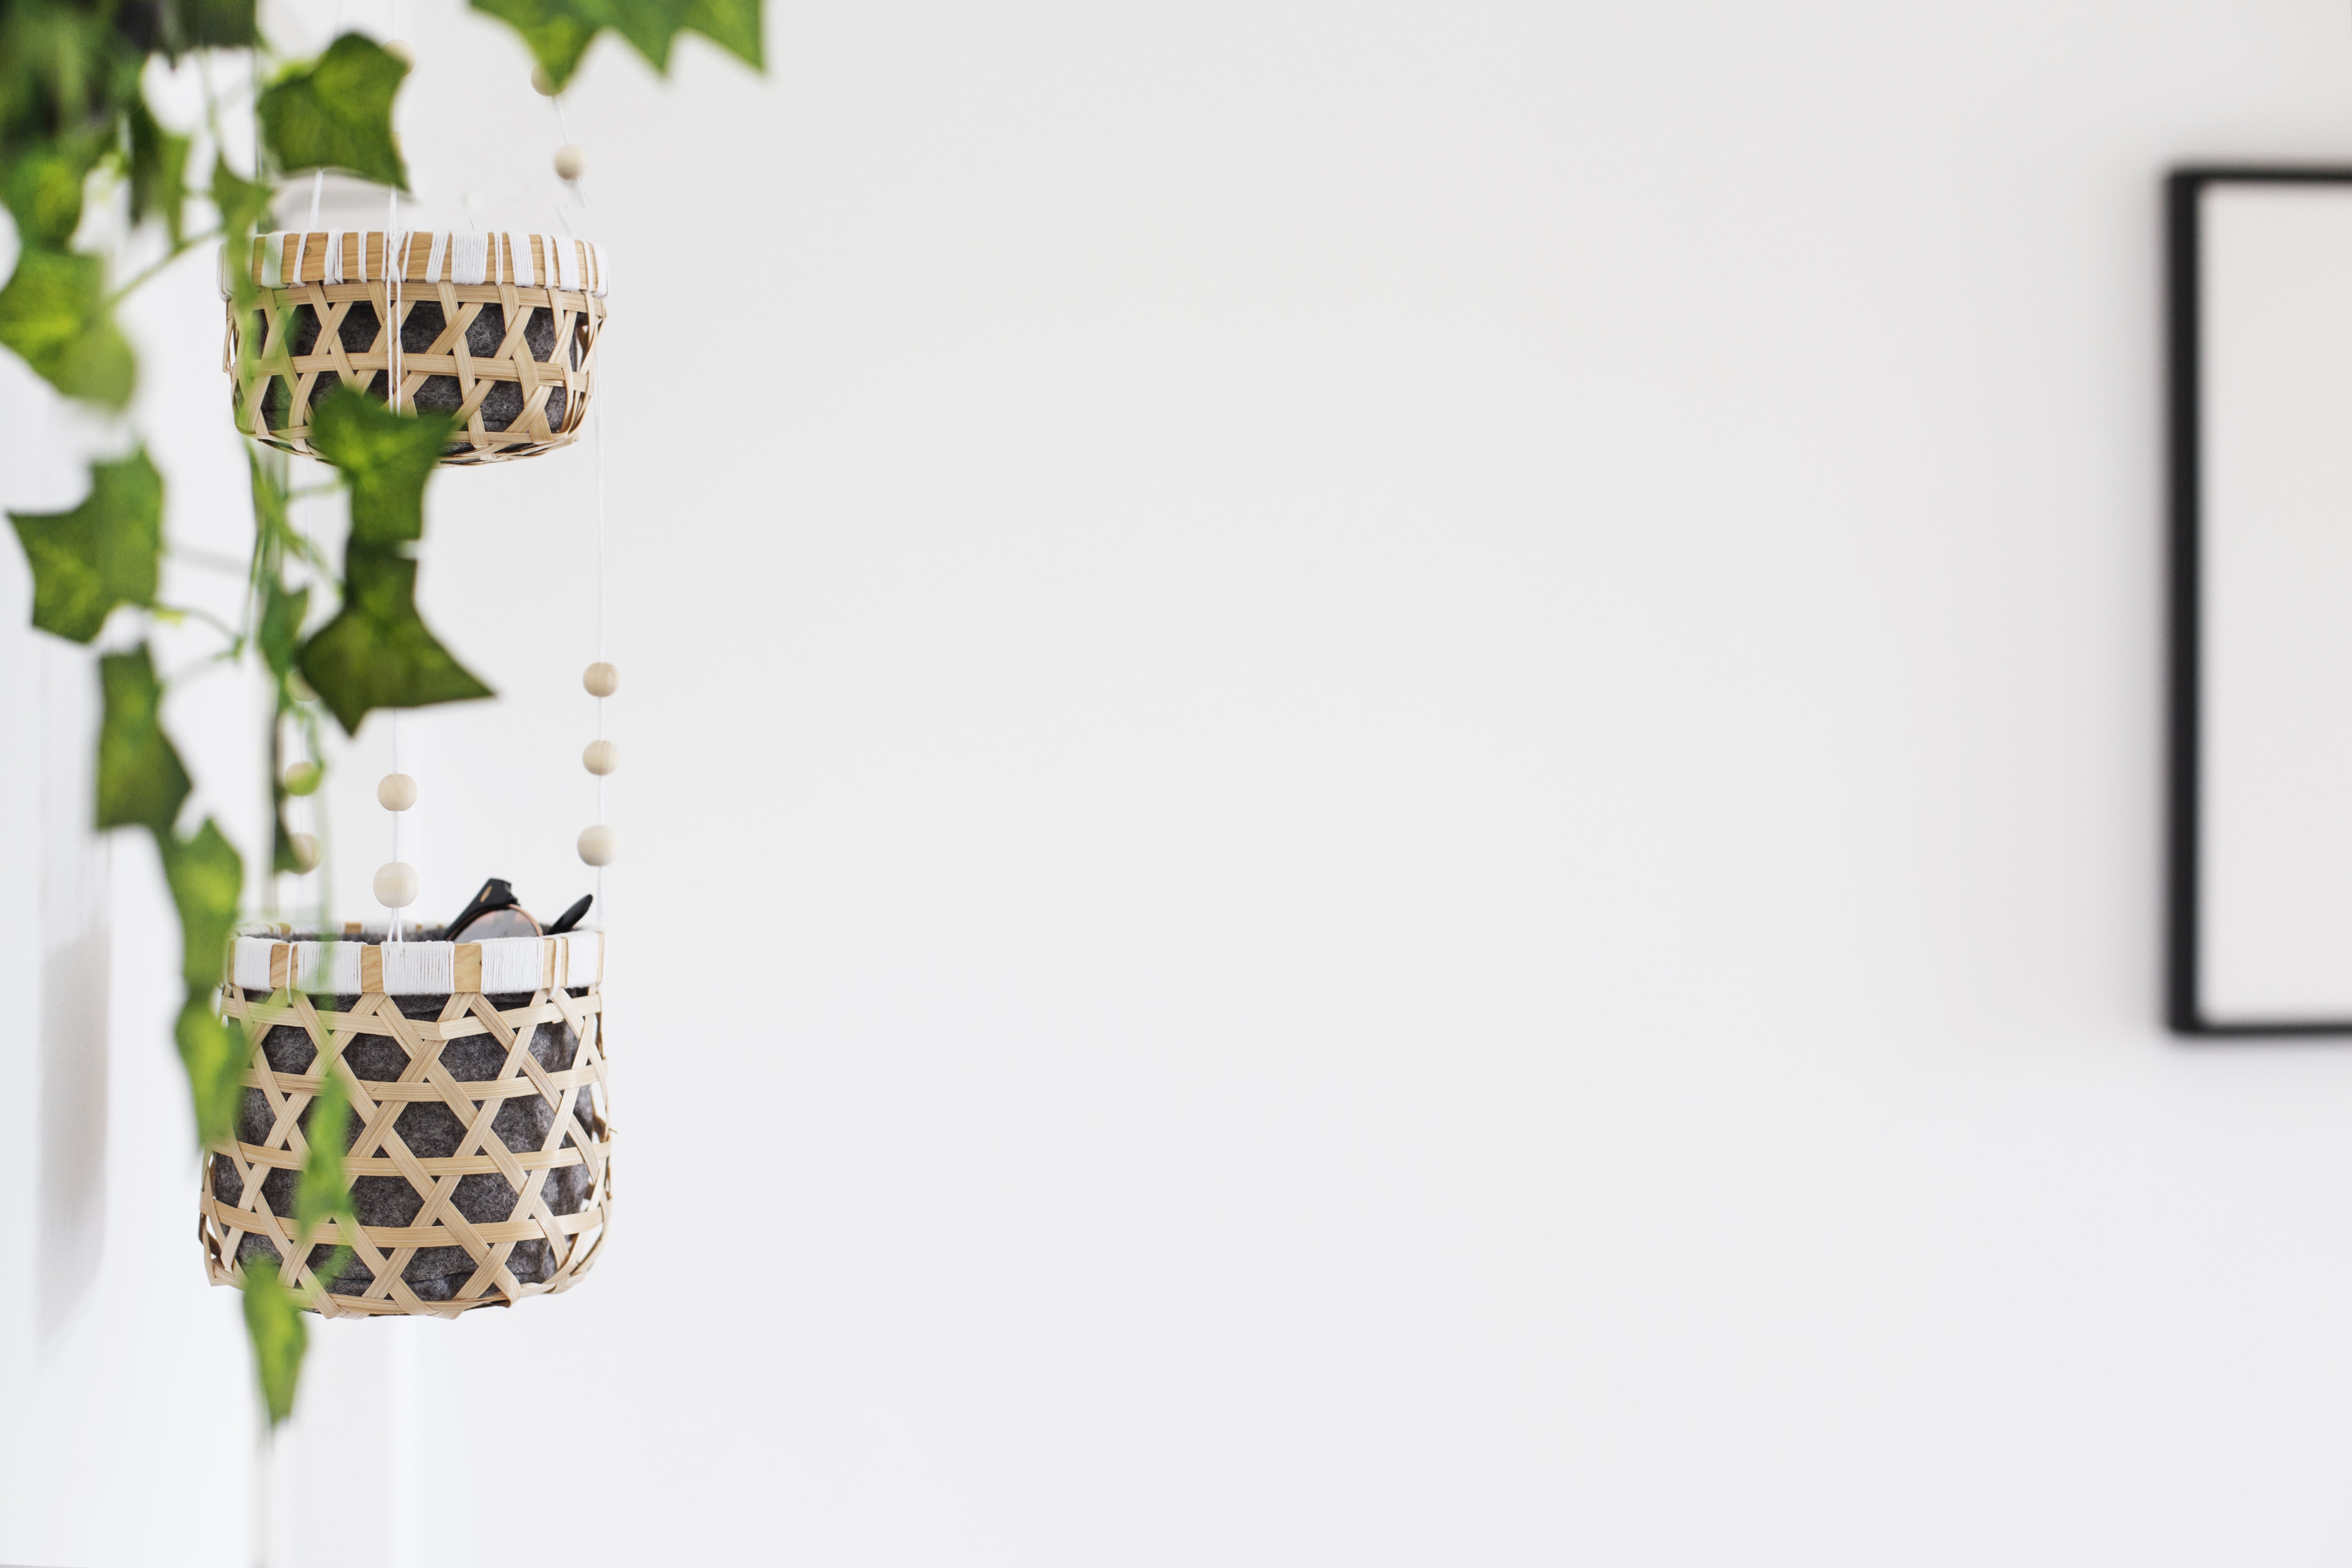
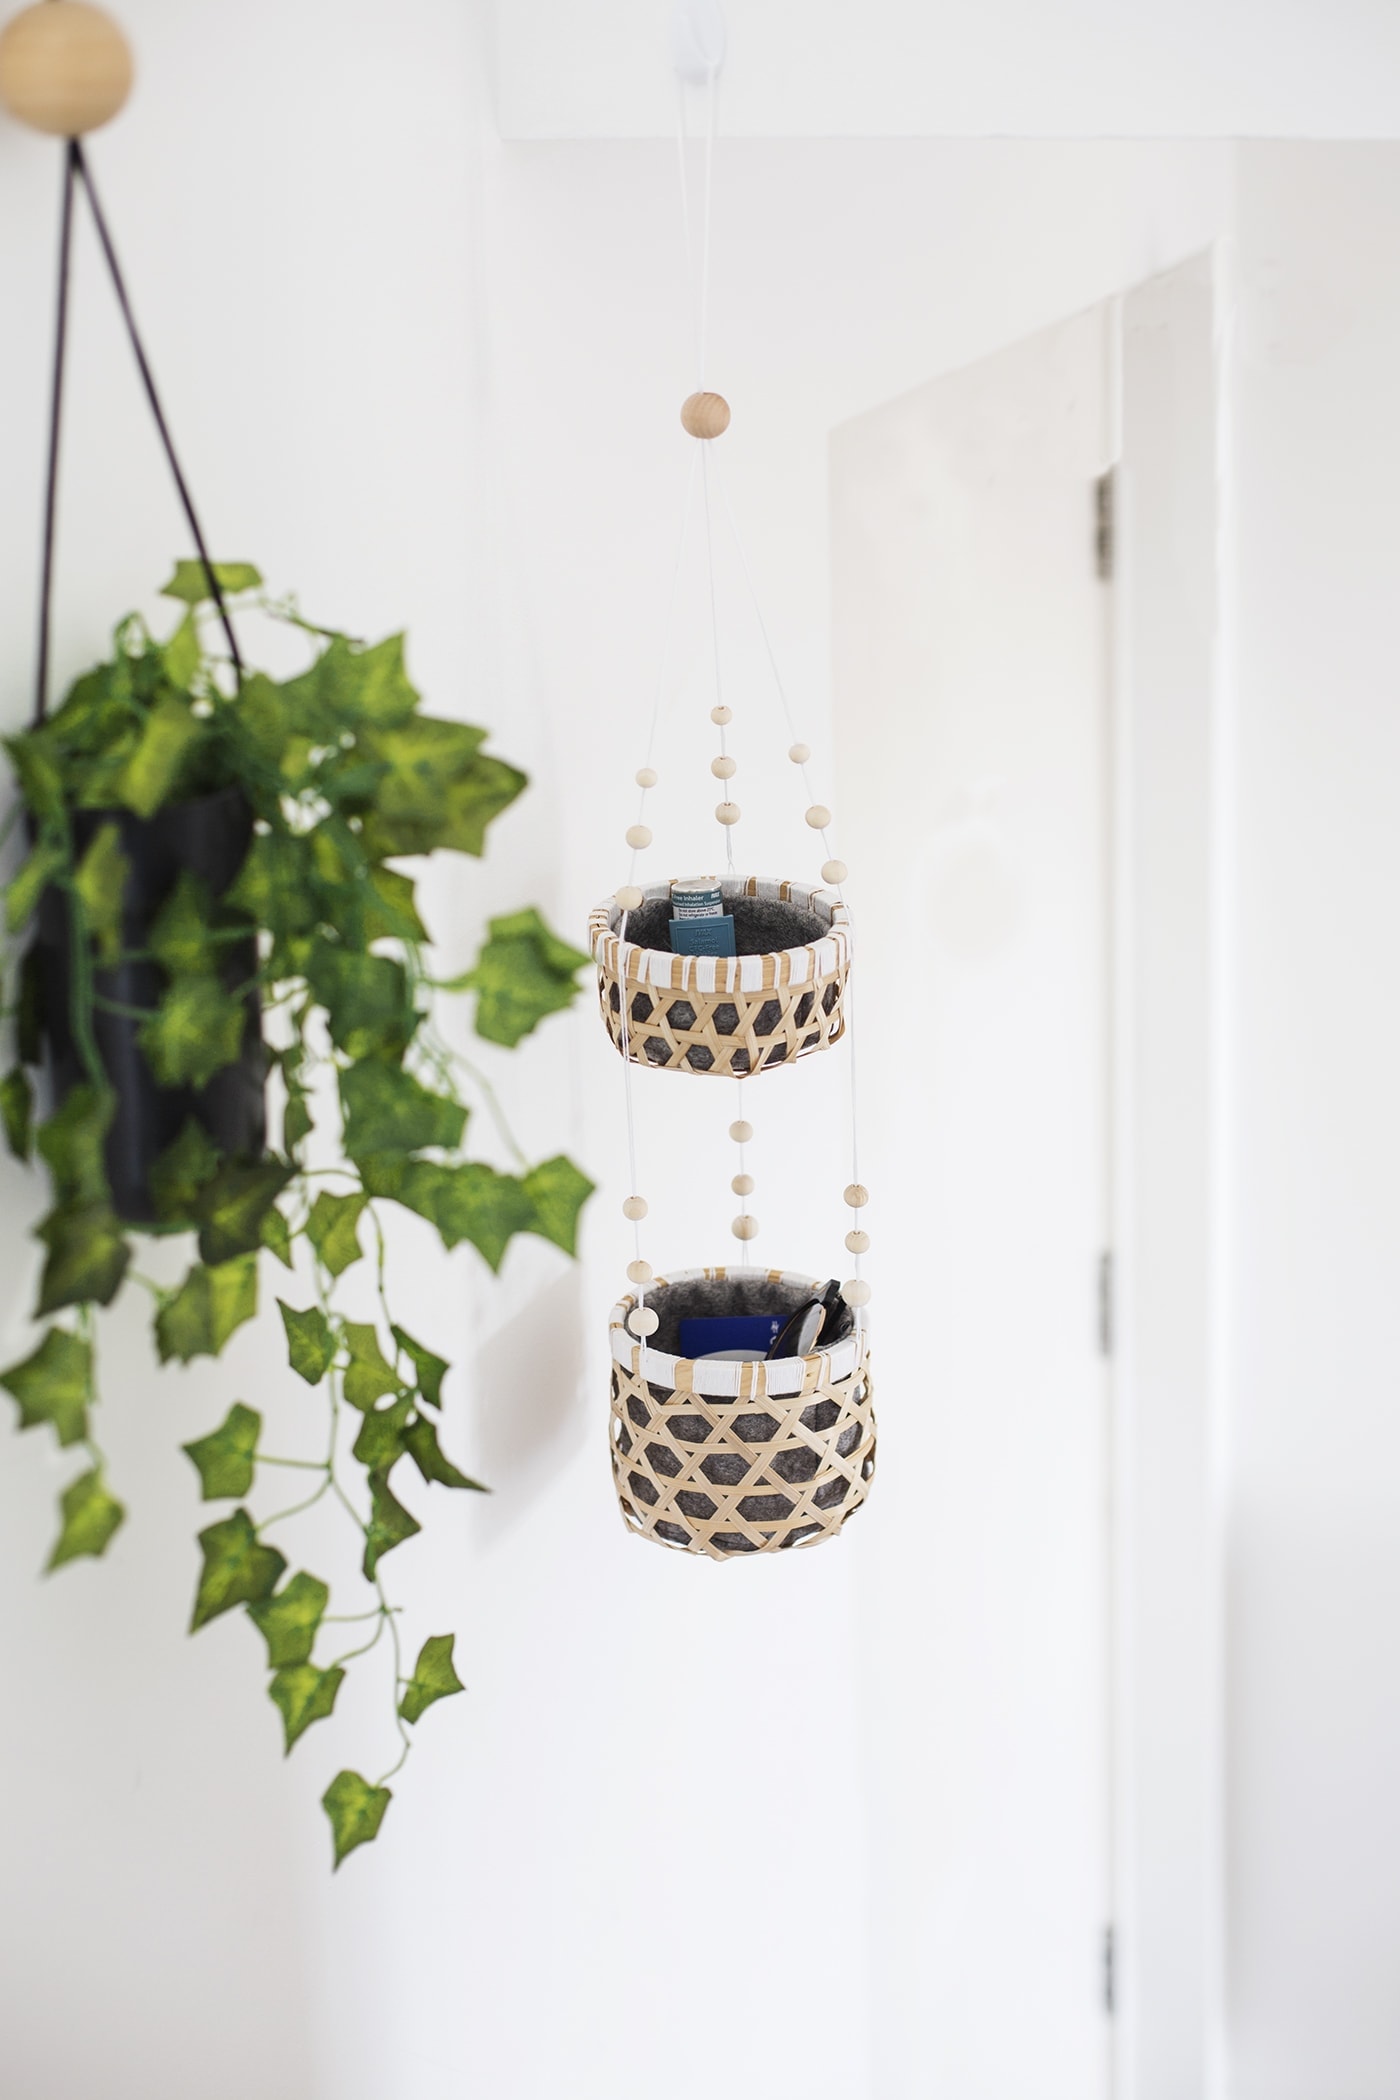
And there it is, my new master plan. Only time will tell if this is the answer to my bug bear. I’ve made Nick aware of it’s use for this evening so fingers crossed. Whilst I created this for a very specific purpose it could also be used in a bathroom or bedroom to store products / make up or you could even use it as a jewellery holder. It has many uses! Enjoy….
You might also like


Meet The Lovely Drawer

Hi, I’m Teri and welcome to my own creative corner of the internet. I blog about interiors, DIY projects, design inspiration and my general life so stick around have a read and say hi.
In the shop

 Quick ViewSelect options
Terrace 1
£20.00 – £25.00
 Quick ViewSelect options
Personalised Cuddly Bunny
£30.00 – £35.00
Work with Me
The Lovely Drawer is an award winning blog with a loyal audience that has grown over the years. I love working with brands small and large on exciting collaborations that can bring products alive in my own signature aesthetic.